


Get The Barn Wood Look By Using Vinyl Flooring

What do you do when you have a large curved surface that lacks character? You add it by using peel & stick planks! Get the barn wood look by using vinyl flooring.
I love this weekend project idea! Add much-needed character at a fraction of a cost using peel & stick vinyl flooring planks. Not only was this project easy but creating the faux barn wood was a piece of cake too!
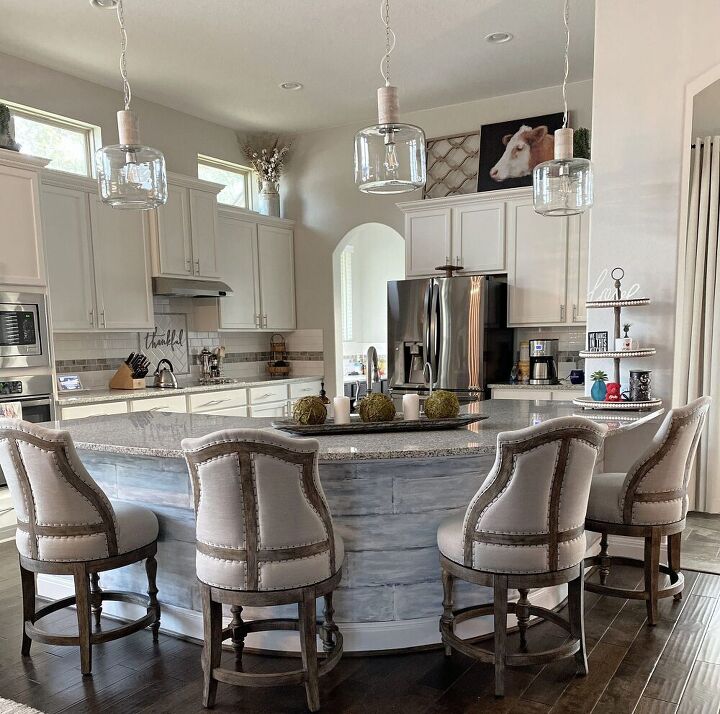
Back in the fall, I had the opportunity to travel to one of my dearest friend’s new home in the Texas Hill Country. She purchased and beautiful home with great bones and beautiful appeal. This abode was however lacking a little of the Hill Country charm she wanted. Case in point, the kitchen bar area.
The kitchen itself is a perfect size and the bar area is wonderful for friends and family to gather – it just needed a little “Hill Country ranch” oomph. Oomph on a budget!
*Heads up! This post does contain an affiliate link. This means I may receive a small commission if you decide to purchase the product but at no additional charge to you. Check the sidebar of my website for full disclosure.
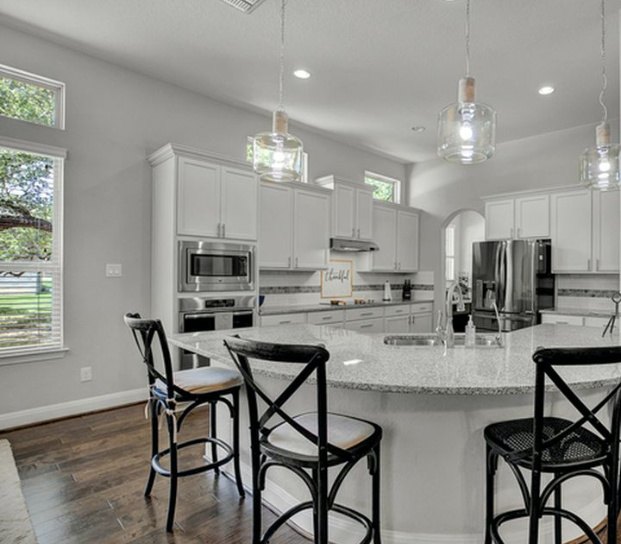
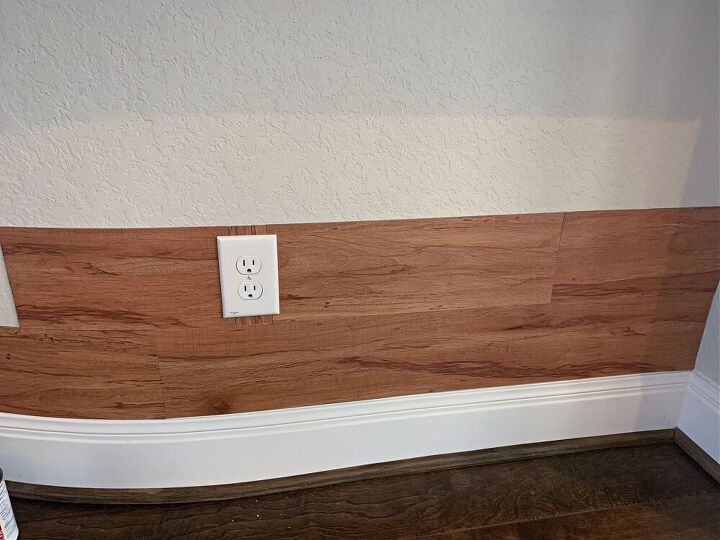
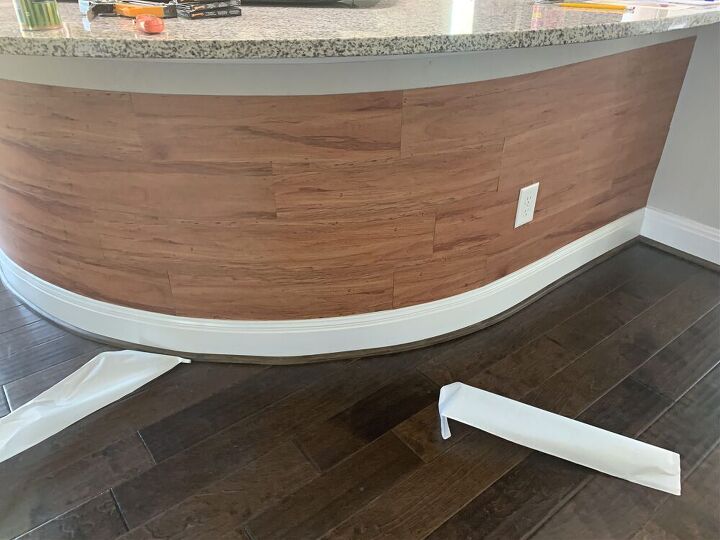
To create this needed character we had our work cut out for us. Do you see that beautiful gracious curve? Yeah, beautiful but high maintenance. No ordinary material would do. Vinyl wood flooring planks seem like the obvious answer, I mean, hello… vinyl is flexible. UNLESS it is backed with the latest technology. Vinyl floors have come a long way! All great unless you are desperate for the wiggly old stuff.
Our hunt brought us to Floor and Décor. We headed to the back corner of the store where dust bunnies are born and clearance items go to live out their remaining days.
And…
There it was! What we were looking for!
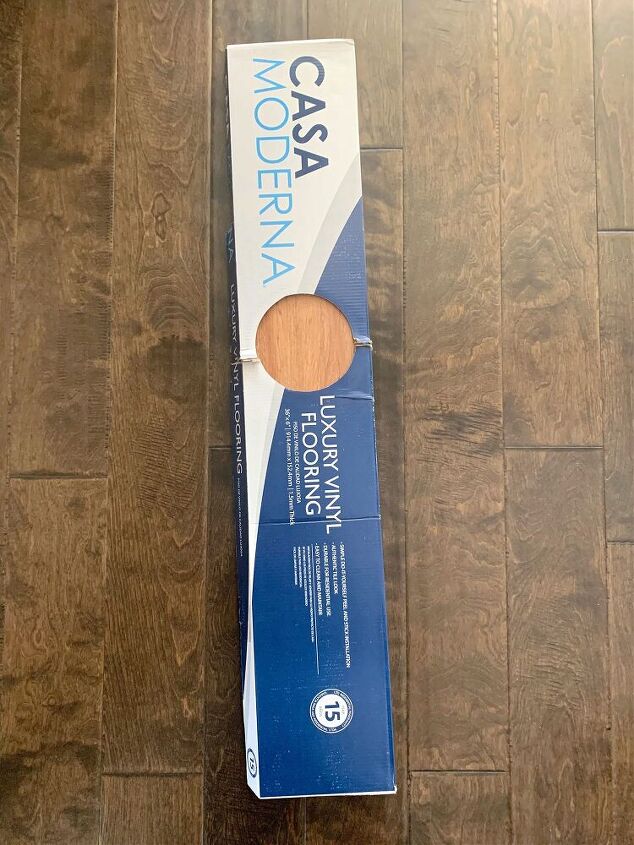
Striking gold, we quickly scooped up our treasure and headed to the checkout! It rang up under $25… major score for the budget!
Ready for the tutorial? Ok! Here we go!
Step 1:
Bring the material in the house and let it acclimate just as if you were going to install it on the floor.
Step 2:
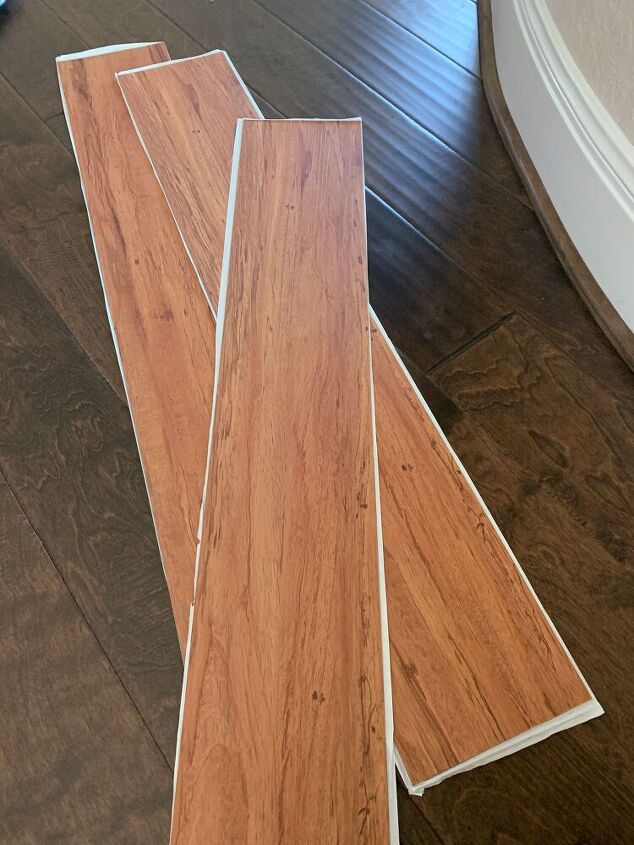
Divide planks into 2 groups, A & B. Group A will be for planks that will be used in their entirety. Group B planks will be cut in half.
Next, take half of Group B and cut those in half.
This process will give us a good variety of widths for the wall.
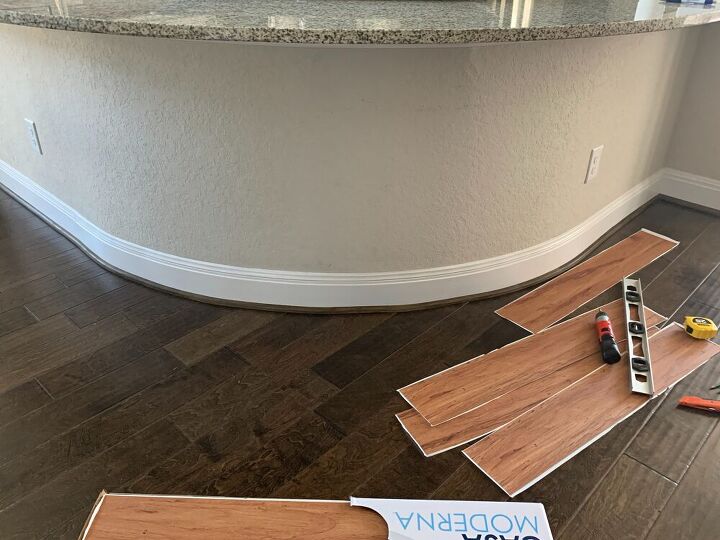
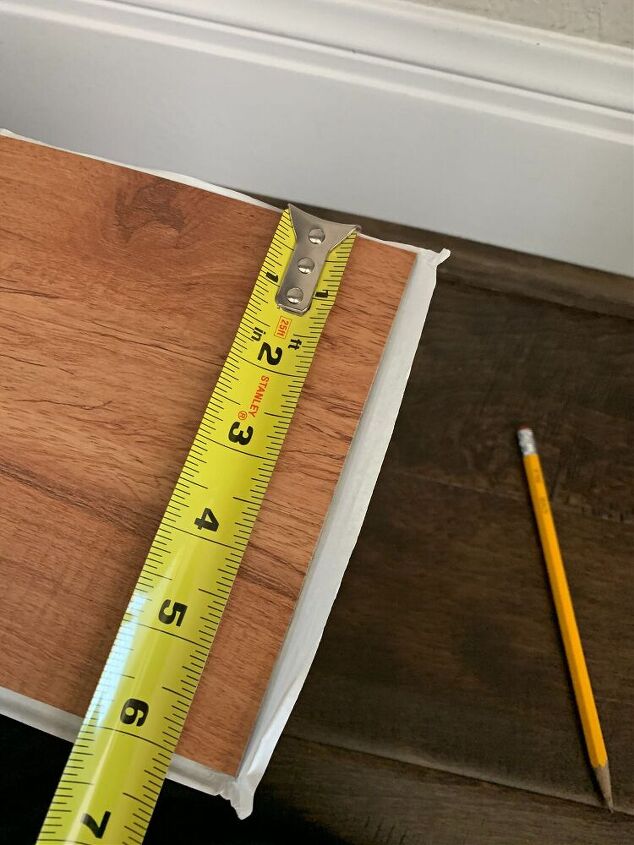
Step 3:
Measure the plank width and draw a level line on the counter wall. Don’t skip this part – it really helps in keeping the plank lines straight.
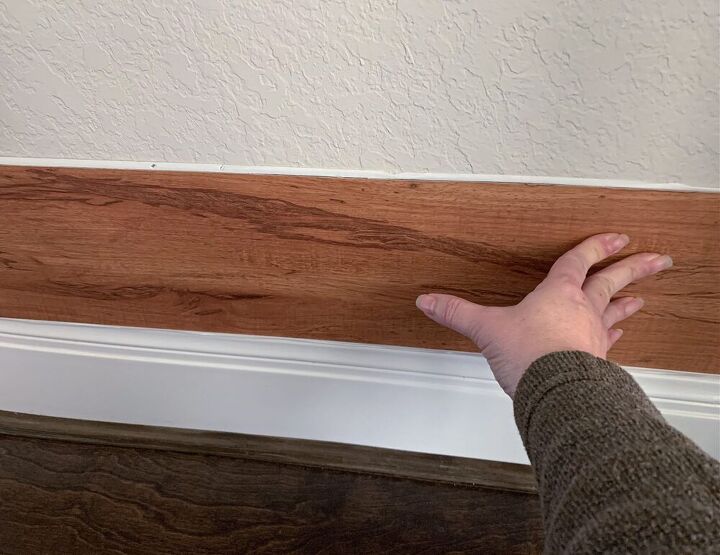
Step 4:
Begin attaching the vinyl planks. Making sure to stagger the cuts. I worked two rows at a time – verifying that each plank was level.
Step 5:
I wish that step 5 wasn’t necessary but it was. We started having an issue with the adhesive backing not adhering to the curved wall.
A friend of mine who is a handyman extraordinaire shared with me an amazing little gadget that shoots brads and staples with enough power that an air compressor wasn’t necessary.

Purchase the DeWalt 5 in 1 Multitasker here
My friend ran to the local hardware store and purchased this little miracle worker. It is so easy to operate and she had the task of attaching the vinyl planks to the wall.
We opted for a nail in each corner of the planks mimicking where nails would reside if we were really adding wood siding and not decorative plastic. It worked! On the deeper curved areas, she added more brads.
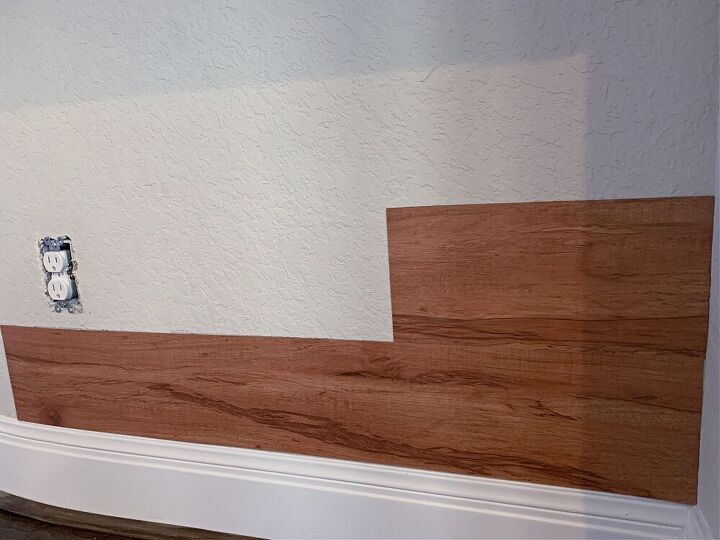
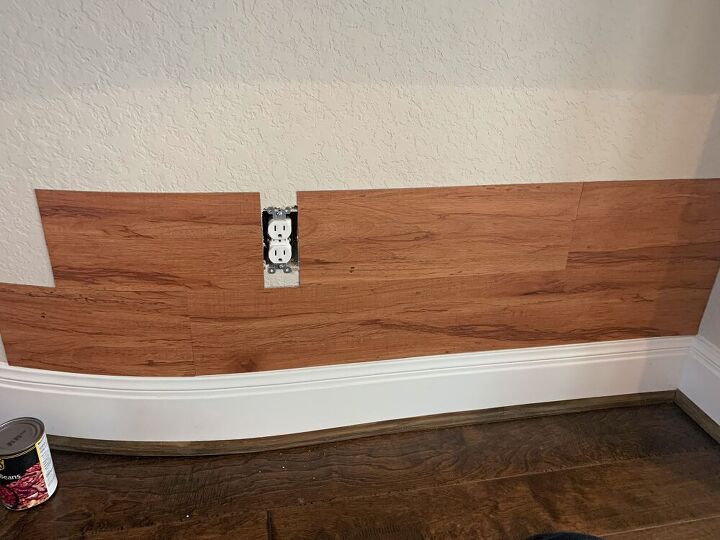
Step 6:
Continue adding the vinyl material in a staggered fashion until the area is covered.
Step 7:
Use painter’s tape to protect the baseboards and walls surrounding the under-counter area.
We brought the “grain” out by adding a slightly water black acrylic craft paint to the surface.
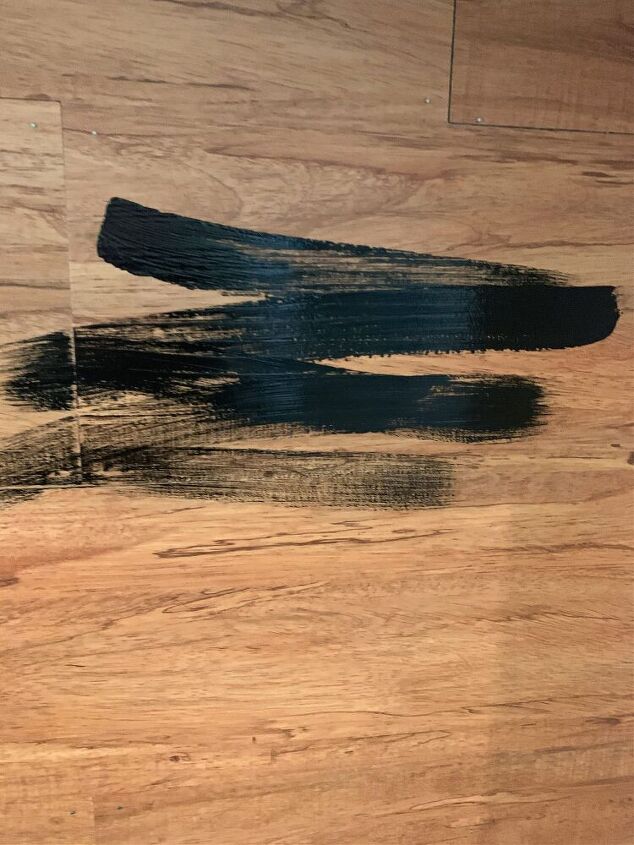
Then we began layering on the color – paying attention to sorta outlining each individual plank. Leaving a little of the original color and the black wash.
We used several colors from beiges to grays to a dab of turquoise. For our neutral colors, we used chalk paints which added a little antique feeling to the “wood”.
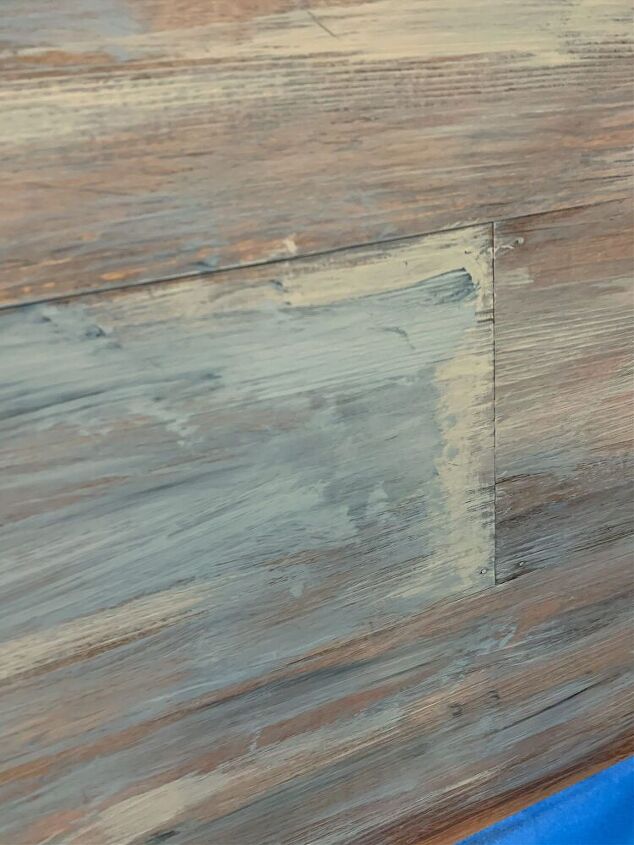
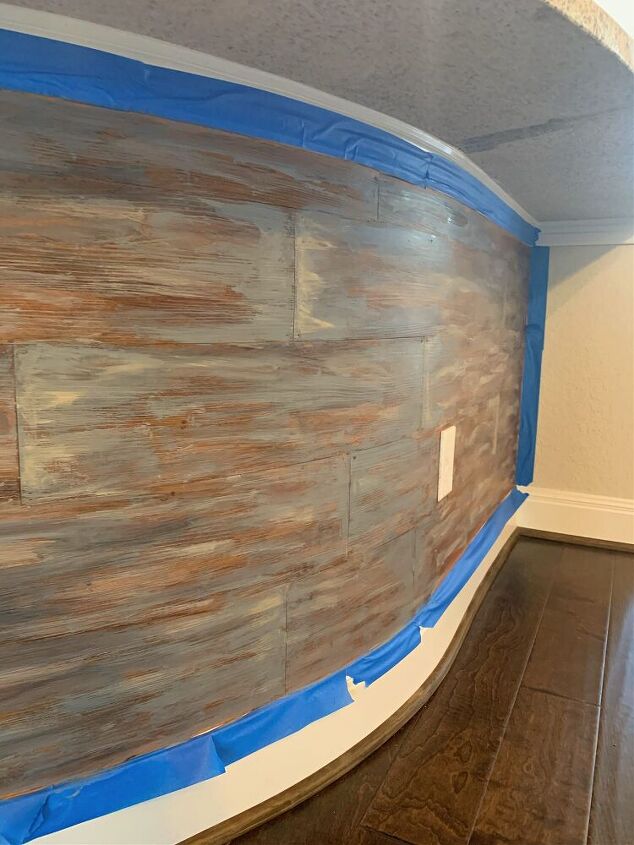
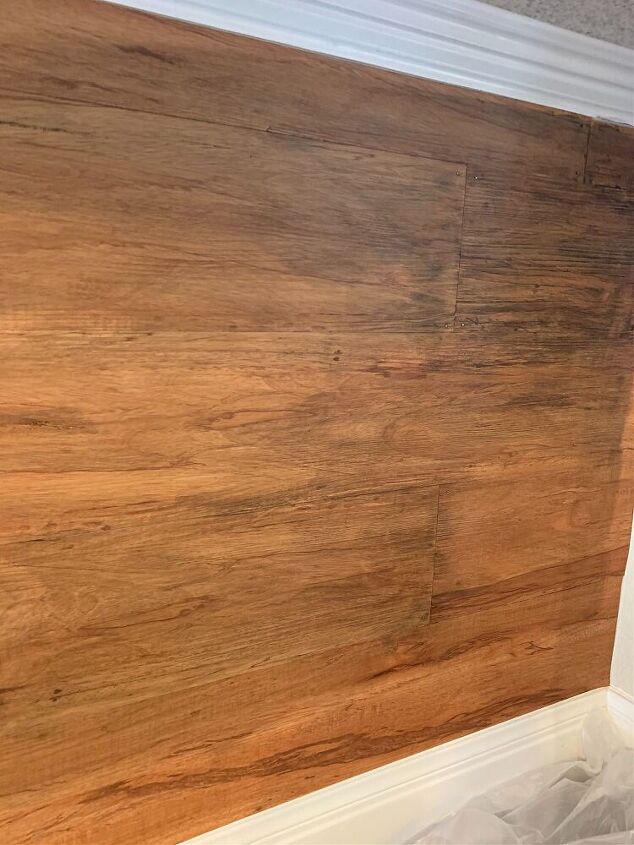
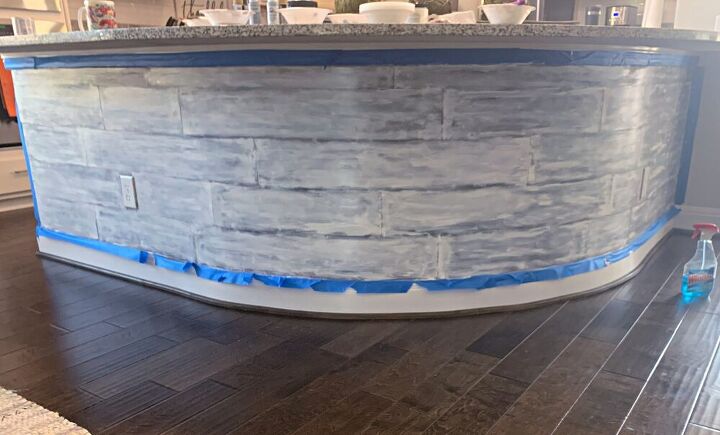
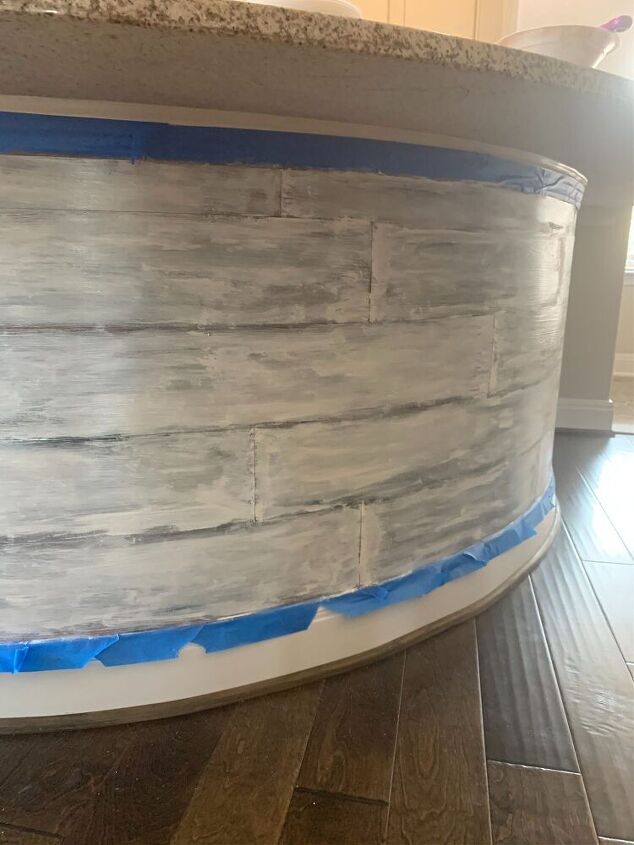
Once we were happy with the mix – the whole wall got a wash in soft white chalk paint. Brush gently on and wipe off sections to reveal the layers underneath.
*little tip: Windex works really well cleaning up little splatters
Step 8:
Gently remove the painter’s tape and touch up any areas missed.

Add your seating option. My friend chose these gorgeous barstools. Love the linen fabric and now she can add a swath of linen color chalk paint to the planks to create more flow between the counter area, walls, and barstools. The barstools were on backorder for a really long time (thanks Covid) so I was long gone when they arrived otherwise we would have blended the linen color chalk paint right then and there. The beauty of the layers – you can add and blend till it’s perfectly imperfect.
It was so fun working with my friend to help make her house a home. Now we have even more crazy stuff to remember and giggle about.
Til Later friends,

Resources for this project:
See all materials


Comments
Join the conversation
-
I feel like you should do your cabinets to match. Just my personal opinion. I think they would look awesome
-
No questions.....
Just love the bar stools


Frequently asked questions
Have a question about this project?
Would this work to use outside on wood plywood wall of an enclosed patio room? Would it hold up to sun and rain?
You did a great job, just wondering though was there a need for any type of sealer? Not all people will keep their feet off that finished wall and I would hate to think of it getting skinned up or scuffed after all that work. Thanks for sharing.
Looks awesome, but wouldn’t just painting it all without doing the vinyl planks have been much easier??