


How to Install DIY Wall Paneling in Your Home: An Easy 6 Step Guide
This post contains affiliate links. Please see my full disclosure policy for more details.
DIY wall paneling is an easy way to add architectural features to your home that doesn’t require a lot of time. It’s also a cost-effective way to give any room a whole new look.
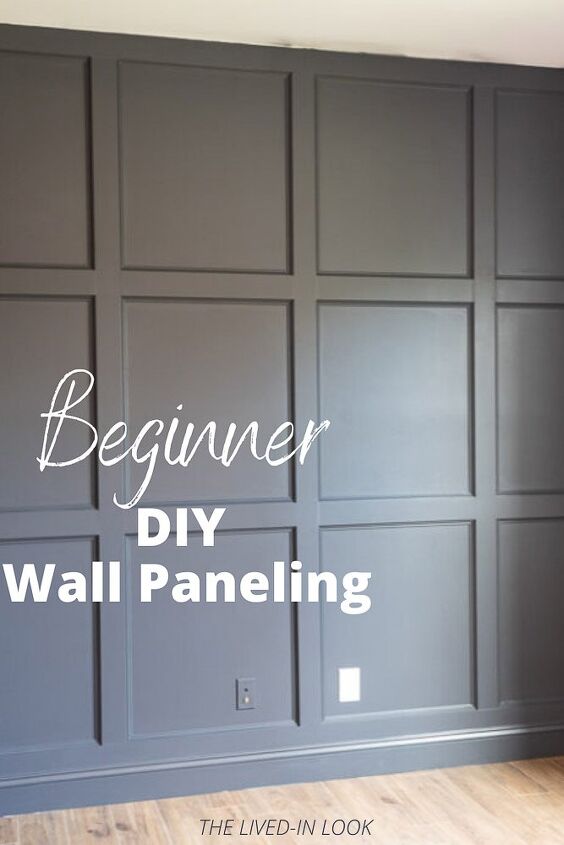
I’m so thrilled with how our wall paneling turned out in my husband’s new home office. I had a vision in mind and it totally delivered to elevate the entire room to a more refined space.
There are so many different ways you can add wood paneling and molding to walls, in fact I shared a super easy tutorial for picture frame molding in our dining room here.
But for this project, I wanted the wall panels to have more of a recessed look to them. Meaning the wall paneling looks built up to allow the wall to appear more set back. I think it gives the wall a bit more depth and character.
Let me show you what I’m talking about.
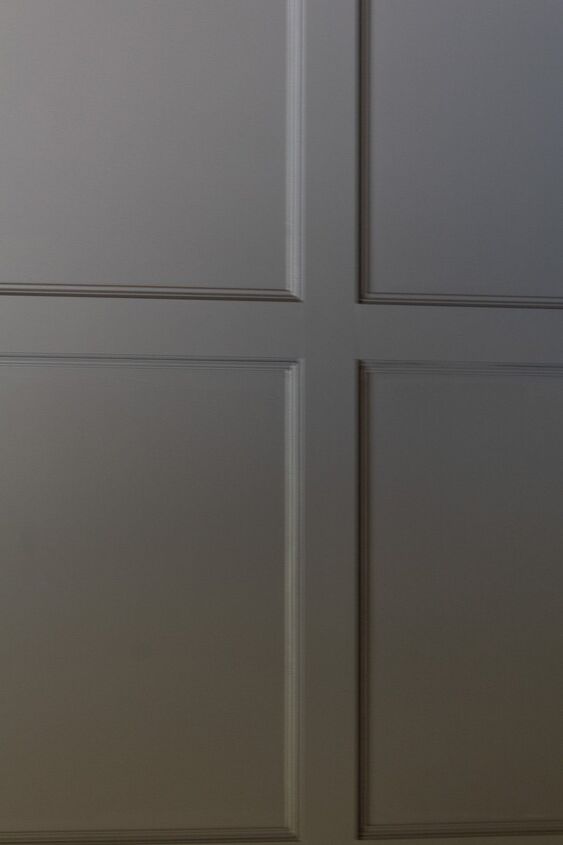
Just the simple addition of some decorative molding to each of the boxes is what gives the wall panels that inset look.
So let’s dive into this easy DIY wall paneling project and I’ll break it all down for you step by step!
The tools you’re going to need for this project are fairly beginner friendly and the wood cuts are mostly going to be straight or 45 degree angles.
- Brad nail gun
- tape measure
- laser level or spirit level
- miter saw
- crowbar
- Multi tool
- utility knife
- Stud Finder
*The exact length and amount of wood materials will depend on the size of your wall and which type of pattern layout you choose.
- 1″ x 4″ MDF boards / wood paneling available at most DIY stores
- skirting board or baseboards
- wood filler
- instant grab adhesive / liquid nails
- decorative wood strips or molding (ensure that whatever molding you choose has a flat 90 degree angle to sit flush against the sides of your MDF boards.)
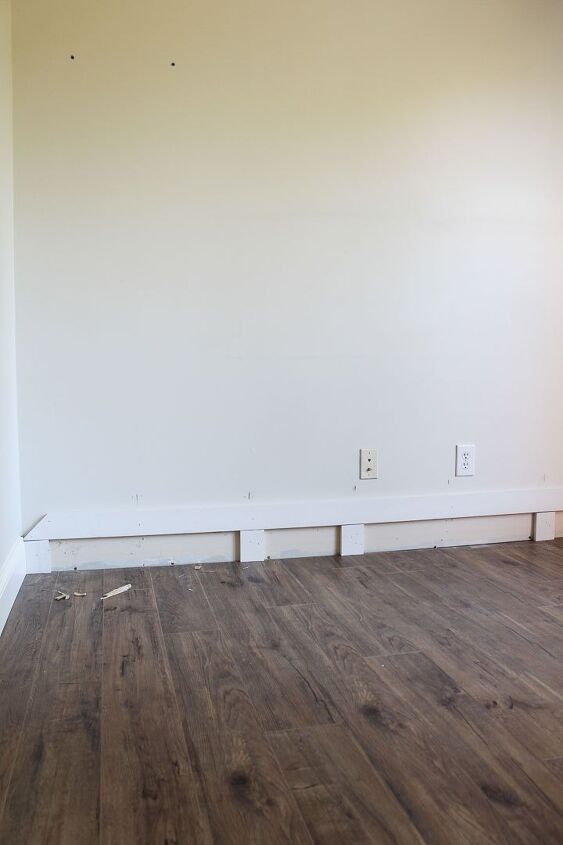
The first step is to prepare your wall surface for your new wall paneling. You’ll want to gently remove the existing baseboards if you plan to reuse them and reattach after the wall panels are up.
Start by using a utility knife to score along the caulk line where your baseboard meets your wall. Then, use a crowbar inserted in that line to gently pry the baseboard away from the wall. Once you’ve removed the baseboard, you can use a pair of pliers to pull out any remaining nails from it.
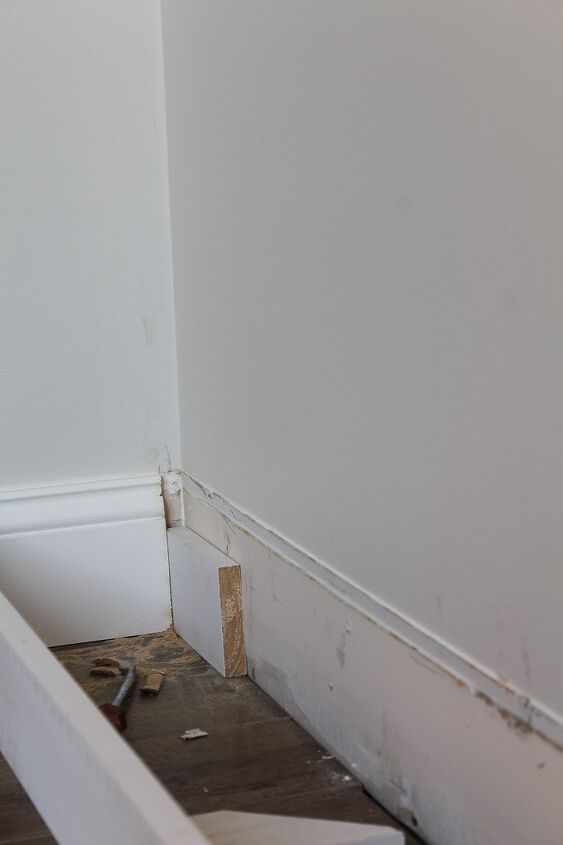
Now that your baseboard is removed you’ll want to cut into the adjacent baseboards to allow for the new depth of the wall when it’s complete. This is important, because you’ll be reattaching your baseboard to the new wall panel which will extend out further than it previously did.
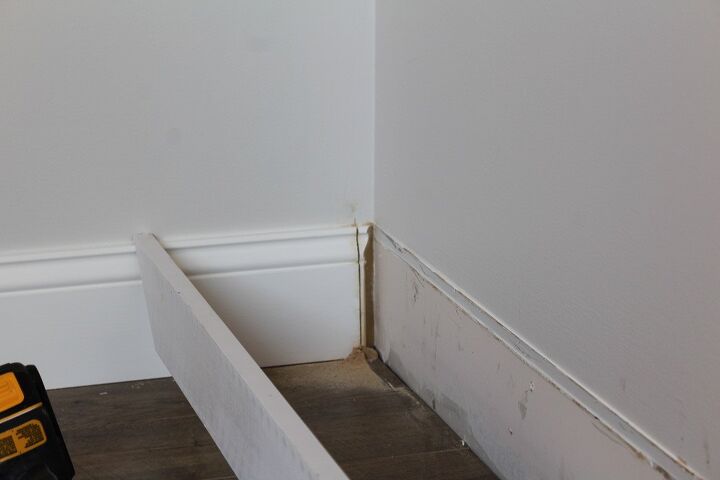
You can do this by lining up a piece of your new MDF board along the adjacent baseboard, marking off the width of the board for your cut.
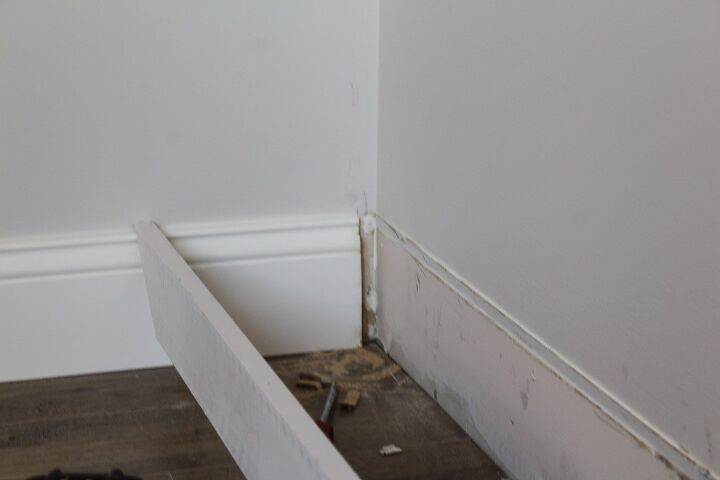
Using an oscillating or multi tool with s straight blade, you’re able to cut into your adjacent baseboard to remove the excess allowing for a deeper gap for your MDF board to now easily slide in.
The next step is to determine the layout of your paneled wall. I suggest drawing a mockup on paper of how you’d like your wall to appear.
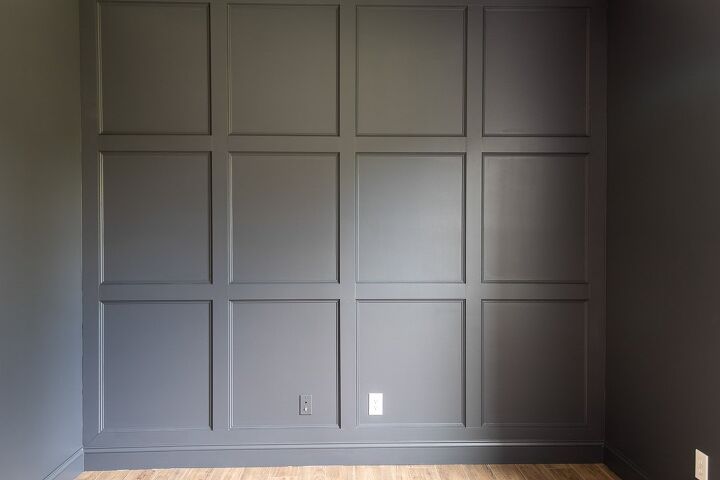
I knew that I wanted at least 4 boxes across the width of the wall and I played around with the measurements to see if my wall height would also allow for 4 boxes. Unfortunately they would’ve been more rectangular than I liked, so I settled on 3 vertical boxes for each column.
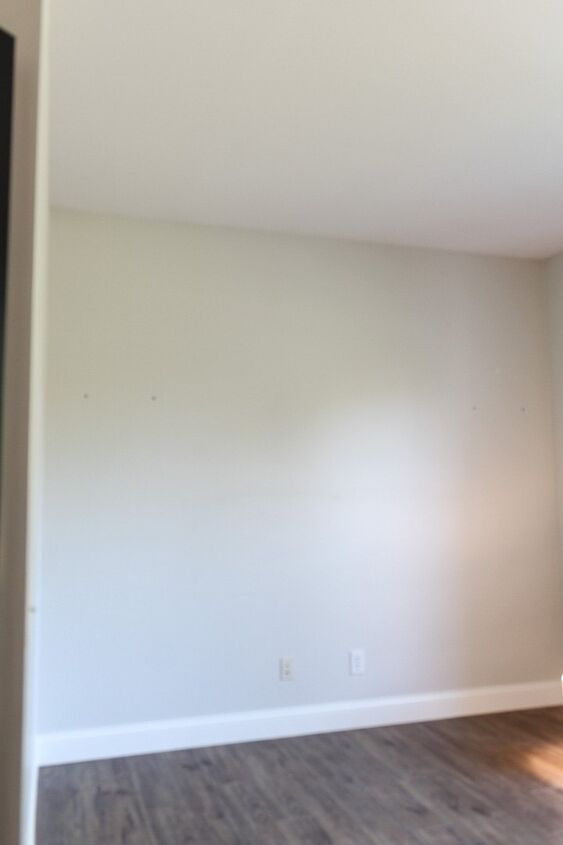
This process is entirely dependent on the amount of wall space you have to work with.
You’ll want to begin by using a stud finder to locate and mark the positions of your wall studs. This will allow for the strongest attachment of your boards.
Now you’re ready to install the bottom MDF panel spanning the entire width of your wall.
Cut the board down to your desired length using 45 degree cuts at both ends.
Before installing it, determine how high you want the board to sit away from the base of your floors. We used spare MDF boards cut down as a placeholder for the new height. These will also act as wall studs allowing you to reattach your baseboard at the end.
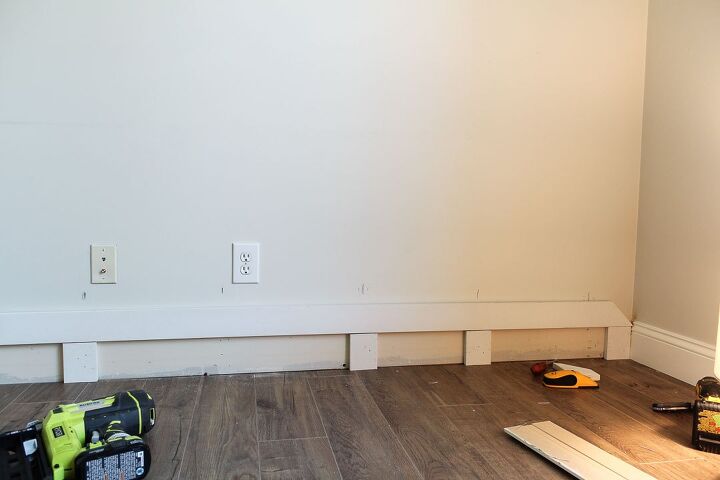
Use a spirit or level laser to ensure your board is level. Then install it using a brad nailer, securing your board to the wall along each of the stud locations.
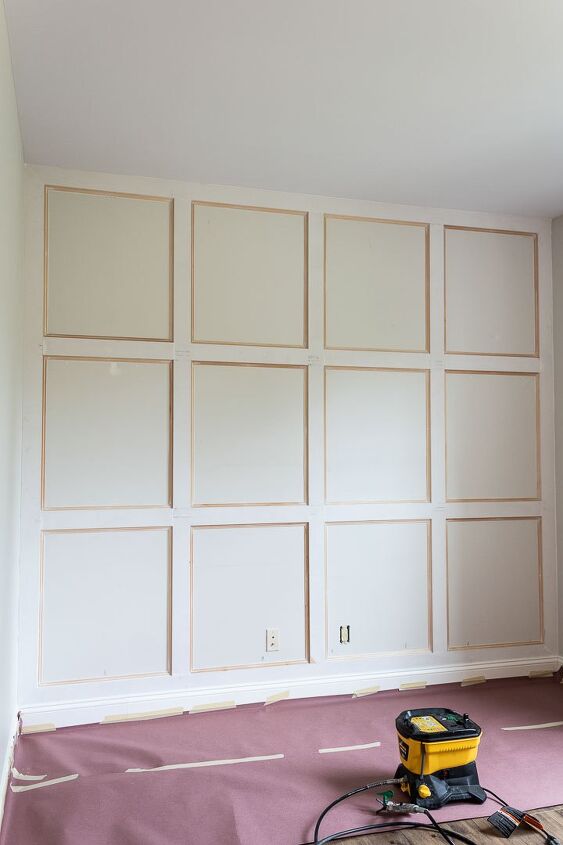
Continue the process of measuring and cutting your top and side MDF panel boards to attach to the wall creating a “picture frame” layout.
Now that you have your layout determined and the outside of the wall framed out, you can start installing your vertical panels for each column.
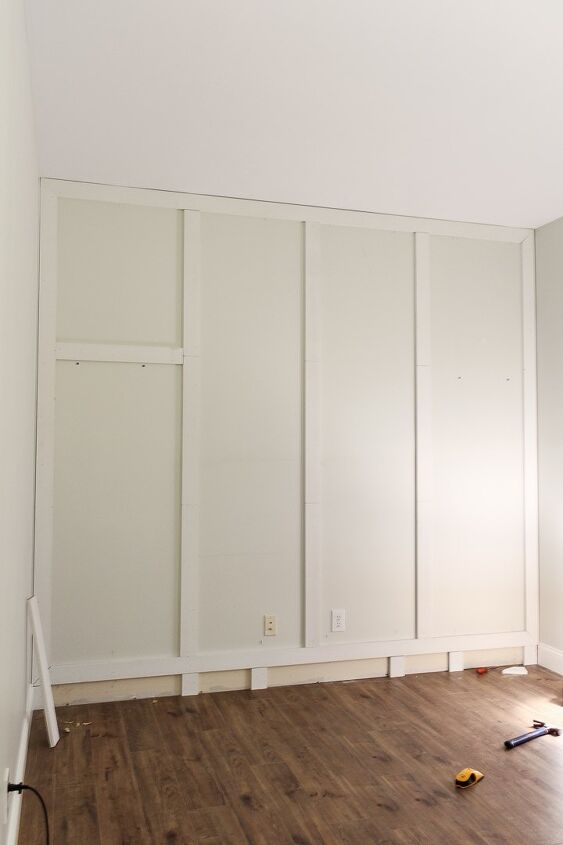
These are cut on the miter saw using simple straight lines and should span the entire height for each column. Make sure to once again align your boards so that they’re level prior to securing them to the wall.
Next, you’re going to create your boxes by also cutting the MDF boards with a straight line. Then attach each of the horizontal panels within the columns.
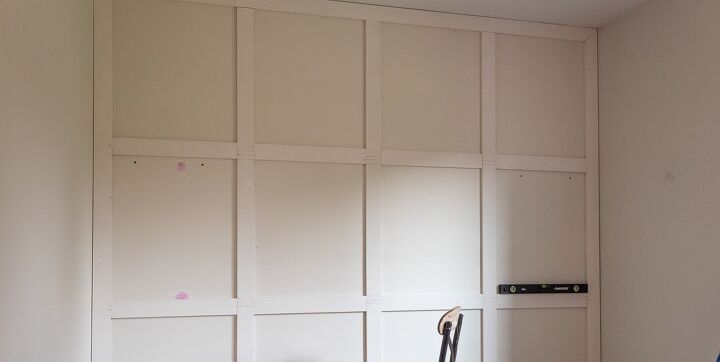
It’s a good idea to measure the width for each of these vertical boards, because your columns may not have been installed as precise as you think. And you want to aim for a very tight fit of where your vertical and horizontal boards meet. This will minimize any large gaps.
Now you’re ready to cut and install the decorative molding trim lining the inside of each of your new panel boxes. This process is pretty straight forward, but can be a bit time consuming given the amount of measurements you’ll need to take.
It may be helpful to mark all of your measurements and label your pieces as you go. Then you can make your cuts all at one time to minimize the back and forth trips from your workspace to the paneled wall.
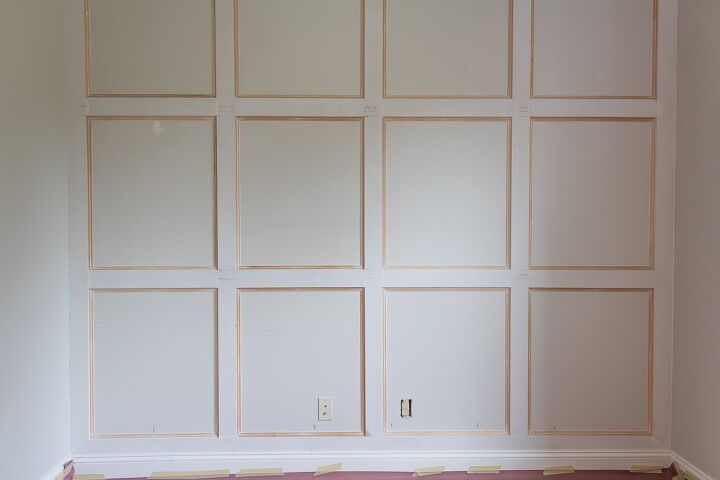
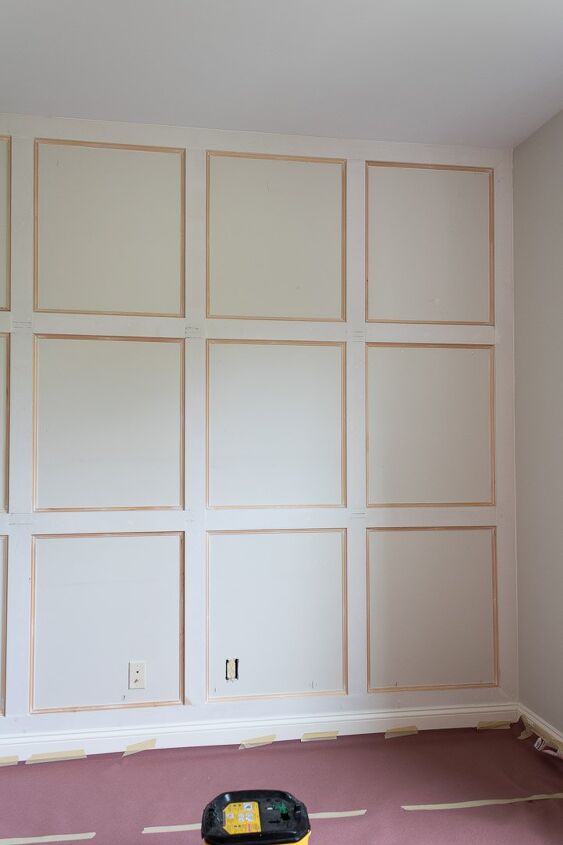
Each of the inside pieces of decorative molding are going to be cut at 45 degree angles to join together inside the wall panel boxes.
This was about the time I got so excited because I could finally see the accent wall taking shape. I loved the depth the decorative molding added to the wall panels.
Finally, you’re ready for the finishing steps. As tedious as this part of the project can be, it’s super important to do if you want to ensure a professional looking finish for your wall.
Always start by filling any nail holes and gaps where your boards join together using wood filler. You should be able to allow this to dry and sand within the same day.
Next, you can reattach your baseboard to the wall. This part can be a little tricky because you’ll need to get that multi tool back out and once again cut into your adjacent baseboards if you’d prefer a mitered cut. Otherwise you can use a coping saw to join your baseboards back together.
This post from The Spruce has great information for deciding between a mitered or a coped joint.
Lastly you’ll want to caulk along the outside frame of your accent wall, along the baseboard and within the insides of each decorative panel box. This helps create a seamless look, especially if you don’t have a perfectly flat wall.
Painting is final and best part of your new accent wall. Personally, I prefer using an eggshell finish on all of my walls. Especially if it has a lot of decorative trim work.
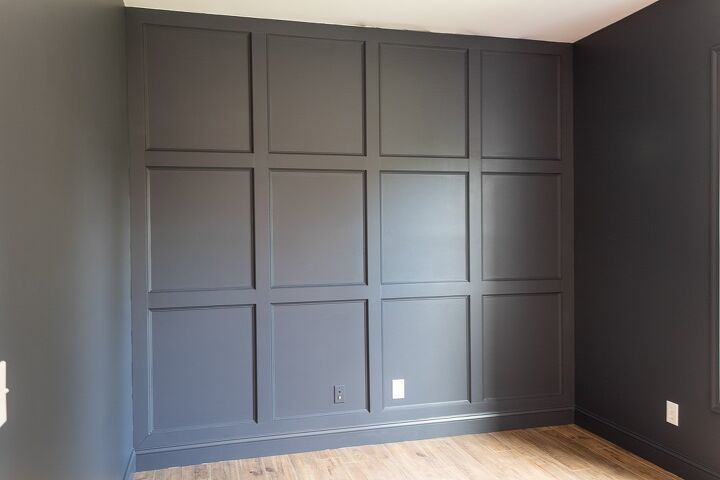
It’s the perfect sheen for durability, but it’s also very forgiving and conceals a lot of flaws on finishing work. Two coats worked well for me, but it can depend a lot on the color and brand of paint you’ve selected.
I went with Valspar brand paint tinted in the color “Cyberspace” from Sherwin Williams. It’s the most amazing moody blue color that floats between blue and charcoal depending on the amount of lighting in your space.
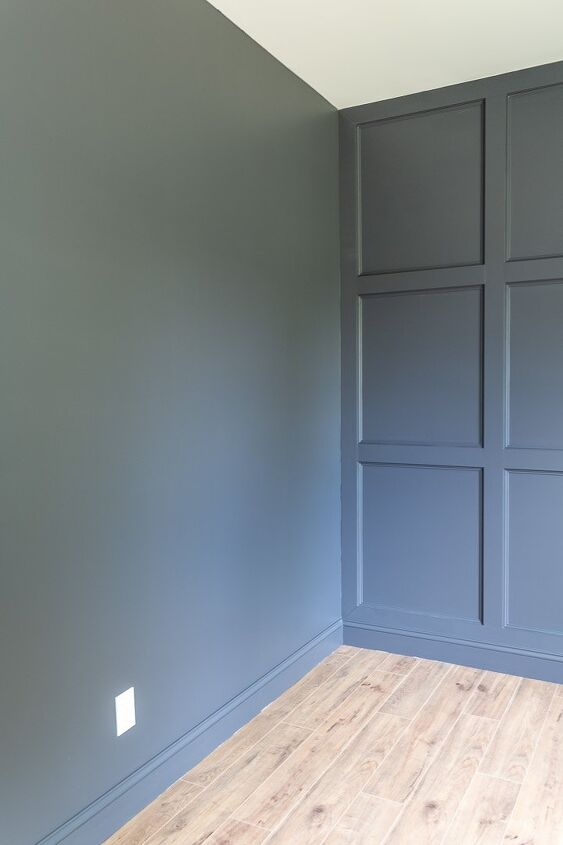
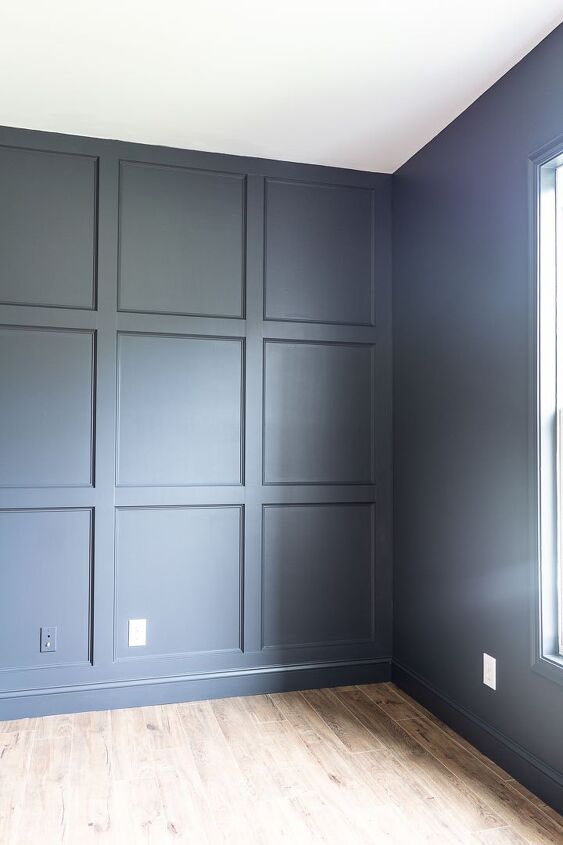
I also decided to go a bit more modern and paint all of the trim work in the same color. I did increase the sheen to an eggshell finish for durability. It also adds a little contrast to the walls.
Got a question? Drop me a comment below. I love helping out. And stay tuned, because I can’t wait to show you the full office reveal soon, It’s gonna be great!


Comments
Join the conversation
-
I know this as board and batten. Makes for a great accent wall. Some people don't or are afraid of removing the baseboard and just cut the vertical boards at a slight angle on the bottom. Set them on the existing baseboard. Yours has a more finished look. Great job and great share.
-
Very nice! You should be proud., you have every right.


Frequently asked questions
Have a question about this project?