


Small Space Living: Girls Bedroom Ideas - 804 Sycamore
Small Space Living: Girls Bedroom Ideas
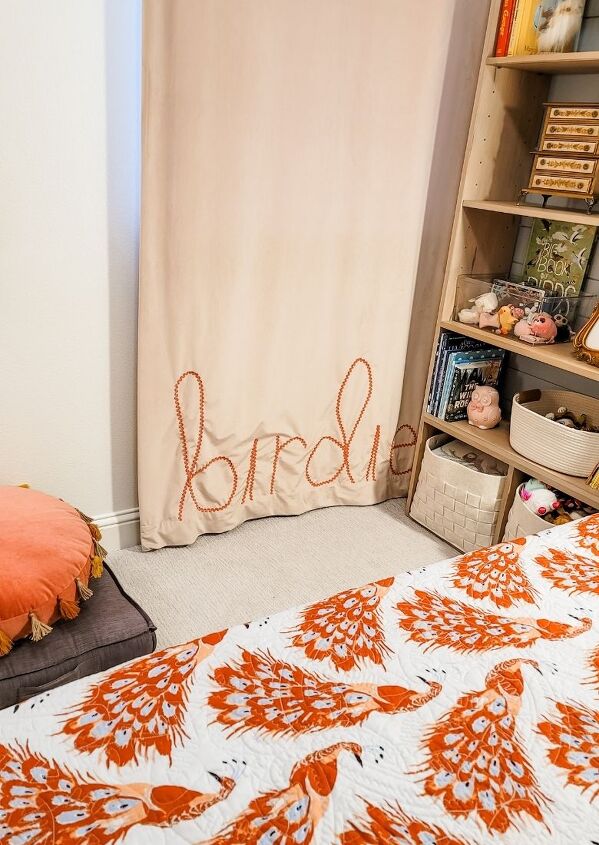
Our youngest daughter, Quinn, got the smallest bedroom in the house (approx. 11’x11′). She doesn’t know or realize this fact, and she probably wouldn’t care, but it does make decorating the room a little tricky. How is it that the person with the most junk has the smallest space to store it?! Quinn is seven and occasionally plays in her room, otherwise it’s used for sleeping and working at her desk. So, I organized the room by having an area for sleep and study. For this small space living: girls bedroom ideas post, I’m so excited to share with you Quinn’s study area!
In
Hometalk Recommends!
Last week I shared the design and construction of her sleeping area. I added shiplap to the wall, designed and constructed built-ins for each side of her bed, and installed a wall sconce. The built-ins organize her little toys, books, and keepsakes. Using upward storage saves on space and makes it easy to see all your stuff. Be sure to check out the YouTube video to see how it all came together. Read the post here.
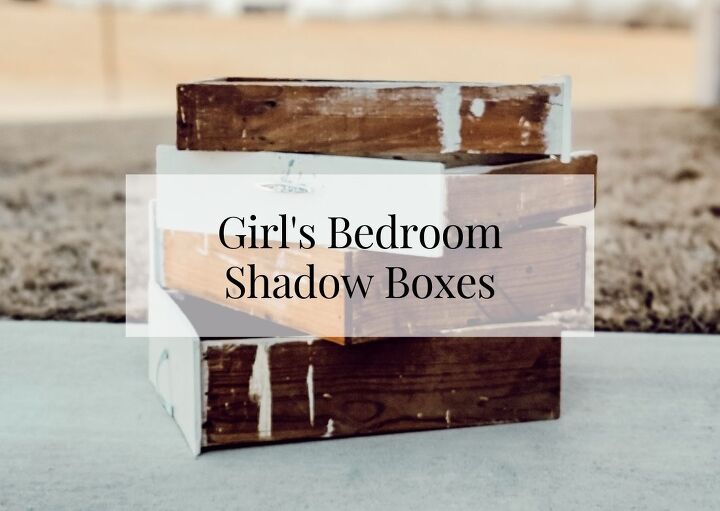
Today, I’m happy to share a very easy DIY project that can be done with crates, suitcases, bins, drawers, or even trays. The concept is to transform a box shaped item to create a large shadow box which adds a decorative element to the space and creates an area to display treasures. The concept is simple, and the steps are even simpler. You can also check out the short TikTok video I made (although it’s missing some of the steps covered in this post). https://www.tiktok.com/@804_sycamore/video/7069428800362171690?is_copy_url=1&is_from_webapp=v1
Small Space Living: Girls Bedroom Ideas
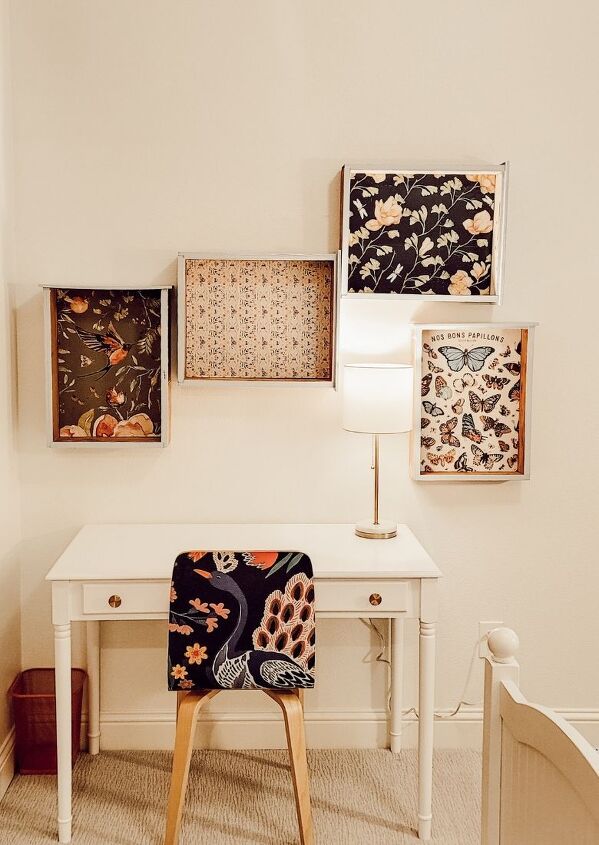
My shadow boxes are made from vintage kitchen drawers. I loved the idea of repurposing furniture to create unique decor so when I found these kitchen drawers on Facebook Marketplace, I knew they were perfect (and cheap). I was looking for smaller drawers, either from a kid’s dresser or in this case an old kitchen, that were shallow so that they didn’t stick out from the wall too much. Smaller drawers also meant that they wouldn’t weigh a ton.
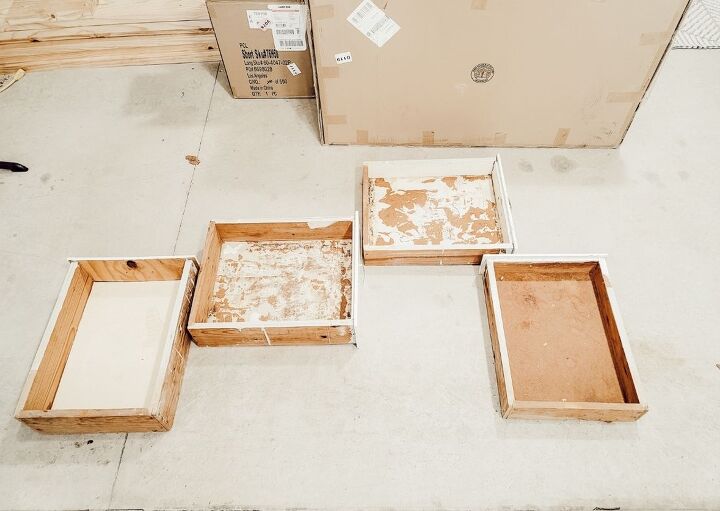
- I cleaned the drawers, replaced the gross bottom of one of them, and sanded off some rough spots.
- I sawed off the bottom edge of each drawer front. This allows the drawer to lie flat against the wall.
- I painted the front facing edge the same blue I used on the shiplap in the room. Sherwin Williams – Fresh Idea
- These drawers aren’t huge, but they were large enough that they required a large piece of paper to cover the bottom of the drawer. I found this beautiful gift wrap to use. Just measure the drawer bottom and cut the paper to fit perfectly.
- Paint an even layer of Mod Podge on the drawer bottom and then place the cute gift wrap over it. I used an old gift card to smooth out the paper. Allow to dry.
- You can also paint Mod Podge over the top of the paper, if you want.
- Finally, add hanging hardware to the back of each box.
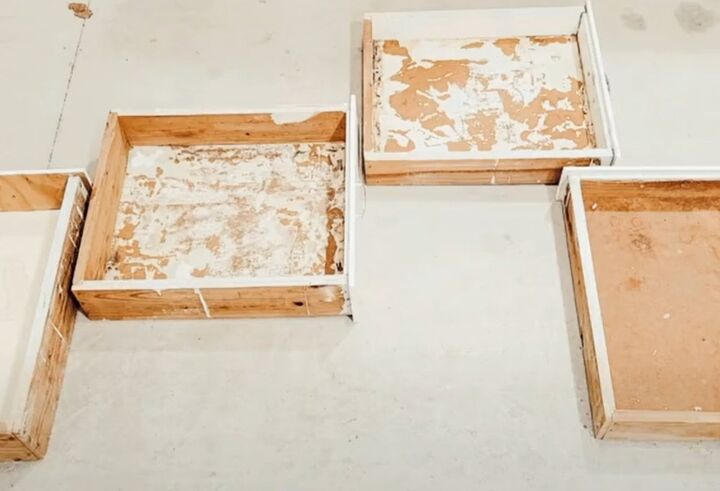
Be sure to thoroughly clean the old drawers or crates. Sometime sanding is necessary so that your decorative paper will lay smoothly. Sometimes minor repairs are also necessary. Remove any drawer hardware as well.
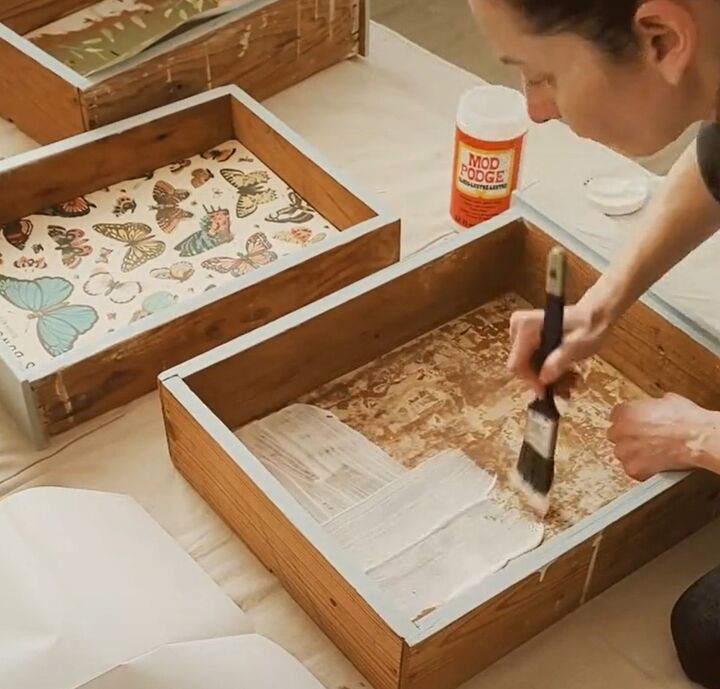
If you want the frame painted, do that prior to installing your decorative paper to the inside. I just added some blue paint to the edge to coordinate with the shiplap in the room.
Measure the inside of the vintage drawer and cut out the decorative paper to fit perfectly. If your drawers aren't square, cut a bit larger and then use an Xacto knife to trim any excess after the paper is dry.
Once your paper is ready to go, apply a thin even layer of Modge Podge to the entire surface. This will create a nice even layer for the paper to attach to.
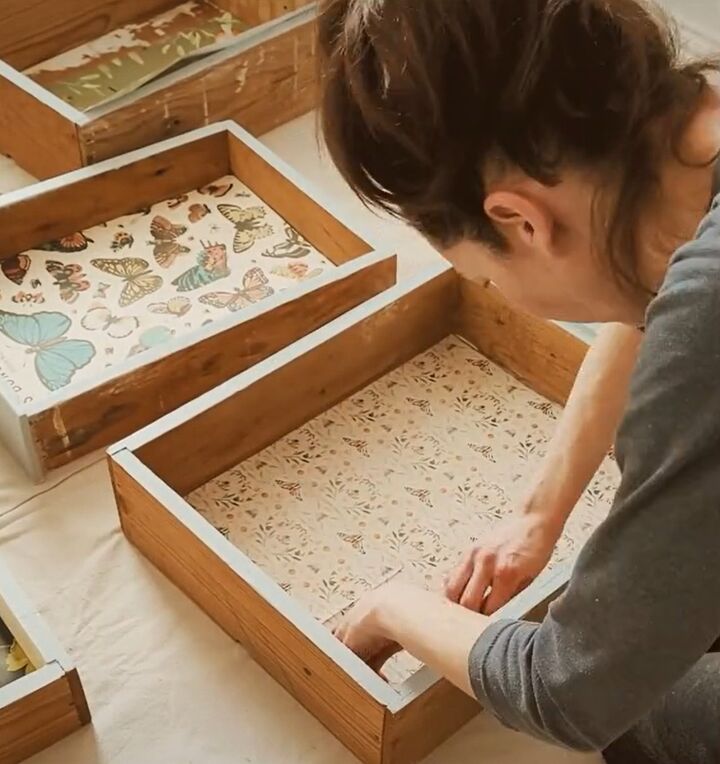
When you set the decorative paper inside the drawer, start at one end and then smooth out with an old gift card. You may have some decoupage squish out, just wipe it clean immediately and get the paper surface smooth and flat.
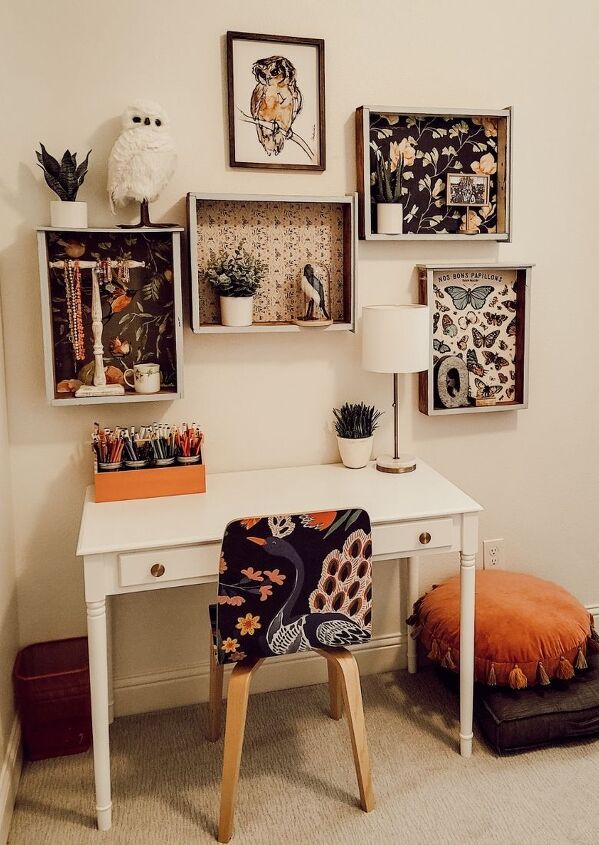
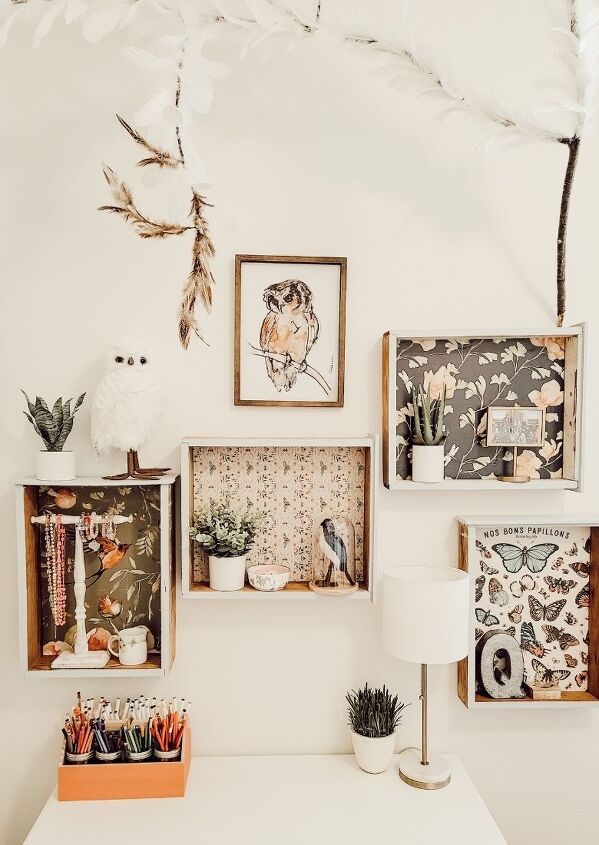
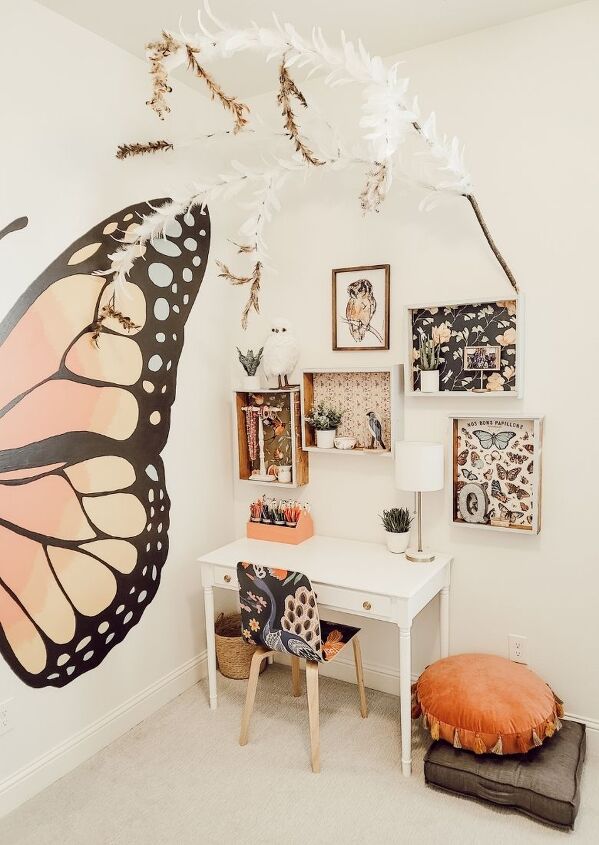
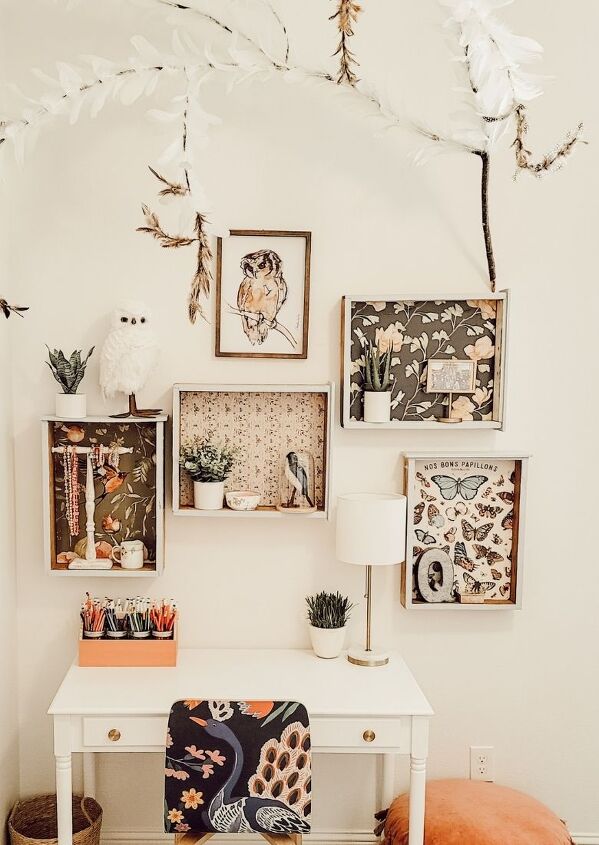
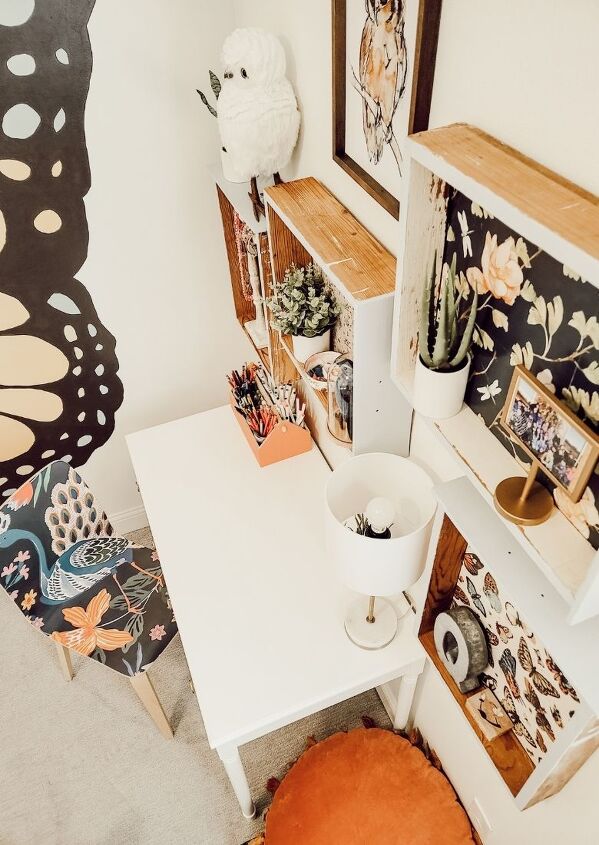
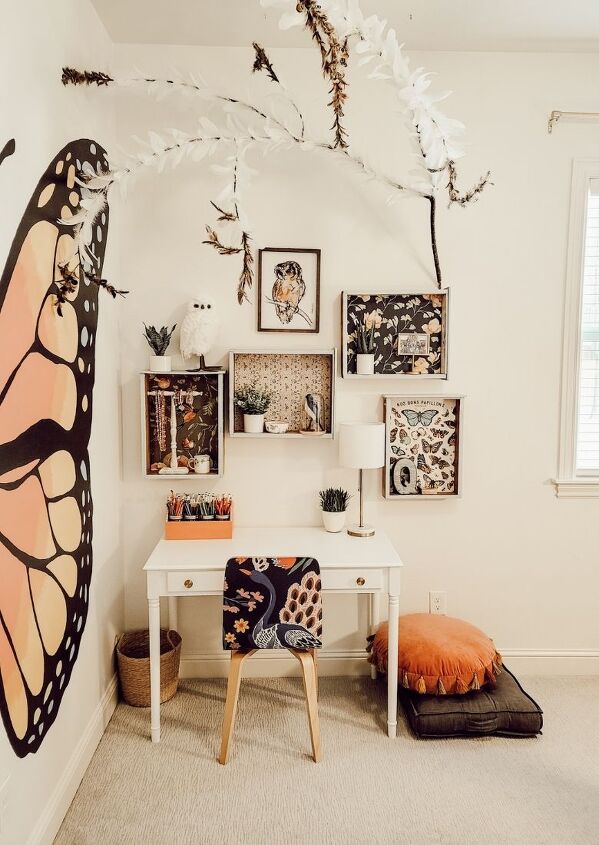
These shadow boxes have a ton of character with their vintage edges, old paint marks, and the new decorative paper inside. My daughter loves placing her treasures in various boxes – watching her decide where to place items is so fun to watch. She even stands on a chair, reaching for the highest box to keep certain things out of reach from her sister. In keeping with the bird theme, I used a glue gun to attach feathers to a branch from our backyard and then hung it above her desk. It’s whimsical and so pretty in-person, but most importantly Quinn loves it. Quinn’s study area has gotten a lot of action since it’s installation and I couldn’t be happier with how this small space living design turned out. Let me know if you have any questions and let me know what you think down below in the comments. I hope this Small Space Living: Girls Bedroom Ideas post has inspired you to repurpose vintage items to add function and beauty to your small space.


Comments
Join the conversation
-
Very lovely. What a beautiful space you created
-
She has a beautiful room. Great idea of how you made it and coordinated


Frequently asked questions
Have a question about this project?