


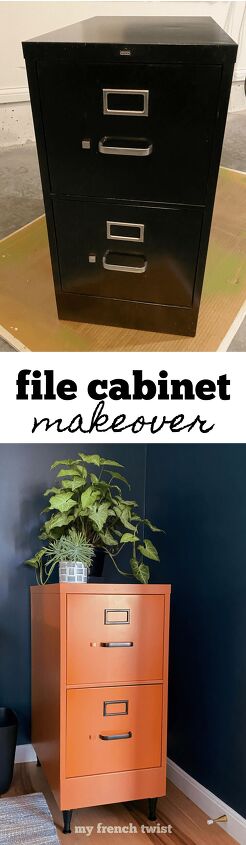
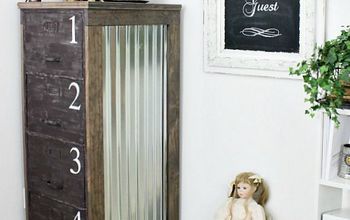
File Cabinet Makeover
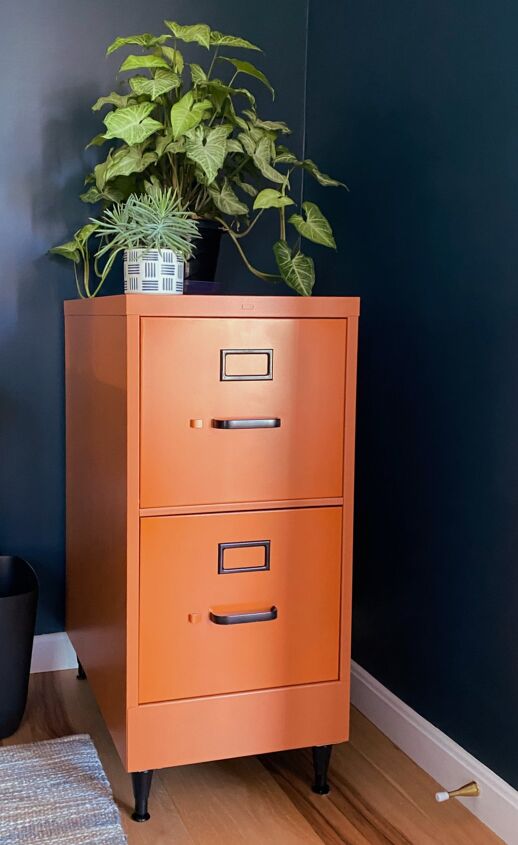
Welcome to week 6 of the Fall 2021 One Room Challenge. Last week, I added a new accessory to Lilly’s cozy boho study – a macramé hanging shelf I made. This week I’m adding an old item to the mix – a salvaged metal file cabinet. But with a little spray paint and some modern furniture legs, this file cabinet makeover adds function as well as flair to this room.
(This post may contain affiliate links; as an Amazon associate I earn from qualifying purchases. See disclosure here.)
supplies needed:
- two drawer file cabinet
- tapered wooden furniture legs & leg plates/hardware
- construction glue
- spray paint
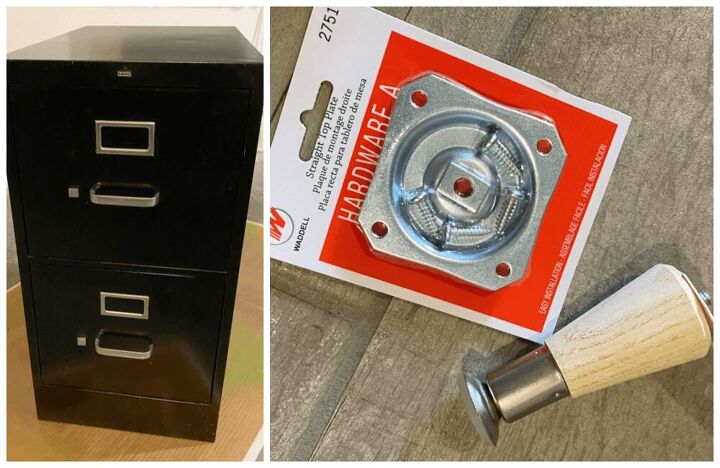
I found a used file cabinet for only $15 on Facebook Marketplace. The legs I added were only 3″, but slightly taller ones would work as well.
step 1 – disassemble
First, remove the drawers.
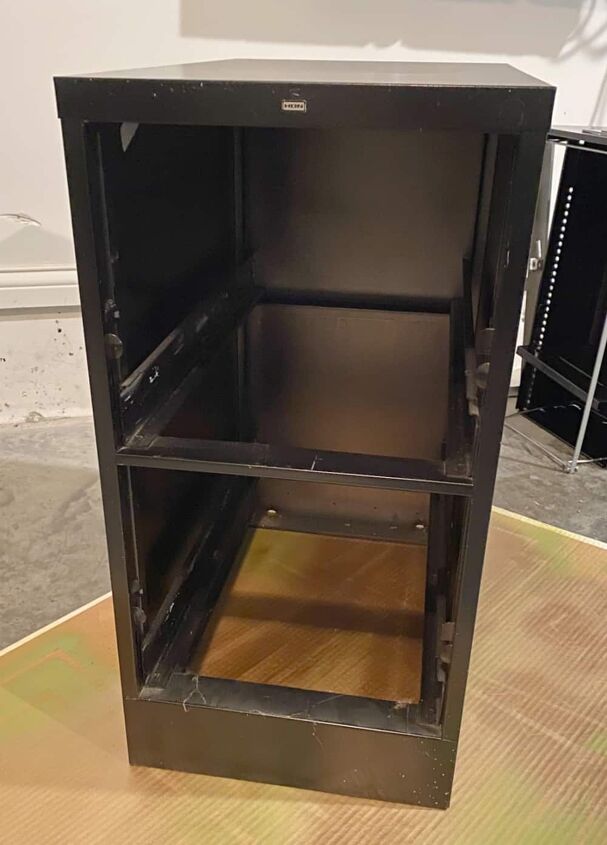
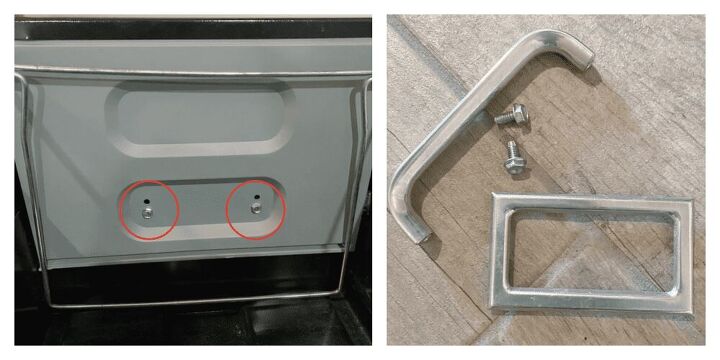
Next, remove the hex head screws from the inside plastic liner in the front of each drawer. Then the handles and label holders can be easily removed.
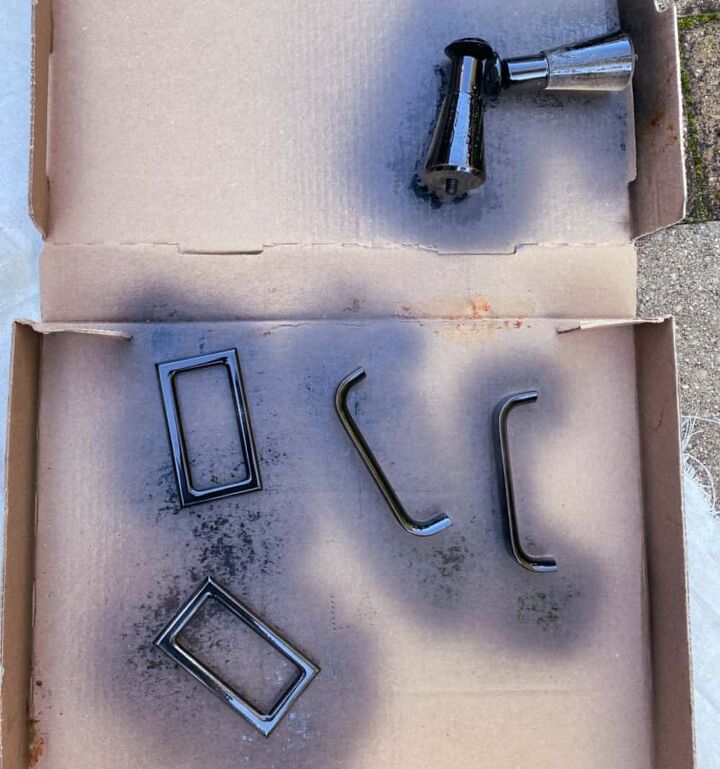
step 2 – paint
Clean the cabinet and drawers well, and gently sand over any scratches. Now you are ready to paint. Be sure to use a spray paint that adheres to metal. I chose glossy black for the legs and hardware.
For the cabinet and drawers, I chose a burnt orange. Don’t be alarmed if the first coat looks spotty. It will take several light coats for full coverage. Patience, Grasshopper!
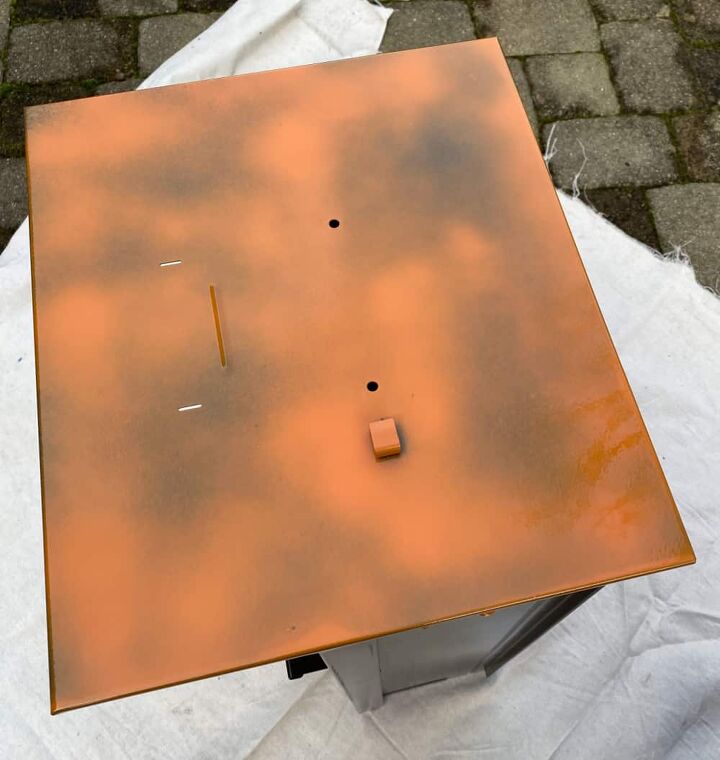
The spray paint worked fine for the drawers and the small areas. However, when I began painting the sides and top of the cabinet, I decided rolling on the paint would work better. I had the hardware store match the paint color and bought a small sample can. Worked great and went much faster!
step 3 – attach legs
Flip the cabinet upside down to attach the metal leg plates. Screwing through metal can be tricky, so I took the lazy girl’s route and just adhered the plates with Liquid Nails construction glue. Let dry overnight. When ready, simply screw the legs into the metal plates. And that’s it! Enjoy your new file cabinet!
The biggest compliment is a little share – pin the photo below!
Missed my posts from previous weeks? Check them out!
- Week 1 – the power of millennials
- Week 2 – moody blues
- Week 3 – diy mudcloth curtains
- Week 4 – styling a bookshelf
- Week 5 – macramé hanging shelf
Check out the other guest participants as well as the featured designers!

Resources for this project:
See all materials


Comments
Join the conversation
-
Looks great. They can also be used to keep tools in.
-
I think the real beauty lies in the addition of the legs. Upgrades look of an old file cabinet. Painting compliments legs for me. Thanks for sharing


Frequently asked questions
Have a question about this project?
Love it! But how did you build the base. What do you use to drill through the metal?? I don’t have an “accomplice “ to help.😊
I have a 4 drawer file cabinet and you inspired me to add some legs and maybe a shelf on the bottom. Did you use a gloss paint on the sides? I know Rustoleum makes a roll on epoxy but only in black, white or red. What did you use?