How to Harvest Potatoes From Garden Beds and Containers

By Nicole Kinning
Potatoes are the ultimate root vegetable: They’re versatile in cooking, they’re a good source of dietary energy, and when you grow them yourself and keep them under the right conditions, they stay fresh on the shelf all winter long.
The best part about planting and harvesting your own potatoes is that, unlike most homegrown produce like tomatoes and berries that require canning to keep, all potatoes need to stay fresh through the winter months is an environment that’ll make them happy. Whether you’re new to potato gardening or you’re an experienced potato harvester looking for pointers, we’ve put together a guide on how to harvest potatoes, plus tips and tricks on curing and storing them through the winter.
Photo via Kelli
When Are Potatoes Planted?
Potatoes are typically planted in early spring at least two weeks after the last frost, or as soon as the soil is thawed enough (about 50 degrees Fahrenheit) to be worked. Just be absolutely sure that the threat of frost has passed; even just one below-freezing night can wipe out your crop of potatoes.
Potato Folklore
How a Potato Plant Grows
Before learning how to harvest potatoes, it’s important to understand the makeup of a potato plant and how it grows. Around two weeks after a potato cutting is planted in early spring, it will begin to sprout starchy leaves above ground. These leaves feed nutrients down to the roots that are beginning to grow underground, known as stolons. The stolons thicken and form the offshoot tubers, or what actually become the potatoes. Once all energy is spent on producing the tubers, the top stem will stop growing and produce a flower bud.
Photo via Jodee Helm
When to Harvest Potatoes
Home gardeners can harvest either new potatoes or storage potatoes. All potato varieties can be harvested as new potatoes by digging up the plant before it reaches maturity. Here are some important details about harvesting new potatoes versus harvesting potatoes for storage:
When to Harvest New Potatoes
New potatoes, also referred to as young potatoes, are meant to be eaten soon off the vine for summer cooking. New potatoes are generally ready to harvest 60-90 days from planting, so in late spring or early summer. You’ll know your new potatoes are ready to be picked when flowers begin to form on the plant. At this point, they’ll be tender and smaller in size with higher sugar content.
When to Harvest Storage Potatoes
On the other hand, storage potatoes are ready to harvest 120 days from planting, so typically in late summer. The skin on the tuber should be thick and not easily peel off when you rub your thumb against the potato. Watch for the potato plant leaves to turn yellow and die back—this is when you want to start gradually watering the plant less to slow tuber growth and prevent rot. About two to three weeks after the plants have died back, when they’re completely brown and dry, is when the potatoes are ready to harvest.
In any case, be sure to keep an eye on the forecast and pick potatoes from the garden or from containers before the first frost falls.
How to Harvest Potatoes from the Garden
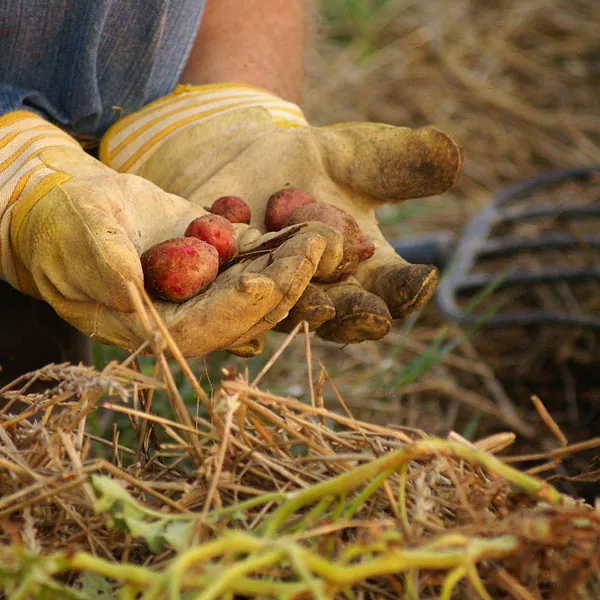
Once your plant shows the right signs of maturity, it’s potato harvest time! Now, you're probably wondering: How do I harvest potatoes? We'll walk you through it all. This will require a lot of digging up dirt, so wear your best gardening boots and gloves.
Tools and Supplies Needed
- Boots
- Garden gloves
- Long-handle spading fork or shovel
- Large bucket or basket
Step 1: Grab the Right Tool
Potatoes grow beneath the soil, so the best way to harvest potatoes requires a long-handle spading fork or shovel to extract them from the ground. If you’re new to harvesting potatoes, a spading fork might be easier; dirt falls through the fork’s tines so you'll better see the potatoes you’re picking up. Spades can also cause more damage to potatoes.
Step 2: Approach the Plant and Dig
About a foot away from the potato plant, drive your digging tool into the soil.
Step 3: Lift and Pick Potatoes
Use your tool to carefully lift up the potato plant’s root mass, and grab the potatoes that come up with it. Place the harvested potatoes in a bucket or a basket to prepare for storing.
Step 4: Circle the Plant
Continue Steps 2 and 3 while making your way around the perimeter of the plant until no more potatoes are left.
Step 5: Re-establish the Plant
Set the plant back into the soil and water thoroughly to re-establish the plant.
Poking Potatoes
Photo via Tova Pearl
How to Harvest Potatoes Grown in Containers
Growing potatoes in containers is a great option if you’re short on yard space or your garden is limited to a balcony, but keep in mind that the tubers probably won’t grow as big in containers as they will in the ground. Harvesting potatoes grown in containers is pretty similar to in-ground potatoes, but we’ll walk you through the process. Like potatoes in the ground, you’ll know when to harvest potatoes by waiting about two weeks after plants above the soil have begun to dry out and die back.
How do you harvest potatoes grown in containers? There are two ways, one of which is very similar to getting potatoes out of the ground, and the other involves dumping the entire contents of the container onto a surface to find the potatoes. We'll address each way to do it.
Tools and Supplies Needed
- Large tarp or drop cloth
- Garden gloves
- Short-handle gardening spade or shovel (optional)
- Large bucket or basket
Step 1: Prepare Area
Lay down a large tarp or drop cloth to create a work surface. This’ll get messy, so make sure you’re wearing gloves and that you’re in a spot that you don’t mind getting dirty, like a patch of grass or a driveway.
If your pot is too heavy to move, place a tarp or cloth on the ground around the container to catch all dirt that you’ll pull up with the potatoes.
Step 2: Empty Contents of Container
If your container is light enough to handle, flip it over onto the tarp- or cloth-covered work surface. Gently break apart clumps of soil with your hand.
If your pot is too heavy to flip, use a spading fork or shovel to dig the potato tubers out by sticking the tool into the soil near the edge of the pot and prying the tubers up to the surface of the soil.
Step 3: Pick Potatoes
Hand-pick potatoes from their stems and collect them in a bucket or basket. If you dumped your container over to harvest the potatoes, gently pick up the root mass and place it off to the side to replant later.
Step 4: Clean and Replant
Fold up the dirt-covered tarp or cloth and dump the excess dirt back into your planting container.
To replant, set the potato plant's root mass back into the soil and fill the container with enough soil to completely cover stolons. Water thoroughly to re-establish.
How to Cure Potatoes
To enjoy your potatoes all winter long, you need to first cure the potatoes before you stow them away. Inspect your batch of harvested potatoes. Discard or eat potatoes that have damaged skin immediately, as they won’t keep. Wipe dirt off potatoes (without water—getting the potatoes wet can shorten their life and cause mold growth) and lay potatoes out in a dark, cool, place at around 40 degrees for two weeks so their skins thicken.
How to Store Potatoes
Once cured, store potatoes in a dark, non-airtight space with a temperature between 42 and 55 degrees. If potatoes in storage take in too much light, they’ll turn green, creating a bitter taste and can cause some stomach issues if eaten due to a buildup of a compound called solanine, which is toxic to humans. Potatoes love humidity, so a damp cellar or basement is ideal. You can add humidity to the space by placing a large pan of water in front of the room’s air source or by keeping potatoes in a paper sack. The stored potatoes will keep for about six months.
Equipped with the right tools and the will to get a little dirty, anyone can plant and harvest their own potatoes for summers to come.
Have you grown and harvested potatoes before? Let us know about your experience in the comments below!
Enjoyed the project?
Comments
Join the conversation
-
 GREG GOOLSBY
on Apr 09, 2023
Yes, I am going to give it a try in a patio container.
-










Frequently asked questions
Have a question about this project?
How large should a patio container be to grow potatoes in it?