How to Prune a Tree to Keep It Healthy and Tidy

While everyone may have a different opinion on why trees should be pruned, almost everyone will agree that if you’re a homeowner, pruning your trees should be one of the projects you tackle every year.
When it comes to doing so, your best bet is to do a little research to make sure the process runs smoothly. Not only can pruning trees be dangerous if you don’t know what you’re doing or if you use the wrong tools and equipment, but improper pruning can cause irreparable harm to your tree or even cause its untimely demise.
This guide takes a look at how to prune a tree. Ahead we cover the ins and out of timing your maintenance, the tools you’ll need to get the job done, and we’ll also review the process of pruning step by step. So if pruning a tree is on your to-do list, you may want to read on before making the first cut.
Photo via Shutterstock
Why You Should Prune Trees
If you have trees around your home, pruning should be a part of your annual maintenance routine. While some people may prune trees that block their widows or access points to the home, there are plenty of reasons to prune your trees. Pruning your trees can:
- Improve tree health
- Increase flower or fruit production
- Improve structural integrity
- Stimulate growth
- Help maintain the tree size
- Enhance its natural shape and improve its appearance
- Save it from damage
When to Prune Trees
The best time to prune trees depends on the type of tree, but pruning should be done during dormancy and right before active growth begins. Pruning will encourage new growth when the weather starts to warm up. However, if you catch any dead or diseased branches, you’ll want to prune those off ASAP.
Do a Scratch Test
When you should prune a tree varies on the type of tree you have:
Deciduous Trees
Deciduous trees, which are the giant oaks, maples, and other shrubby trees growing in your neighborhood, shed their leaves each year. The best time to prune them will be late fall to winter. Not only have they entered their dormant stage by that time, but there’s also far less insect activity, and the likelihood of disease is gone. Most fruit trees are also deciduous.
Subtropic Trees
Trees in subtropic areas like Florida or California can be trimmed year-round; the only caveat here is that you should make sure that you’re not pruning too much at any given time. The industry standard is never to cut more than 30 percent of live tissue from a tree in any given season.
Flowering trees
Flowering trees should be pruned within two weeks after flowers fade. Pruning a flowering tree at any other time can reduce your flower display or destroy it altogether (unless you’re pruning it for the sole purpose of clearing it of diseased or dying branches).
Conifers
Typically, conifers require minimal pruning. However, if you must do so, it’s best to prune these evergreens in late winter before growth begins.
Tools for Pruning Trees
There are several tool options for pruning trees—it all just depends on the scale of the job and the kind of tree you’re pruning.
Hand Shears
Also known as hand pruners or pruning shears, hand shears are essentially a stout pair of scissors that can cut through thick branches anywhere between one and two inches around. For novice pruners or those with young trees, Fiskers tree pruner is a reliable pair of hand shears and a good place to start.
Loppers
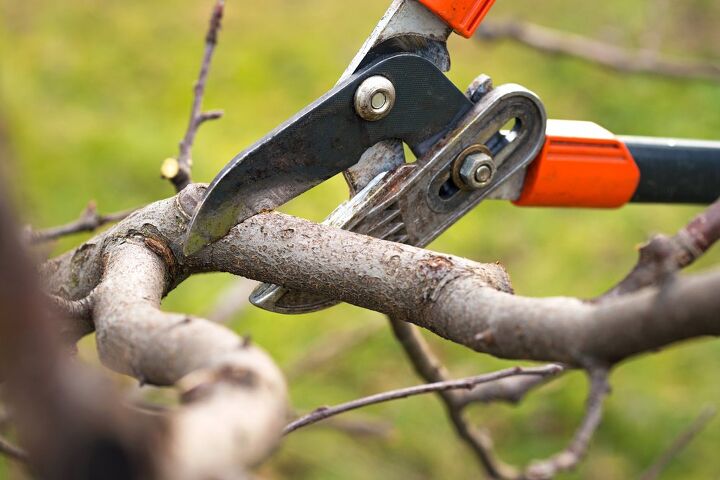
These snippers work like hand shears, but they have longer handles and blades that are meant to cut through thicker branches. Typically, loppers can cut through branches up to three inches thick around. The long handles are ideal for trimming branches high above your head or reaching awkward spots.
Pole Tree Pruners
Pole pruners are designed to reach branches that are far above your head. Typically, pole tree pruners are about eight feet long, but telescoping pruners can extend up to thirty feet. Pole pruners have pruning blades at the top of the pole and a string that runs down the length of the pole.
To cut a branch, you hold the pole with one hand and pull the string with the other hand to make the cut. While this may sound a little difficult, a good pole pruner should be able to trim the branch with just one cut or one pull of the string.
Hand Saw
When you’re dealing with branches that are up to five inches thick around, you’ll likely need a hand saw to prune your tree.
Chainsaw
If you’re dealing with mature trees with branches thicker than five inches, you may need a chainsaw to prune your tree.
Tree Trimming Safety Tips
According to the National Ag Safety Database, the three most common tree trimming accidents are:
- Electrocution
- Falls
- Being struck by falling trees or limbs
These are pretty serious injuries, so taking the right precautions is crucial when tackling this project. Here are some tree trimming safety tips to consider.
Use the Right Gear
Whether you’re using a pair of hand shears or a chainsaw, always wear eye protection. You never know when a rogue branch or twig may decide to go flying in the wrong direction. If you’re working with a chainsaw, be sure to wear lineman’s gloves and protect your head with a hard hat.
Use the Right Tools in Good Repair
It’s imperative to use the correct tools for the job you’re trying to accomplish. For example, when you need a chainsaw to trim a limb but use a pole saw instead, it’s a recipe for disaster.
A chainsaw is likely the most expensive tool you would need and if it’s not in your budget, keep in mind that home improvement stores like The Home Depot have rental options for large tools and equipment.
Beyond having the right tools, make sure that everything you’re using is in good repair. A dull blade can cause kickback or slippage and can be just as dangerous as a sharp blade.
Check the Weather
If the weather forecast calls for rainy, icy, stormy, or windy conditions, you may want to skip the tree pruning and revisit when it’s a clear day.
Inspect a Tree Before Climbing
Before you start working, be sure to identify weak limbs or branches and avoid using those for support.
Photo via Shutterstock
How to Prune a Tree
Now that we’ve covered the proper safety precautions and common tools you’ll use for tree pruning, let’s go through the steps on how to prune a tree correctly to avoid any damage.
We’ve listed all of the equipment below that could apply to your pruning job to be thorough. But, depending on the size of your tree and the thickness of the branches, you may only need one or two of them to get the job done.
There are also two important parts of a tree we reference below that you should know about before you start pruning:
- Branch collar: This is the distinctive thick patch where the branch connects to the trunk of the tree, usually on the underside of the branch. The collar heals the wound left after pruning.
- Branch bark ridge: This dark, rough, ridge separates a branch from its trunk and is typically on the top side of the branch.
Tools and Materials Needed:
- Hand shears
- Loppers
- Pole pruners
1. Clean Up Your Tree
Give your tree a good once over. Look for and remove branches that are dead, diseased, or damaged. Remove any sprouts from the base of the tree trunk (suckers) and any straight sprouts growing from the main branches (water sprouts).
Both are likely sucking nutrients and energy from the rest of the tree. When you’re cleaning up, be sure to make your cuts right where the offshoots emanate from the trunk or the branch; leaving any stubs will only enable the suckers and water sprouts to keep growing.
2. Remove Branches
In this step, you’ll want to strategically remove tangled branches so that air and light can move through the canopy along with any branches that are dead, dying, or broken, close to the ground, or branches growing in wonky directions like downward or inward.
To avoid ripping the bark on heavy branches, start by cutting long branches down to a manageable length and then finish the cut at the collar. Ideally, you’ll want to remove the branch with three cuts:
- Cut from below. On the underside of the branch, find a spot that’s about twelve inches from the collar, and start your cut. Be sure not to cut all the way through; a third of the way is fine.
- Cut from the top. Move to the top side of the branch. Make another cut about one inch above your previous cut, and continue cutting until the branch rips off.
- Cut to the collar of the branch. Your last cut should be right at the branch bark ridge. Using a downward motion, cut to the branch collar.
Photo via Shutterstock
How to Prune a Fruit Tree
Although expert-level farmers may say that every fruit tree is different and, therefore, so is the pruning process, that’s not necessarily true. There’s really no difference between pruning an apple tree or a peach tree thanks to modern fruit tree breeding methods.
When you strip down the process, there are a few steps that apply to all fruit trees, which we’ll cover below.
Tools and Materials Needed:
- Hand shears
- Loppers
- Pole pruners
1. Clean Up Your Tree
Give your fruit tree a good once-over; remove any branches that are dead, diseased, or damaged. Remove suckers and water sprouts growing from the main branches. Be sure to make your cuts where the offshoots emanate from the trunk or the branch and don’t leave any stubs.
2. Thin Out the Branches
With this step, your goal is to thin out the branches in order to let more light and air through the canopy.
You’ll want to look for and remove all of the following:
- Branches growing in wonky directions (i.e., downward or toward the center of the tree)
- Branches that cross paths with other limbs
- Branches that seem to compete with their neighbors
When thinning out branches, be sure to make the cut right up against the branch; here again, you don’t want to leave any stubs. When you’re done, you should have about 6 to 12 inches of airspace around each branch.
Keep the Healthy Branches
3. Head Back
Heading back refers to making cuts to the tree so that you can manipulate the way it grows so it’ll successfully bear more fruit. First, you’ll want to trim the newest growth on the tree so that the branches grow short and thick down the line instead of thin and wispy. This is important for two reasons:
- Thin branches will snap under the weight of the fruit
- Cutting new growth stimulates growth lower in the canopy and that, in turn, produces more fruit
When heading back a tree, you’ll likely be cutting off 25-30 percent of new growth. This time, your cut should only be partway into the length of the branch—about halfway down into the new growth should suffice. Make your cut at a 45-degree angle about ¼ inch closer to the tree trunk than outward-facing buds. This ensures that the next round of new growth heads away from the trunk of the tree, instead of doubling back.
How to Prune an Evergreen Tree
Evergreen trees typically need little to no pruning. More often than not, people will prune evergreens because the branches impede a walkway, a driveway, or their view. If you find this is the case with your home, you might consider moving the tree and/or replacing it. If you find that you must prune your evergreen for whatever reason, just follow the same steps listed above for pruning a tree.
Photo via Little Homestead In Boise
When to Call a Professional
If you’re dealing with exceptionally tall trees, mature trees with super-thick branches, or trees growing near power lines, you may want to skip the DIY and call in a professional. Not only would they have the equipment to handle such a big project, but they’ll also have the training and know-how to work around dangers like power lines.
Do you have tree pruning tips? If so, share them below with the Hometalk community!
Enjoyed the project?
Comments
Join the conversation
-
 Helena
on Apr 09, 2024
Great tips, thank you. I have previously used tree service in Las Cruces for this, professionals have the knowledge to recommend the best care routine for your trees, including which species will thrive in your environment and how to properly space them.
-


Frequently asked questions
Have a question about this project?