


How to Remove Caulk When It's Old and Dingy

By Marilyn Syarto
Caulk is your best friend when it comes to sealing air and water leaks from stationary parts of your home such as tub surrounds, countertops, and parts of windows. Caulking in the right spots can also help stop mice and other rodents in their tracks and deter them from entering your home.
Some caulk looks pretty and pristine while you may have done a less-than-artistic job of caulking gaps in your basement or outdoors to keep critters out. But there’ll come a day when you need to replace old, worn out, or dull caulk. Our guide gives you the basic steps for how to remove caulk with or without chemicals, indoors and outdoors, so you can replace it with fresh and more effective caulking.
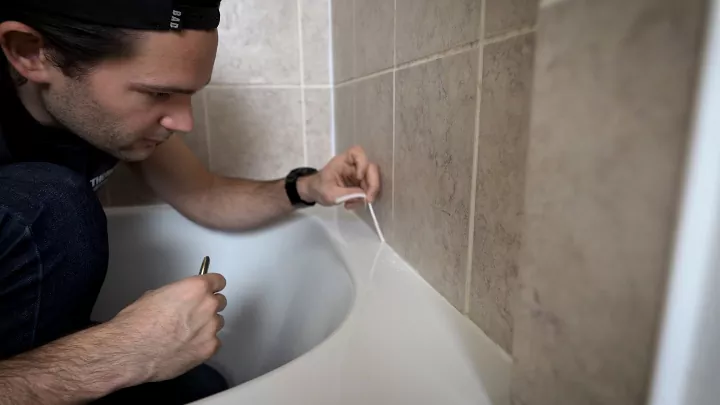
Photo via Zac Builds
What is Caulk?
Caulk is a waterproof sealing material made from latex, rubber, or silicone for flexibility and each is formulated for either indoor or outdoor use.
For newbie DIYers, it helps to know exactly what you’re dealing with, especially if you’re working with caulk that you didn’t apply yourself. You’ll likely encounter caulks made of various materials when you go to remove it, but that shouldn't be an issue upon removal.
Sometimes, caulks are easily confused with other materials that serve similar purposes. Here’s a brief explanation of what you need to know:
- Silicone caulk vs. silicone sealant: Silicone caulk is waterproof and flexible, but not glue-like, and silicone sealant is more of a flexible glue that bonds two surfaces with cracks or gaps. Both are found in minimal colors, such as clear and white.
- Acrylic caulk vs. silicone caulk: Acrylic caulk is less flexible, ideal for filling in gaps between trim and wall, for example, and can be found in a variety of colors. Silicone caulk is best for kitchens and bathrooms because it is more waterproof than acrylic caulk.
- Interior caulk vs. exterior caulk: For weather-related reasons, use specially formulated exterior caulk for outdoor projects because it holds up to elements that interior caulk can’t.
- Caulk vs. grout: Caulk is a flexible material for closing gaps while grout is a non-flexible material that helps hold tile together.
- Caulk vs. mortar/cement/concrete: Caulk is flexible while the other materials are not considered bonding or flexible. They are meant to build durable flooring or other surfaces or to hold stone and bricks in place.
When to Remove Caulk
Some homeowners may think that caulk is a set-and-forget material, but that’s not the case. A caulk job usually lasts about five years, according to Mr. Handyman. There are many reasons for needing to remove caulk, including:
- Mold and mildew can’t be cleaned anymore because it has migrated beneath the surface of the caulk. You want to replace it with a new and improved mildew-resistant caulk.
- The caulk is dried out and cracked.
- The caulk is peeling and missing in places.
- The caulk looks dull and dingy.
- You want to change or refresh the color of the caulk.
- New caulk won’t stick to old caulk and therefore won’t form a seal.
- The old caulk was not correctly applied and is causing leakage.
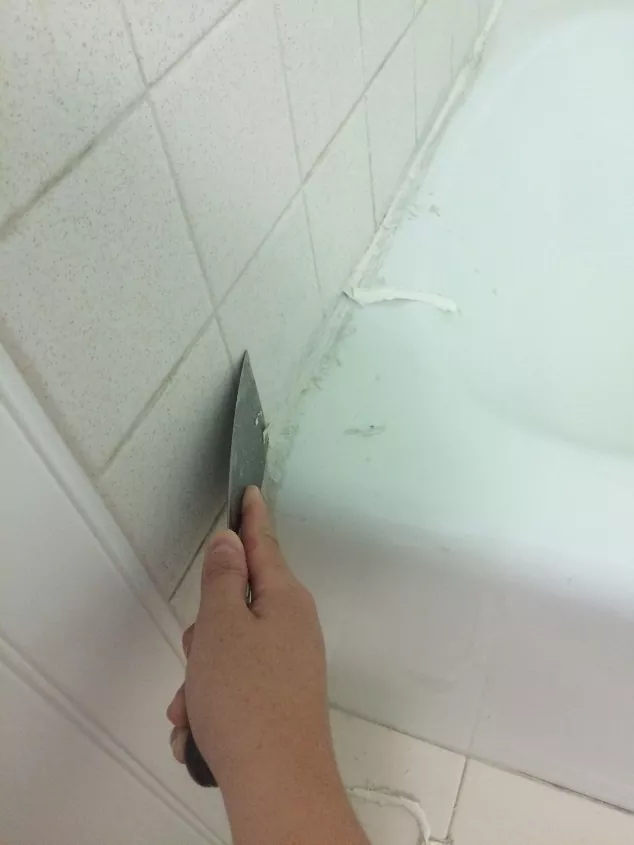
Photo via Leslie
How to Remove Caulk Without Chemicals
You don’t need chemicals to remove caulk, and you might want to go without chemicals for a few reasons:
- You need to remove a little caulk from a very expensive countertop.
- Silicone caulk is tough to dissolve even with chemical removers.
- You don’t want your kids or pets to encounter any chemicals when removing caulk from the bathtub.
- You want to remove the caulk immediately and don’t have time to buy the chemical remover.
Many seasoned homeowners will use only tools (no chemicals) to remove interior and exterior caulk. Here’s what to do.
Tools and Materials Needed:
- Utility knife
- Hair blow dryer
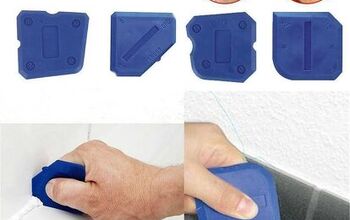
- Caulk-removal tool (minimizes damage to surfaces), putty knife, glass scraper with razor blade, or needle-nose pliers
- Abrasive pad
- Mineral spirits
- Bucket (if needed)
- Water (if needed)
- Clorox bleach (if needed)
- Sponge, paint brush, or foam brush (if needed)
- Protective gloves (if needed)
- Face mask (if needed)
Step 1: Slice the Layers of Caulk
Take a utility knife and make long slices through the bead of caulk on two sides.
Step 2: Soften With Hair Dryer if Necessary
If the caulk is not sliceable, you will need to soften it. That’s where a hair dryer comes in handy. Use the lowest setting on the caulk to soften it. Blow the dryer on small sections of the caulk for about 30 to 40 seconds.
Watch the Heat
Step 3: Pull Off the Caulk
Use your bare hands and pull the caulk out as much as you can, manipulating it with your fingers—it should be a bit easier since you sliced it.
Step 4: Employ the Tools
Remove the rest of the caulk using whichever of these tools works best for your needs. Just be mindful of scraping adjacent surfaces:
- Caulk-removal tool
- Utility knife
- Glass scraper with a razor blade
- Putty knife
- Needle-nose plier (to pull layers of caulk off)
Avoid Sandpaper
Step 5: Clean the Surface
If there was no mold or mildew on the removed caulk, use an abrasive pad that’s doused in mineral spirits to clean off any caulk residue. This is an important step because the surface needs to be clean for the new caulk to stick.
If there was mold and mildew on the caulk, take an extra step before caulking in order to capture spores left behind on the surface. Here’s what to do:
- Wipe the surface with warm water.
- Add one gallon of warm water and ¾ cup of Clorox bleach to a bucket.
- Wipe down the area using a sponge, paintbrush, or foam brush dipped in the bleach mixture (wear protective gloves and mask).
- Let the bleach mixture sit on the surface for five minutes.
- Rinse with warm water.
- Let the area air dry completely before caulking.
WARNING: Mineral spirits and bleach are a toxic combination and should never be mixed. Use one OR the other.
How to Remove Caulk With Chemicals
There are times removing caulk with a chemical stripper can work better than chemical-free methods. But beware, some chemical removers don’t actually remove or dissolve silicone caulk, but instead may make it expand so it’s easier to slice up. With that being said, chemical caulk removers are best used on acrylic caulk.
Tools and Materials Needed:
- Caulk remover chemical (see recommendations below)
- Caulk remover tool, utility knife, glass scraper with razor blade, or needle-nose pliers
- Old toothbrush or putty knife
- Protective gloves
- Face mask
- Eye goggles
- Hair dryer (optional)
- General cleaner or vinegar and water
- Bucket (if needed)
- Water (if needed)
- Clorox bleach (if needed)
- Sponge, paint brush, or foam brush (if needed)
- Protective gloves (if needed)
- Face mask (if needed)
Step 1: Ventilate the Space
If you’re using a chemical caulk remover indoors, be sure to properly ventilate the room per the directions on the product’s label.
Step 2: Apply the Chemical
Follow the directions on the chemical you are using, but in general, you’ll spread a wide bead of the product to completely cover the caulk. Here are a few popular caulk removal chemical products:
- 3M Caulk Remover
- Goo Gone Caulk Remover
- Orange Sol 10022 Contractor Solvent
- Crown Tuff Strip Ultimate Caulk Remover
- Dap 18026 Caulk-Be-Gone Caulk Remover (best for latex caulk)
Step 3: Wait for the Chemical to Work
You will need to wait hours—sometimes overnight—for the chemical to either soften or dissolve the caulk.
Step 4: Use the Tool
When the caulk is ready for removal, it should be super easy to do the job. Remove the caulk using whichever of the following tools works best for you:
- Caulk-removal tool
- Utility knife
- Glass scraper with a razor blade
- Needle-nose plier (to pull layers of caulk off)
Step 5: Remove Residue
Use an old toothbrush or putty knife to remove the residue (don’t use sandpaper). If necessary, use a hair dryer to further soften the residue so you can remove it with the toothbrush or putty knife.
Step 6: Clean the Surface
If there was no mold or mildew on the removed caulk, use an abrasive pad that’s doused in your cleaner of choice or a combination of vinegar and water to clean off any caulk residue. This is an important step because the surface needs to be clean for the new caulk to stick.
If there was mold and mildew on the caulk, take an extra step before caulking in order to capture spores left behind on the surface. Here’s what to do:
- Wipe the surface with warm water.
- Add one gallon of warm water and ¾ cup of Clorox bleach to a bucket.
- Wipe down the area using a sponge, paintbrush, or foam brush dipped in the bleach mixture (wear protective gloves and mask).
- Let the bleach mixture sit on the surface for five minutes.
- Rinse with warm water.
- Let the area air dry completely before caulking.
Have you had a challenging experience removing caulk? If you have a great tip on how to remove caulk, please share it with our Hometalk community!
Comments
Join the conversation
-
I acturally just did this last week. Used a 9 in one scraper and a wire brush, Came right out, Cleaned the porcelain tiles let dry overnight, Next day Silicone Caulk using ammonia free windex, Worked like a charm.
-
When it comes time to reapply new caulking, I would highly recommend using a little miracle tool that has been designed for the purpose. For best results, Do Not use your fingers to spread or flatten the caulking.


Frequently asked questions
Have a question about this project?