Layer Glaze and Wax, Give Wood "burnt"edges and Apply a Prima Transfer

This was such a fun project! I got to try a lot of different products and I certainly found some new favorites!
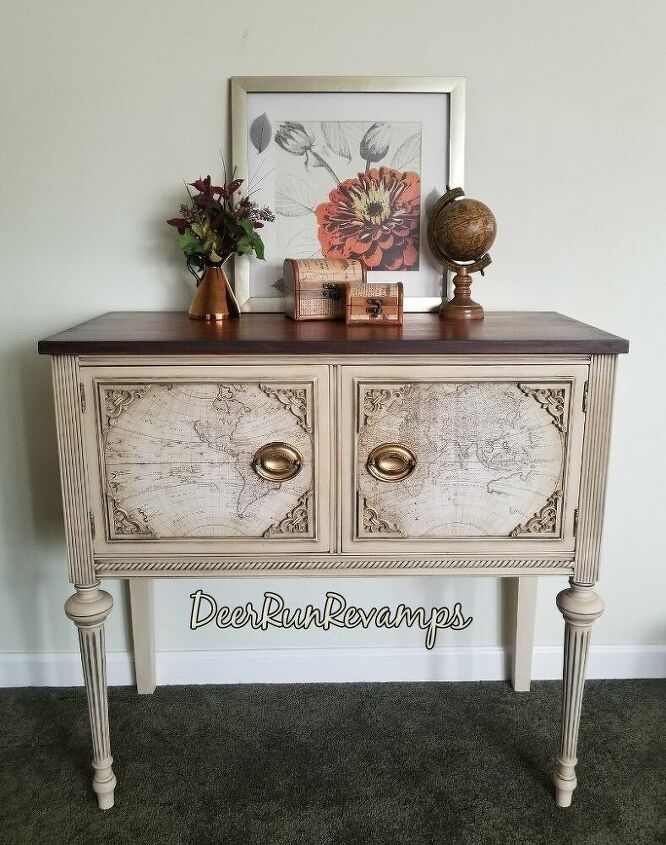
I've always loved a layered finish and anything with maps, so I brought the two together!
In this tutorial, I'll show you how to get dark edges on your wood tops, get the layered look using glaze and wax and how to apply a redesign with prima transfer...
Best Prima transfers!
First step is always prep your piece. Clean well with your choice of cleaner, make any necessary, repairs and do a scuff sand all over (sand the piece lightly with 220 grit sandpaper). Then wipe down with a damp rag.
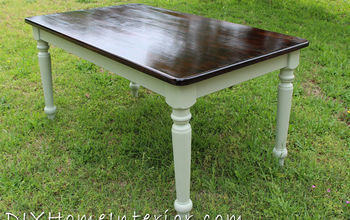
My piece needed a lot of prep. It was in pretty rough shape. After stripping and sanding the top, I found a gorgeous cherry wood! I decided to leave it natural, but if you want to stain a section of your piece, do that now
Now paint away!
I used a homemade off white/ beige paint. It's a chalk paint and the color has a wonderful contrast to the cherry wood and matches the transfer I was using perfectly!
After each coat dries, sand with 220 grit sandpaper. This smooths out any brush marks.
Once the paint has dried, apply your clear wax. Applying wax first gives you more control over the glaze and dark wax
***DO NOT WAX OR GLAZE THE AREAS THAT YOU WILL BE PUTTING THE TRANSFER***
Here comes the fun part!
Using a pointed wax brush or artist brush, apply your black glaze along the edges of the wood top. I use valspar clear glaze that can be tinted any color with just a bit of paint. Using a paper towel, wipe back the excess. If you still feel like there's too much glaze, you can wipe it away with mineral spirits. After allowing the glaze to dry, 1-2 hours, using a sponge applicator, I put 3 layers of polycrylic (follow cans directions) for durability on the top only
Staying with the black glaze, apply it in all the details, along all moldings, and along all the seams, using the same wipe back method.
Allow your glaze to dry, 3-6 hours. Now, using the same method, apply the dark wax directly over the glaze, blending it into the paint until your are satisfied with the look, wiping away with paper towels and removing excess with clear wax. This gives the beautiful layered, old world look
It's time for the transfer! I applied it to the cabinet doors. First, trim the part/s of the transfer you want to apply to your piece. Before removing any backing, position it and make sure it fits and looks properly. Each of the maps that I was using came in 2 sections. To be sure I got it even, I measured to find the middle of the door. This is where the two sections will meet. Make sure the area is smooth, clean and free of dust/wax. Remove the back film and position and transfer where you want it. Using the tool provided, smooth it out using slight pressure, assuring it adheres properly. Now, carefully remove the top film
Repeat these steps for the remaining transfer sections.
Once applied, seal with wax or polycrylic. I chose wax. I then applied the appliques using wood glue and went over those and the moldings with the black glaze, followed by the dark wax to tie it into the frame of the piece.
Enjoy your old world finish!
If you have any questions, please ask in comments. I'd be happy to help!
You can find Redesign With Prima Transfers, moulds, waxes and so much more in our Etsy shop!
Enjoyed the project?
Resources for this project:
See all materialsComments
Join the conversation
-
 Clergylady
on Mar 31, 2023
Love the maps.
-
-
 Carolina's Art
on Mar 31, 2023
All I can say is, "I'm in love"!!!
-








Frequently asked questions
Have a question about this project?
What kind of dog? I have a rescue that looks as if she could be a litter mate! So I’m curious about the possible breed or mix. Wouldn’t trade mine for $1M. ❤️
And I love this project too. 😁
Please share where you got the transfer. I absolutely love this piece!!! Outstanding job!!!