


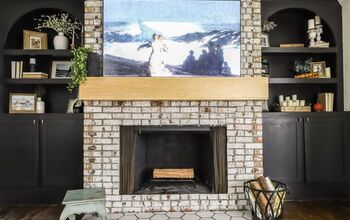
How to Build an Electric Fireplace DIY
(This post was written in collaboration with Slate-ish but all thoughts and opinions are my own.) Do you love the look of an electric fireplace but want to spruce it up a bit? Check out this incredible electric fireplace DIY.
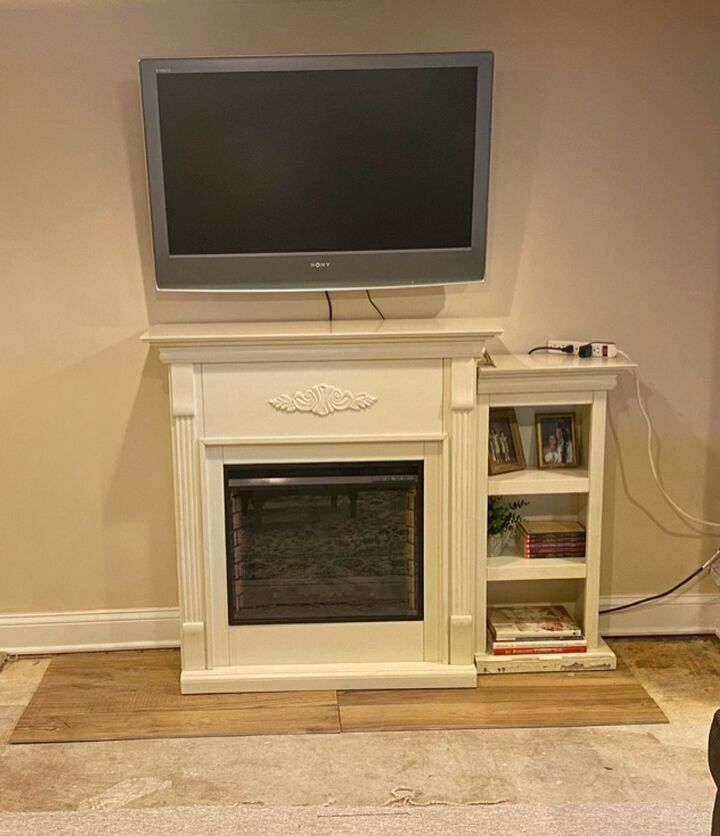
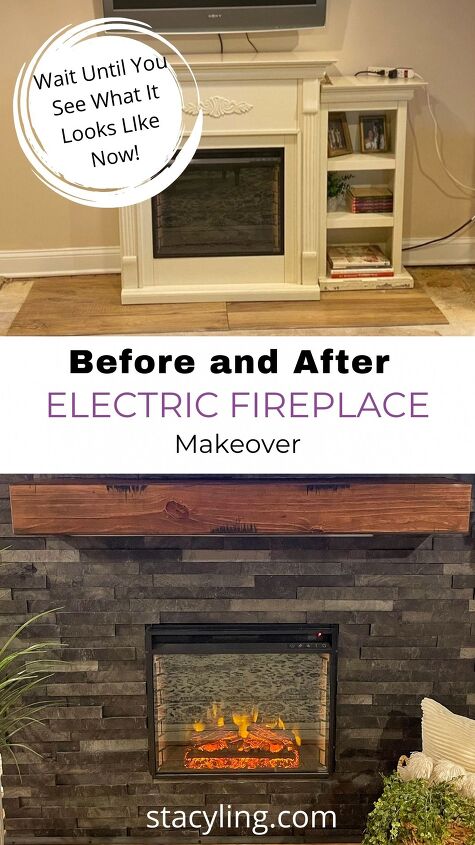
Several years ago, I purchased this pre-made electric fireplace for the basement.
The basement does not have a heating system, and since we aren’t down there much, an electric fireplace was a great solution.
It heats the room well, adds ambiance, and cozied up an otherwise cold basement.
As much as we love the look of the electric fireplace, we’ve always wanted to build a more permanent aesthetic that would add value to our home.
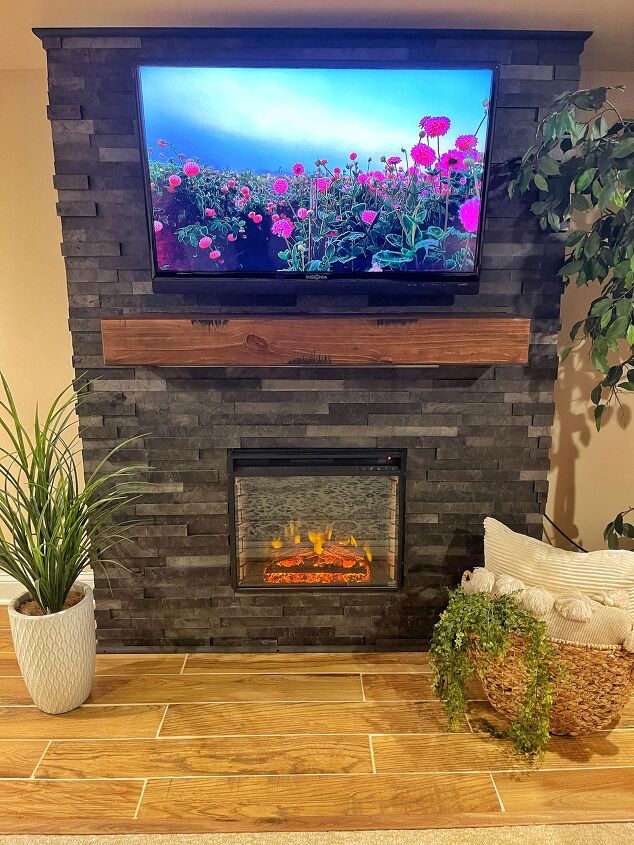
So we decided to renovate the basement with a new fireplace surround.
Wait until you see how we upgraded a pre-made electric fireplace to a custom-made fireplace!
About Slate-ish
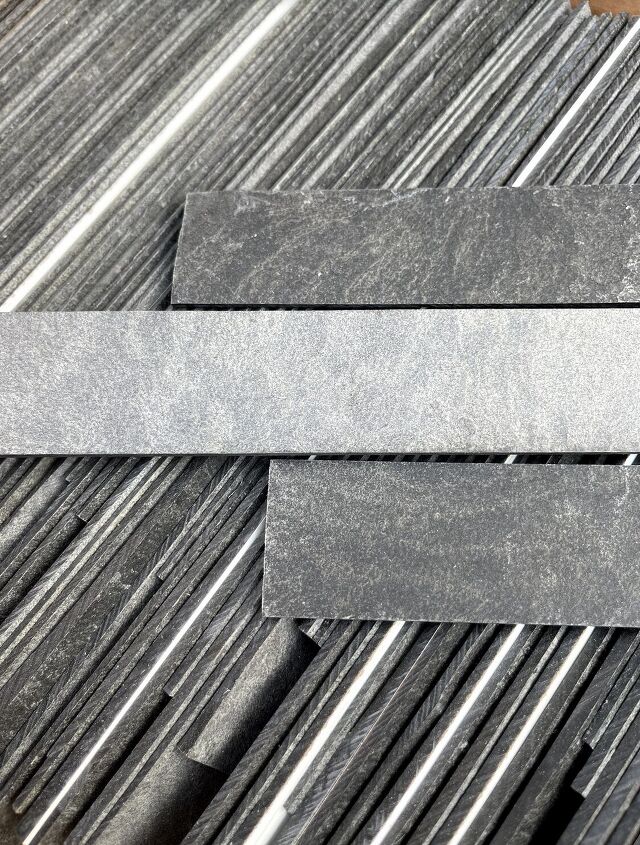
In my search for different products to use on the new fireplace surround, I found this AWESOME product to use on the fireplace that you have to check out!
Slate-ish is made in America from scrap paper-composite materials. These solid core laminates are made from layers of paper and resin, which are heated and pressed.
It comes in 20 different colors, as well as peel and stick or loose pieces.
For this project, we are using the loose pieces in Graphite 2.0.
Supplies Needed to Build This Electric Fireplace DIY
- Electric Fireplace Insert (Ours is 20”x30”)
- (12) 2×4’s
- 8D Nails
- (3) Sheets of Sheetrock
- 1.25” Drywall Screws
- Level
- Hammer
- Ruler
- Screwdriver
- Power Drill
- Chopsaw
- Oscillating Saw
- Cats Paw
- Mantel of your choosing

How to Build an Electric Fireplace DIY
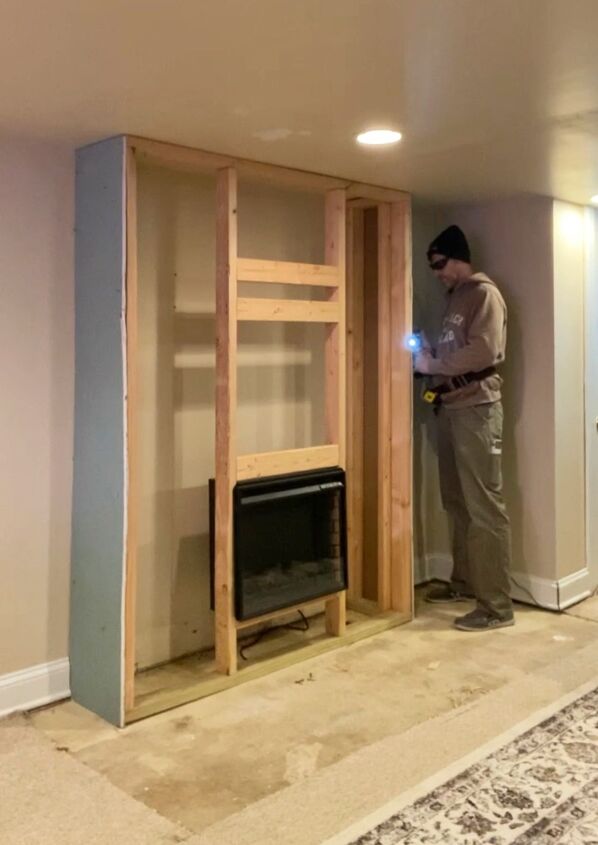
For our fireplace, we dismantled the pre-made electric fireplace to strip it down to just the insert.
There are all different sizes of electric fireplace inserts available if you don’t already have one.
I recommend that you have building experience before attempting to make this project.
NOTE: Every home is different. Sizes of rooms, ceiling height, etc. are not the same from home to home. When following this DIY, go by the measurements for your home and electric fireplace insert.
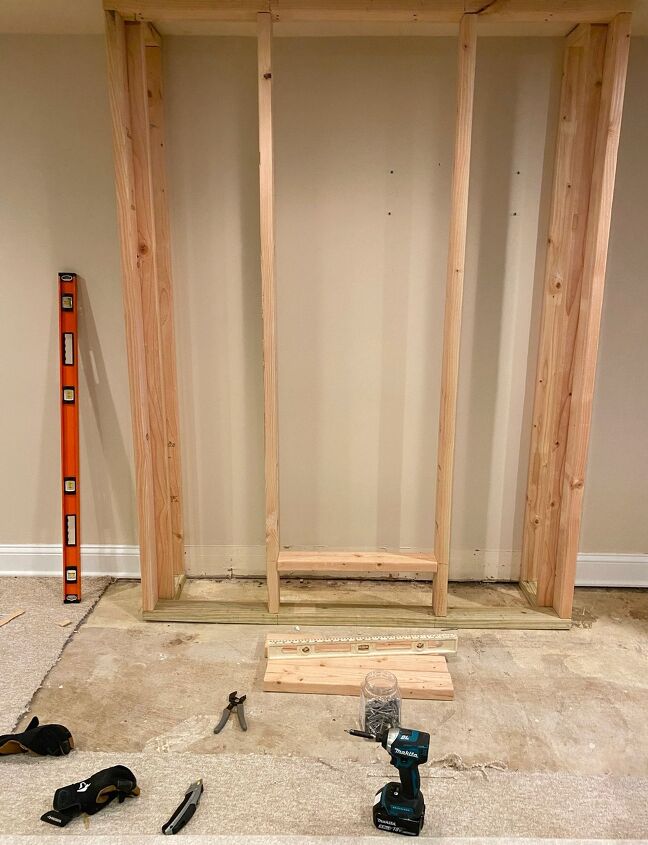
- Measure the electric fireplace and site where you want the fireplace.
- Frame out the walls of the surround based on the measurement of the electric fireplace insert. Ours is 20”x30”.
- Cut 2 – 2×4’s 5ft length for the top and bottom plates of the front wall.
- Cut 4 – 2×4’s that represents your floor to ceiling height.
- On the ground, nail the bottom plates onto the taller 2×4’s.
- Then nail the top plate onto the taller 2×4’s.
- Then pick up the wall and nail it into studs place.
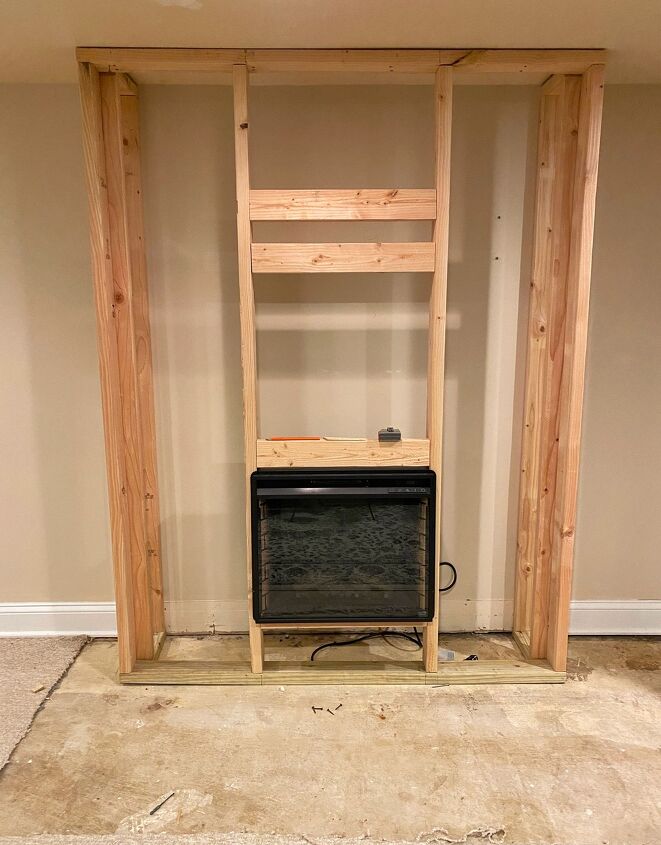
- Cut 4 pieces of 2×4 to 1ft lengths.
- Cut 4 more 2×4’s to for the floor to ceiling height.
- Nail the 2 short 2×4’s to 2 tall 2×4’s twice. These are your sidewalls.
- Put the sidewalls in place. Nail it into the studs and floor.
- Then nail the side walls to the front wall, making sure it is plumb and level.
- Cut 2- 2×4’s the width of your electric fireplace insert.
- Then nail them into place for the height of your electric fireplace insert.
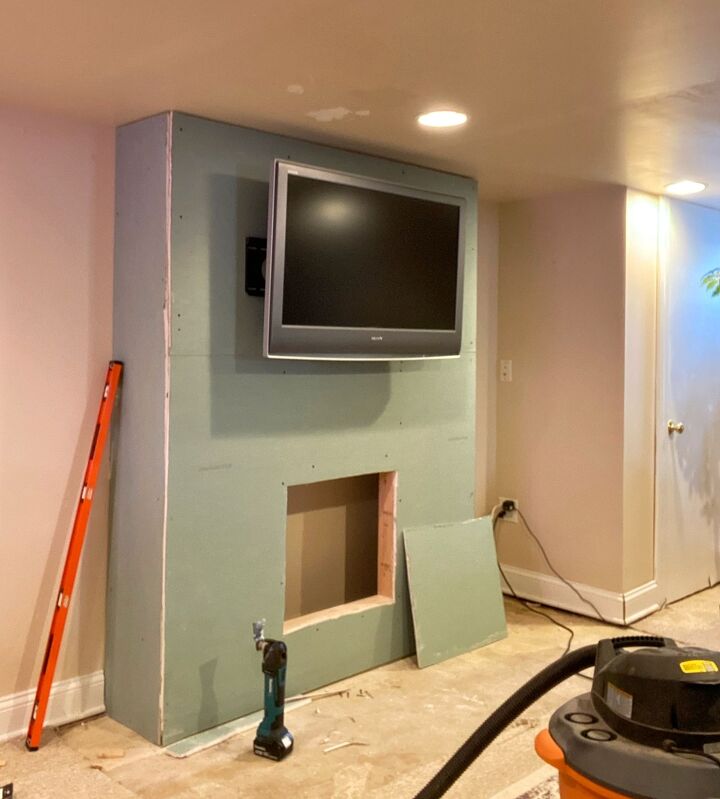
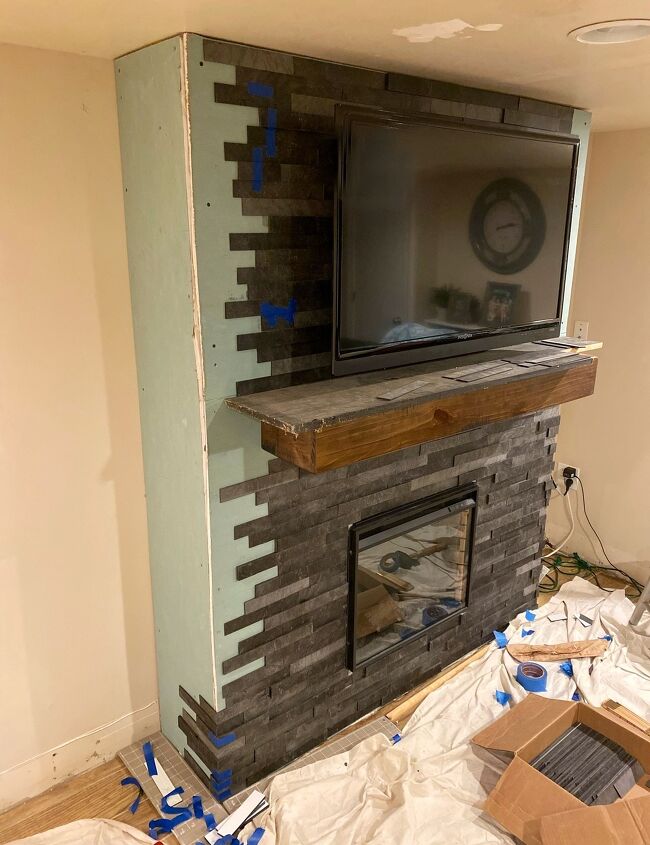
- (Optional: we added a tv bracket and blocking above the fireplace. If you decide to add a tv too, you’ll need to cut additional 2×4’s to support it as we did).
- Cut sheetrock to size and screw it to the studs.
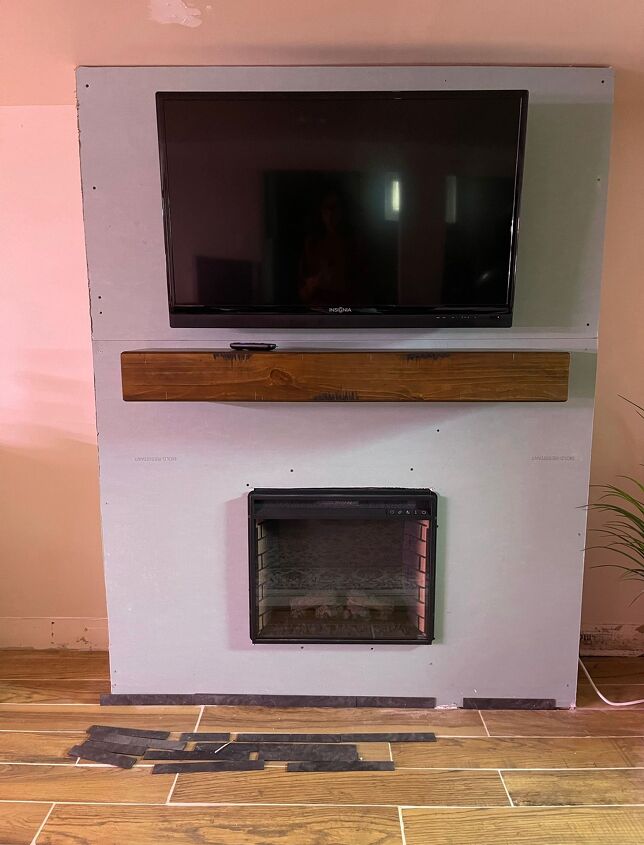
- Install mantel of your choice.
Now that we have the fireplace surround built, it’s time to finish it off!
Supplies Needed to Apply Slate-ish
- Slate-ish
- 100% Clear Silicone Adhesive
- Miter Saw with Carbide Tipped Blades
- Utility Knife
- Sandpaper
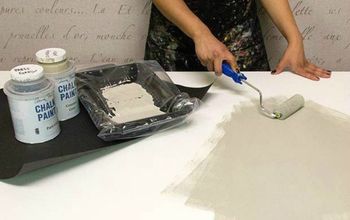
How to Apply Slate-ish
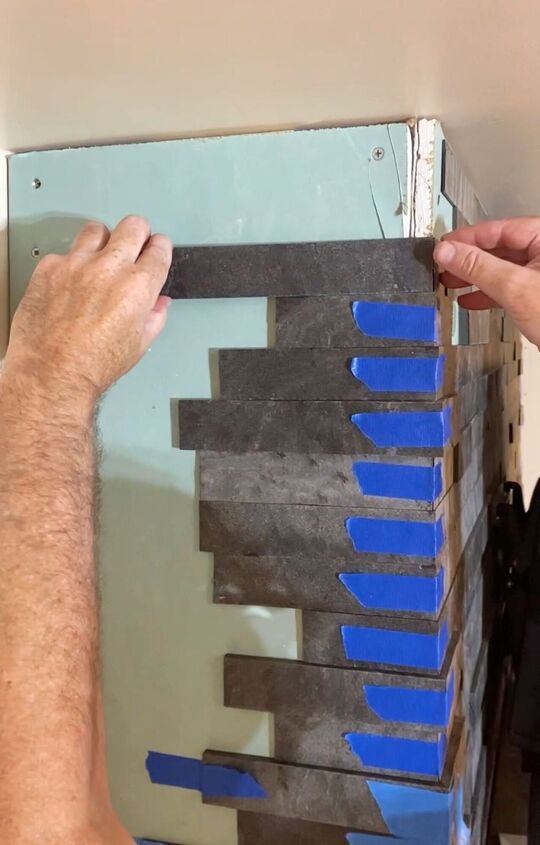
- Appy Slate-ish to a clean, flat wall surface. According to the manufacturer, the sheetrock should be painted.
- Start at the bottom of the fireplace. Level the bottom layer first before applying Slate-ish.
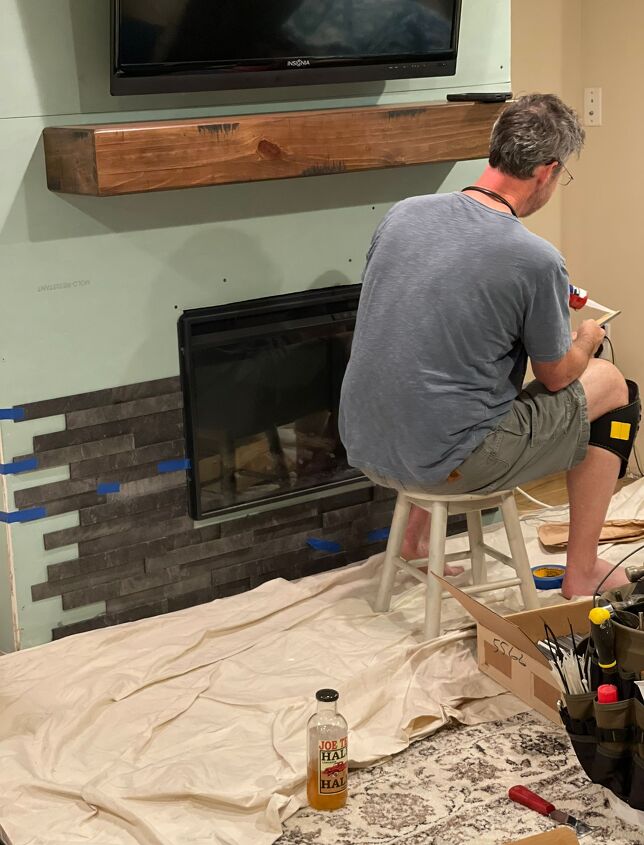
- Using clear 100% silicone adhesive, start at the bottom and work your way up. (Tip – use painter’s tape to hold tiles in place until dry if necessary.)
- Cut pieces to size with a miter saw, Note: carbide-tipped blades work best with this product.
- If you smear adhesive – let it dry and cut away later, or use a utility knife blade or even sandpaper to scrape off.
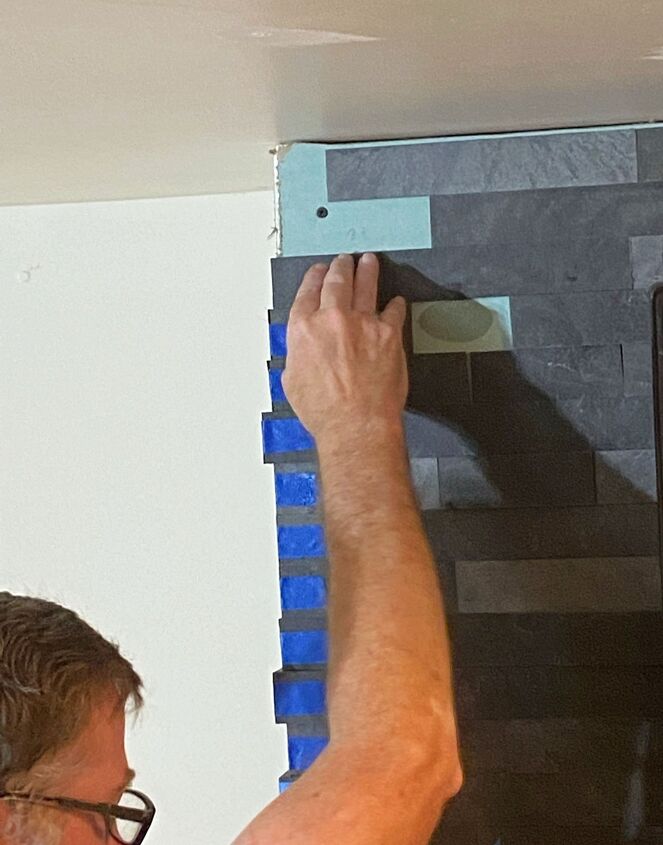
In order to get the look we achieved, we mitered the corners.
Note About Mitering Corners – do not attempt to miter the corners with this product. It was really extremely difficult to do and very time-consuming. Use corner trim on the corners instead of mitering.
We also added quarter round trim at the bottom, then painted it to finish off the bottom of the fireplace.
After the Electric Fireplace DIY
We love the look of the new fireplace and can’t wait to use it this winter when the New Jersey temps drop.
Doesn’t Slate-ish look so good on the fireplace too?
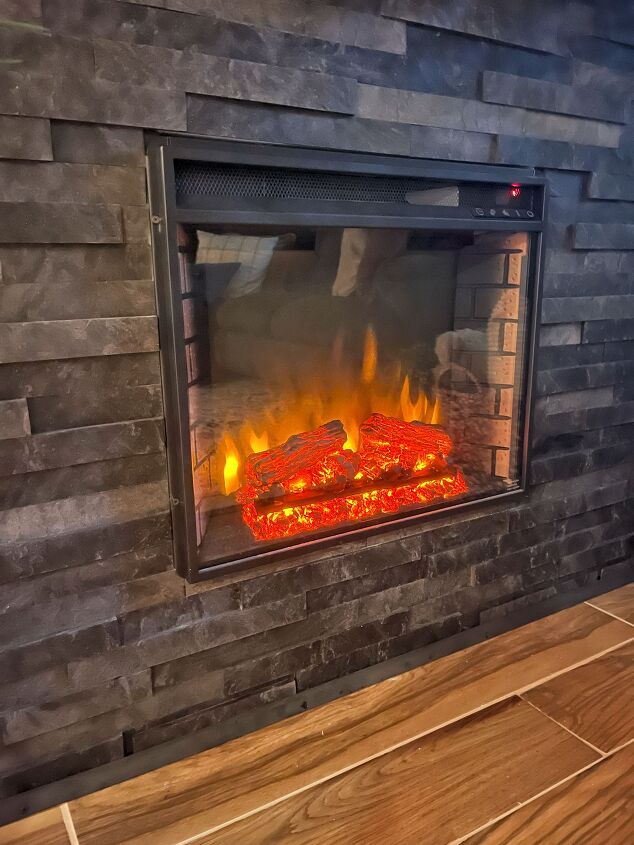
I love the look and even though the corners were really tough to do, we are happy with the result.
After working with Slate-ish, it would also look amazing on an accent wall and be easier to install.
For more DIY projects, CLICK HERE!
Pin and Save It For Later
If you like this post, please share and pin it on Pinterest. (If you hover over the image, the Pinterest button will be in the upper left corner.)
I’ve created the below-custom pins for this post.
Subscribe to the blog and gain access not readily available to the public.
Thanks so much for following along.
Enjoy a beautiful day! xo

If you like this post, please follow me @bricksnblooms on Pinterest, Facebook, Instagram, and Tik Tok. Subscribe to my YouTube Channel. Or join my Facebook Group.
Resources for this project:
See all materials


Comments
Join the conversation
-
Great look! Appreciate all the tips and warnings.... TY!
-
WOW, this is stunning and definitely a focal point to your room. Great job and one to be proud of.


Frequently asked questions
Have a question about this project?