


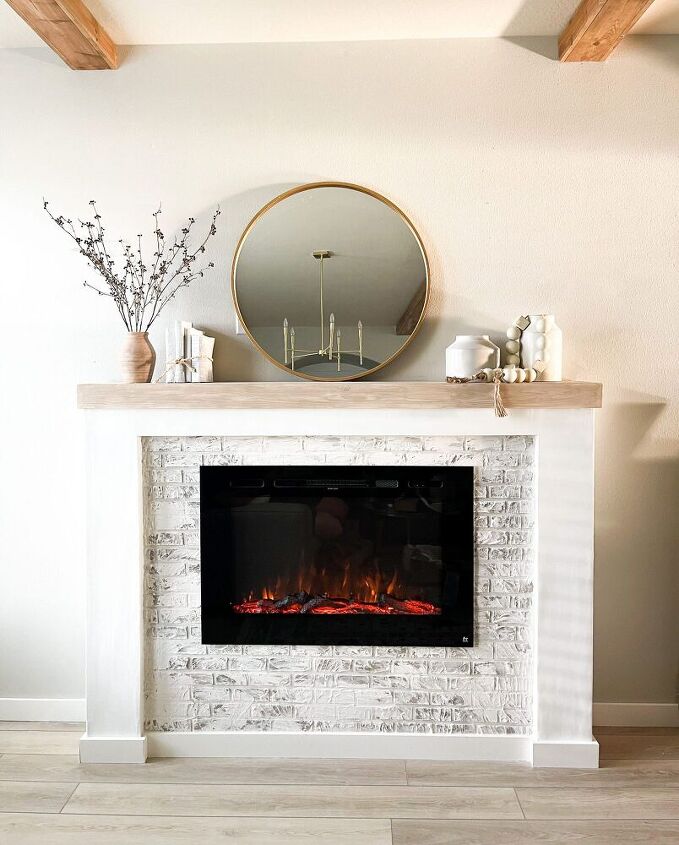
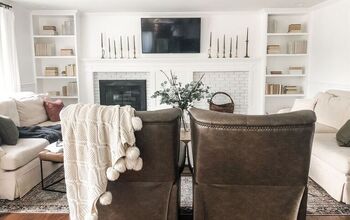
How I Added a DIY Fireplace to My Home

We love our home but like most buyers, we desired the beauty and benefits of a fireplace that this house did not have. In 2019 I decided to build a faux mantle so that I had somewhere to hang stockings during the holidays. It was adorable but 2 years later I was ready for the real deal so I set out to upgrade to something more permanent. As much as I love DIY I think a chimney was a bit outside my skillset so I decided on a DIY electric fireplace.
Electric fireplace inserts are a great option to add a fireplace to any home. They come in a variety of shapes, sizes, and prices, making it an achievable solution for the average homeowner and DIYer. All you have to do is build a surround! Keep reading to see how I added a DIY fireplace to my home and scroll down for more photos!
Framing the DIY Fireplace
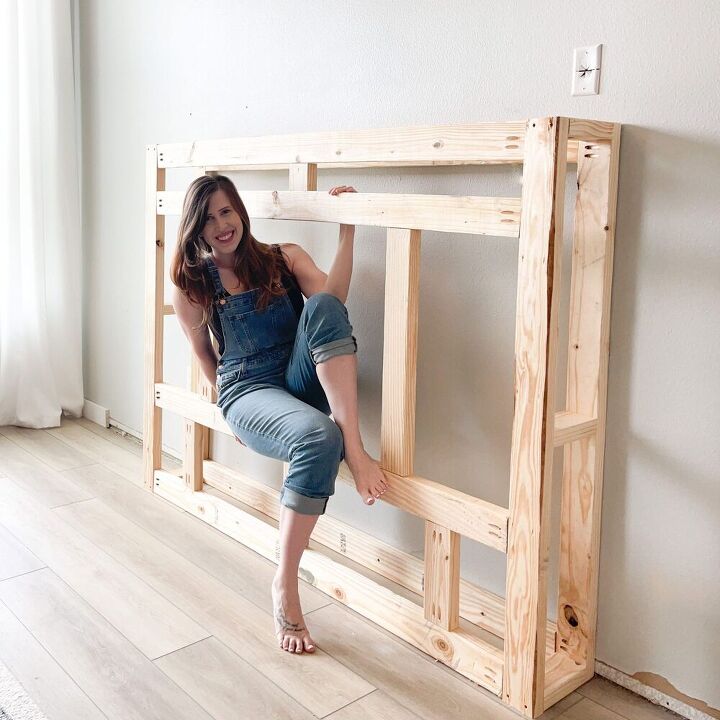
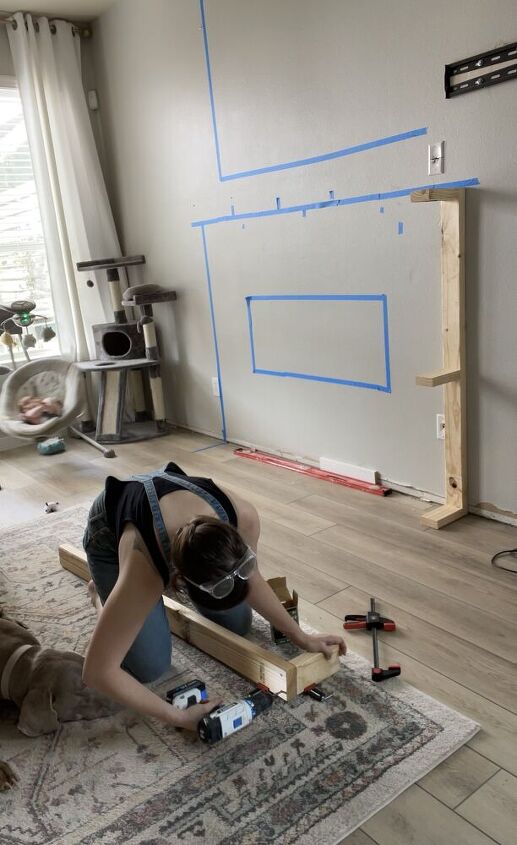
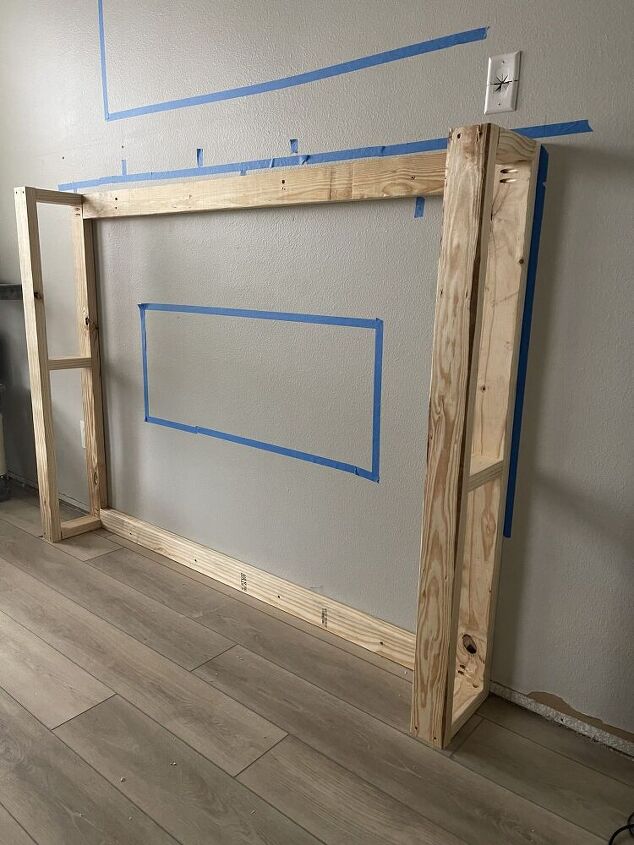
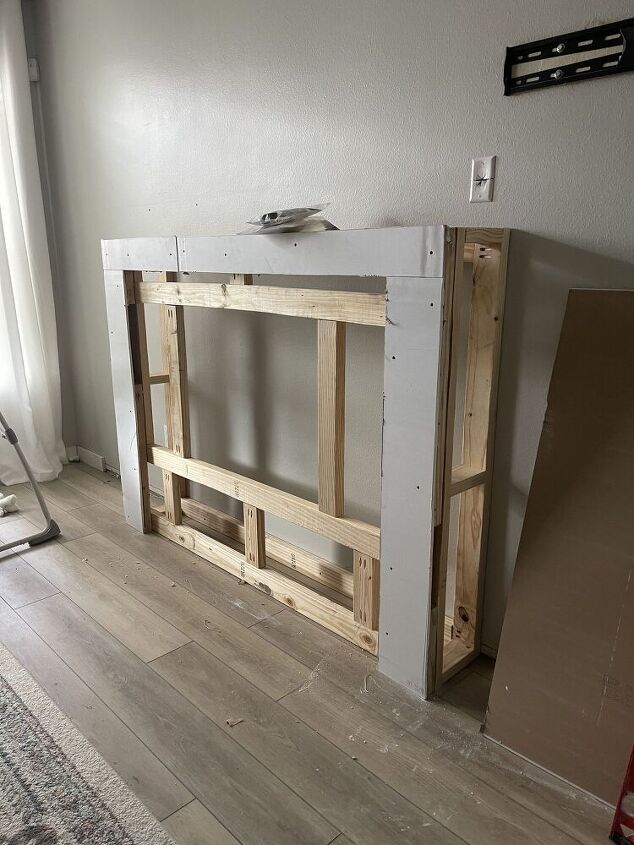
First, I needed a frame. I used the DIY beams on my living room ceiling to find the center of the room and started working on a frame out of 2x4s. I came up with the measurements based off the painter’s tape I had mapped out on the wall when I determined the size I wanted. You could do this just about anywhere in your home. My fireplace frame was about 72 inches wide, 53 inches tall, and 10 inches deep however the final measurements added 2 inches all the way around so make sure you consider that when building your frame. The frame is screwed into the studs and my husband gave it the ol’ “dad shake” for structural approval.


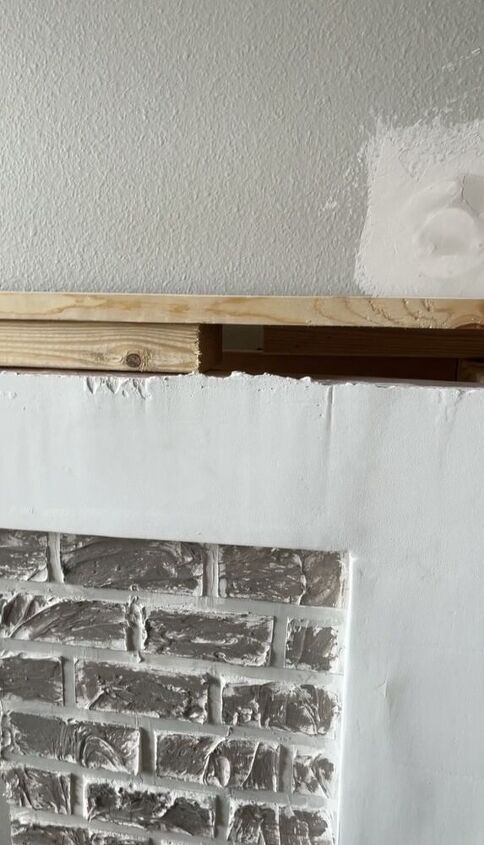
DIY Fireplace Drywalling
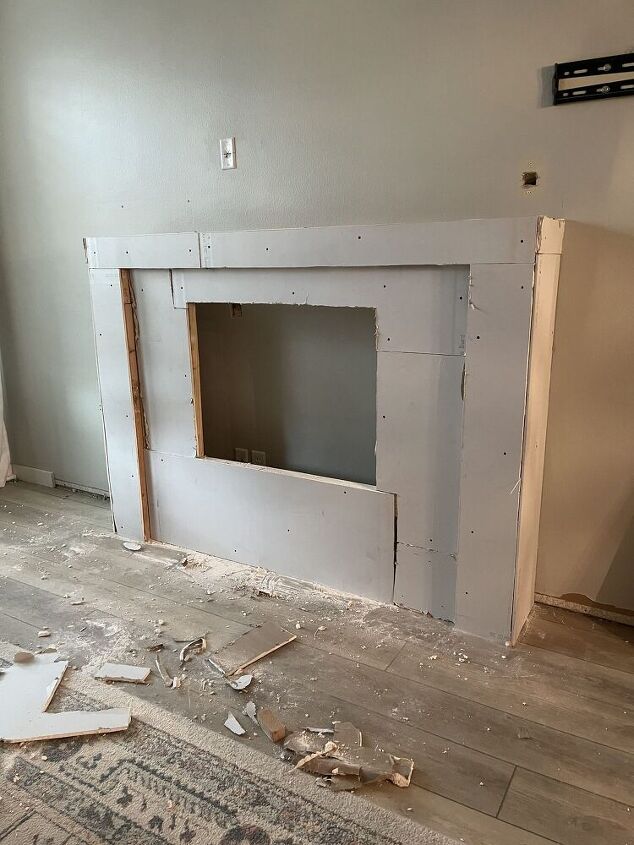
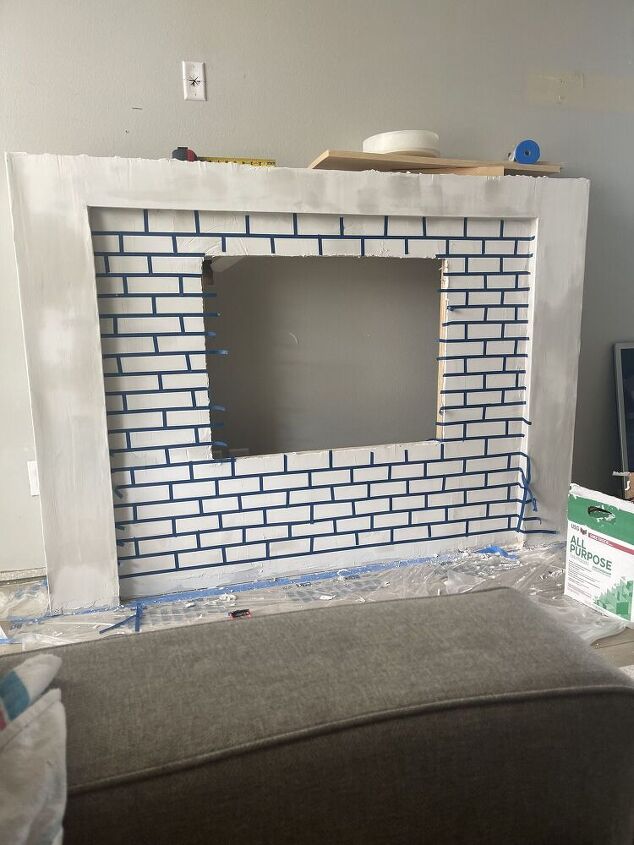
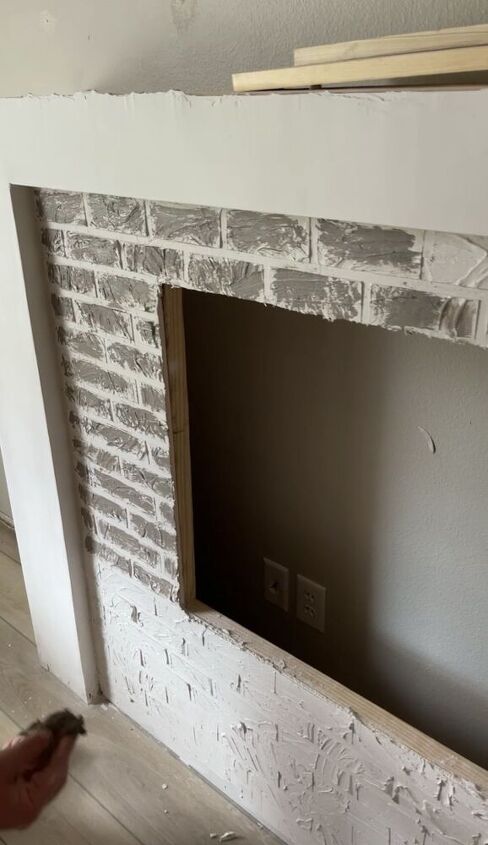
Because of the post-pandemic cost of wood, I opted to cover my frame in drywall. This was inexpensive and allowed me to make the fireplace look built in to my existing walls. It only took me 1 sheet of gypsum to cover the frame by piecing it together and screwing it into my frame. I’m no professional drywaller but I learned a little bit by watching contractors replace our bedroom sheet rock after the pipe burst. One thing to note is that last minute I decided to bump out a 6 inch area around the front to make the inside recessed. Also, I had an electrician come add an outlet behind my frame so that I would be able to plug in my fireplace insert.
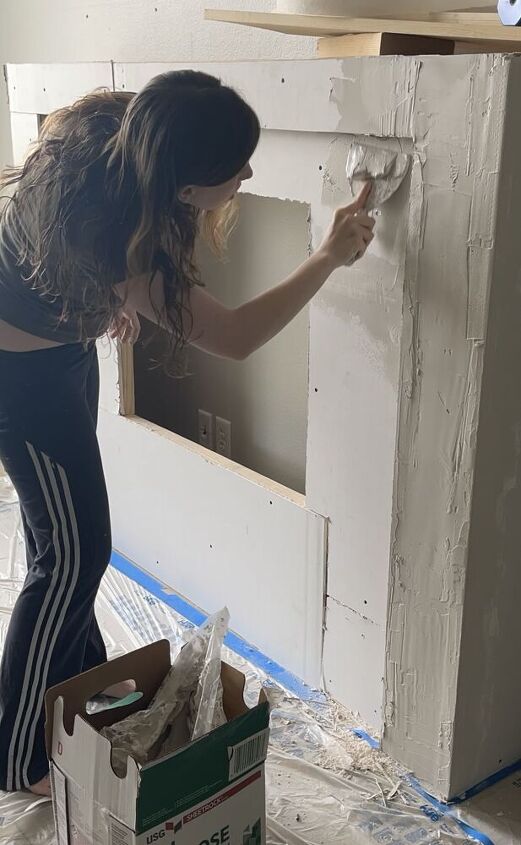
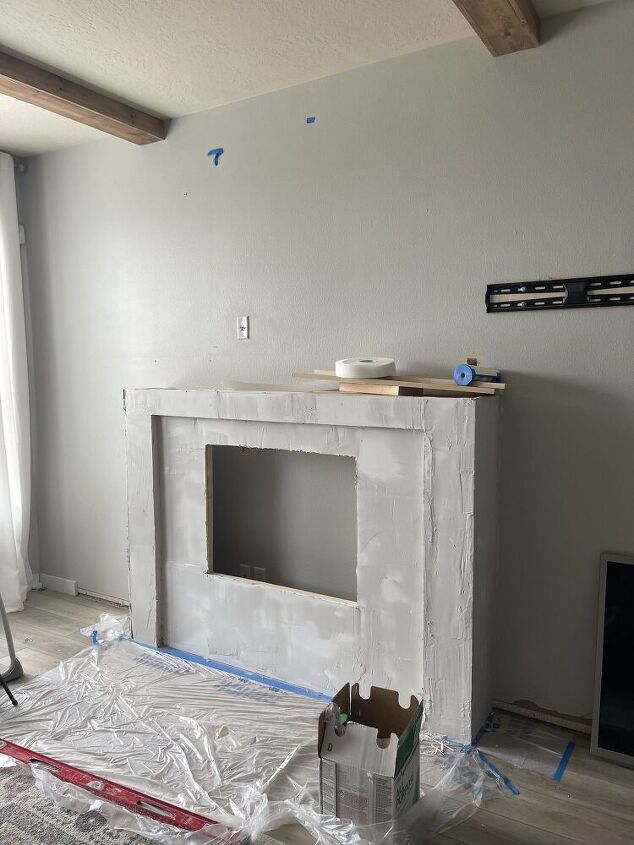
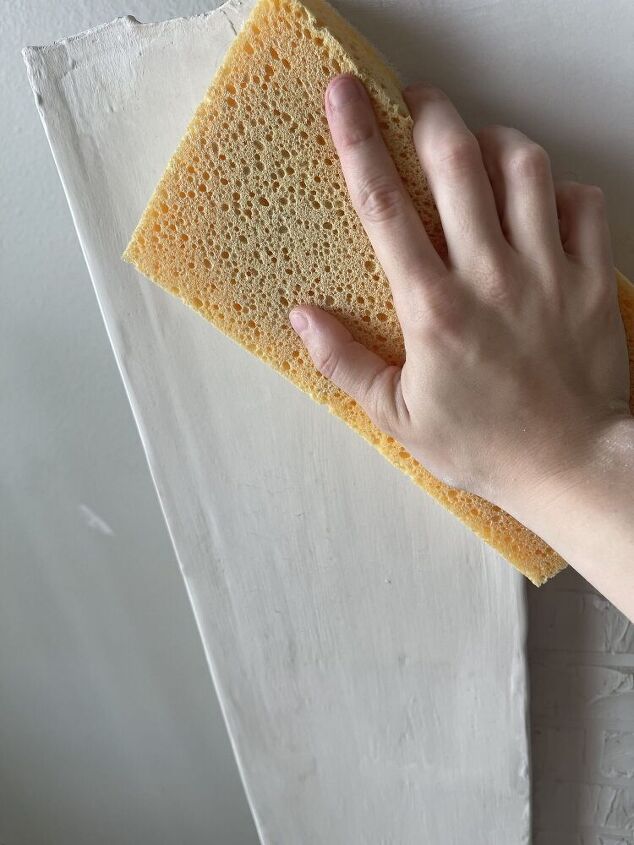
Next, I taped the seams, added corner bead, and used joint compound to mud over the entire thing. This part was the most tedious of the entire project. I now know why drywall is considered specialty work- its hard to get everything smooth! I used a dustless drywall sponge to wet sand and because I didn’t want to add texture, I tried my best to get it smooth. Its not perfect but I can live with it for now.
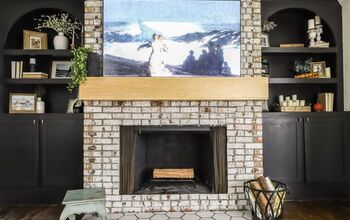
The Faux Brick
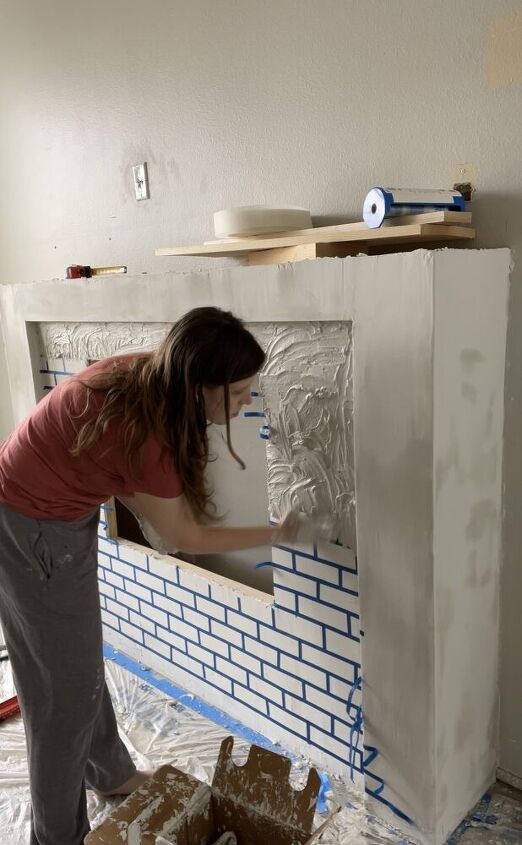
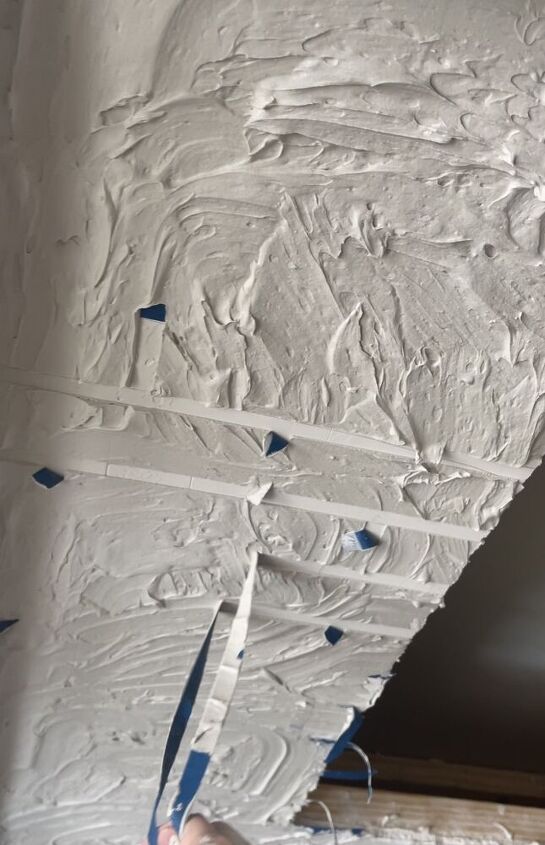
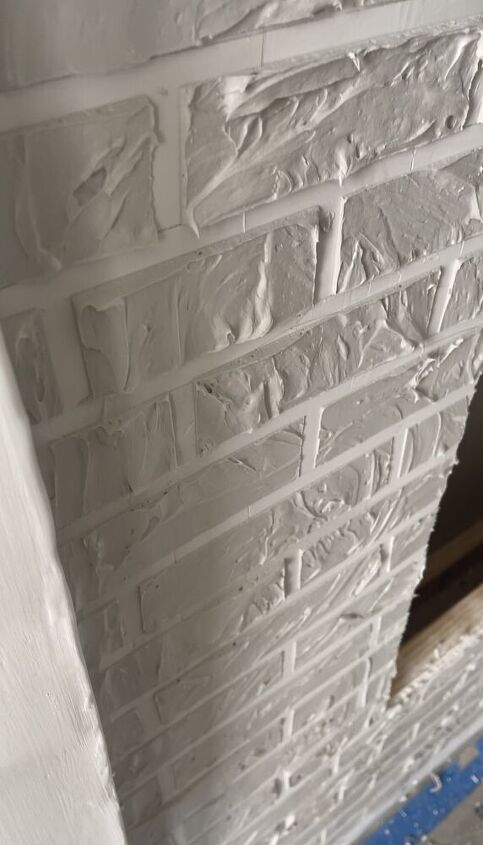
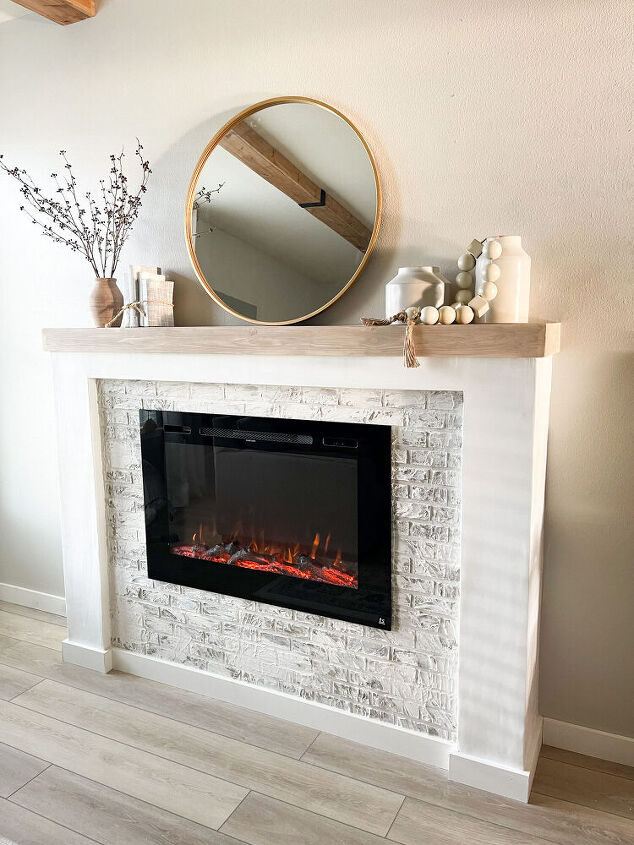
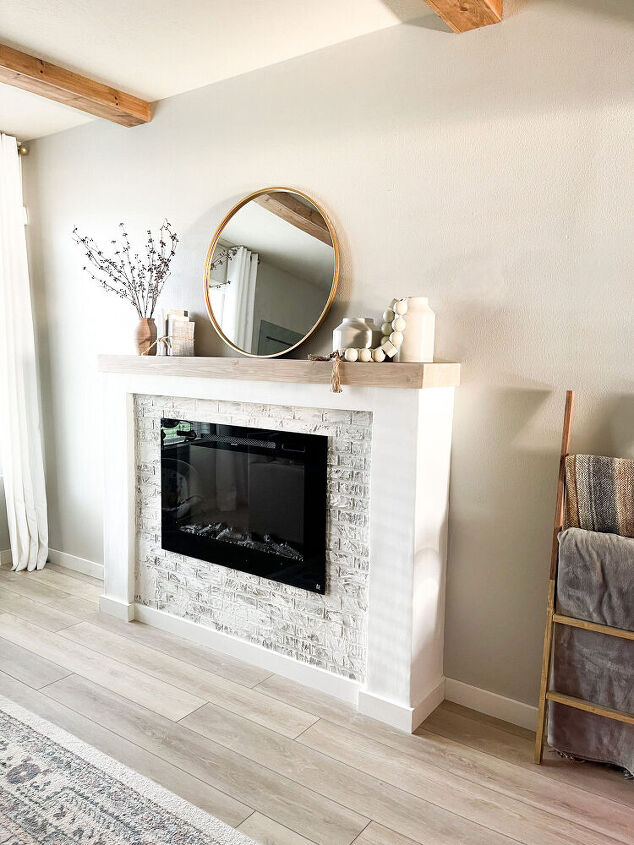
I wanted to add some character to my fireplace so I opted for my favorite faux brick method. If you have never seen this, it will blow your mind! Its so simple, cheap, and looks very real!
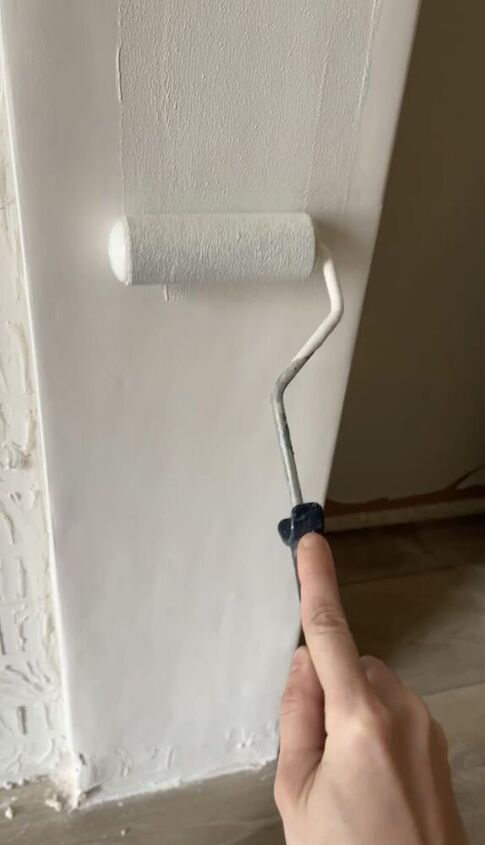
First, use this thin tape to tape off a brick pattern. Then simply smear on joint compound and remove the tape to reveal 3-dimensional texture. The thicker you apply your joint compound the more dimension it will have! Next, paint the “brick” your desired color. Ive done reds, browns, and this time we used gray. Finally, I like to whitewash or German smear the bricks to create a softer look.
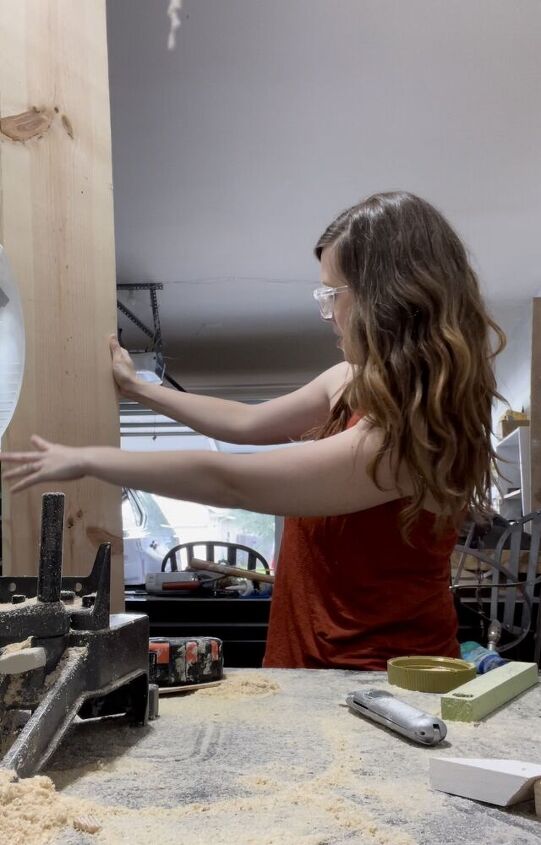
The Mantle
I used a pine 1×12 as my mantle, cut it to the correct length, and stacked some 2x4s underneath so that I could add a facial board without covering up too much drywall. Then to finish it off I used my favorite stain method.

The DIY Fireplace Budget
The main cost of an electric fireplace is, of course, the electric fireplace insert. I didn’t include this in my build cost because this will depend on the size, shape, and brand, you choose. The build itself was actually very cheap! Heres the breakdown:
- (10) 2x4s: $50
- (1) Sheet of Drywall: $10
- Joint Compound: $10
- Joint Tape: $5
- Corner Bead: $5
- 1×12 Pine Board (mantle): $30
- (2) 1×4 Pine Board (mantle): $15
- Misc. Supplies (Screws/Tape/Paint)
- 1×4 Primed Pine (Baseboards): $30
Estimated Build Cost: Around $150
Touchstone Home Products sponsored my electric fireplace insert and I highly recommend it!
Forte 80006 40″ Recessed Electric Fireplace


Resources for this project:
See all materials


Comments
Join the conversation
-
Just WOW!
-
No worries! I know I can figure out how to support it if I need to. Thank you so much!


Frequently asked questions
Have a question about this project?
Hi Kelsey, This is a beautiful build and your tutorial was GREAT. Thank you for sharing your project. The end product looks as though it is part of your home. What I am questioning is where you plugged the fireplace in. There were no outlets in the pictures prior to picture #10 and there in the shadow of the firebox are what look like 2 outlets. Did you put them in AFTER making the surround? I have a fireplace already in my home and was thinking of getting something to put into the opening to replicate a real fire.
was it hard to pull the tape off after you put the spackle stuff over it?
I love it!!! I'm totally doing this. How did you bump out the 6" space to make the recessed? TIA 😊