


DIY Fireplace Makeover: How To Add Brick To a Fireplace
DIY Fireplace Makeover: How To Add Brick To a Fireplace
Easily elevate your boring fireplace with this simple brick makeover
This project is sponsored by Glen-Gery
Y’all we are just a stones throw away (sorry I couldn’t help myself) from having this living room renovation completed!
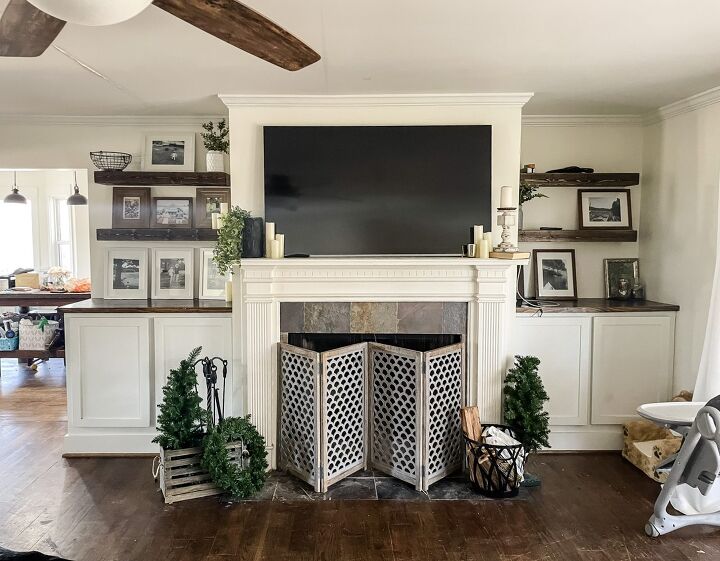
It wasn’t a bad space, it just felt very plain & I could sense the untapped potential!
When we bought the house last May we painted the walls Alabaster & basically stopped there.
Since this space is on our 2022 project To Do List we decided to go ahead & knock it out!
We have been putting in a lot of DIY elbow grease to make this space feel less blah & more like us.
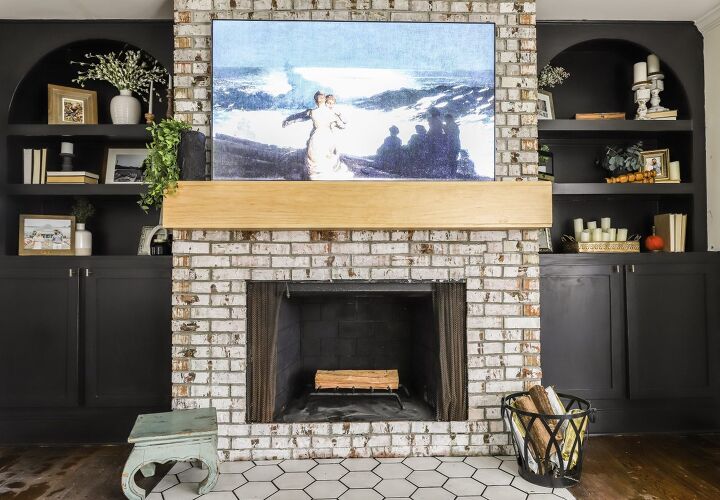
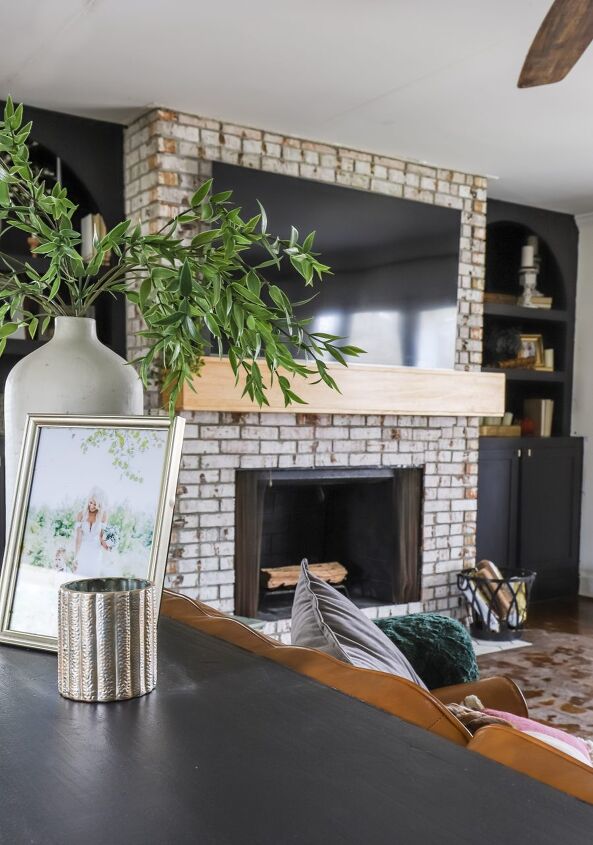
The main feature in this living room is of course the fireplace wall, well it will be anyways…
We recently finished adding these arched built-in bookcases which really look things up a notch, but we weren’t done there 😉
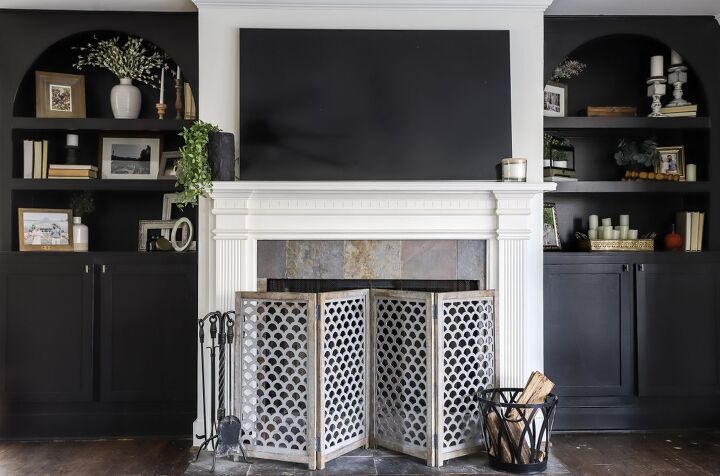
With the built-ins looking so grand we knew we had to do something extra special with the fireplace too!
There are so many options for making over a fireplace but we needed something that was DIY friendly, affordable, & timeless.
So naturally we went the thin brick route!
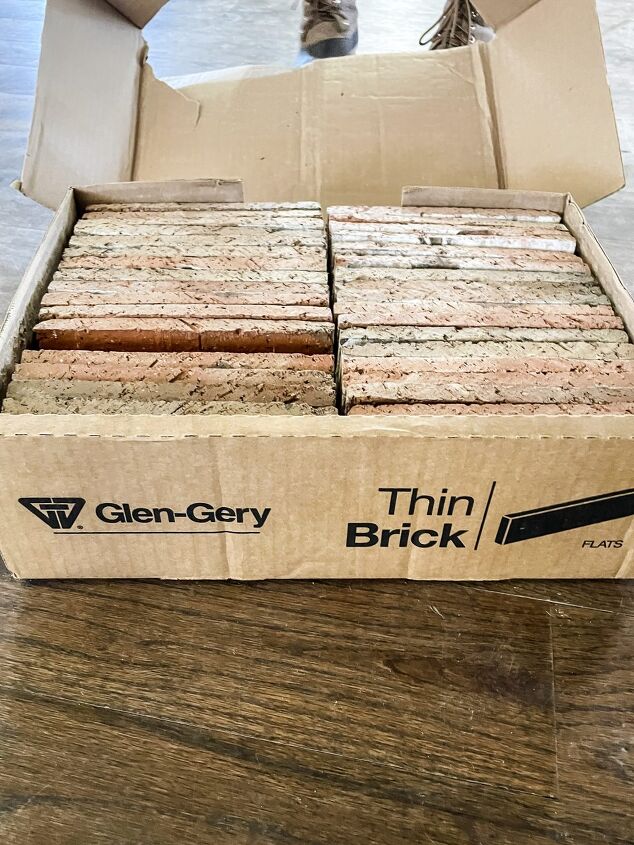
The color of Glen-Gery’s Washington thin brick immediately caught my eye & I knew it would be the perfect complement to our black arched bookcases.
This thin brick has the same texture, color, & size as real brick because it is REAL brick, just cut thin.
I am no masonry expert, but adding this brick to our fireplace wall was a piece of cake & I can’t wait to show you how to do it!
DIY Fireplace Makeover: How To Add Brick To a Fireplace
Supplies:
- Glen-Gery Thin Brick
- Type N Mortar Mix
- Non-sagging Adhesive
- 3/8″ Spacers
Tools:
- Caulk Gun
- Level
- Diamond Blade/Wet Saw
- Trowel
- Grout Bag
- Striking Tool
- Tape Measure
Layout/Demo
First, figure out how many thin brick flat pieces & corner pieces you will need.
Measure the width & height of the wall & the height of the corners (if any) that will be covered.
Glen-Gery has a simple formula for you to plug in your measurements here & you will know exactly how much you need!
Once you have the thin brick ordered it’s time for demo!
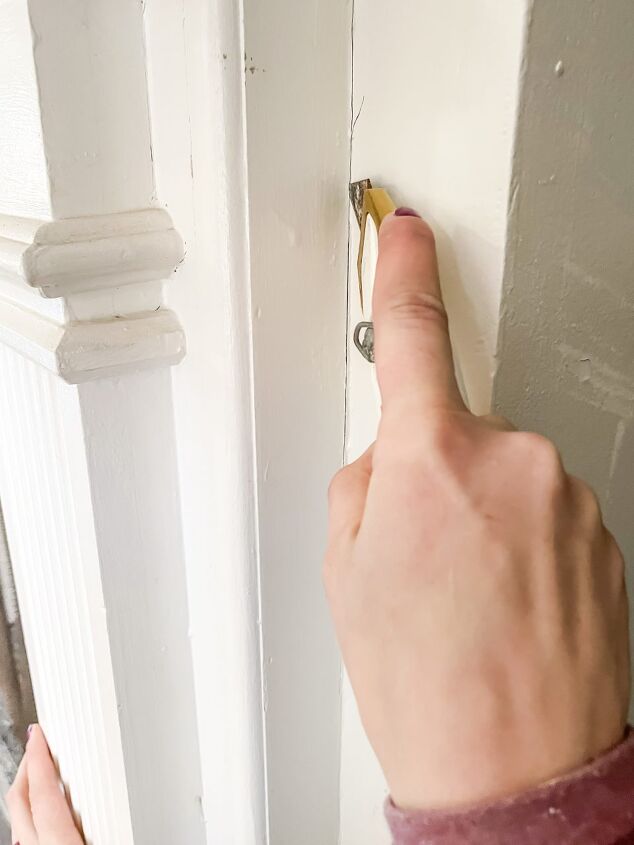
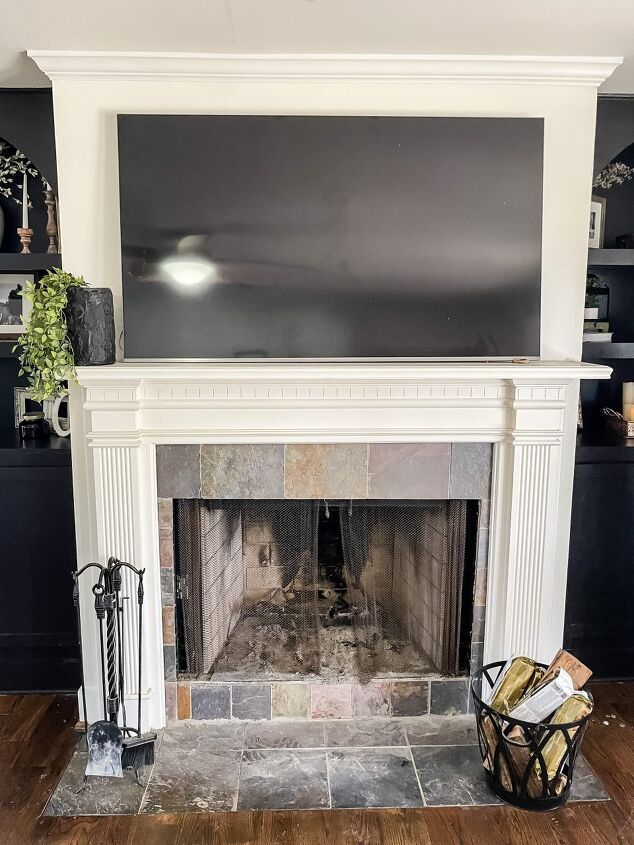
We removed our mantel first, it was literally just hanging on with caulk & a few nails.
Once that was removed it was time to pull up the floor tiles & the tiles around the fireplace itself.
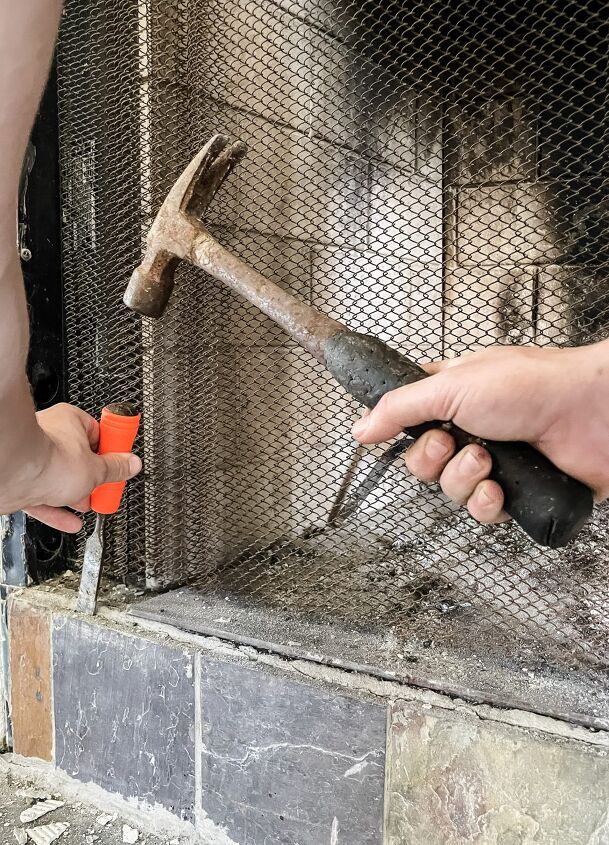
The tiles came off easily too, we just pried them away from the wall with a hammer & chisel.
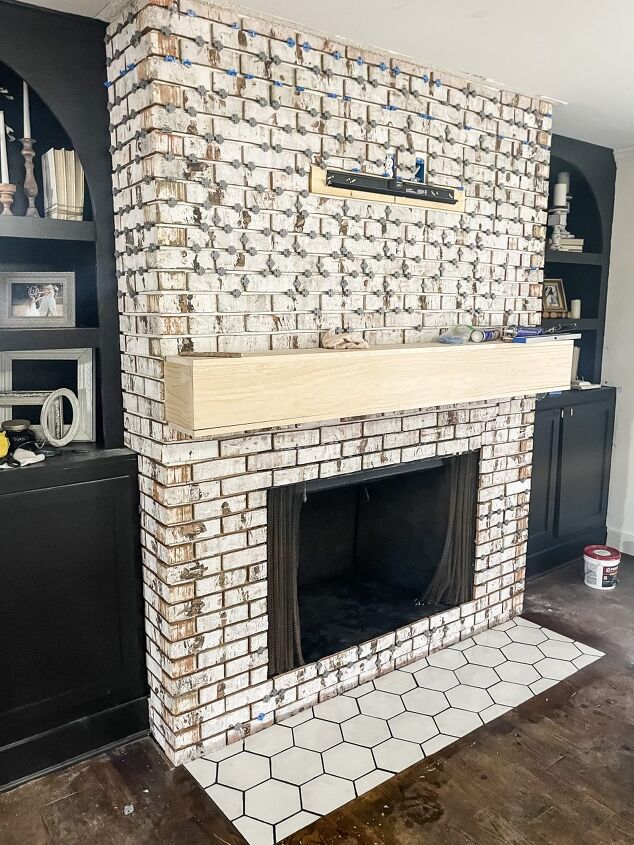
Our big plan is to have the entire wall bricked & add a simple DIY faux beam mantel.
After the demo was complete we added paperless drywall to the areas that were bare & cement board to the bottom portion where new tile would be laid.
Installing Thin Brick
One of the main reasons we chose Glen-Gery thin brick is because it’s super simple to install!
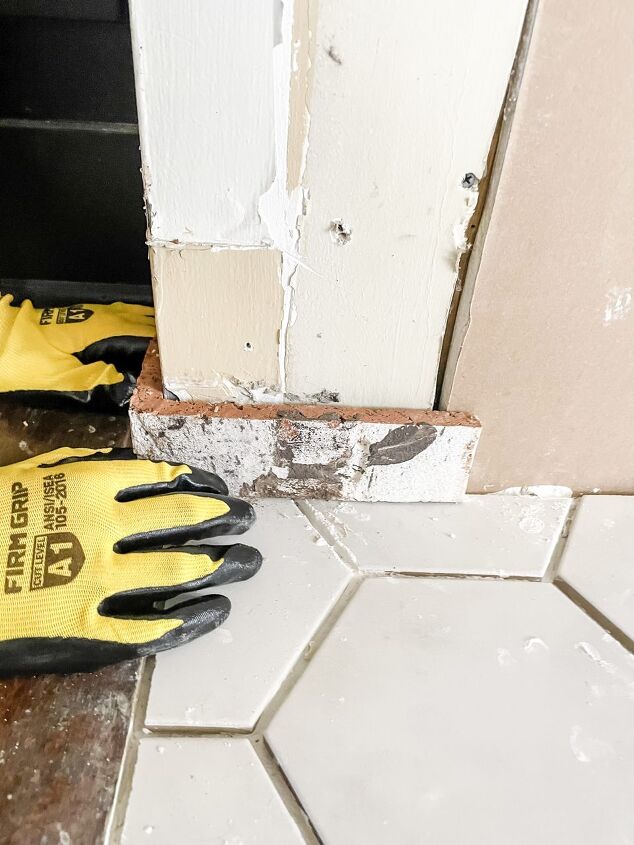
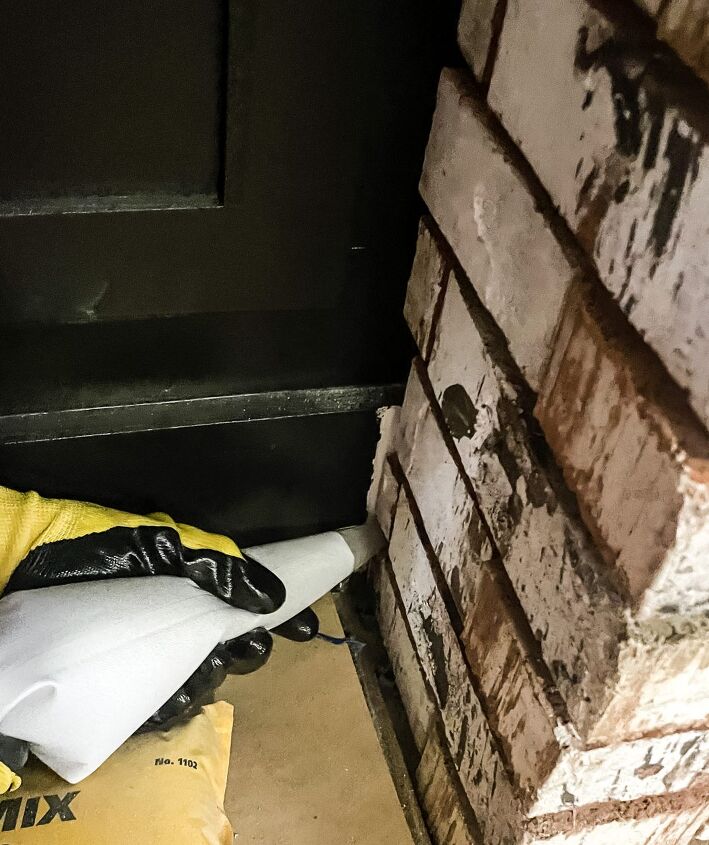
Start by installing the corner pieces first.
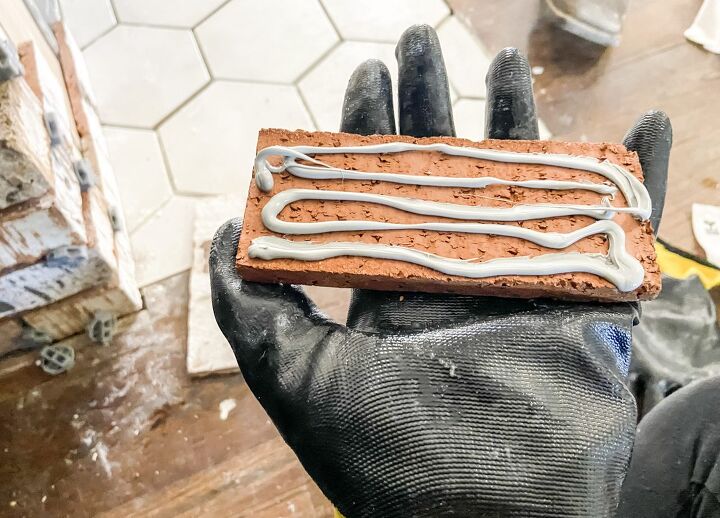
Apply a generous seam of non-sagging adhesive to the back of the first corner piece, then press it into place leaving room for a 3/8″ mortar seam.
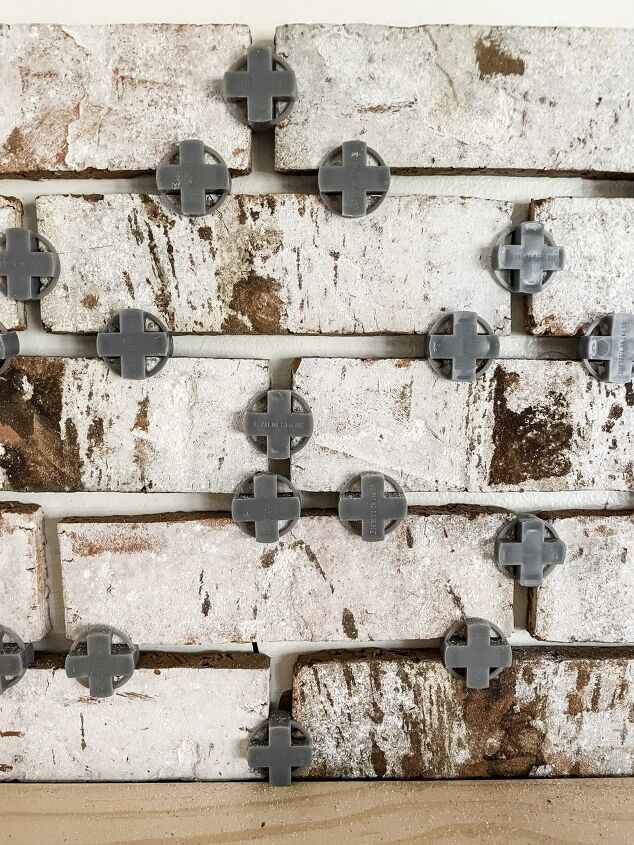
We used 3/8″ spacers to help keep the distances between the bricks even.
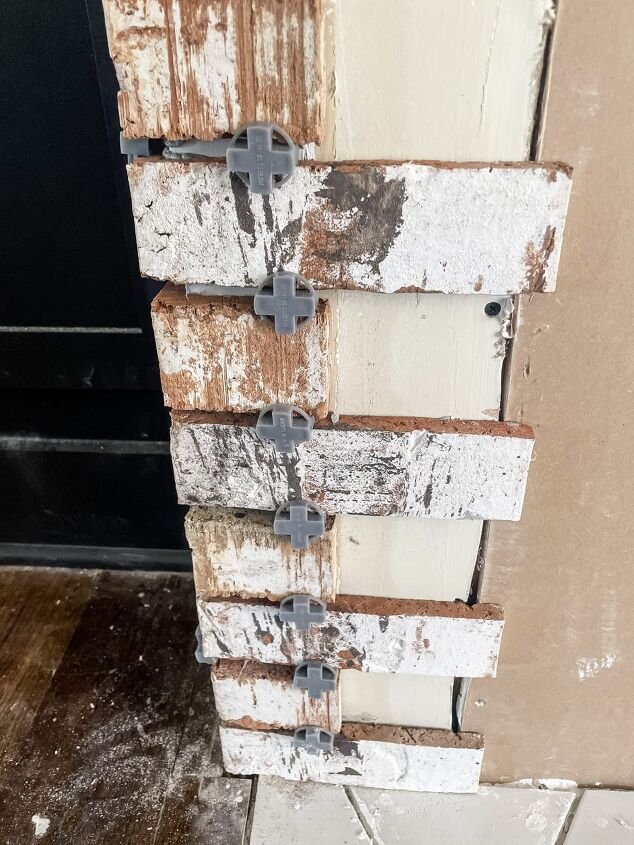
Alternate the long & short legs of a couple of corner pieces, installing a few before starting on the straight lines.
Once you have a small run of corners up, start adding in the flat pieces using the same adhesive & spacers.
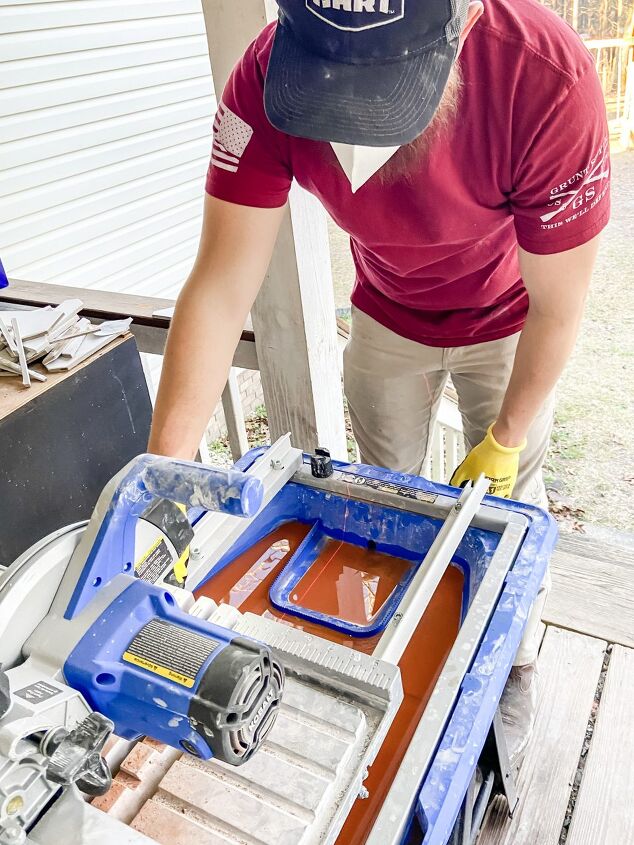
When smaller pieces of the flat brick were needed we used a wet saw to cut them down.
I like using a wet saw because it creates less dust & they are so easy to cut with, but any diamond blade will work.
Y’all I am already in love with the look of this brick!
We went with the Glen-Gery Washington color from their Black Hills Series, it is the perfect mix of rustic & modern.
There were a lot of different colors & styles to choose from but this one matched our home style perfectly!
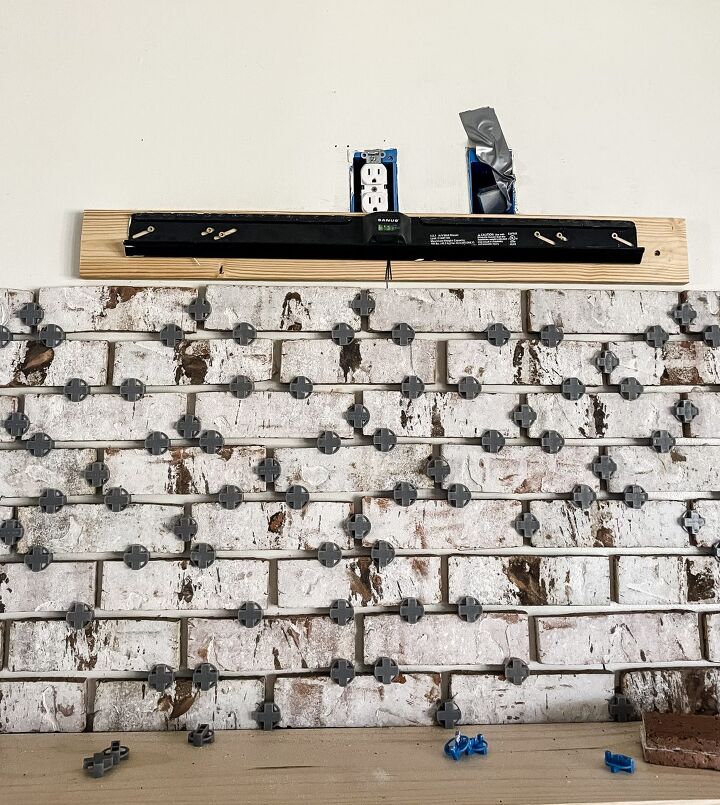
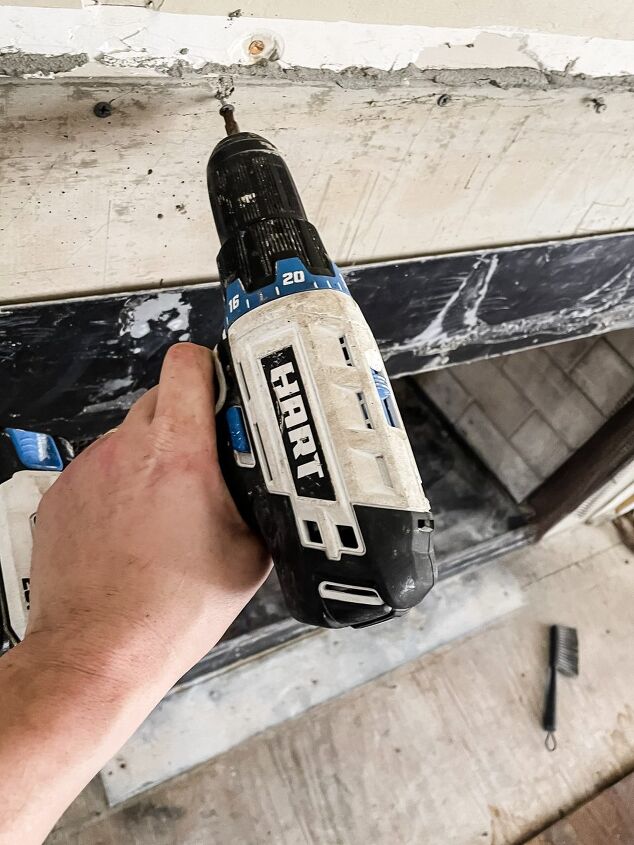
To make things a little easier we installed our mantel mount & tv mount before bricking those areas.
Adding Mortar Joints
I can’t lie, I really love the fact that this is my first time having to mix mortar for this project!
Using adhesive to apply the bricks made it so simple but you will need to mix type N mortar for the joints.
My first attempt at mortaring the joints went not great… but I figured out some tips/tricks & the don’t do’s that will make your first attempt flawless!
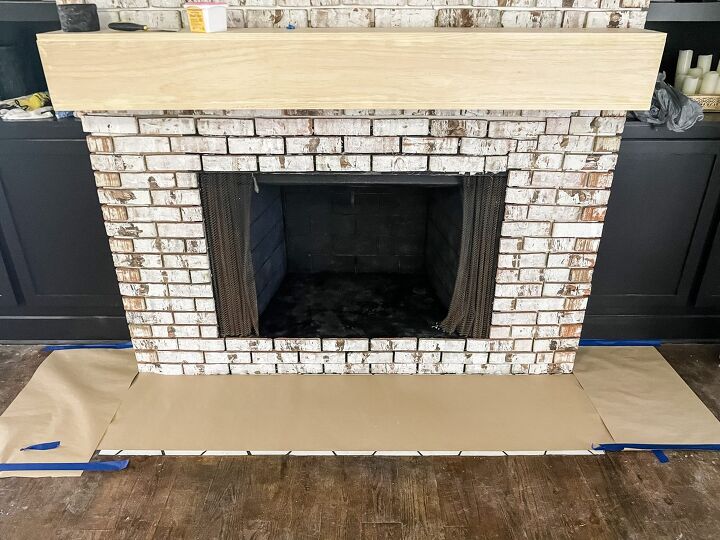
Tip 1: Lay craft paper or a tarp on the floor, it’s gonna get messy
Tip 2: Mix the mortar correctly
Seems obvious but my first batch had a lot of issues & ended up being thrown out.
To get the right mixture: mix for 3-4 minutes straight (no clumps & consistency in material), let slake for 5 minutes (sit there & don’t touch it or even look at it 😉), mix again for another 1-2 minutes.
Trust me this is the magic formula to getting Wendy’s Frosty consistency mortar, which is what you want!
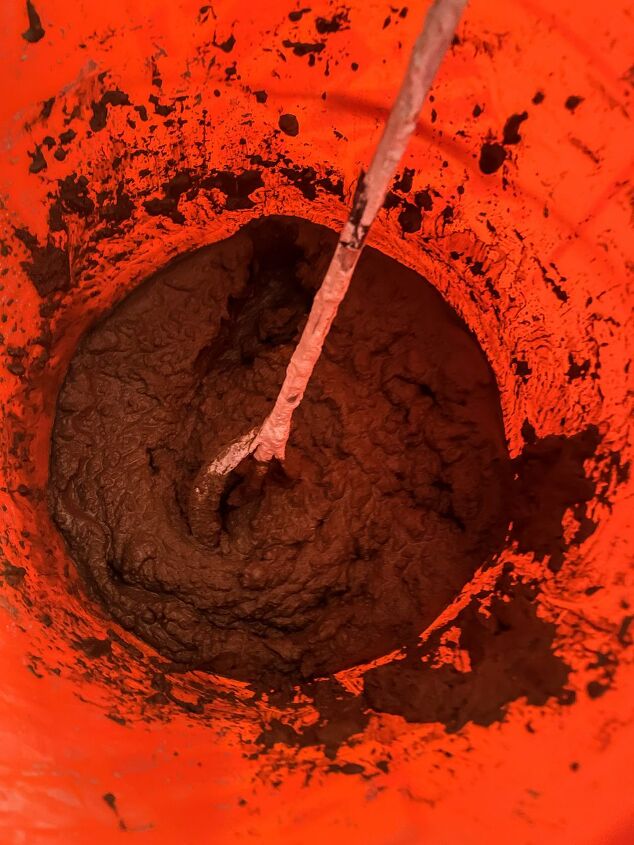

Tip 3: Wet the inside of the grout bag before adding any mortar
Once the consistency makes you want to stick a fry in it (don’t do that I’m teasing, save the fries for the real frosty 😉) spoon it into a piping bag.
Twist the top of the bag & start piping the mortar into the joints.
This whole process reminded me of icing a cake, but this cake will just be admired forever & not eaten.
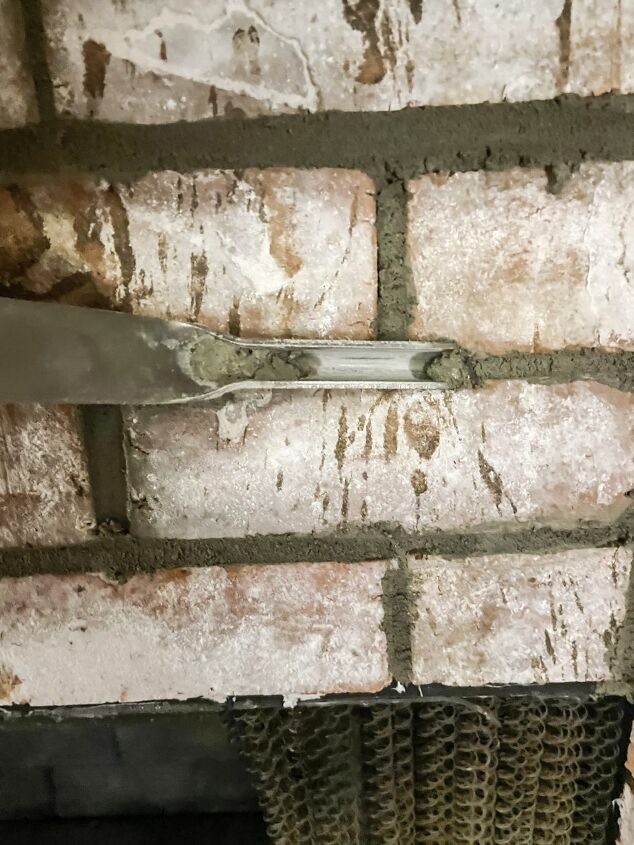
After the mortar dries to the texture of damp sand, strike it with the concave jointer, vertical lines first, horizontal lines second.

I brushed off the excess mortar from the bricks & stepped back to admire our new brick fireplace!
This fireplace makeover came out even better than I dreamed it would.
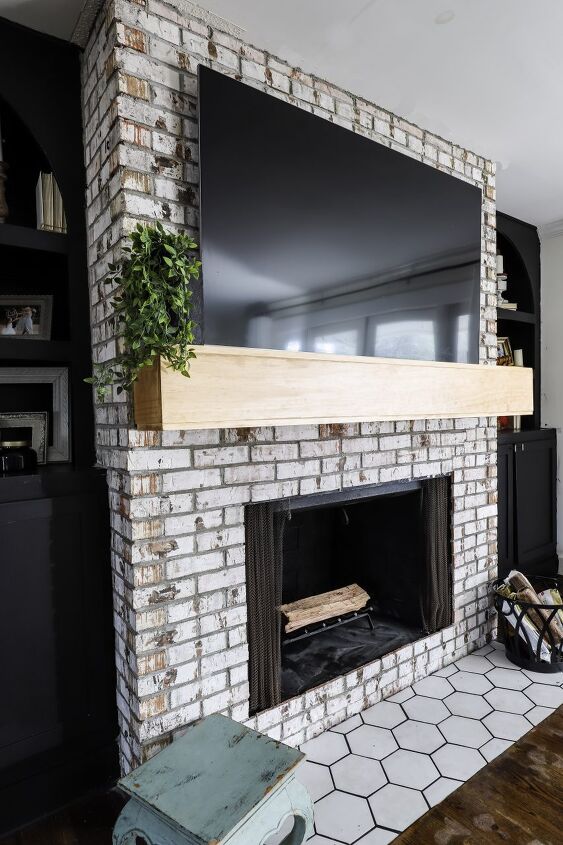
The thin brick enhances the built-ins & really elevates the entire room.
It’s exactly what this living room was missing & now it feels so cozy, modern, & us!
I still can’t believe how easy it was to install the Glen-Gery thin bricks & how they completely transformed this boring fireplace wall into something amazing.
Let me know what y’all think of our new addition!
We just have a few more projects to button up before our complete living room renovation reveal & I can’t wait to share it with y’all.
Resources for this project:


Comments
Join the conversation
-
Looks like you need to add brick to the floor, instead of the hexagon tile.
-
Both look absolutely beautiful but I totally get wanting a change. The shelves look so custom. Thanks for sharing.


Frequently asked questions
Have a question about this project?
Your fireplace looks beautiful! And the way you did the open shelves really gave it a whole new look. I was just wondering where did you get the floating shelves?
The brick fireplace looks great! Are you planning on removing the hexagon tile as well? I love the look. The mantel is great,I would have made it darker to coordinate with the rest of your Reno.