


Sea Glass Plates- Food and Dishwasher Safe!

by
Caroline
I have a little bowl of sea glass on a shelf that I have added to for years. It’s always something I look for whenever we get to the ocean. It is so beautiful, but is always so small. I always thought it would be amazing to have pieces big enough to actually make something useful with, like a set of dishes. After our last excursion to Larabee State Park with the kids I was adding the few small pieces I found to my slow-growing collection and the wheels began turning. Hmmm….
This is a really fun, easy way to get colorful patterned dishes for an affordable price. We are going to use a technique called reverse painting on these plates. The reverse painting technique is what allows us to paint these plates and still be able to eat off them. Usually when you paint something, you add the background colors first, then add the details on top of that. We will be doing the opposite of that. This is a really easy, simple pattern that anybody can do, but go ahead and get as detailed and intricate as you are comfortable doing.
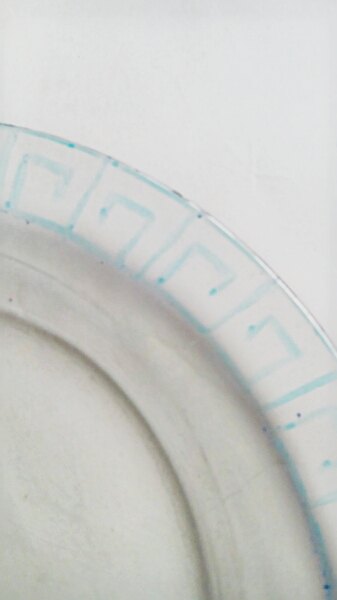
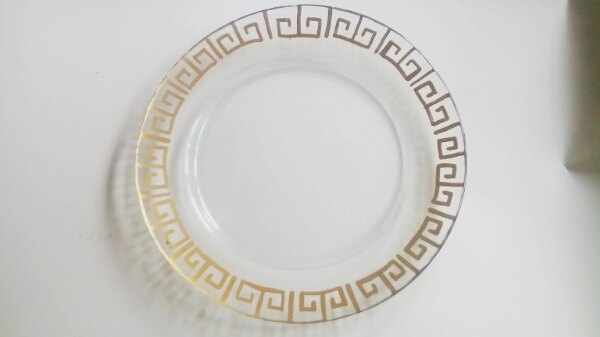
Any markers that can wipe away will work. DO NOT use a permanent marker, like sharpie. After you have sketched out your design, flip the plate over. You’ll be working on the back side of the plate. This is where the reverse painting technique comes into play. If we first painted the background and then added the details, those details would not be seen since we are working on the underneath of the plate so that our plates are food safe and can actually be used as a plate is intended to be used. So we begin with the details. I grabbed a gold paint pen and use light pressure and steady, sure strokes. With most paint pens either pushing too hard or pausing in the middle of a stroke can cause more paint than you want to to ooze out. This is the exact reason why I sketched out my pattern ahead of time, it takes the guesswork out of it when you have the actual paint in your hand.
After I finished painting my pattern along the rim I wiped the temporary marker from the front of the plate and set it aside to dry. If you are doing a set, this is a great time to start the next plate, like an assembly line. :) These paint pens dry pretty quickly. After about 20 minutes, I felt confident enough to add my background color on top of my detail work. I wanted my plates to look like sea glass, so I picked up Martha Stewart Frost Translucent Glass Paint in Surf. I squirted some of the paint right onto the back of the plate and then spread the paint around evenly with a sponge. To make sure I had even coverage, I would occasionally flip the plate over and check out how it looked from the front. I did this because with this paint, an area with a heavier amount of paint will be noticeably darker when it dries. I assume this is because of the translucent nature of this type of paint, as I don’t have this problem with more opaque paint, but I could be wrong!
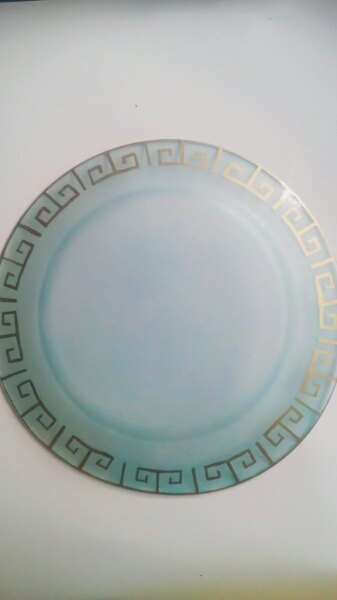
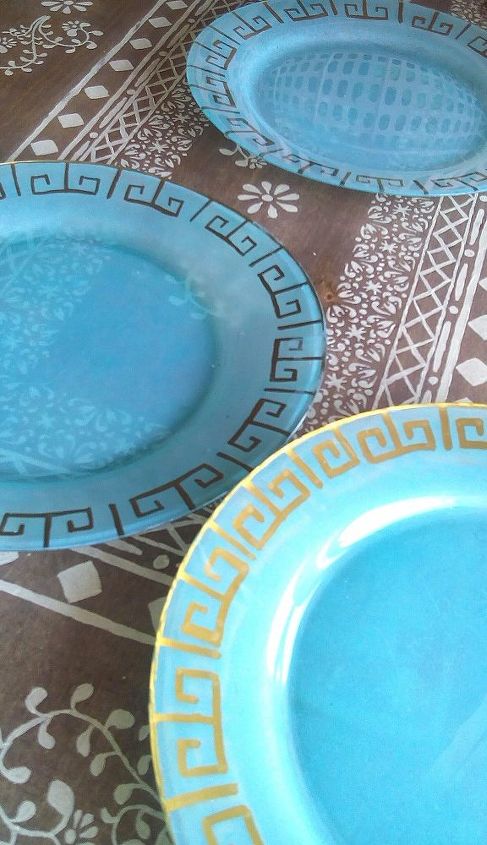
After I set the plate aside to dry for a couple hours, I added a second coat, repeating the previous step of first spreading out the paint and then pouncing with a sponge for texture. Here is a picture of the difference between the first coat and the second coat. After the second coat these plates are still slightly translucent, so you could increase the number of coats to three or four if you wanted these plates to be completely opaque.

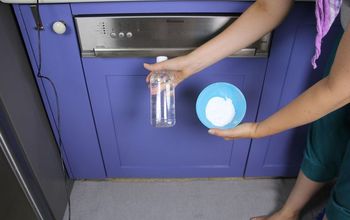
After you are satisfied with the look of your plate you have a couple different curing options. You can let it air cure 21 days or you can pop it in the oven. Me, being pro-instant gratification, decided on oven curing.
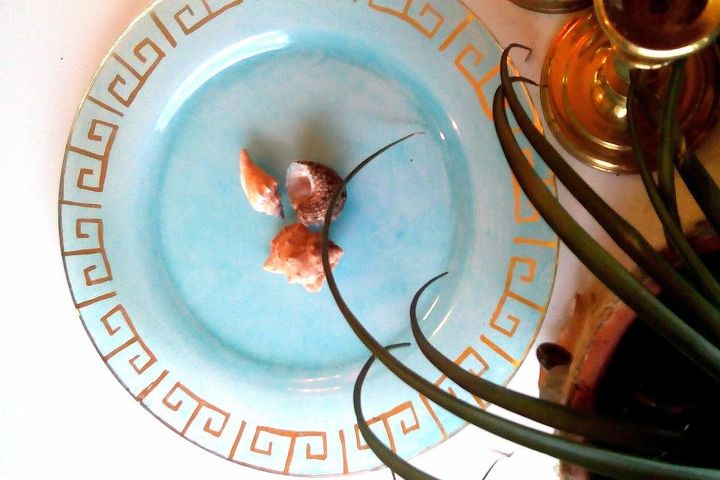
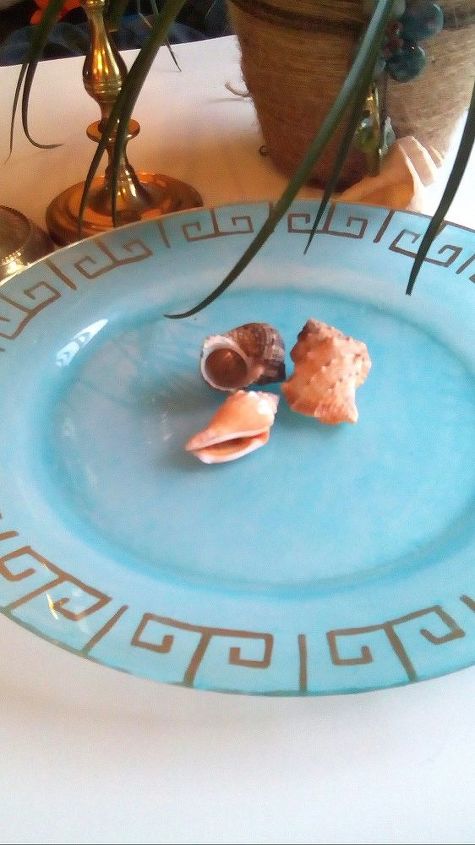
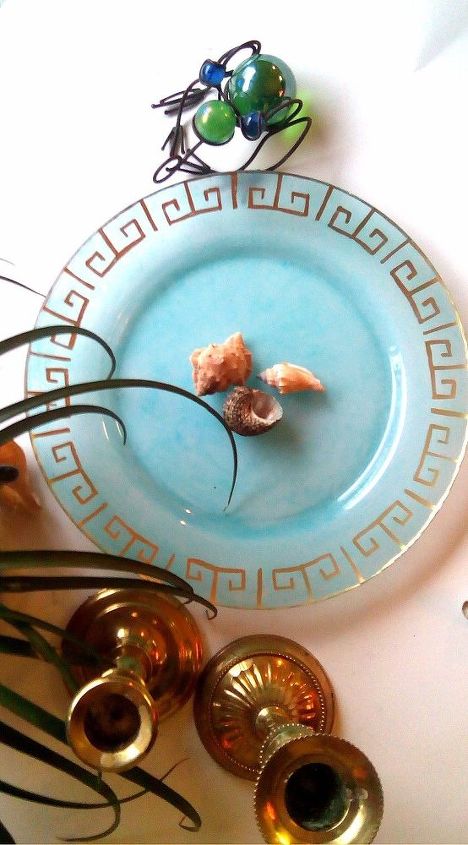
And we are left with food safe, dishwasher safe seaglass looking set of plates! Are they gorgeous?! These would be so beautiful as a table setting with a beach vibe or coastal decor. It was hard to get a good photo showing off the texture, but it really looks like seaglass, like this plate was rolling across the ocean floor for years, being lightly scrubbed by sand as it rolls with the current until the edges smooth out and the clear glass gains some opaqueness. (Is that a word- opaqueness? Whatever, it should be if it isn’t) But keep in mind, you can create any design that matches your decor / color aesthetic. Go nuts! Have fun! Get messy! Amazing things can happen when you do!

Want more details about this and other DIY projects? Check out my blog post!
Comments
Join the conversation
3 comments
-
These turned out awesome! Love the grecian look.
-
These are so pretty!


Frequently asked questions
Have a question about this project?