


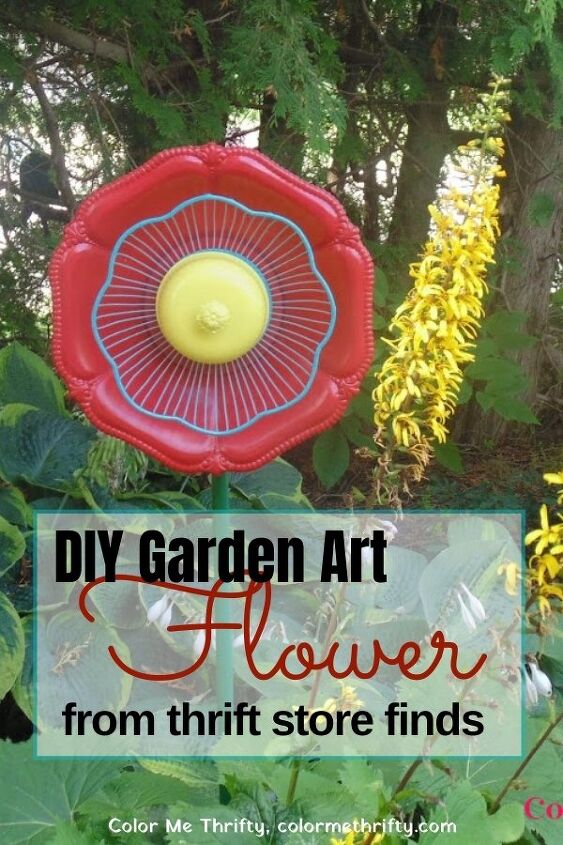
Garden Art Flower From Thrift Store Finds
When I went to my local thrift store recently I challenged myself to find 3 things that I could make into a repurposed garden art flower.
It’s fun to sometimes go to the thrift store with a very specific task in mind. It makes you focus, and helps you to not get distracted by everything else that’s in the store.
The items I was hoping to come home with could have been made out of anything; metal, glass, wood, ceramic, plastic, or a combination of any of them.
And on my way to the thrift store I was excited to see what I might find.
There were quite a few things that I mused over, but I settled on these 3 items.
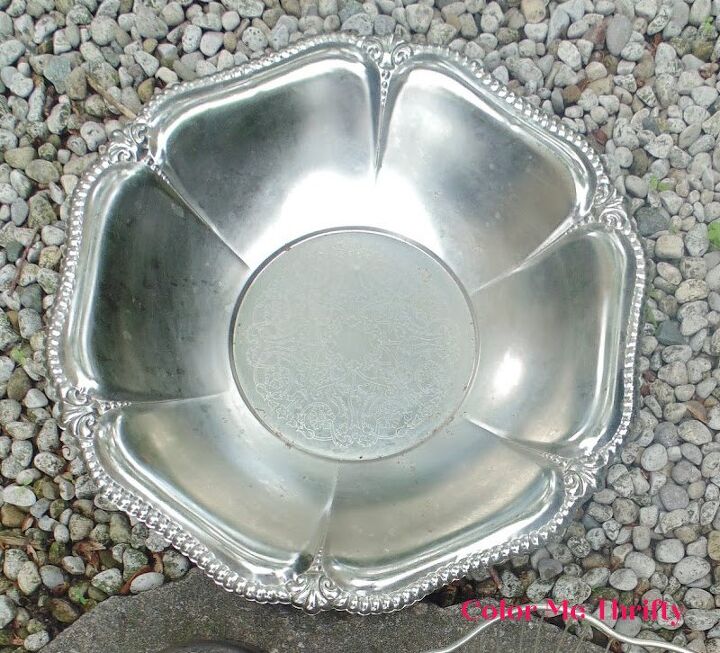
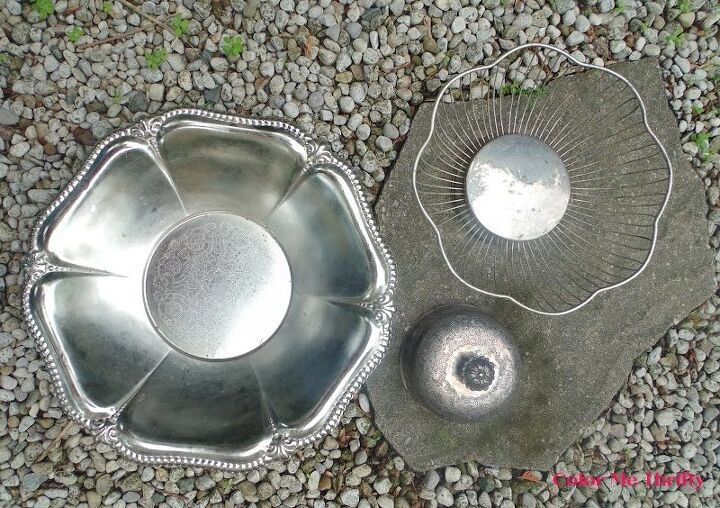
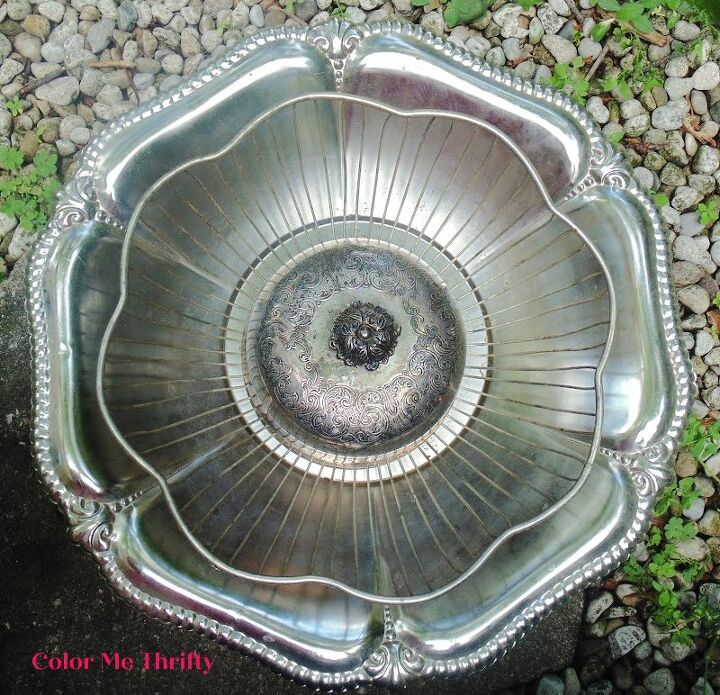
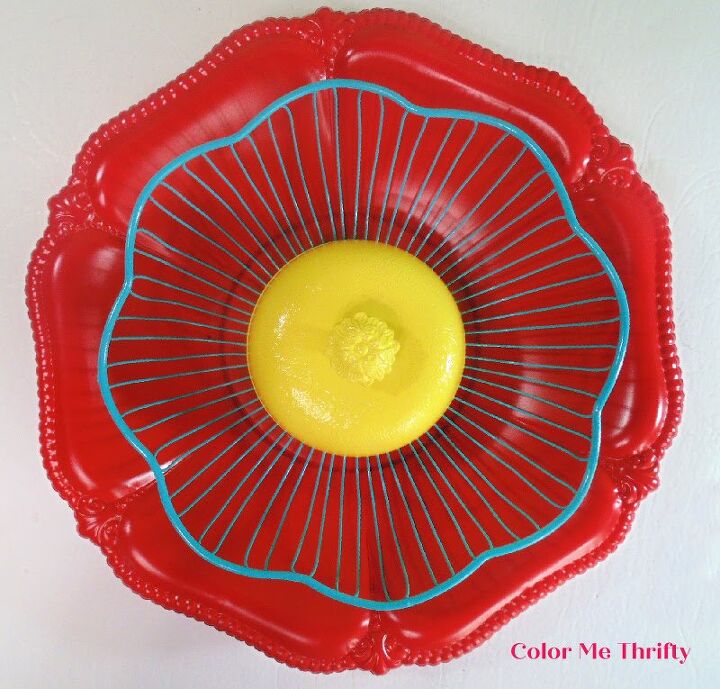
This very light metal flower-shaped tray was just 50 cents. It’s about 14″ across, and will be the base of the largest repurposed garden flower I’ve ever created.
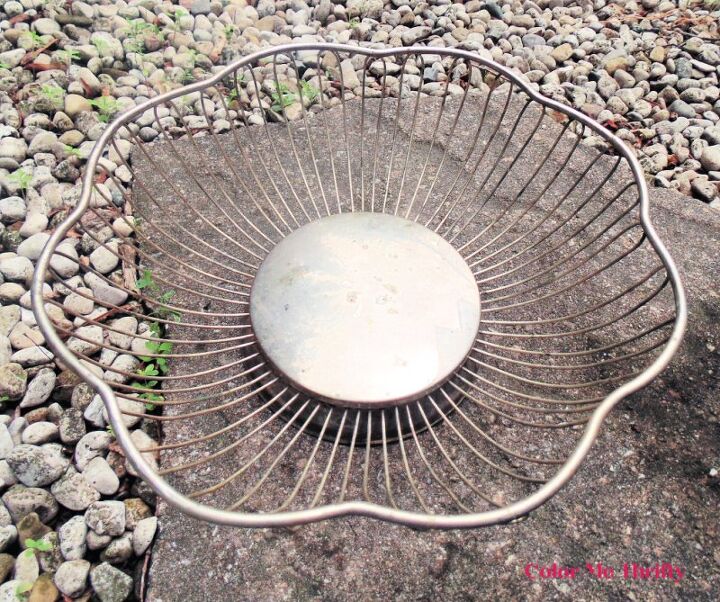
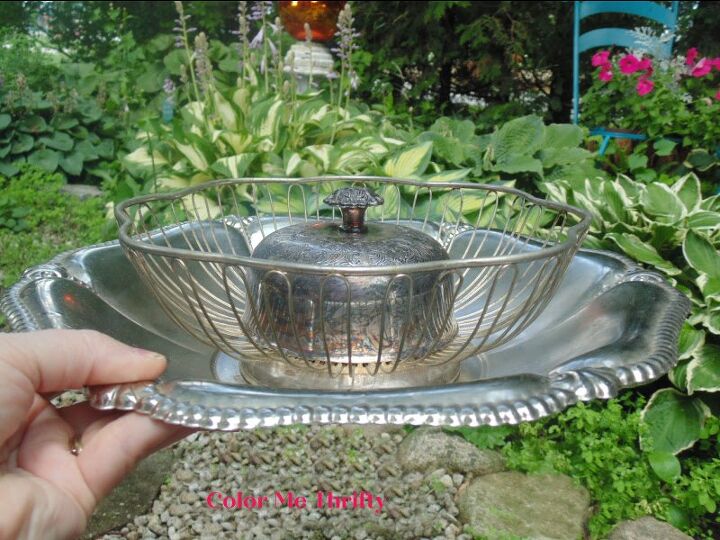
The second item is a one dollar 10″ wide silver plate basket that had seen better days.
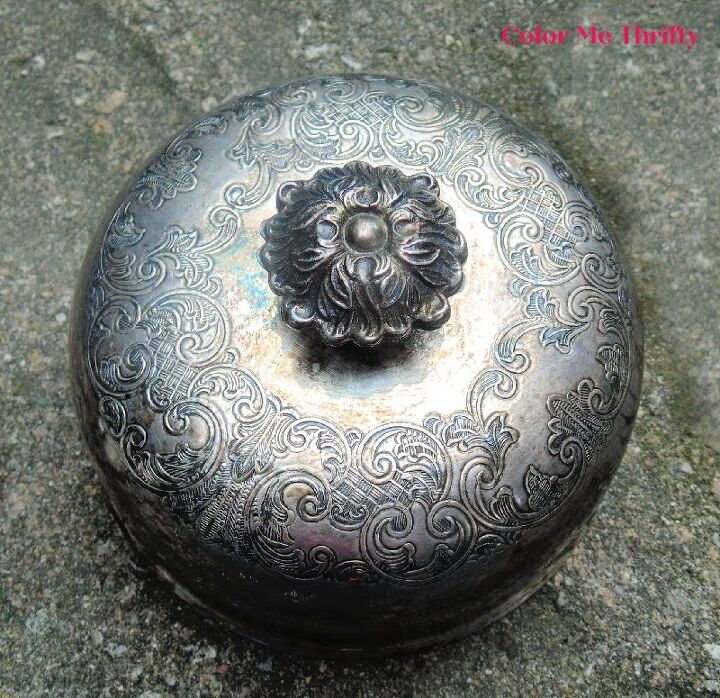
And the third item was a 50 cent 4″ wide heavily etched silver plate lid, which I’m guessing was originally from a butter dish.
This is how the three items look together au natural.
Not bad at all, so by all means if this look is your thing gluing them together just like this would be beautiful.
But this gal needs some color.
When choosing items for a garden junk flower, you want to look for pieces that fit together nicely to create a flower-ish shape.
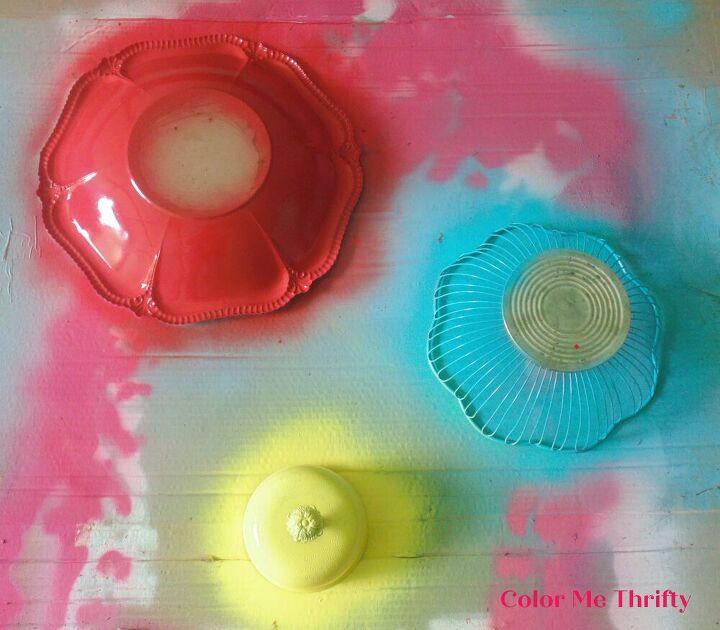
To add some color to my pieces I turned to one of my crafting best friends… spray paint, and I painted the bottoms with two light coats.
I purposely left some unpainted areas in the middle to make sure that the glue that comes later can adhere as much as possible.
I painted just the top of the lid because the underside won’t be seen.
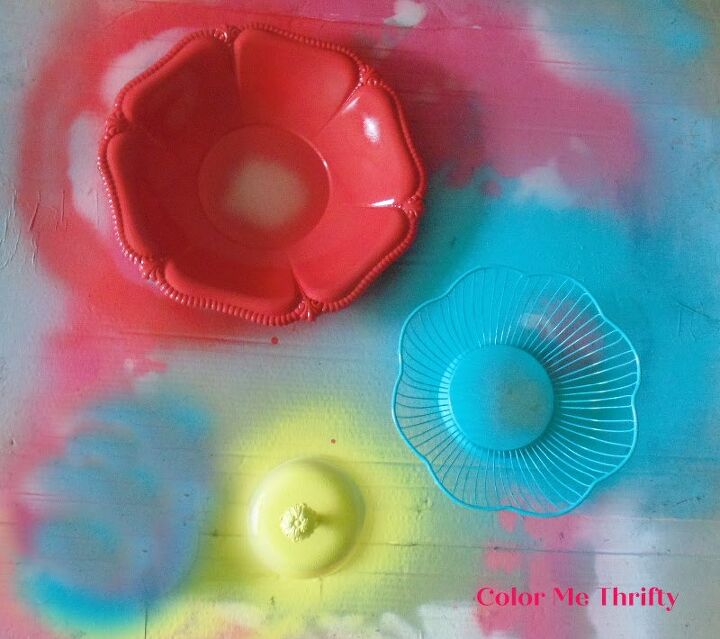
And then I spray painted the tops of the tray and the basket, leaving some of the center area of the base unpainted… again for better glue adherence.
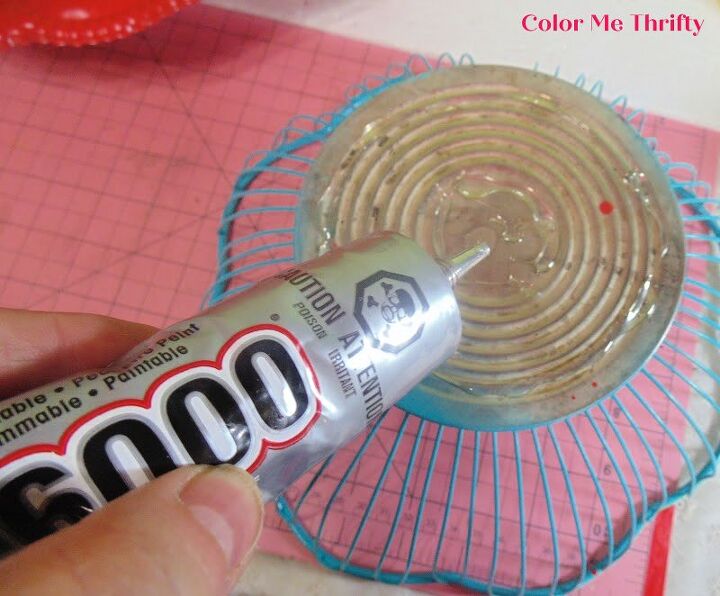
After the pieces were completely dry, I glued them together using E6000 glue.
After the pieces were glued together I left my flower to cure for about 4 days.
It’s been very hot and humid here, so I left it longer than I usually would.
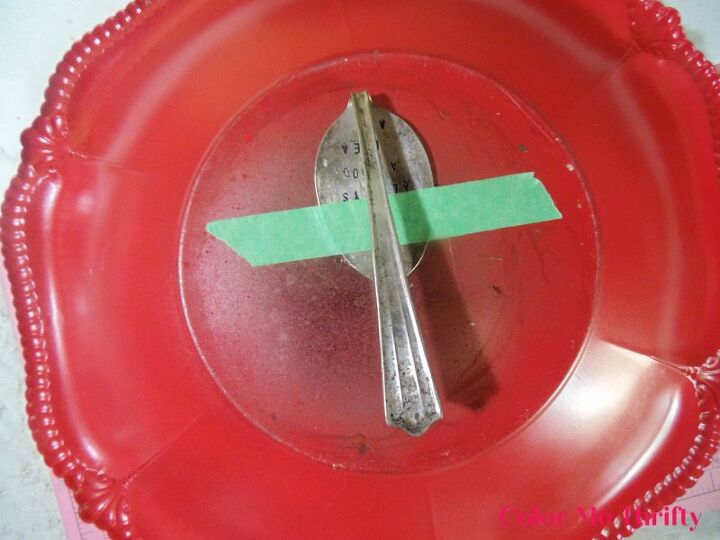
Once my 3 pieces had become one well glued-together flower, I glued a tablespoon that I bent back by hand onto the back for a stem.
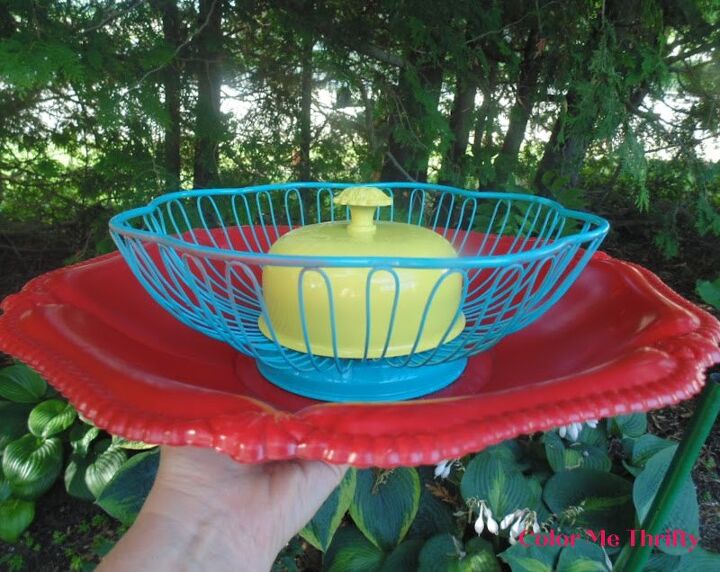
It was very lucky that the lid fit very snugly around the center area of the basket. I applied the glue around the inside of the lid, put it in place and it worked.
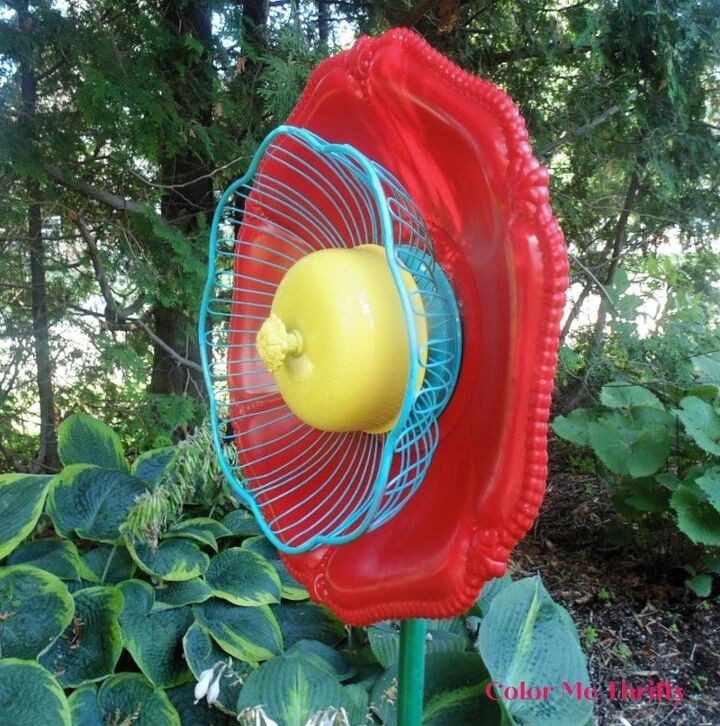
Here’s a side view of my garden art flower in the garden.
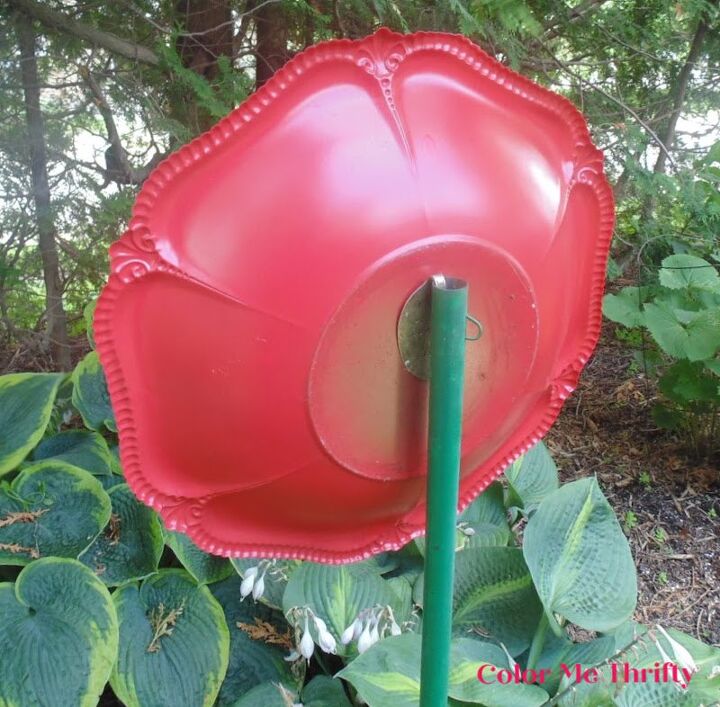
The tablespoon fits perfectly into a 1/2″ pipe that I spray painted green.
TIP: any pipe can be used, but make sure your tablespoon handle will fit into it before you glue the spoon on the back of the flower. Also, the pipe should be placed 8 to 10 inches into the ground.
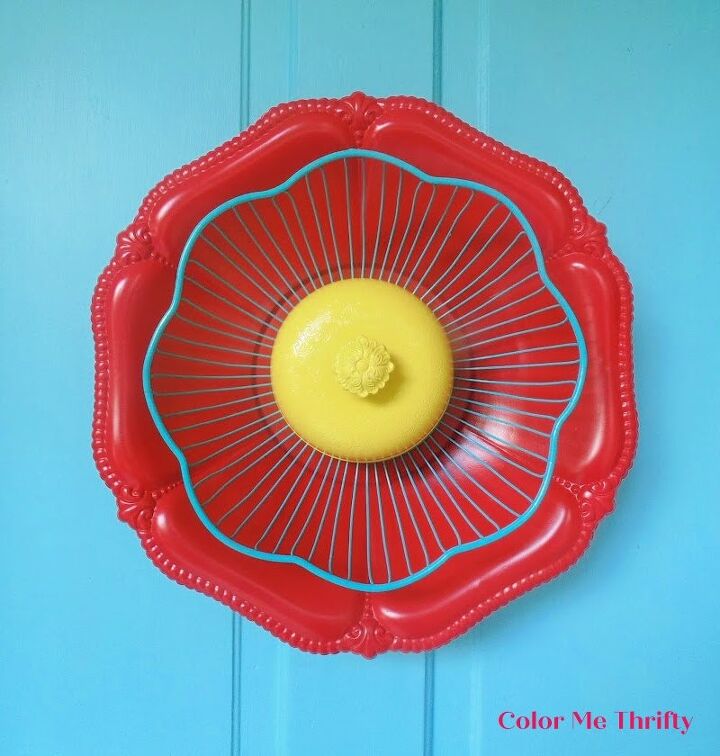
Since this garden art flower is a little on the large size, it can also be used as front door decor.
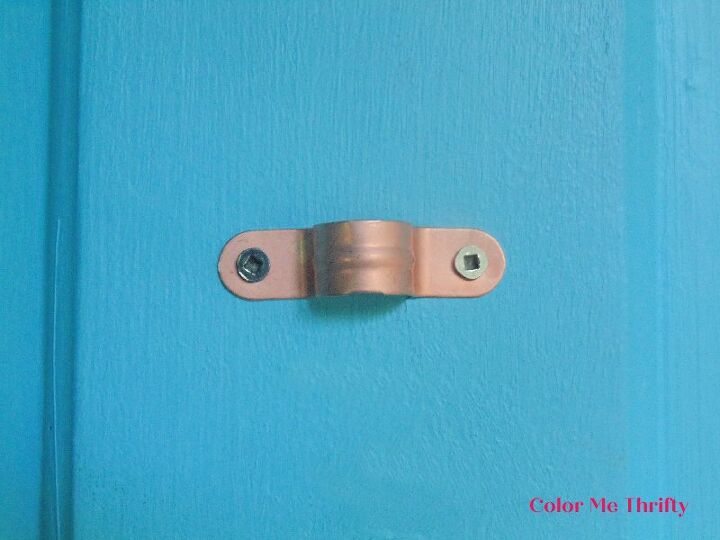
To do that all I needed to do was screw this copper fitting into the door, and then the spoon just slipped through it.
You could also do this to a wall or fence outside as well, on your patio or deck, or anywhere really.
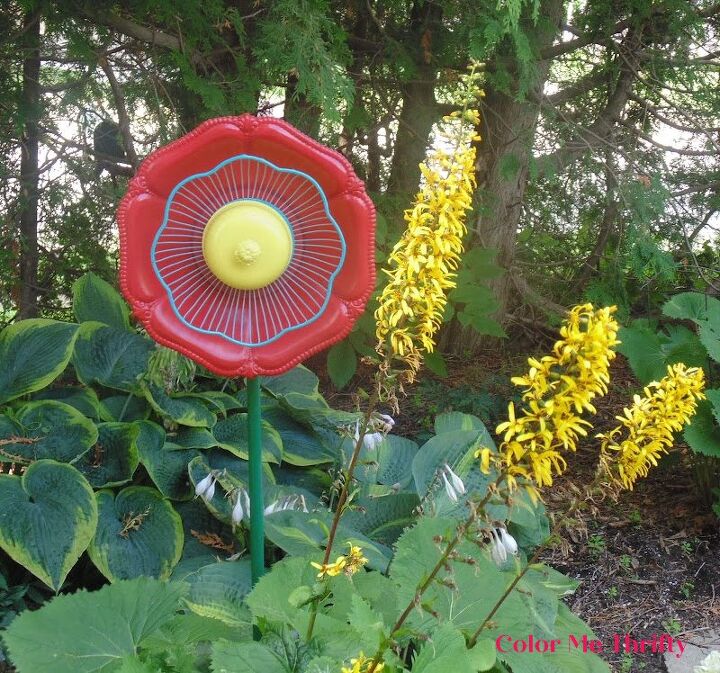
But I think I’ll be keeping mine in the hosta garden beside some blooming yellow ligularias.
The colors really pop, and it’s a nice happy addition to the front garden.
It took about an hour to create this garden flower, not including paint drying and glue curing time.
You can find more DIY garden art flower projects on my blog here.
Resources for this project:


Comments
Join the conversation
-
Cute! I love bright colors, but I just could not paint over the pretty detail on the butter dish lid. So for me, I would have left it unpainted.
-
I have been doing a similar project for several years. I glue 2 or 3 plates together using E6000 and then glue a bent over spoon to the back of the plate and when the glue has dried I put the handle of the spoon into a restolum painted metal rod. I recommend putting the metal rod in the ground first.


Frequently asked questions
Have a question about this project?
If you use a copper water pipe in due time it will turn green. Nice about this pipe you may be able to use same glue. Buy a “Y” fitting add about six inches of pipe to it to have another flower on the same steam.
Or don’t want to wait for years for the copper to change on its own you might be able to find her mixture of speeding up the copper to changed Or Better Yet SaVE
Your Money and buy either Black Iron Pipe or Galvanize Pipe. And hand tighten fittings Only so You May Use Them Again.
Making Sure You Buy a End Cap. So when you pound it into the ground you don’t mess up the threads, then un~screw it to slide your spoon into the pipe. And now you have your “Y” on,,,,
REALLY, Go NUTS By Placing more “Y’”s on it. Also Get some Angles and Nipples so one of the “Y” you may tilt a Stem at a 45* or 30* Degree Angles, that’s where your going to need the nipple to make that connection okay. ??? More on me,,,
i have MS,, and Really hard to hit these small keys on my cell phone, &, a lap top cost more than I can afford.. Because I need phone to call for help. And I love to give some other ideas,,, I don’t know if this flower person mines or if others mine I toss in a idea of mine ?? By Using There’s with it. Really I’am Sorry for adding on to Your Clever Ideas !! Your Alien with MS !