


Quickly Remove Old Paint From Furniture

by
Patricia
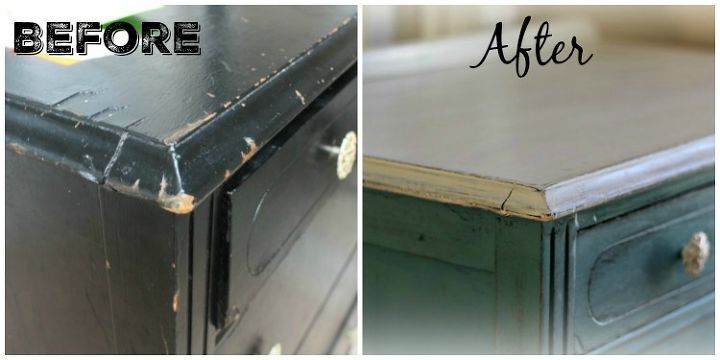
I found this oh-so-cute dresser at a thrift store. It’s circa 1920s and was painted in what appears to be a thick oil-based black paint. There was a lot of veneer damage underneath the paint which is why I’m sure the previous owner painted it. There were other shoppers interested in this piece, and we had a fun conversation about refinishing furniture, but as we discussed it they decided it would be too much work. So I decided to tackle it and brought it home.
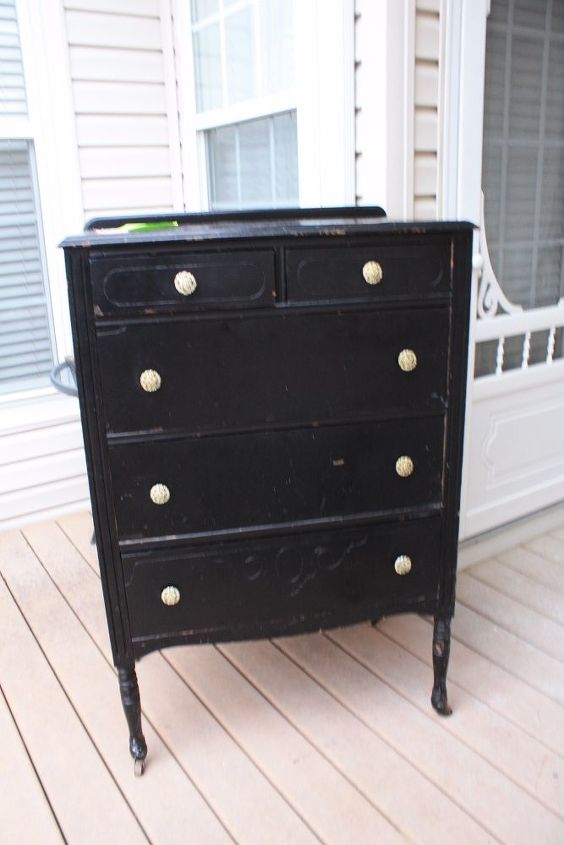
Normally you can paint right over the surface with Chalk Paint. However, because the paint was chipping off, I decided to remove it to have a good foundation for my new paint. (Update: Another Hometalker raised the concern about lead paint. I use a test kit available at the hardware store to test for lead paint prior to stripping the paint.)
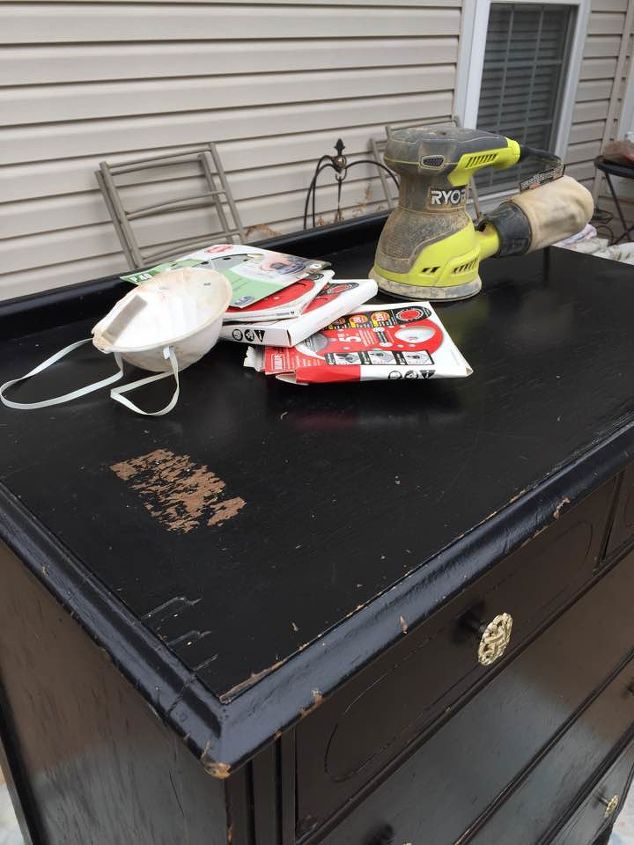
My least favorite thing to do is removing paint. I’m not a fan of chemical strippers, mainly because of the gooey mess, so I decided to use my orbital sander. Sanding off the paint is messy, too, but it’s easy to clean up afterwards with a broom. But be sure to wear a mask and eye protection!
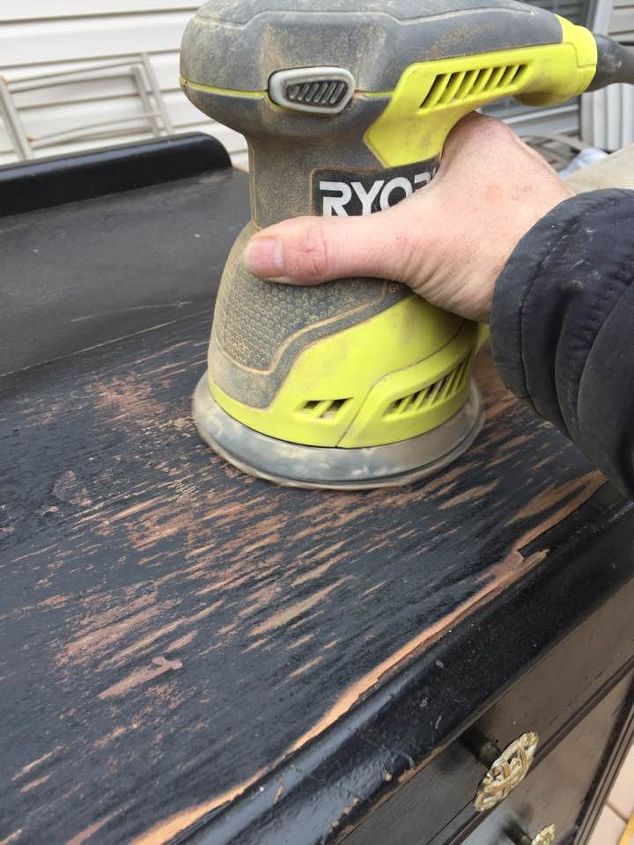
I started with 60-grit sandpaper, but quickly decided I needed 40-grit to blast through the paint. That did the trick! I then went over all the surfaces again using progressively finer grit sandpaper to get a nice smooth finish (80-, 100-, 150-, 220-grit). I used a mouse sander on the tight spots where my orbital sander couldn’t reach. It took about an hour from start to finish to remove the old paint.

I used a mouse sander on the tight spots where my orbital sander couldn’t reach.
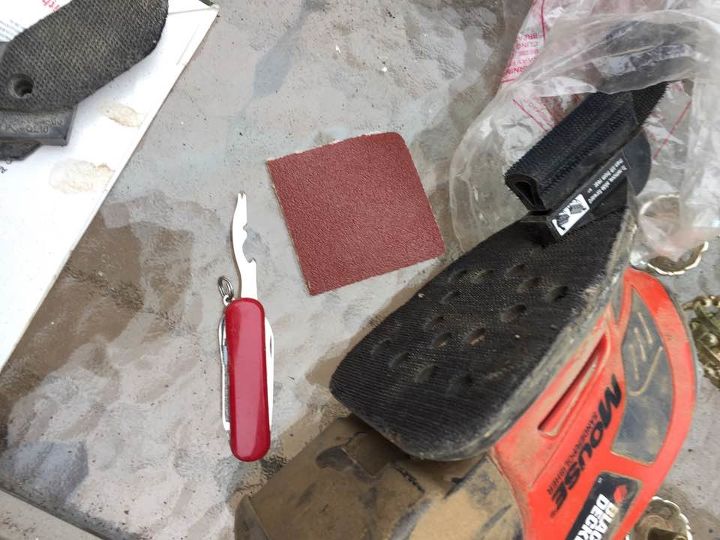
I also used the convex and concave attachments on the mouse sander to get into the curved edges and corners of the dresser. It took about an hour from start to finish to remove the old paint.
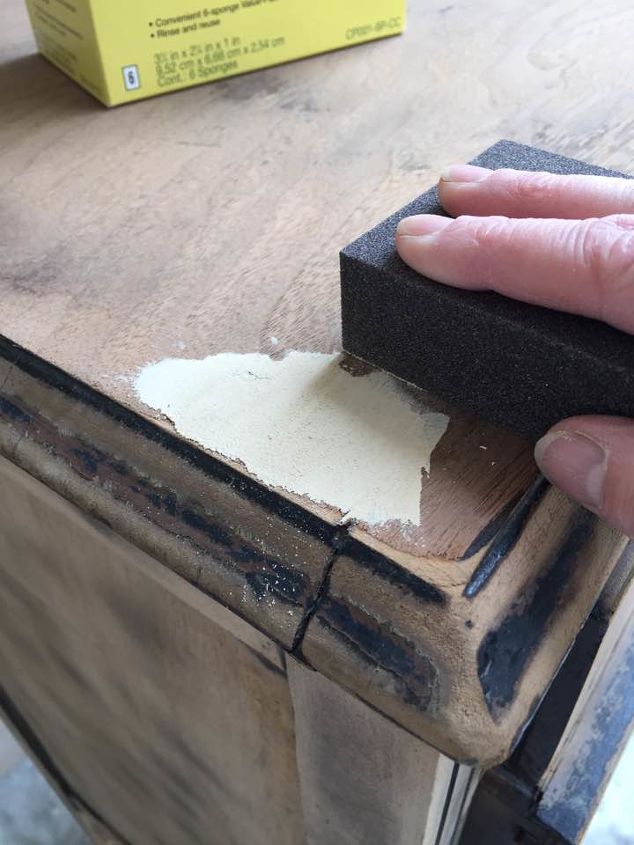
My design plan was a cheerful rustic-shabby-farmhouse finish. So I worked in some of the damaged areas into my design, but I made a few repairs here and there with wood filler.
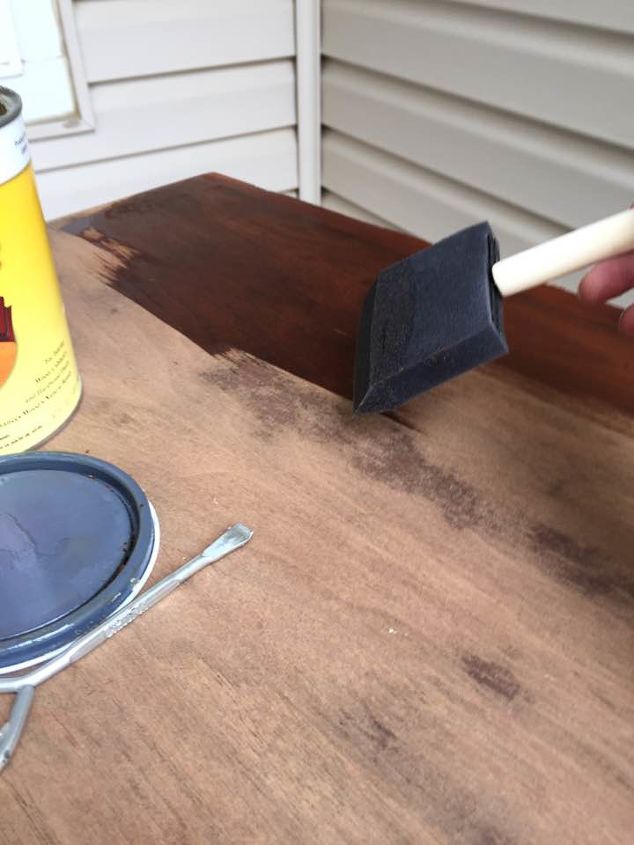
Before applying the new paint, I brushed on a clear coat of shellac to prevent the tannin from the raw wood from bleeding through.
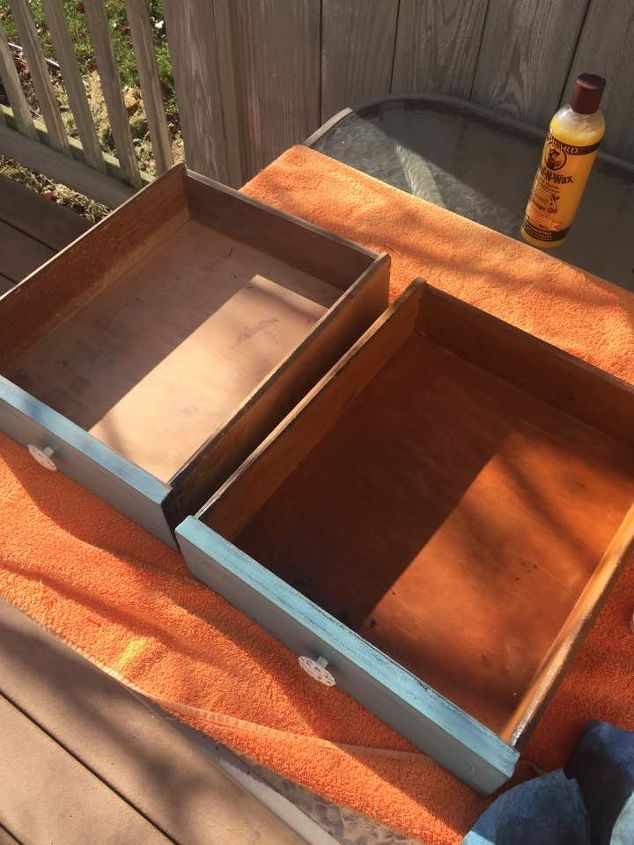
The interiors of the drawers were in good shape, but I reconditioned them because the wood was very dry. The drawer on the left is original, and the one on the right is reconditioned.
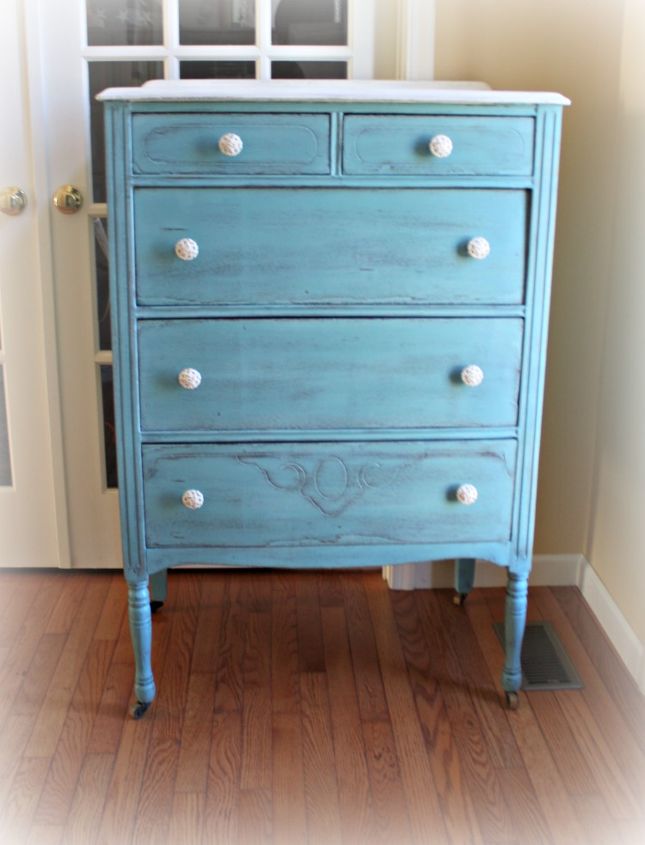
I sanded back the new paint to give it a worn look and then sealed the paint with soft clear wax.
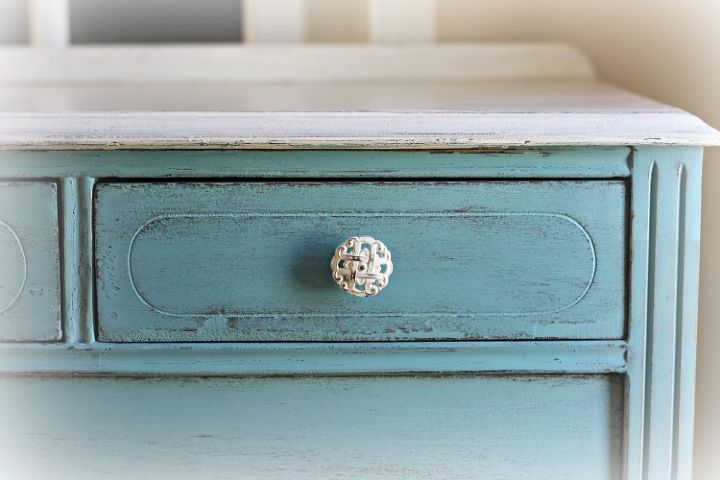
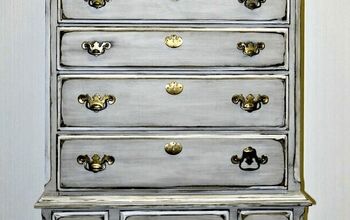
This photo shows is an example of where I didn't make repairs to the damaged veneer. But I think it adds some charm to the finished piece. The drawer pulls that came with the dresser were not original, but they were very pretty, so I painted them white to match the top of the dresser.
I would like to invite you to stop by my blog if you would like more information on this project, or to see other projects I'm working on. Thank you and I wish you a healthy and happy New Year!
Want more details about this and other DIY projects? Check out my blog post!
Comments
Join the conversation
4 of 40 comments
-
Beautful!
-
What a pretty dresser. Wonderful job


Frequently asked questions
Have a question about this project?
Hello. Nice job. Do you know who made the dresser. I have a set from my grandmother, a dresser,vanity and bed. Thanks.
Can u sand veneer that has small gashes on it and then paint it?
What is clear soft wax and how do you use it and can it be purchased at lowes?