


DIY Energy Efficient Window Screens

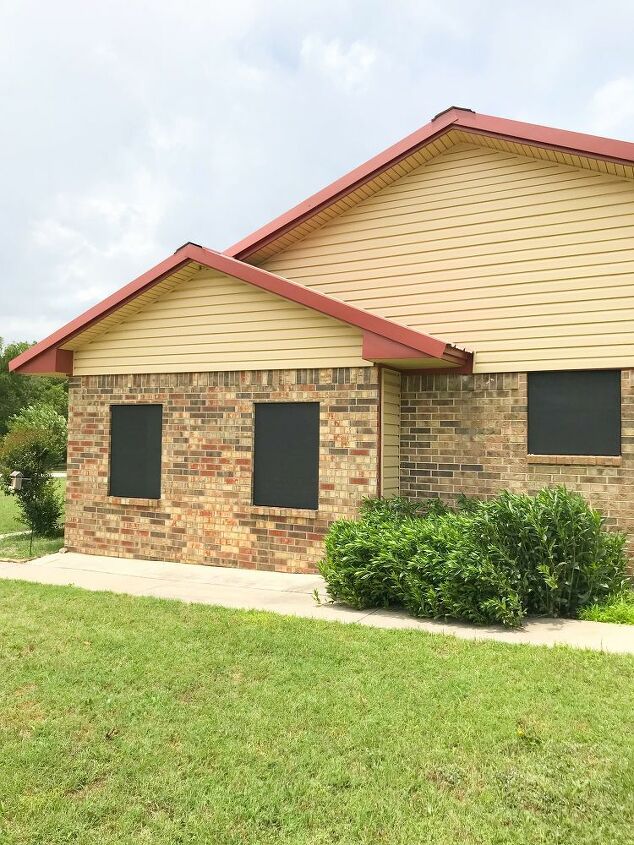
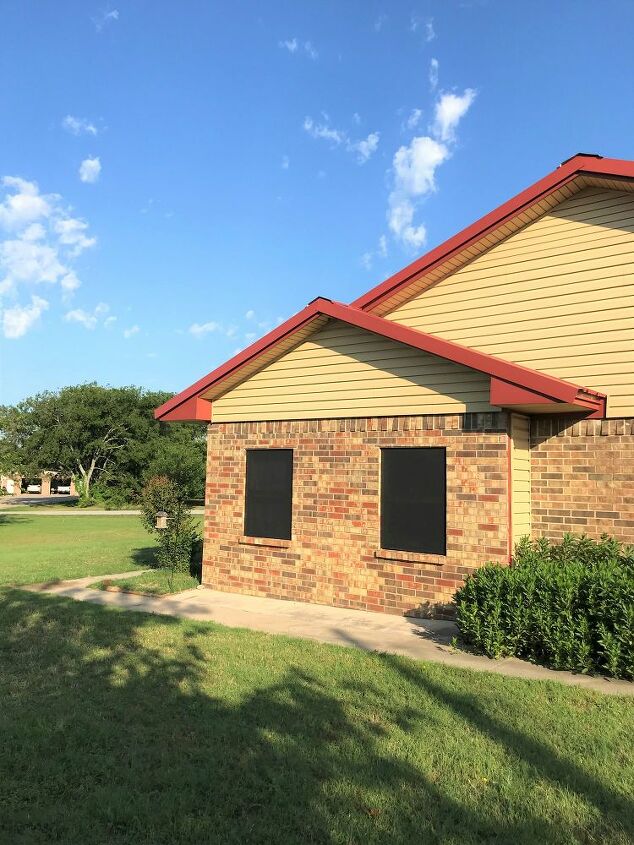
We've been wanting to do this for years, yes, I said years. We just never made time to do it. We finally did it! I love how it makes the house look so fancy with the dark screens!
When we moved in, there was one screen left on the house, but it was trash. So, we had no screens or frames to try and even repair. The metal framing to create your own screens is extremely costly. This is our budget friendly way to have screens on our home.
Not only does it look nice, but it helps keep the heat out better too! It's energy efficient yall!

This is how it looked before. These windows are as old as the 1982 house they live in. They are cheap windows and they do not keep the heat out, What. So. Ever!
But these new screens we built do help keep the heat out. No, not completely, but they help so much more than not having them at all! We couldn't get over how it helped actually!
Also, if you are concerned about them not letting light in, they do reduce the brightness, but not to the point that you can't see anything. It still looks like its daylight outside. This is what the kitchen window looks like with the screen on.
Disclaimer: This is what worked for us. We are DIY Rookies. We do not claim to be professionals. We just wanted to try and make our home look nice while keeping the heat out. Don't send the window screen police after us.....please!
Our windows measure 47" tall x 35" wide. This process cost us about $25 per window to make.
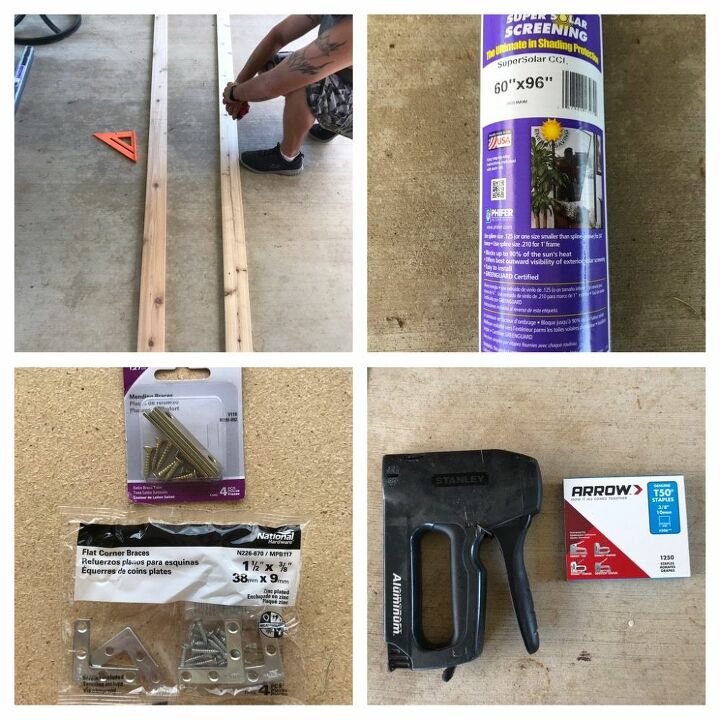
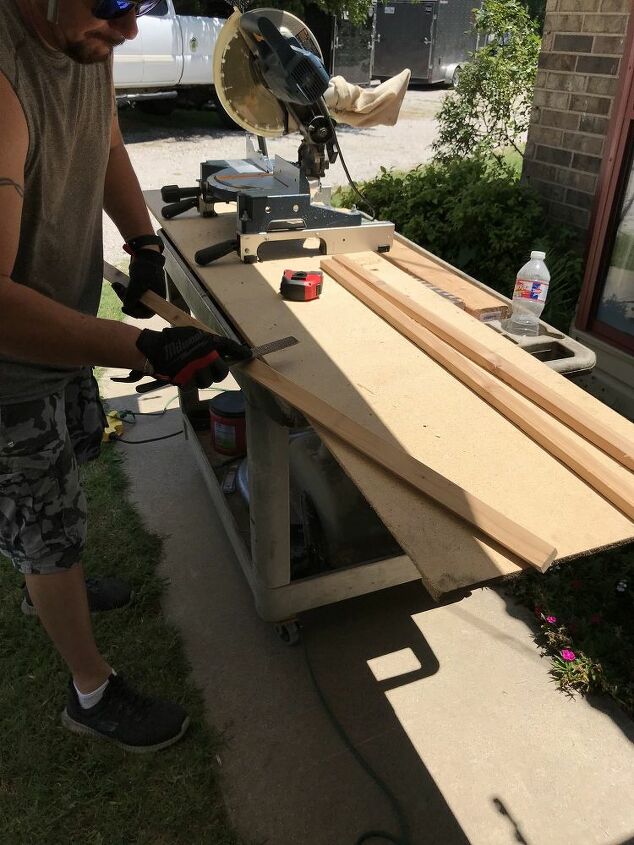
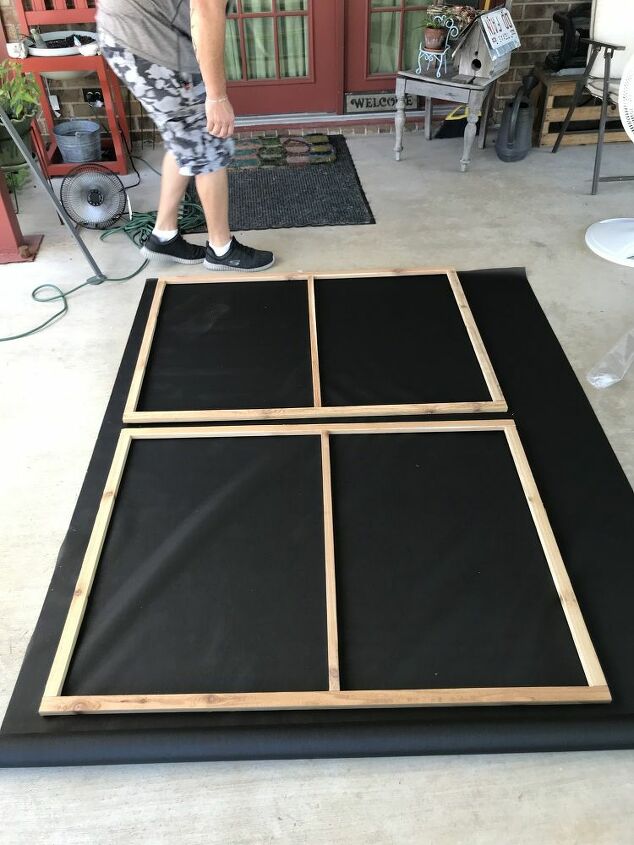
We bought (2) 8' x 4" x 3/4"cedar planks. We thought the cedar would be better in our Texas weather. Using our table saw, my honey cut them down to size. He trimmed them down to strips that were 1-1/4" wide. That gave us two pieces that were 1-1/4" wide and then we used the leftover piece as our center brace.
NOTE: You can buy pre-cut pieces of wood so you don't have to do this cutting down step. It's up to you!
Click here: Phifer Super Solar Screening is the screen we used. It's actually slightly cheaper on Amazon than what we paid at Lowe's, who knew! We bought it at Lowe's and its specifically for keeping the heat out. This roll only did two of our larger windows for us.
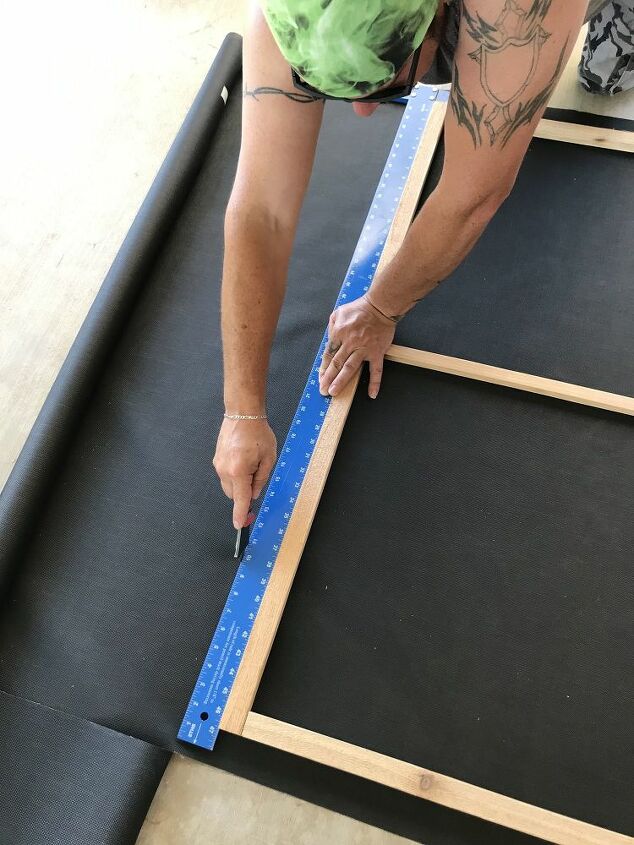
These brackets are what we held the frames together with. The corner braces go on the corners and the straight (mending) braces hold the center brace on. These are cheaper on Amazon as well!
You will also need a staple gun and staples. This is what we used to attache the screen to the wooden frames.
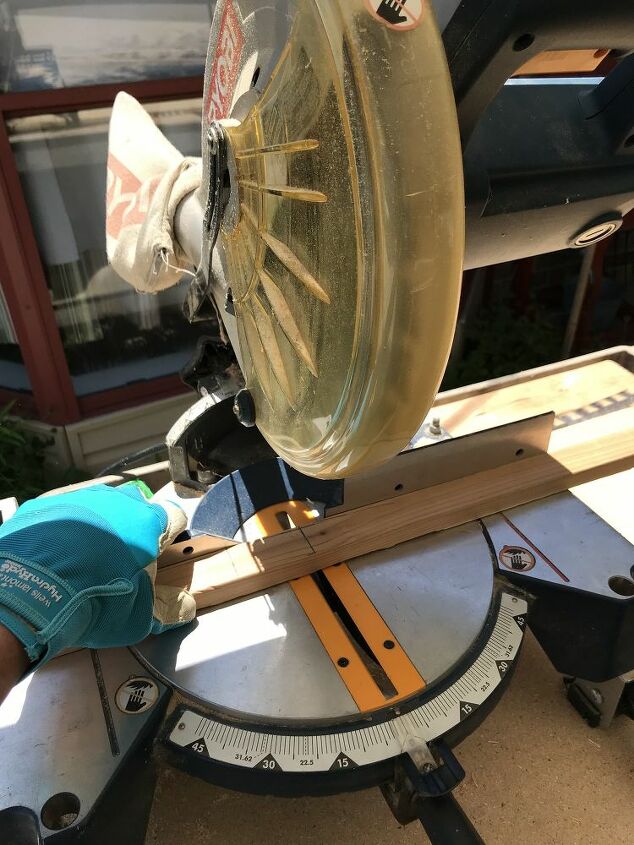
I used our chop saw to cut our stripped down wood pieces into the sizes we needed. Per window we needed 47" x 2 pieces and 32-1/4" x 3 pieces, one of these pieces we used the leftover cut piece from up above, it was our center brace.
NOTE: You will need to measure your windows to get your measurements.
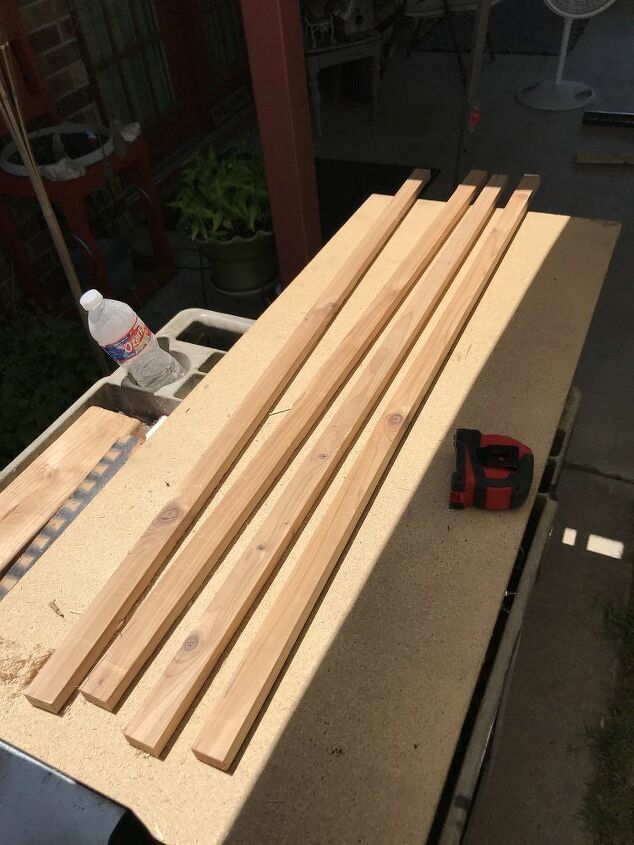
These are the side pieces, now I just need to cut the top, bottom and center pieces.
My honey used a two way rasp to smooth the edges of the wood down so that the screen would not be damaged when wrapped around them.
Our rasp has two sides, he used the finer side to smooth the wood.
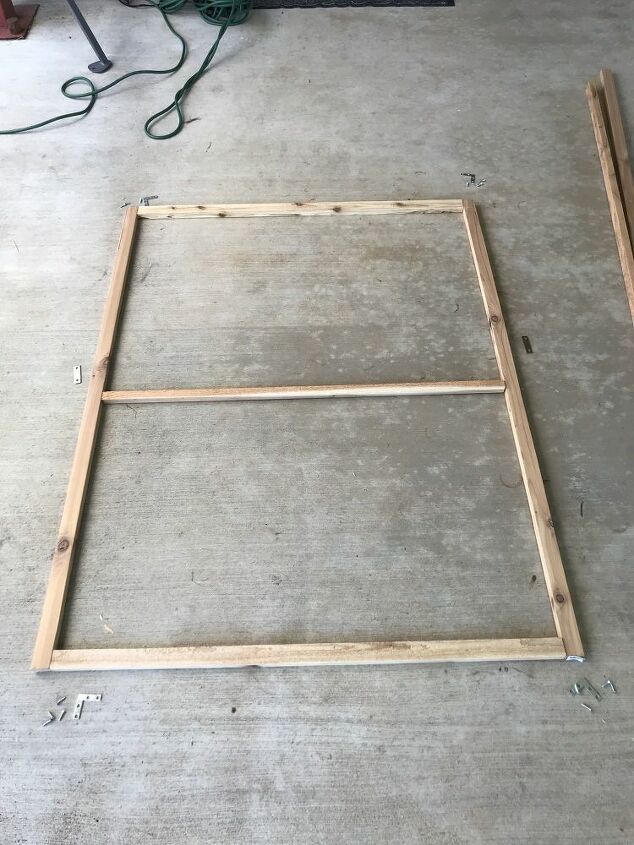
Here all of our pieces are cut and placed where they need to go. Now to attach all the pieces together.
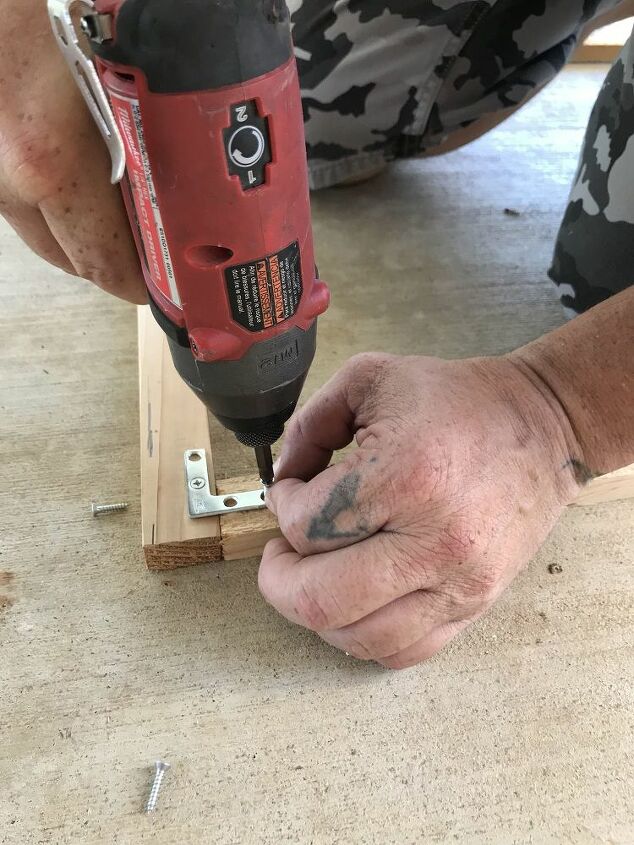
He used the power drill to attach the braces to each intersection.
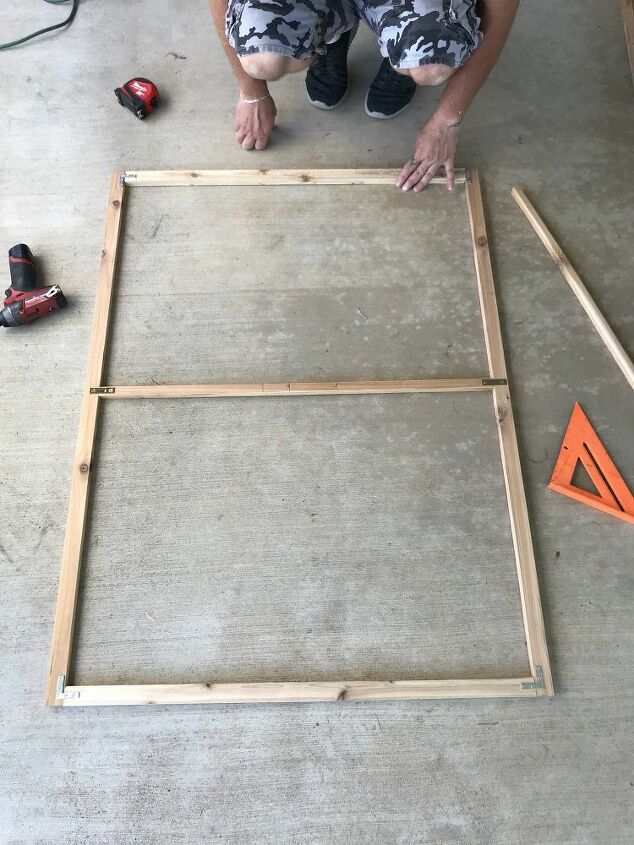
After all the braces were attached, it was very sturdy and ready for the screening.
You can't really tell here, but there is just a little bit of screen left on that roll. We had just enough for two windows and then it was back to the store again!
He used his long T ruler and a box knife to cut the screen down to size. That helps get you a nice straight uniform line.
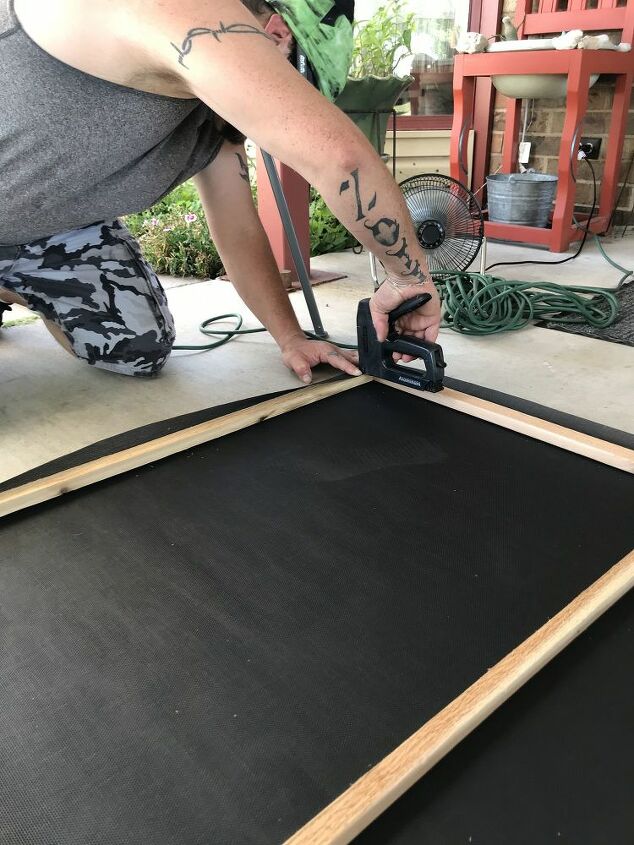
Next we got to work adding the screen to the wooden frames with the staple gun. We would staple the shorter ends first, then pulling the screen taught, go around and staple the remaining sides.
NOTE: Try and get the screen as tight as possible onto the wooden frame.
Now I bet you're wondering how we attached them to each of the windows. We didn't. They fit perfectly tight into each window. You can visit our blog HERE to see how we make sure they are not moving.
If you have any suggestions on how to attached them to the windows, let us know. We have metal windows with brick all the way around. We did not want to try and screw them into the windows for fear of causing the glass to break.
Since we installed the screens, we've had a pretty bad wind storm and the screens did not budge. If you're not from Texas, you may not know what I'm talking about, but this same wind storm caused a crane to fall on an apartment building in Dallas. It was awful!
We feel like they are going to stay put and it sure is nice to pull up into our driveway and see how nice the house looks now with its new window screens on it. We love it!
Comments
Join the conversation
-
Great project! Thanks for sharing!
-
The screens look great! I wish I found your post earlier when we decided to replace window screens on the first floor. I addressed screenmobile customer service and they did the job fast. No complaints. However, we need window screens for the second floor, so I'll save your project and share it with my husband. I'm sure he will also interested in trying it out. Thanks!


Frequently asked questions
Have a question about this project?
You say they keep the heat out, do you think they would keep cold air out in the winter too?
My house has screens on all the windows. These screens came with the insulated windows I had installed in the early 90s. My question is can I use this darkening screen on the screen frames I already have?? My windows help immensely cutting the heat, but I am a bit of a vampire & like inside my house to be dark!, If I want sunlight, I can just go outside!
Thx for your time
BCR
a thank you to you for the easiest, most practical, detailed post. The best I've come across and I've been looking for days.... I love the little wedge idea on your blog, very clever!