DIY Vintage Inspired Hex Tile Floor Part 1

Our home was built in 1929 and we love all the charm older homes have. Unfortunately, ours was extensively remodeled in the 1960s. Some of the original wood windows with leaded glass were changed out to aluminium, faux wood paneling was put everywhere! The kitchen was totally redone with a sort of plywood cabinet covered in a vinyl, countertops and backsplash were the same. The wood floors were covered in linoleum. However, the bathroom floors were left intact. The penny tiles were very cute, but we needed to gut plumbing and electrical and didn't have time wrap our head around saving the tile. Instead, we used new black and white hexagon shaped tiles in a pattern reminiscent of 1920s tile patterns. We used the tile in our kitchen, bathrooms and the latest project is our back entry. The instructional pictures I used in this tutorial are from the back entry, but the before and after I included are from our kitchen. Process and tiles used are the same. We just didn't have the step-by-step photos from the other rooms and we haven't finished the back entry. Also, the back entry is adjacent to our kitchen, so we continued the pattern in this space. I split the tutorial into two parts because the process is very long. And if you are like us, working on projects in short spurts, the end of this tutorial will be a good stopping point. The first part, this tutorial, is preparation for laying tile and the second part is laying, grouting, dehazing and sealing the tile. Keep reading for the directions!
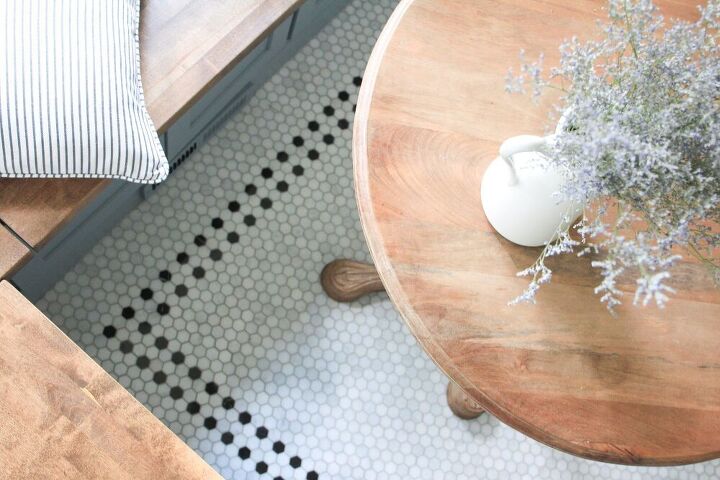
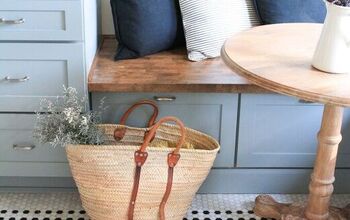
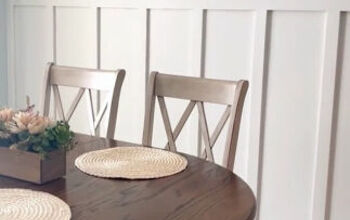
Here is the tile as it appears in our kitchen breakfast nook.
Yikes I did not take a photo of the cement board, but you will see it in the third and fourth steps, and it is listed in materials. The rolled up material is the Redgard decoupling membrane without the packaging. The clear wrapping of the tile with name is laying under the utility knife and red grease pencil. Then there us the drill and screws for cement board.
Mixing the thinset is messy. Make sure to do this outdoors or in an area where you do other messy projects. You will need to add water, so it is best to be near a hose or utility sink.
Make sure to wear a mask when mixing because the thinset dust will rise and spread as you are pouring it out. It's best to mix in smaller batches to prevent the thinset from hardening as you are working.
You want the thinset to be the consistency of peanut butter. Add in a bit of water and mix continually as needed until you reach that peanut butter feel. Make sure to move the paddle all the way to the bottom of the bucket to mix in any thinset that settled to the bottom.
After the trowel test, you will either keep mixing or if the desired consistency is met, you will let the mixture stand for 10 minutes. After the 10 minutes are up, you will mix with the paddle for 1 minute before using.
Make sure you have the correct 3/16 inch v notch trowel. Apply in long even strokes. Start from a corner, moving top right to left or vice versa.
Before mixing the thinset, you would measure out the cement board to fit your space. Use a utility knife to cut the board to your needed dimensions.
Using screws specifically for cement board, screw down the boards. My husband spaced the screws out about 5 inches. Once all board sections are screwed down, wait the recommended 24 hours before walking on the board.
Measure and cut the uncoupling membrane prior to mixing the thinset, as was done with the cement board. You will mix another batch of thinset following the same steps listed earlier. Apply the thinset onto the cement board as you did when laying cement board, then lay down your pre-cut pieces of the uncoupling membrane. Wait the recommended 24 hours before walking on the surface.
Lay out the sheets of tile as though you were putting puzzle pieces together. Choose a small area to work on and go section by section, laying out a few squares to cover the width of your floor space. Using the grease pencil, draw where there is overlap to cut off. In the photo you can see that the sheet in the lower half of the photo has already been cut to fit up against the edge of the stair. Meanwhile, the sheet in the top of the photo is being marked to cut. Our son loves helping and marking the tiles is a perfect job for him!
After making the necessary markings on the tile, use your tile cutter to cut off excess. Follow the instructions provided with your tile saw.
After cutting the square sheets of tile to fit the space, you will lay them on the floor to see they fit. If you are using different colored tiles to form a pattern, use a grease pencil to mark the tiles to be cut out, in order to fit in the other color tiles. We get some loose black pieces and lay them on the white tiles to plan a design. This part is fun and creative! Lay out a couple different options and let them sit for a few days to help decide on the winning pattern.
We are mixing in black tiles to form our pattern, so we made markings on the white tiles to be removed and replaced with the black. The more complex the pattern, the more time you will spend arranging and cutting. And once tiles are cut out, you should lay the squares back down to ensure you cut out the correct tiles! Of course you can always add the tile back in, but it's just another step. Whew! This work can be tedious! I decided to end the first part of the tutorial here. It is a good place to break before the rest of the process. You will want to be well rested before mixing more thinset, applying the thinset, setting the tile, and grouting.
We love how the tile turned out. It is hard work, but my husband is a glutton for punishment ha ha! Round penny tiles or slightly larger hex tiles would look great for a vintage feel as well. I also love the large checkerboard look, and that would mean less work!
For the budget I did not include the price of the tile saw or the drill. I figure, if you are trying this you have the tools in your arsenal or will purchase them for multiple projects, not just this one.
As for the time to complete the project, I stated 1 week. This will vary depending on the size of your floor, hours you can commit per day etc. We are currently working on our back entry in small chunks, 1 hour here or there. When my husband worked on our kitchen, we weren't yet living in the house and he would spend long chunks of time on projects. Check out the second half of this floor tile process by clicking this link: https://www.hometalk.com/diy/tile/floor/diy-vintage-inspired-hex-floor-tile-part-2-44298465
Thanks for reading! Hope this post inspires you! Follow me on Instagram for more home decor and DIY!
Enjoyed the project?
Resources for this project:
See all materials
Comments
Join the conversation
-
 Dl.5660408
on May 28, 2022
Wow, magnificent! The redo is amazing; it was so drab and dated before. Now it’s so bright and the floor is the crown jewel
-
 This Dear Casa
on May 31, 2022
Hi there! Thank you so much! You are always so kind. Hope you have a great day.
-
-
-
 Jls3245634
on May 27, 2023
How to remove old 12 inch squares and the sealant underneath it
-
 This Dear Casa
on May 27, 2023
Hi there, I think you're asking how to remove tiles and underlayment. If you want to use power tools, you will need an angle grinder. You will also need a floor scraper, shop vac, trash bags, and protective equipment like knee pads and goggles. There are plenty of videos available. Home Depot has a good article.
-
-












Frequently asked questions
Have a question about this project?
Wow! Not only is your nook simply gorgeous, but it really looks at least 2x bigger after all your improvements! I live in a 100+ yr old farmhouse and am beginning to attempt a few updates but I'm afraid that tile saw and i would not work well together....im addicted to my $15 Wal-Mart jigsaw. Out of curiosity though regarding the tile saw could something like that be rented. Do you know? And would it even be possible for me to use it as I have fibromyalgia and carpal tunnel syndrome?
Can you share the link for both the black hex tile and the marble hex tile?
I am curious, why did you put uncoupling membrane over the cement board? Normally you use one or the other, not both.
You skipped over an essential step. Always ensure your plywood subfloor is solid. You don't want flex and it needs to be well secured to the floor joists. Always start here first. Use screws to secure the subfloor, not nails. Nails WILL pull out over time. Ensure the subfloor is flat and level. Then apply the cement board (or uncoupling membrane). Then tiles.