


How to Make a Cute DIY Console Table Out of Reclaimed Wood

Today, I'm excited to share with you the process of making a beautiful DIY console table out of reclaimed wood. I saw one that I loved but it sold for $2,000 so I decided to replicate it myself. Follow along as I build the console table. The unique character of reclaimed wood combined with craftsmanship creates a stunning piece.
Tools and materials
- Reclaimed wood (for tabletop and legs)
- Saw (circular saw or table saw)
- Chisel (for cutting tenons and mortises)
- Pencil and ruler
- Wood glue
- Clamps
- Sandpaper (various grits)
- Safety goggles and gloves (for protection)
Steps
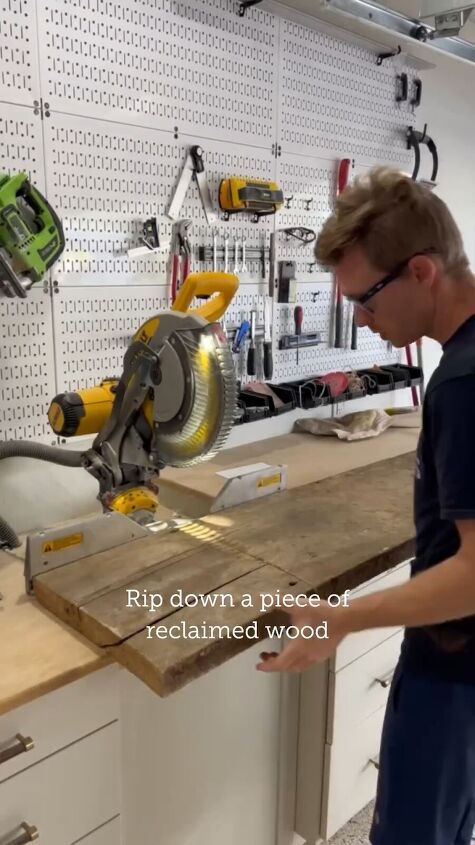
1. Rip down reclaimed wood
Begin by selecting a piece of reclaimed wood for your tabletop. Measure and mark the desired width.
Using a saw (circular saw or table saw), carefully rip down the wood to achieve your desired tabletop width.
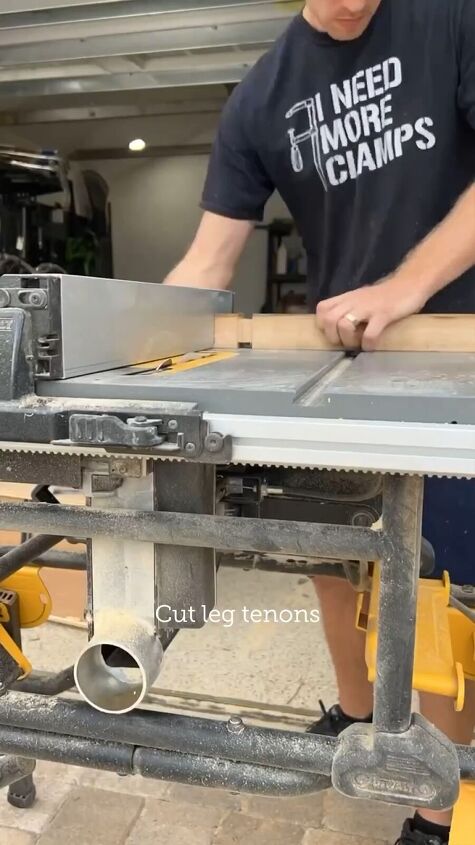
2. Cut leg tenons
Measure and mark the length you want for your table legs.
Cut the table legs to length using the saw. Leave a portion at the top of each leg for creating tenons.
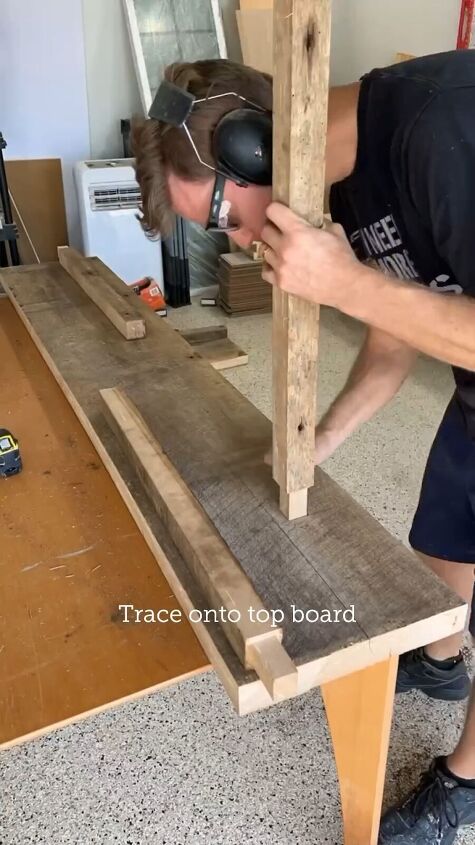
3. Trace and cut mortises
On the underside of the tabletop, trace the shape and size of the leg tenons. This will guide you in creating mortises.
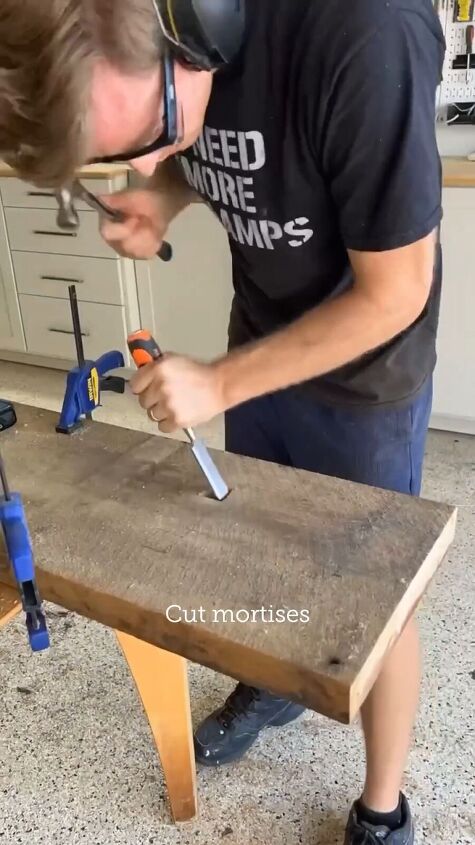
Chisel
Use a chisel to carefully cut out the traced mortise shapes on the underside of the tabletop.
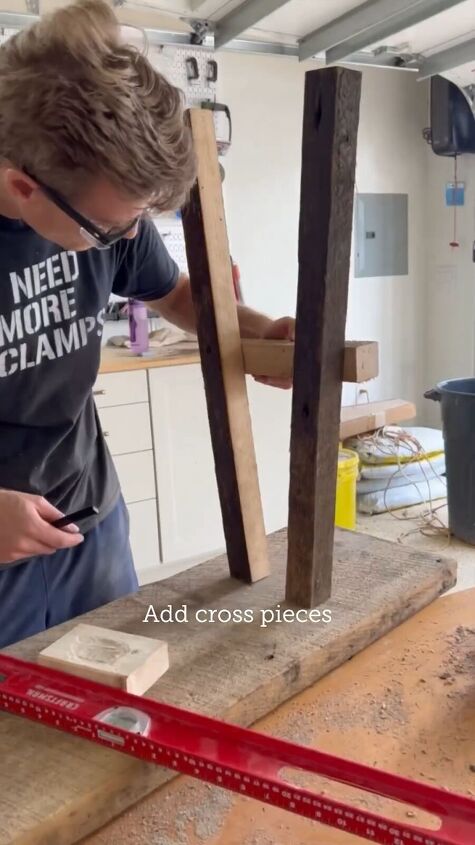
4. Add cross pieces
Cut smaller pieces of reclaimed wood to act as cross supports between the legs.
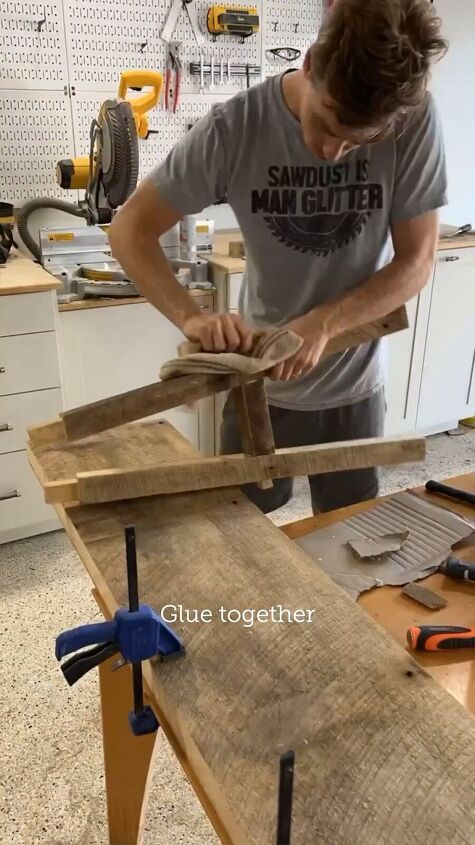
Glue
Apply wood glue to the ends of the cross pieces and insert them into the mortises you've created on the legs.
Carefully assemble the legs and cross pieces, ensuring a snug fit.
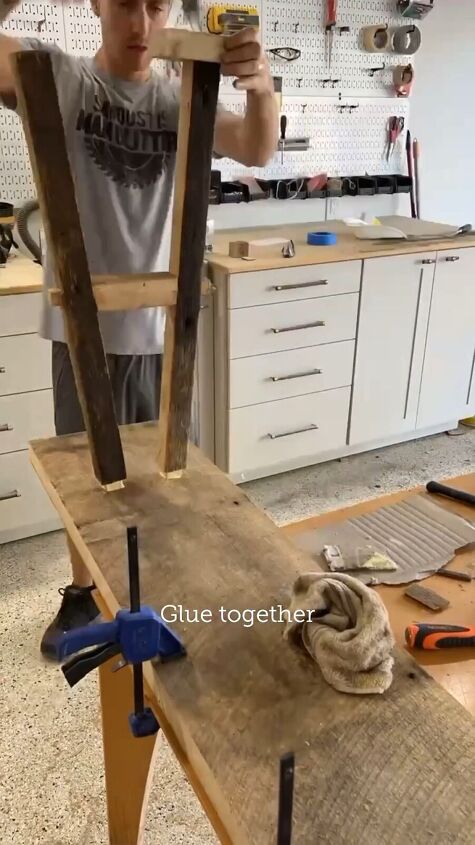
5. Glue and clamp
Apply wood glue to the tenons on the tops of the legs.
Carefully position the legs with the cross pieces attached onto the mortises on the underside of the tabletop.
Gently press the parts together and use clamps to hold them firmly in place. Allow the glue to dry according to the manufacturer's instructions.
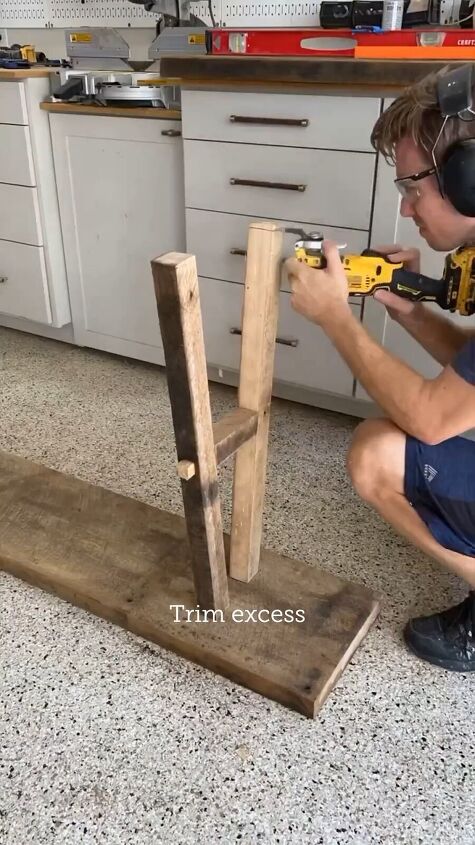
6. Trim excess
Once the glue has fully dried, carefully trim any excess wood protruding from the mortises and tenons.
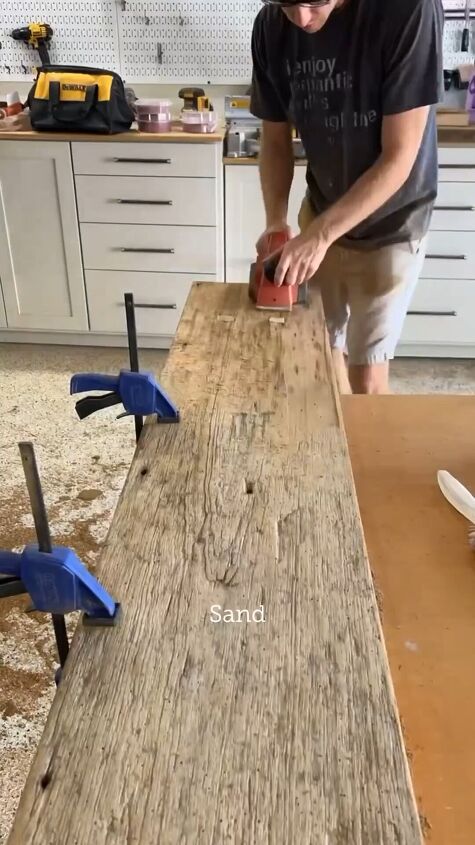
7. Sand
With safety goggles and gloves on, use various grits of sandpaper to smooth down any rough edges and surfaces. Sand until you achieve the desired finish.
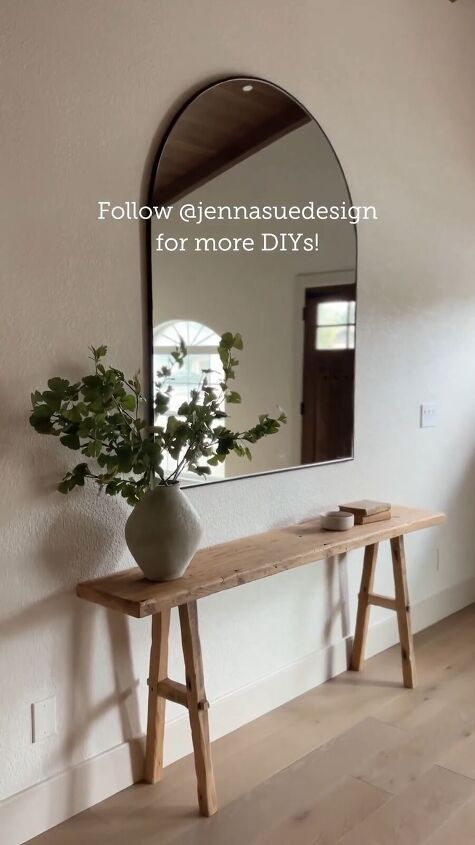
DIY console table
Here’s my one-of-a-kind DIY console table. I hope you enjoyed learning how I built a DIY console table to fit my narrow space. If you have any questions or want to share your own creations, feel free to leave a comment below.
Follow @jennasuedesign on Instagram for more DIY ideas.


Frequently asked questions
Have a question about this project?