


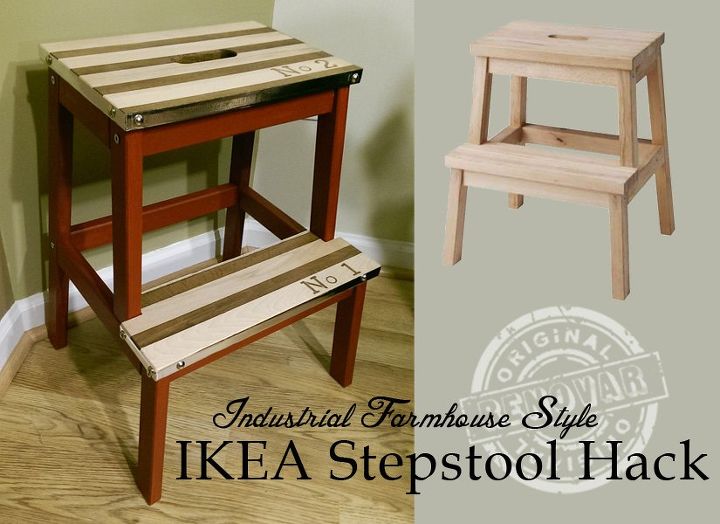
DIY IKEA Hack Project - Farmhouse Style Stool
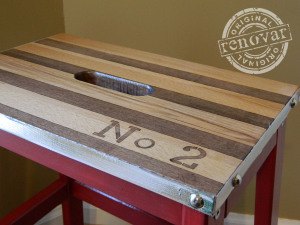
Here is a diy Ikea hack on the BEKVAM step stool. I used a striped stain process, stencils and foil washi tape with upholstery pins. Hope you like it.
For this project:
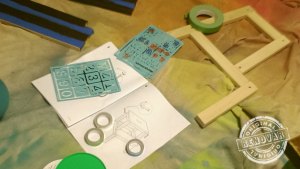
I took out all of the pieces and made sure i had everything (nothing worse than driving four hours to find that your are missing a screw), We were all good.
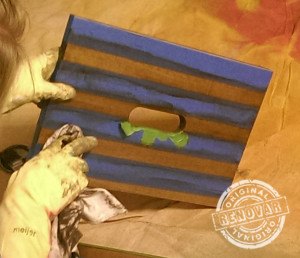
I then used the painters tape to make my lines for the top and the step. Once it was taped off (Confession - I rarely measure) I took out the gel stain and applied it with a small chip brush by manufacturer guidelines, then wiped off the excess. While the stain was drying, I opened my paint sample. I started painting the supports and sides with the foam brush.
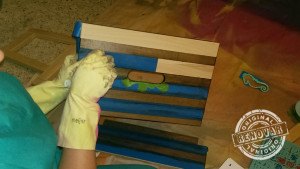
I seriously love taking the tape off and seeing my beautiful stripes. I love stripes. and polka dots and chevron. {Sigh} they all make me smile.
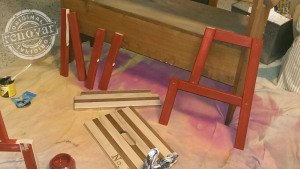
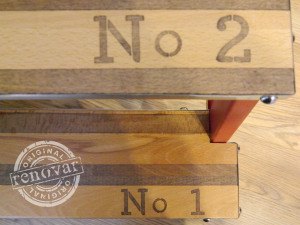
I used two coats of the red. It dried fast like a stain so was easy! Next, I stenciled my letters on. Once I got myself and the step stool back in order I completed the staining of the numbers. Then, I simply used a 120 grit sandpaper to 'erase' my mistake with the No.1 misplacement. No big deal.
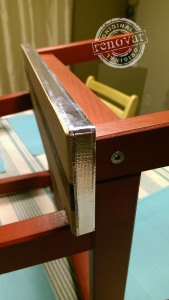
To finish it all off I wrapped the metallic washi tape around the edges. Isn't it pretty? It took two rolls and since the packages were with random colors of metallic silver, gold, green and blue - I did have to buy a few packages. At 2 bucks, I am not complaining.
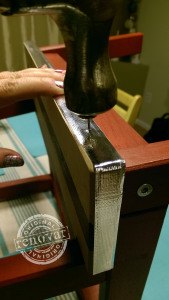
And then to add more of the industrial feel I nailed in some upholstery tacks to corner areas.
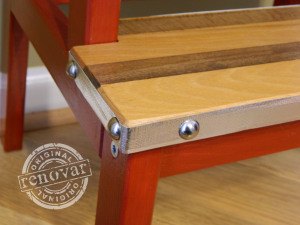
At first, I didn't think that the tacks were functional and that they were merely for decoration. However, it helps secure the tape- especially at the seems - in the long run. Not to mention, that sometimes a little bling really completes the look and feel of a piece!

I am so happy with the end result! What do you think? Can you believe that even with my oopsie daisy moments - it still took only about an hour? Below, you can see some of the details.

Want more details about this and other DIY projects? Check out my blog post!
Comments
Join the conversation
2 of 5 comments
-
You could cover the tape with Modge Podge to keep the tape in place. It would also prevent any tape from peeling off on the sides.
-
I love this idea. I’m going to try doing my old Bombay chest using your idea.


Frequently asked questions
Have a question about this project?
Any by chance I could watch a video on how u do it?? Pls
. Thanks 😊