


DIY Gold Glitter Mercury Glass Pumpkin
I'm sure you've all seen at least one of the numerous do it yourself Mercury glass tutorials. This isn't just another one to add to that silvery mercury glass list. Well, not exactly. I decided to do some experimenting because I wanted to make a gold (not silver) glass pumpkin to put out with my primarily gold toned autumn decorations.

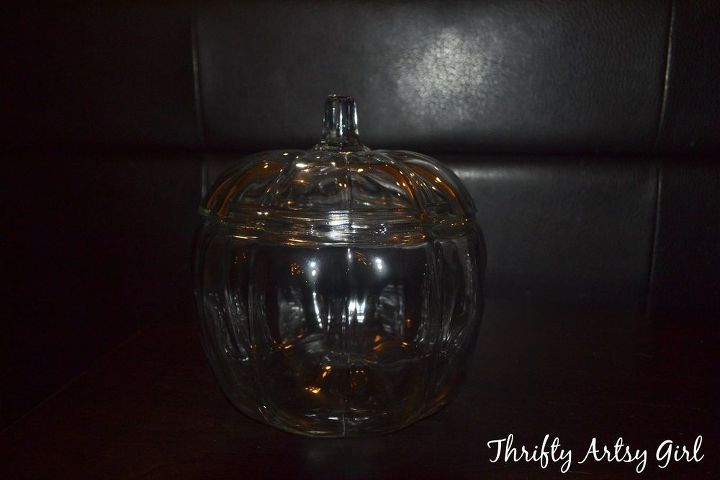
The standard silver mercury glass is made using Krylon looking glass spray paint or Rustoleum Mirror Effect spray paint which is silver and makes glass look just like a mirror. The gold mercury glass tutorials usually use metallic gold spray paint which is no where near as shiny as the looking glass paint. I had bought a fairly large clear glass candy dish pumpkin at Walmart for $6 so I just needed to come up with a way to make it the mercury glass gold color I wanted. I decided to try using Krylon looking glass spray paint and to try to create the gold pumpkin I would incorporate glitter. Lots and lots of glitter :).
Gold Glitter Mercury Glass Supplies:
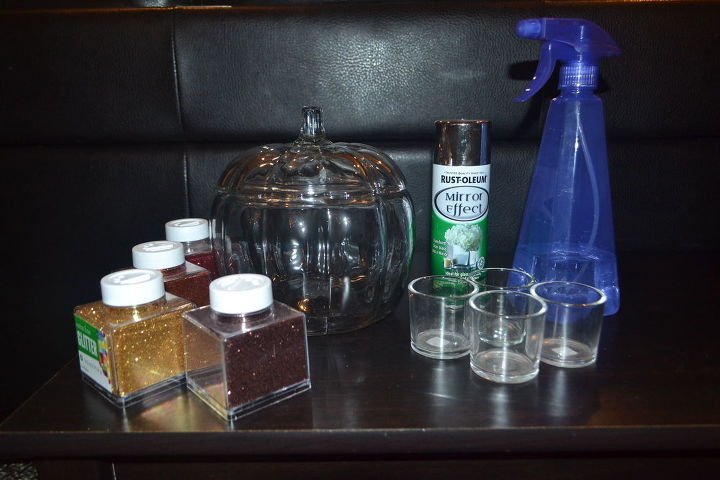
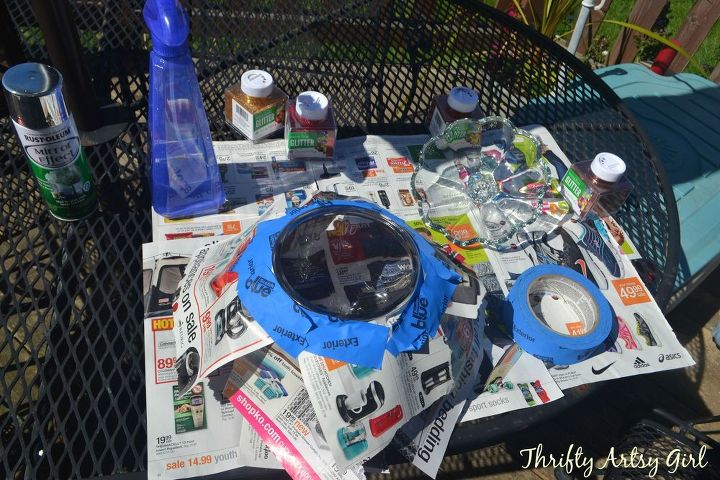
I experimented with 4 different techniques on some votives to figure out what would work the best to get the look I wanted. (To see all the techniques and results check out my blog post http://thriftyartsygirl.blogspot.com/2015/09/diy-gold-glitter-mercury-glass-pumpkin.html). I taped off the outside of my glass pumpkin since I was only going to spray the inside. Just like with all the other tutorials out there I used a spray bottle with water and vinegar to try to help me get the true mercury glass affect.
I did the top of the pumpkin first. I sprayed water, then sprinkled on glitter (I used all 3 colors) and then sprayed with paint. Here's how it looked on the second go around before I sprayed the paint.
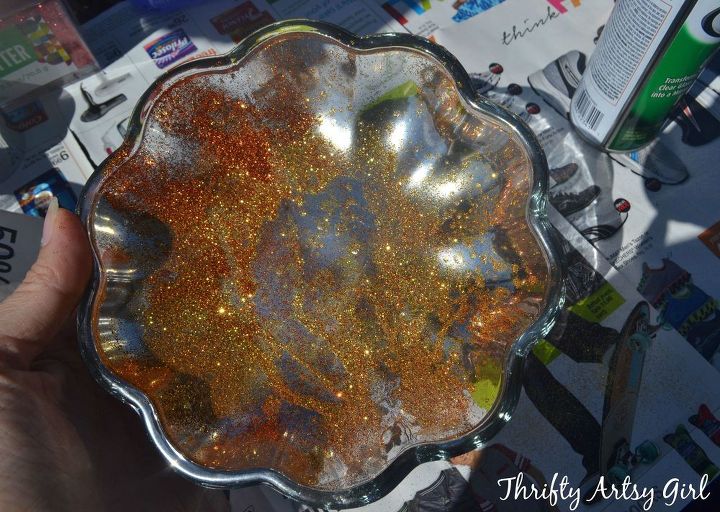
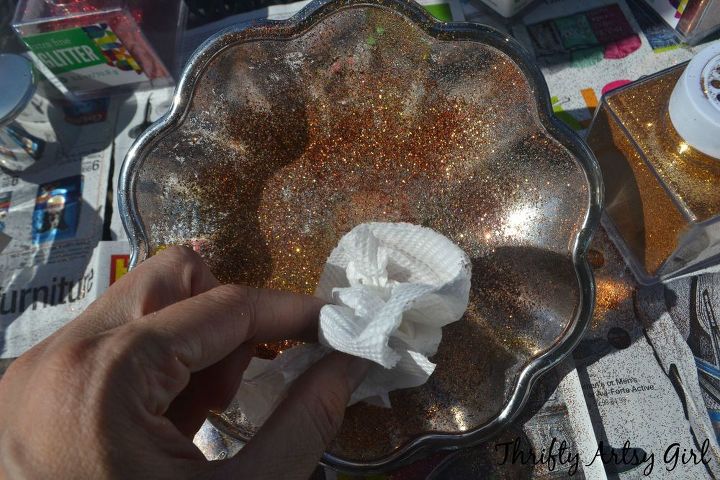
After the third application I waited for the paint to dry a little and I gently blotted and pushed the glitter around to create see through areas indicative of mercury glass.
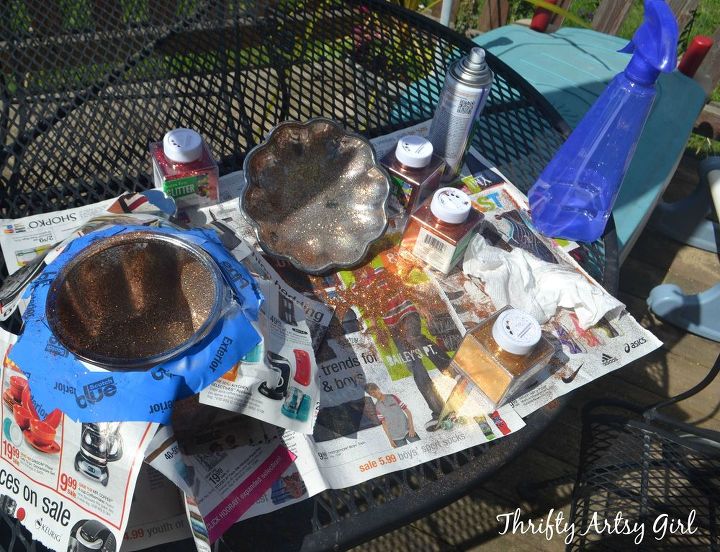
Here's how the pumpkin looked when I finished, and of course the mess I made ;).
After the pumpkin was dry, I immediately put it inside to create a fall vignette in my living room.
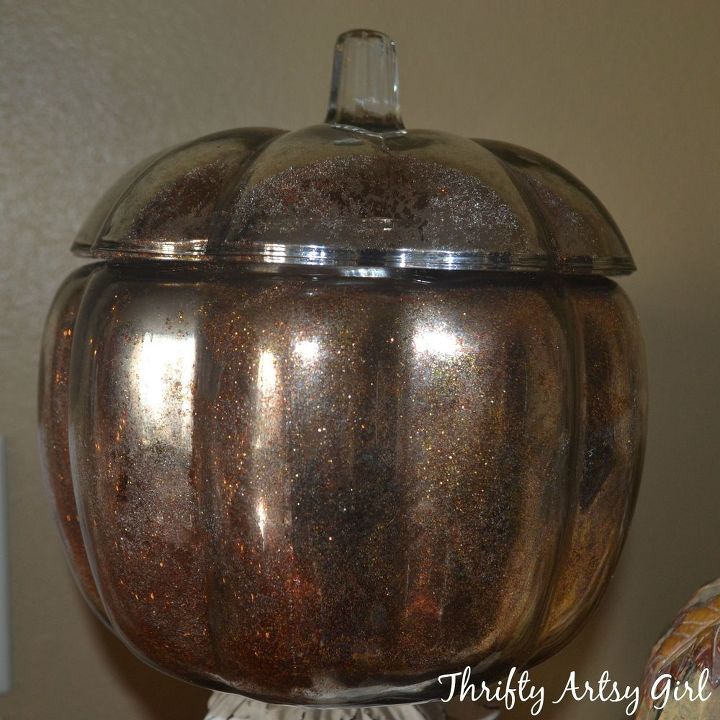
The pumpkin seemed to change colors and hues throughout the day!

Here's a picture at dusk. I have a battery powered candle inside that is much larger than a faux tea light and puts off a little bit more light.
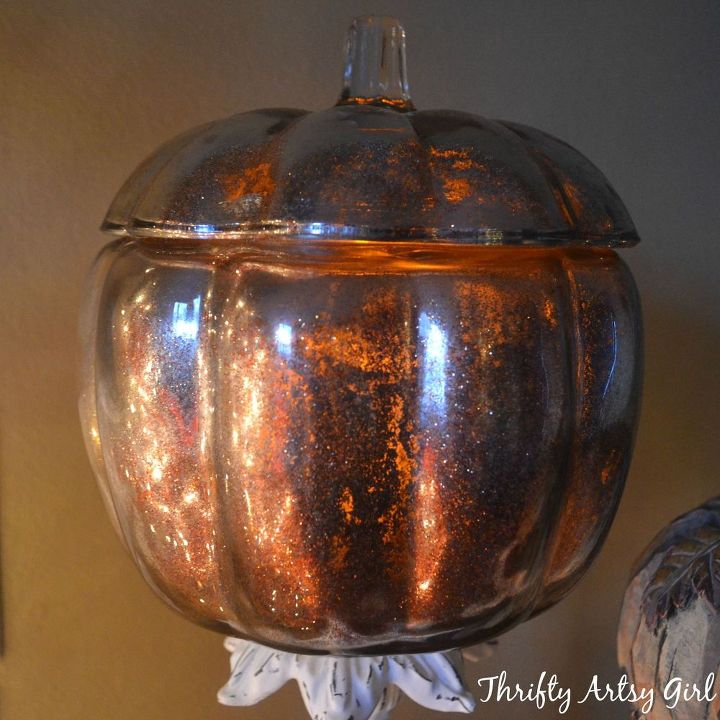
Here's a night shot. I can't believe how different the pumpkin looks throughout the day!
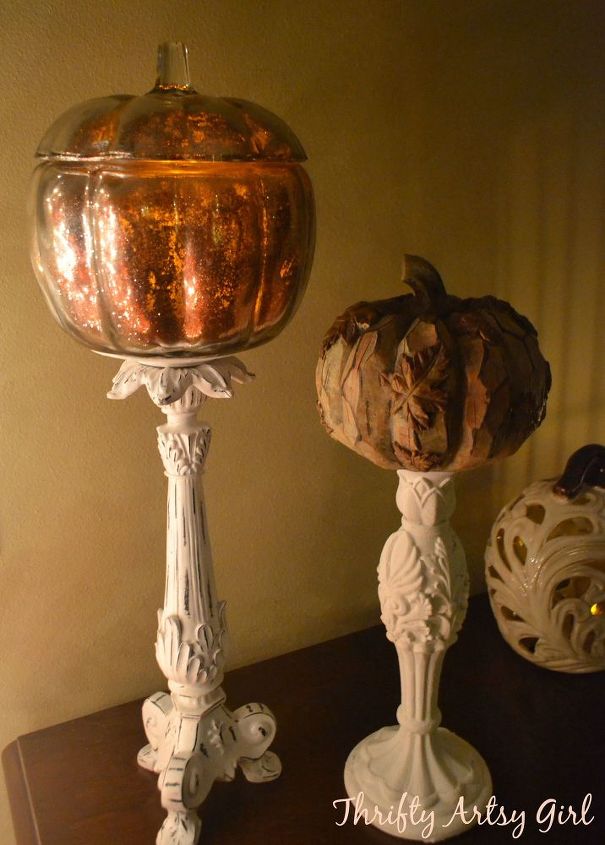
I am beyond thrilled with how my glittery gold mercury glass pumpkin turned out! My pumpkin seems to look different every time I glance over at it and it changes color throughout the course of the day, like it has a mood/mind of its own. This has made me love it even more than when I first saw its sparkly orangey-goldness. Not only was this a very easy DIY but it was very affordable too. FYI the Pottery Barn small mercury glass pumpkin is $25...Just saying. To see the full tutorial, including 4 different approaches to get a glittery mercury glass look and more pictures of the finished pumpkin stop by my blog post ;)

Want more details about this and other DIY projects? Check out my blog post!
Comments
Join the conversation
2 of 20 comments
-
WOW! gorgeous!
-
and I just gave my glass pumpkin - just like yours - to the goodwill! I'm kicking myself right now! really pretty!


Frequently asked questions
Have a question about this project?