


DIY Geometric Wood Wall Decor
This was how it all started. I had an urge to cut hexagons and make the edges beveled, so I did.
I didn’t really have a project in mind, I just kept cutting hexagons, putting them on the ground, and staring. (I stared at them a lot.)
At some point, I thought I should probably decide what to do with the hexagons before going any further.
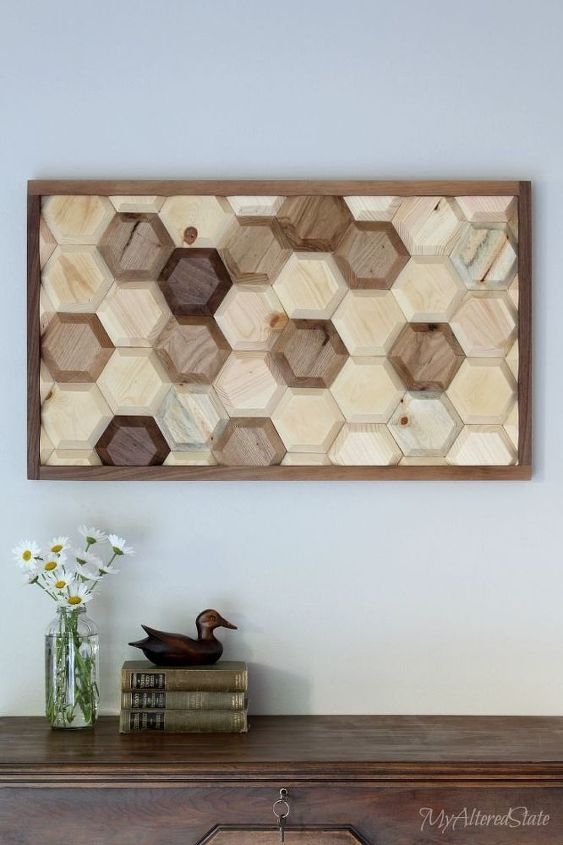
So… after taking breaks to stare at them, and over 451 cuts later, I came to the conclusion that what I had here- was probably art.
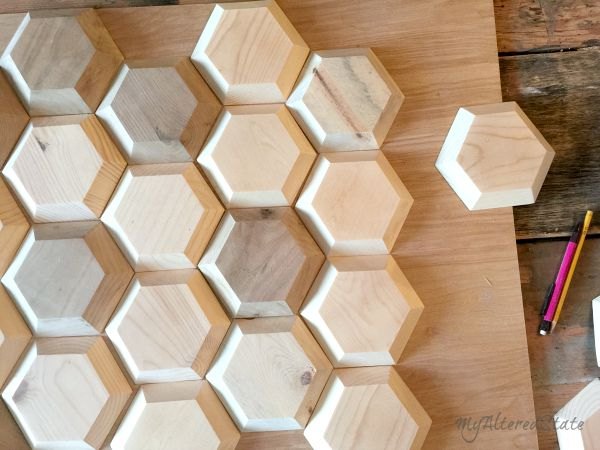
First of all, lets talk about hexagons.
I like them because they are easy to cut on a miter saw.
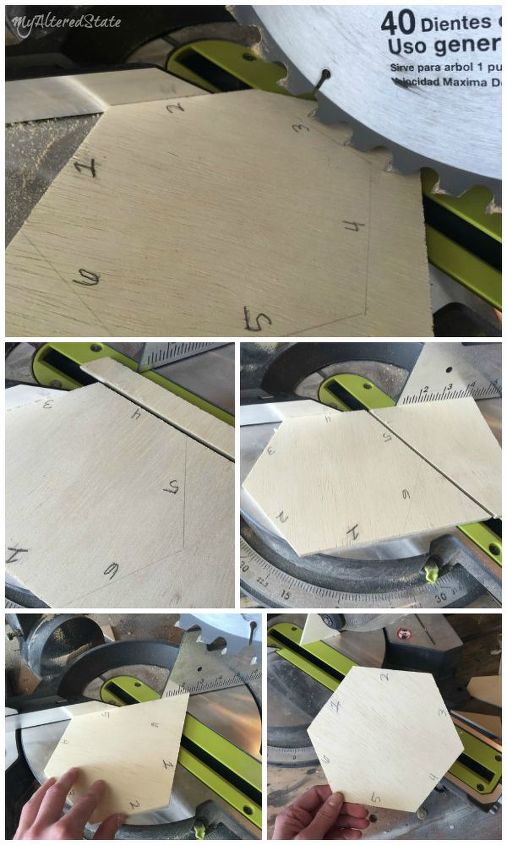
The saw can be set at 30° the whole time, while the wood is turned after each cut.
(In the following images, I use plywood scrap to explain this process.)
It’s important to have a hexagon template to trace onto the wood, so I Googled: “printable hexagon” and printed it out to the size I wanted. (6 inches.)
I didn’t really have a project in mind, I just kept cutting hexagons, putting them on the ground, and staring. (I stared at them a lot.)
At some point, I thought I should probably decide what to do with the hexagons before going any further.
So… after taking breaks to stare at them, and over 451 cuts later, I came to the conclusion that what I had here- was probably art.
First of all, lets talk about hexagons.
I like them because they are easy to cut on a miter saw.
The saw can be set at 30° the whole time, while the wood is turned after each cut.
(In the following images, I use plywood scrap to explain this process.)
It’s important to have a hexagon template to trace onto the wood, so I Googled: “printable hexagon” and printed it out to the size I wanted. (6 inches.)
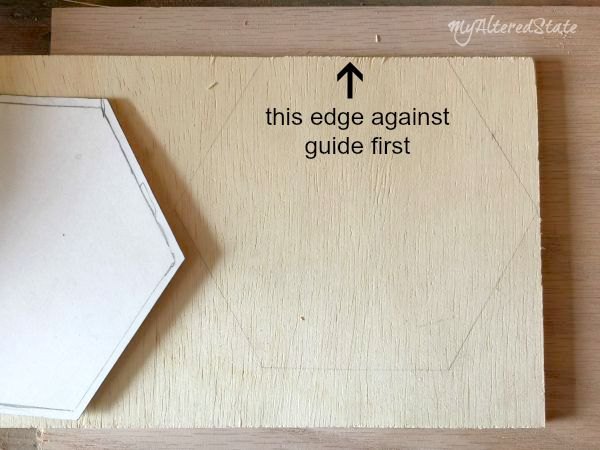
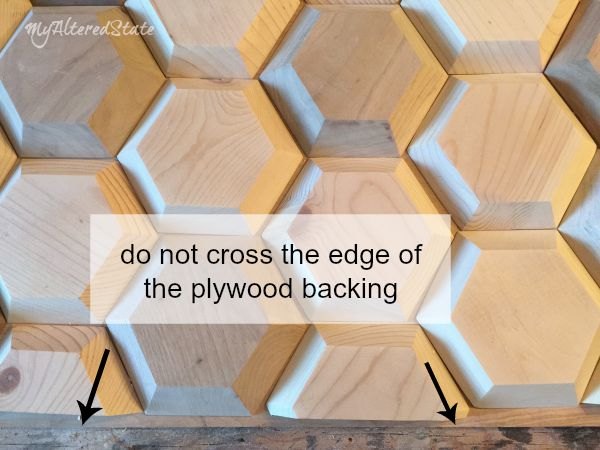
To make the cuts, I needed one edge of the hexagon to be lined up on the true edge of the wood. (Above image.) That ensures that the following cuts will be lined up correctly.
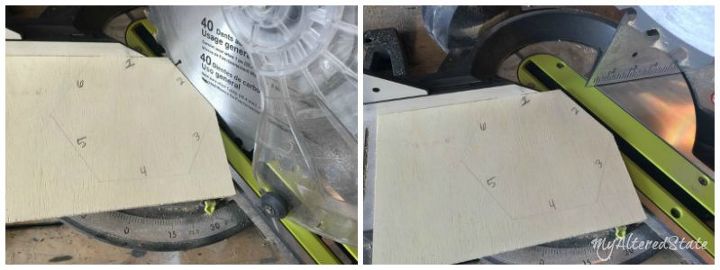
After making the cut on edge I rotated the wood once to the left, placing that #2 edge along the saw guide.
After I had my hexagon, I used my table saw to bevel the edges.
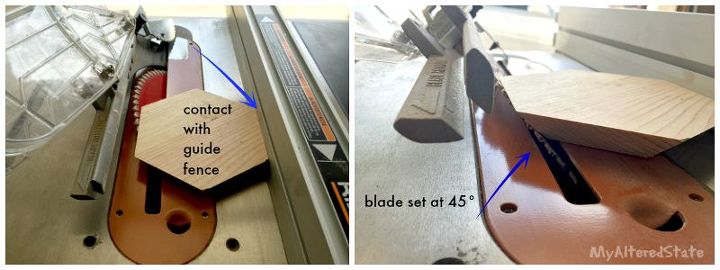
This part was a little intense, because that’s a saw blade there, and it’s sharp.
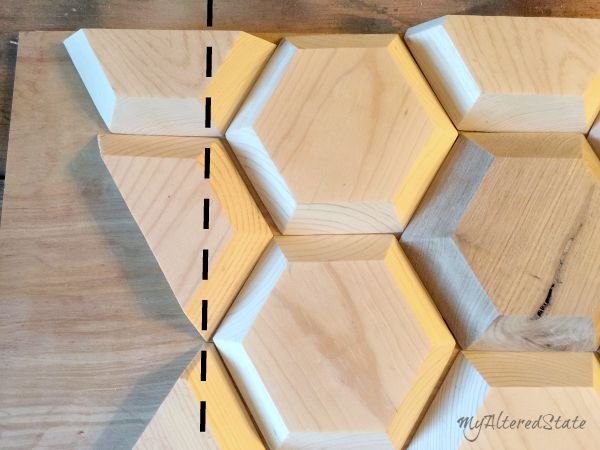
I spent a lot of time playing around with grain direction…
The table saw cuts off the excess around the edges, and leaves me with a rectangle-shaped art piece. (That is actually made up of hexagons. ha ha)
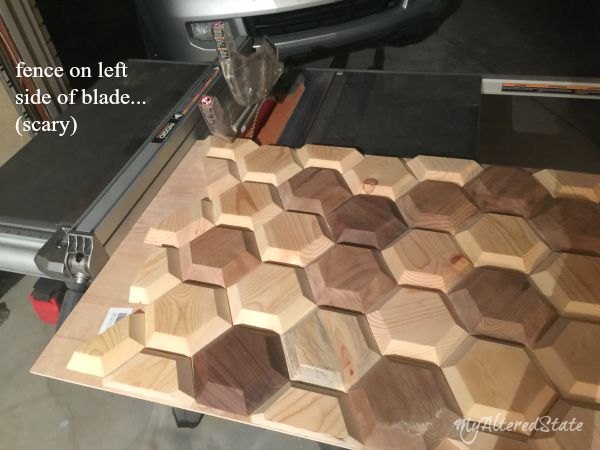
I needed help to run it through the table saw, so my husband acted as my second set of hands. I moved the guide fence to the left of the saw blade (is that legal?) and trimmed the edges.
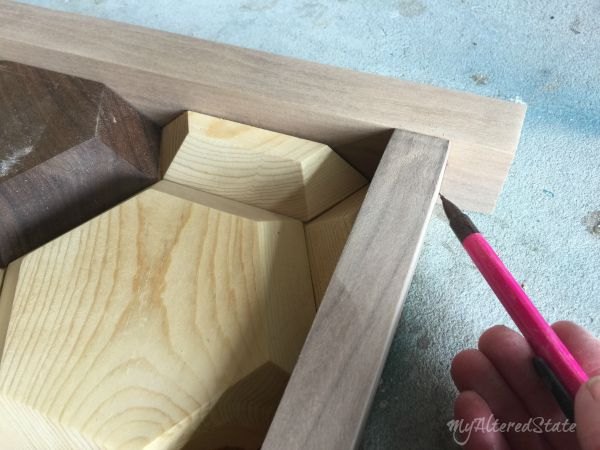
After trimming each edge, I began work on the frame.
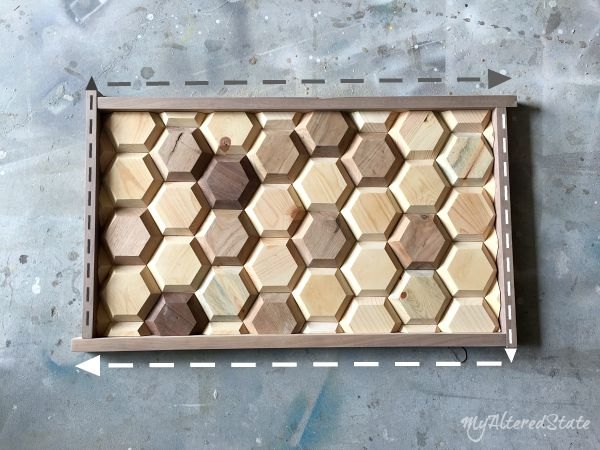
…then marked the ends so I could cut them to size.
Is anyone still with me? This post is getting long.
When I flipped the art piece back over… AHHHH!
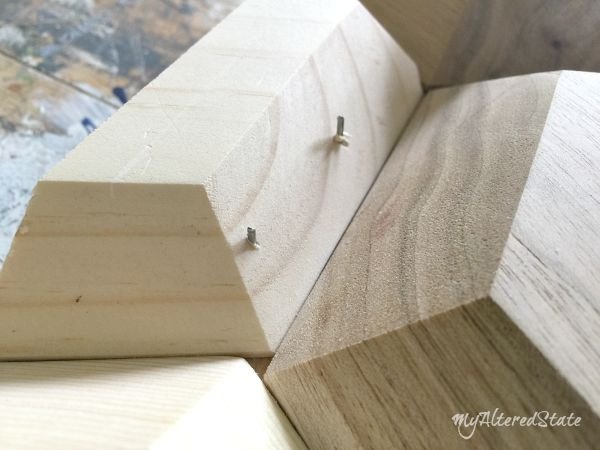
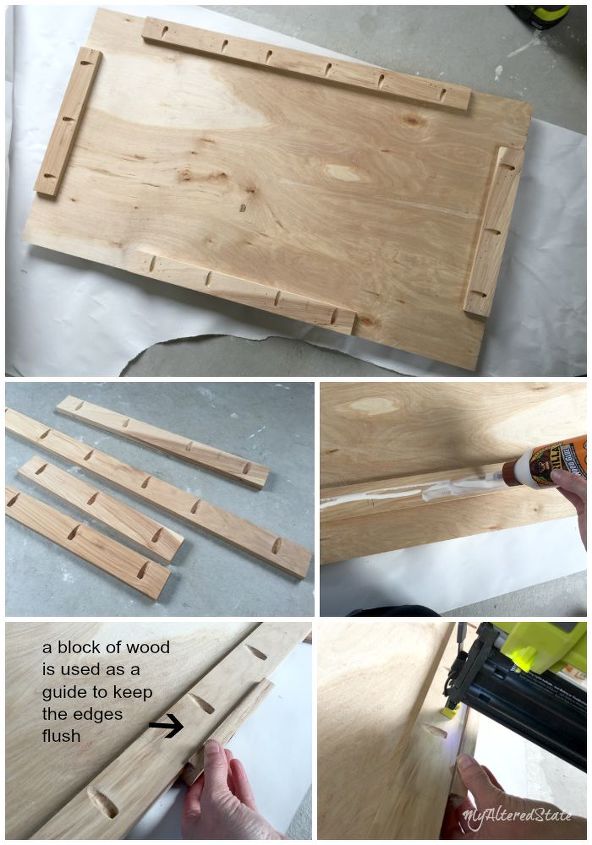
After I fixed that brilliant mistake, I attached the pieces of frame via the pocket holes.
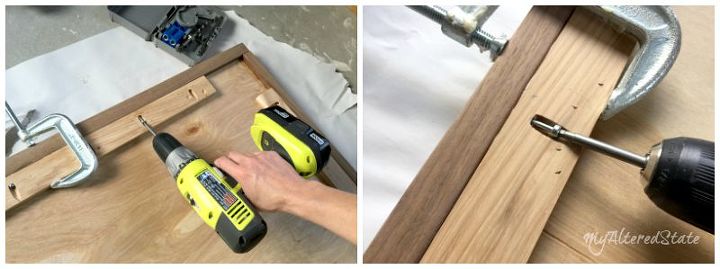
To secure the corners, I used a counter-sink drill bit and wood filler.
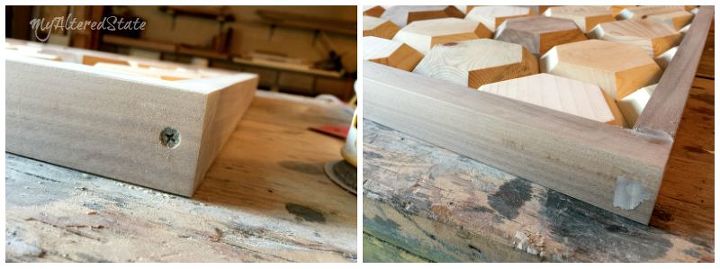
When the wood filler was dry on all four corners, I sanded and wiped the frame down with tung oil.

Want more details about this and other DIY projects? Check out my blog post!
Comments
Join the conversation
2 of 40 comments
-
As a quilter I have always been told that hexagons are a difficult pattern to make. But after seeing what you made, a hexagon quilt is sounding pretty easy! Your work is beyond beautiful!! TFS
-
Don't take this wrong......I like your art with the Hexagons, but I think of all the things you could ACTUALLY USE them for.......make things come to mind. A wooden planter, Initials, a shelf with a little pazazz, and etc. Very nice art!


Frequently asked questions
Have a question about this project?