


Moving a Leafed Out Hosta With the Help of a Belt and Some Tape

Denial-that is what I am in every time I plant a Hosta. I know it is going to grow and get big I just don't believe it at the time. This is probably because I usually purchase bare root Hosta from online retailers and they usually have only a few leaves and 1 or 2 eyes (eyes are what growers call a Hosta division). They seem so small that when I go to plant them I lose all sense and end up putting them where I will eventually have to move them.
Hometalk Recommends
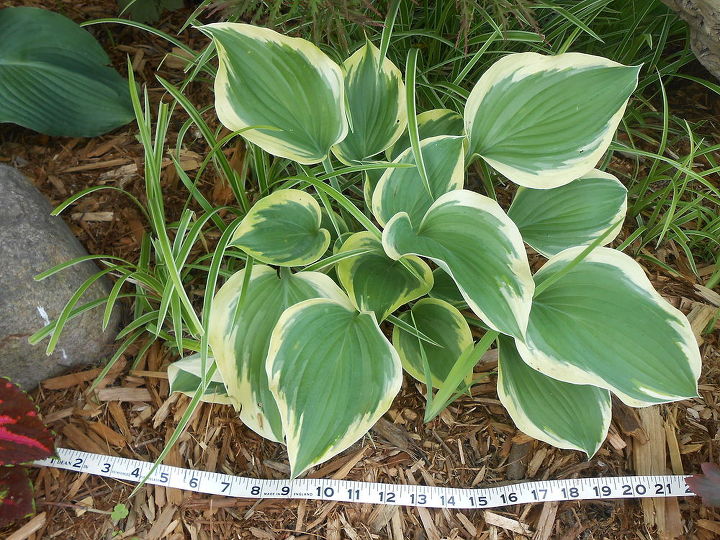
Here are a couple of examples of some small Hosta I planted that will eventually be very large (given time): Here is Hosta "Liberty" which I planted last year. It is hard to believe from her size right now she will eventually be 6 feet wide.
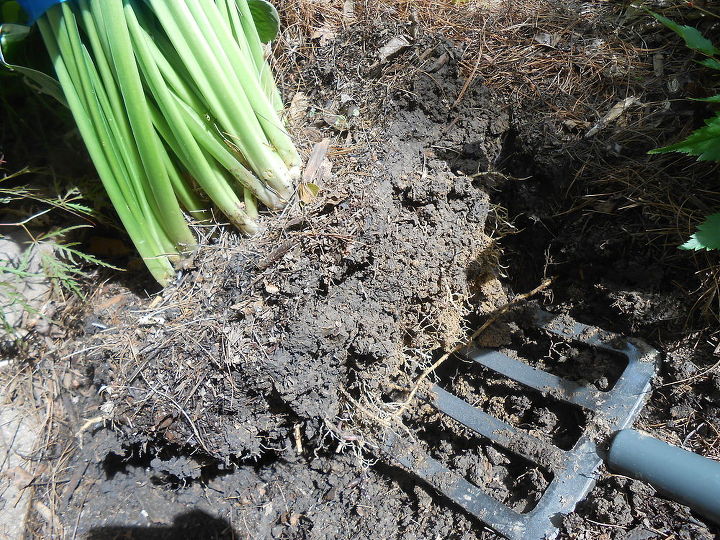
So this denial leads to my Summer ritual which involves moving these beasts to a more appropriate position in the garden without setting them back too much. Using a pitchfork loosens the roots without cutting them like a shovel would do. The tape helps to make digging and moving it easier and also keep the Hosta leaves upright so the roots can pump water up the stems.
What you will need for this:
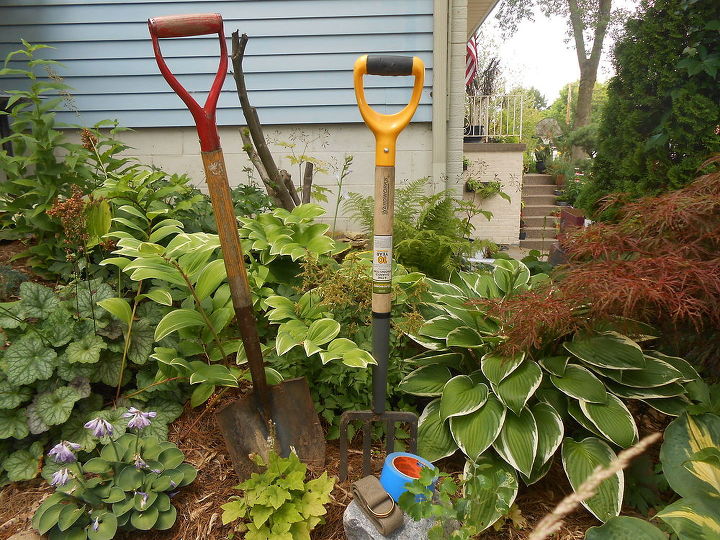
1. A pitchfork or perennial fork-I prefer to use a pitch fork to move my plants I feel it causes less damage to the plants roots than using a shovel
2. A shovel to dig a new hole
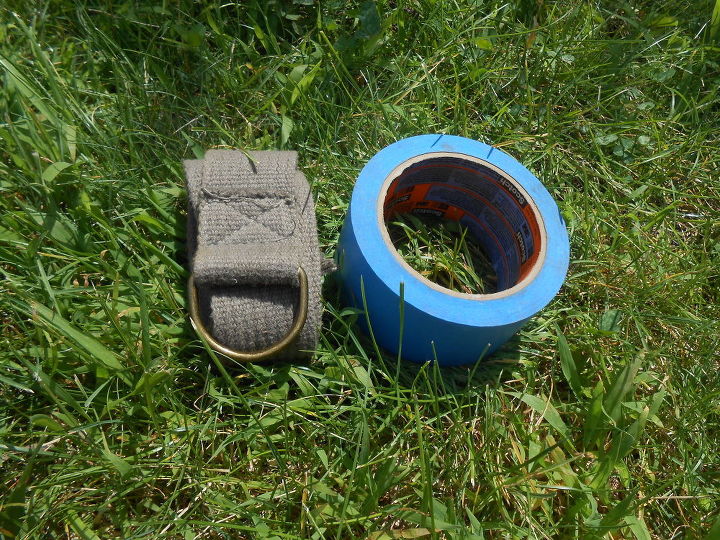
3. Masking tape or painter's tape
4. An old belt with a D ring (or a piece of rope)
Steps to move the Hosta:
1. Dig a hole where the Hosta is going to go or prepare a container for the Hosta.
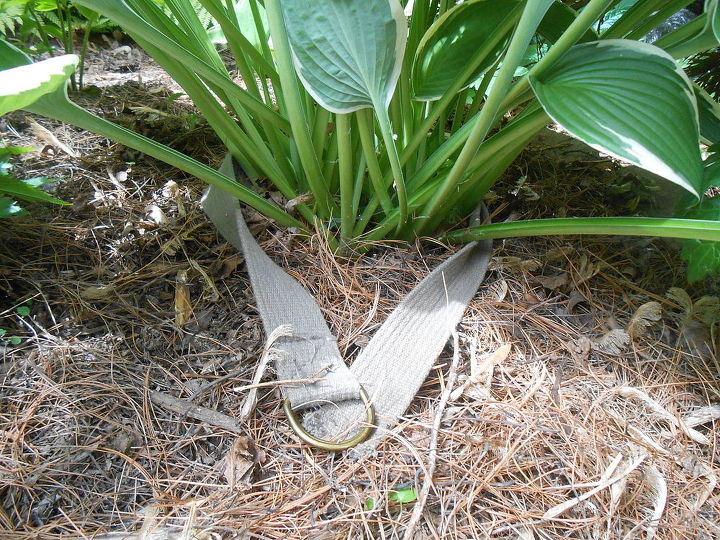
2. Take the belt (or rope) and place it around the bottom of the Hosta:
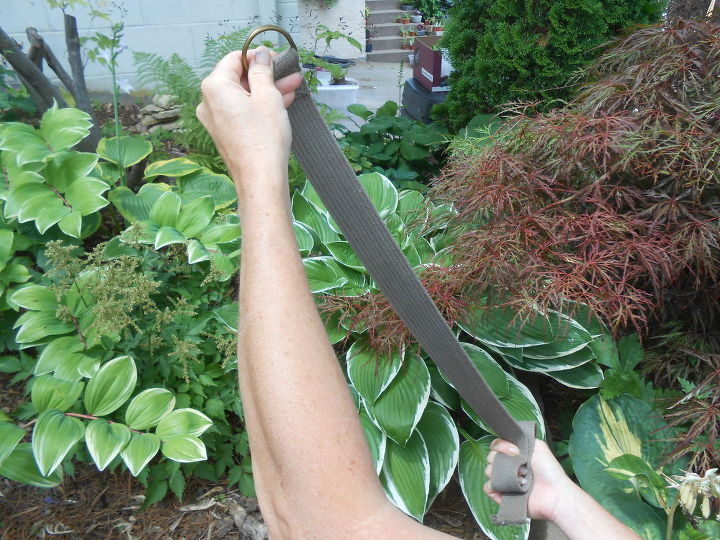
3. Now pull the belt (or rope) up around the stems of the plant:
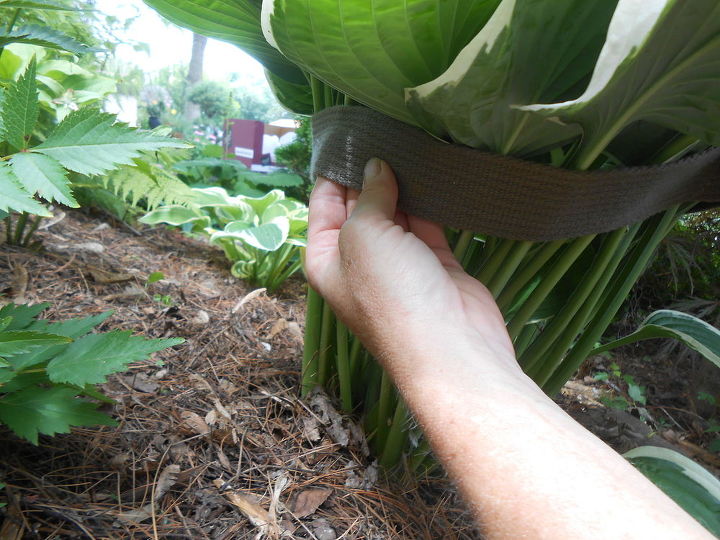
Pull it tight enough to hold the stems and leaves up-as tight as possible without breaking the stems or leaves.

4. When it is tight enough tie it off. If a couple leaves escape that's OK:-))
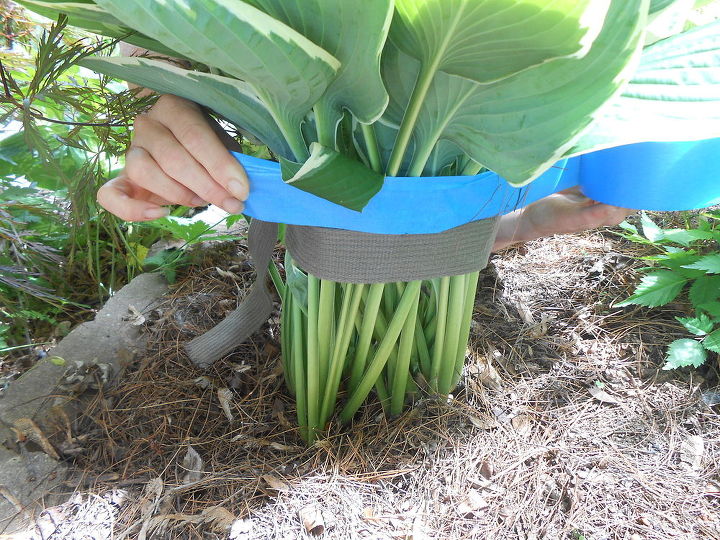
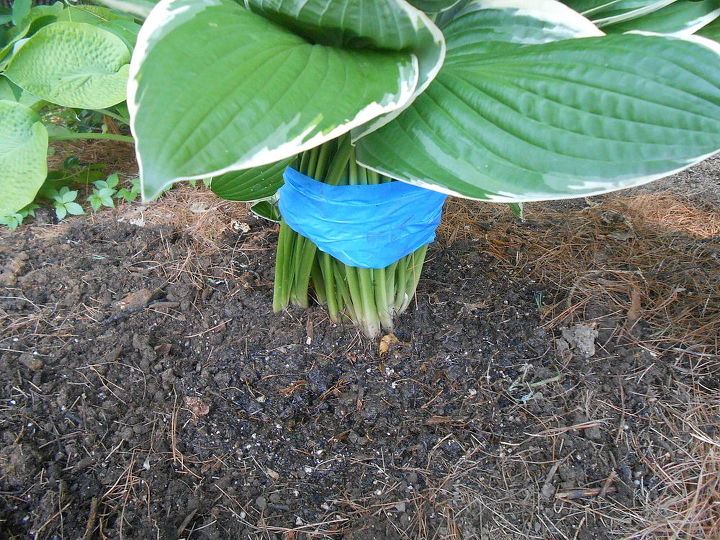
5. Get the tape out and run the tape sticky side out around the Hosta either above or below the belt-I prefer above to keep the leaves in a tight bunch.
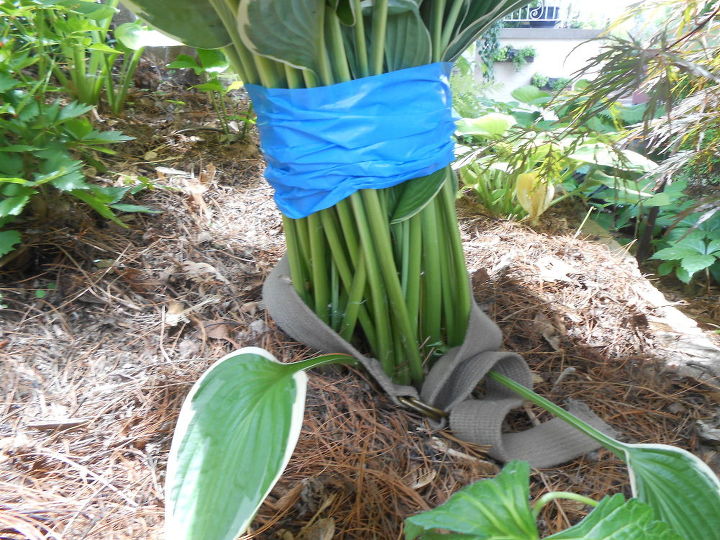
6. Wrap the tape around 3 or 4 times. When you have taped the Hosta you can release the belt and remove it.
7. Now grab your pitchfork. Shove it in the ground around the base of the Hosta and wiggle it back and forth (up and down) where you inserted it in the soil. This is to loosen the roots from the soil. Do this all the way around the base of the Hosta.
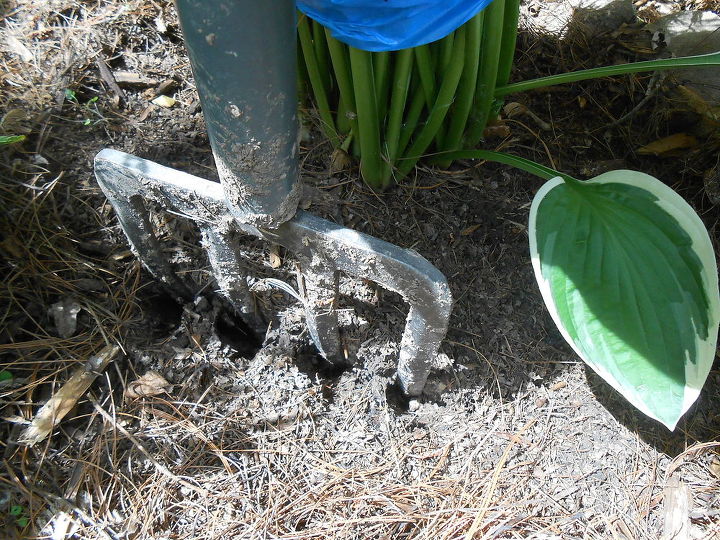
7. Now grab your pitchfork. Shove it in the ground around the base of the Hosta and wiggle it back and forth (up and down) where you inserted it in the soil. This is to loosen the roots from the soil. Do this all the way around the base of the Hosta.
8. Knock off extra dirt by dropping it a couple of times in the hole.
9. Now place it in the hole that you have dug making sure you are planting it at the same depth it was at.
10. Backfill the hole with dirt and water well:
11. Keep well watered until the Hosta becomes established in it's new home. Leave the tape on for a few weeks (until it loosens)-it will help keep the Hosta leaves upright while the Hosta recovers from the move.
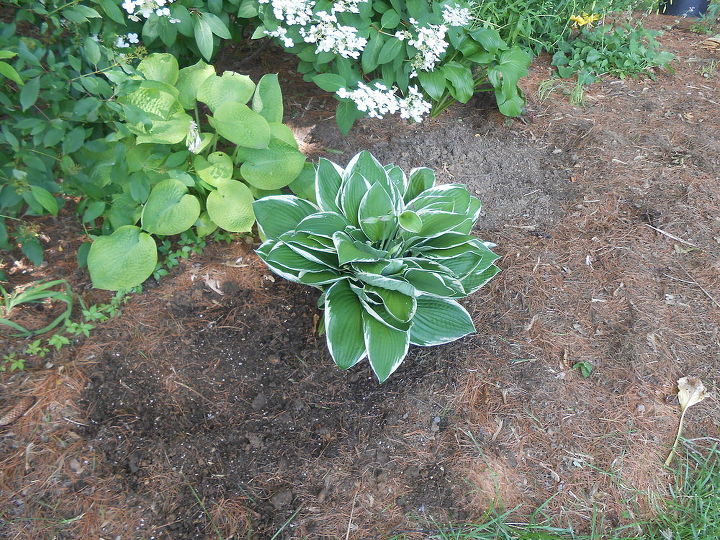
Here is a picture of Hosta "Honeybells" that I moved about a week ago. You will notice how the tape keeps the leaves from wilting and flopping (even in a sunny position).
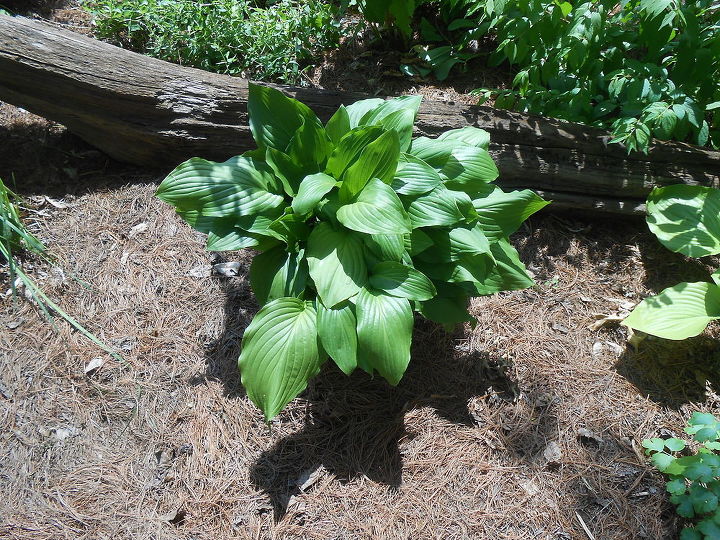
This technique can be used with any size Hosta that is fully leafed out-just make sure to keep the Hosta well watered until it becomes established-which may take the rest of the season.
Visit my blog for more detailed information:
Comments
Join the conversation
-
My hostas are beasts! I've broken two metal pitchforks doing this.
-
Yes, I will try it. However, I would separate them into 1or 2 sections. Hostas (if the deer leave them alone) like to spread out. I find them quite expensive to buy, so I spilt them instead. Then I can place them all around my yard!


Frequently asked questions
Have a question about this project?
My hostas are beautiful when they come up in the spring, but two or three months later the edges of the leaves are all eaten and make the plants look terrible. What can I use to kill these eating bugs?
How do I deal with rabbits who eat my hostas down to the ground?
Will this method also work for peonies?