


Honey Bee House Number

by
A
8 Materials
I wanted a sign that clearly showed my house number but was also attractive. There are so many options available, but inspiration really hit me while I was perusing the aisles of Michael's.
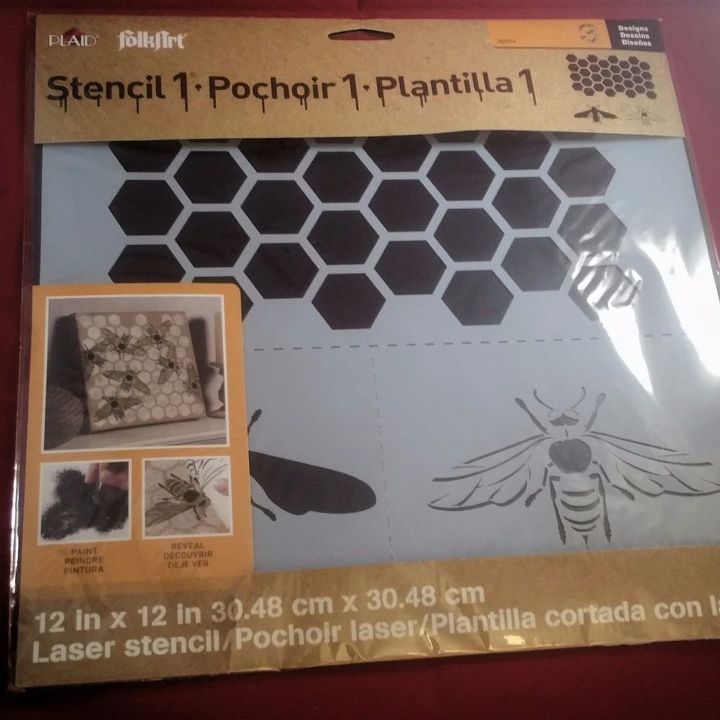
This is where my inspiration came from. It says it is a 12" x 12" stencil, but once you cut away the 2-part bee stencil, it is somewhat smaller. I am partial to the honey bee motif, as my father was a beekeeper.
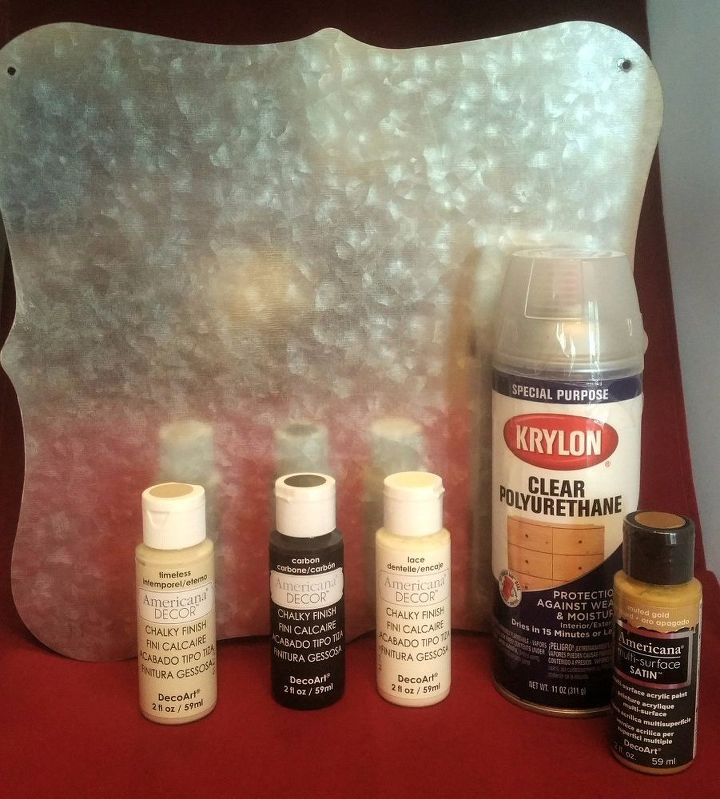
I gathered up the colors I wanted and then searched for the perfect background. I found these sheet metal signs and I knew it would be just right. Colors are listed in the supply section of this tutorial.
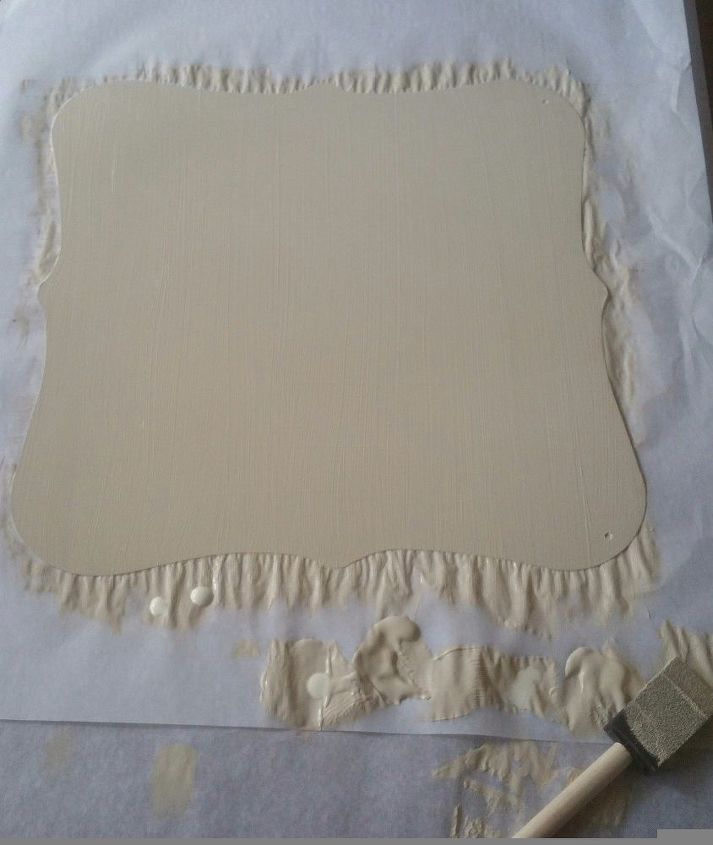
On a prepared surface (I used parchment paper, but any protective material will do), lay the sign flat. Give it 2 coats of Timeless paint (allow to dry in between – I’m impatient, so this is where that small fan comes in handy). Mix 2 teaspoons to 1 teaspoon, Timeless and Muted Gold and about a tablespoon of water. Use this for the final coat on the sign. It should be just a little streaky, but that is okay. Allow to thoroughly dry.
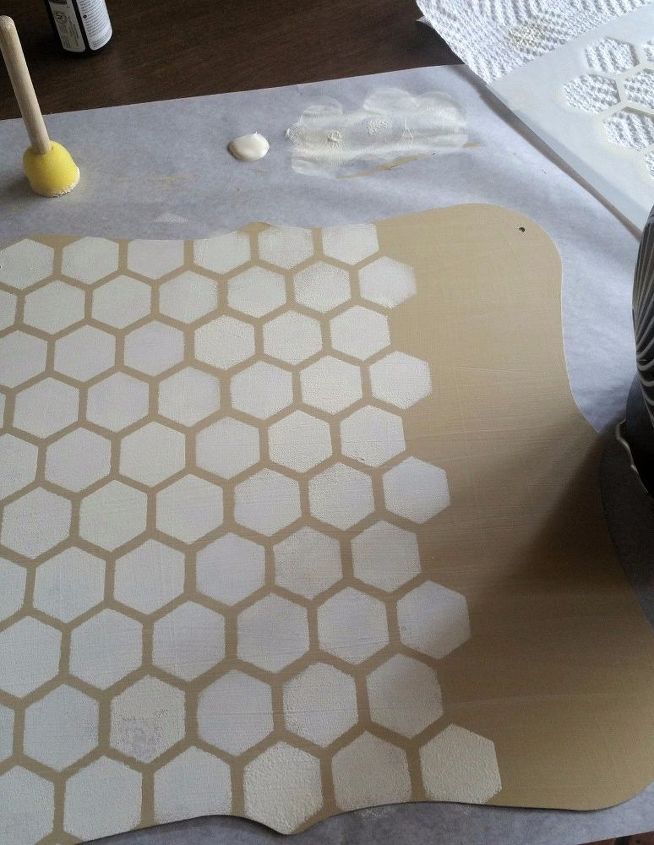
Using the honeycomb stencil and Lace paint, stencil the entire surface of the sign with the pattern.
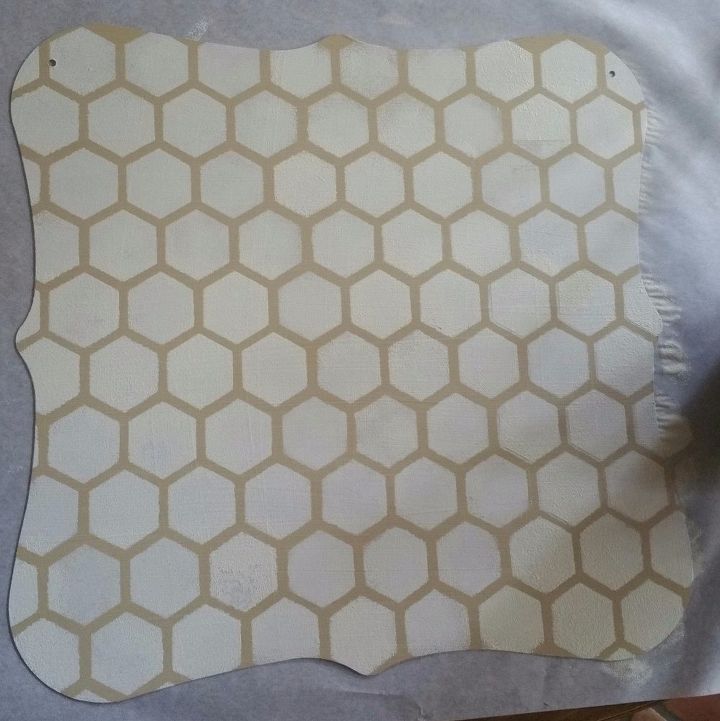
You will have to move the stencil several times – just be careful to match up the pattern and do not cover a previously stenciled area until it is dry. Allow to thoroughly dry.
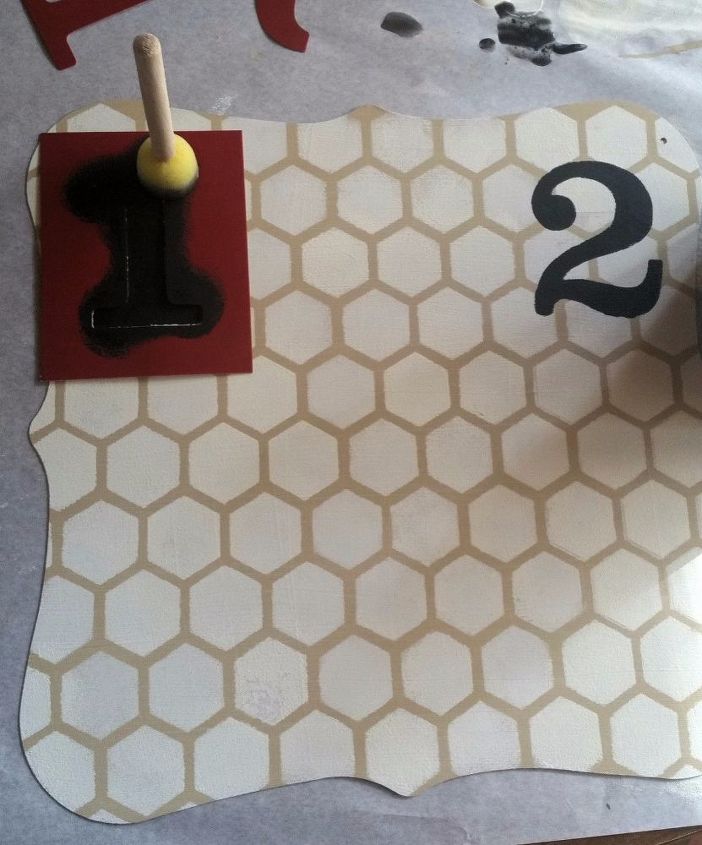
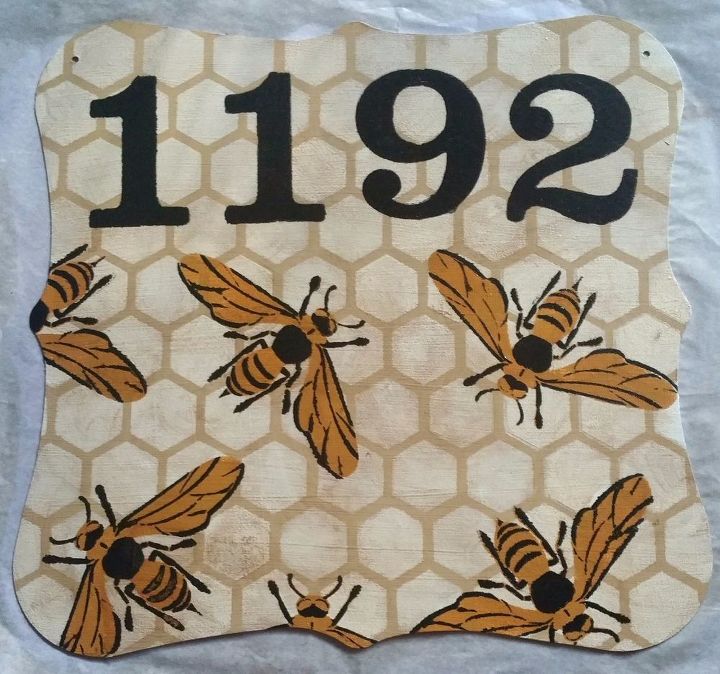
Using the number stencils that you have chosen, decide where you want your house number to appear on the sign. Stencil the numbers with Carbon paint.
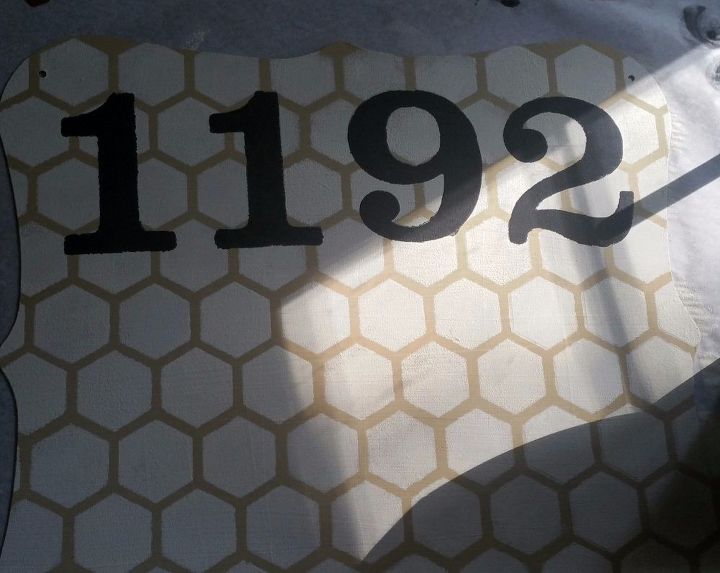
Be careful with alignment and spacing. Allow to thoroughly dry. I chose to set my house number at the top, but on this square sign, horizontal or vertical alignment would work.
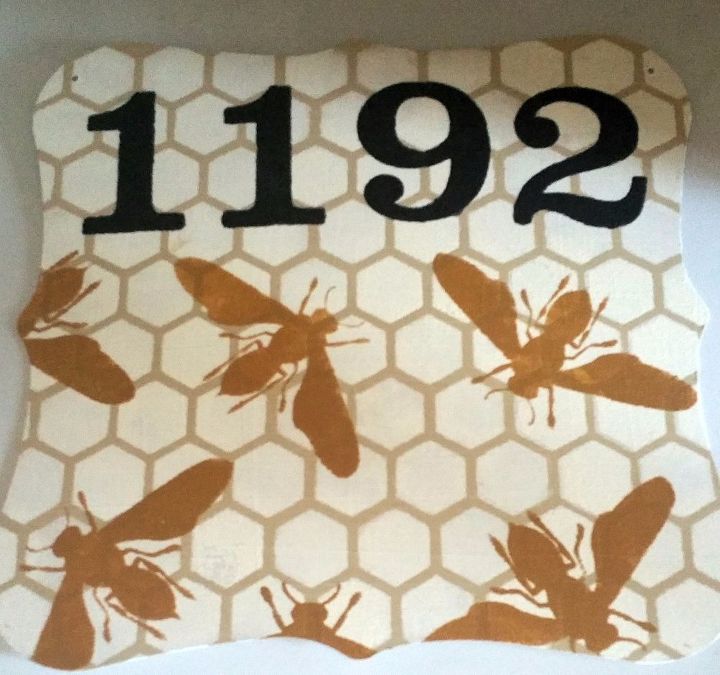
Using the outline stencil for the bee, stencil with Muted Gold paint randomly in the remaining area of the sign. To look natural, you will want to place them in different directions and even stencil partial bodies moving off of the edges of the sign. Allow to thoroughly dry.
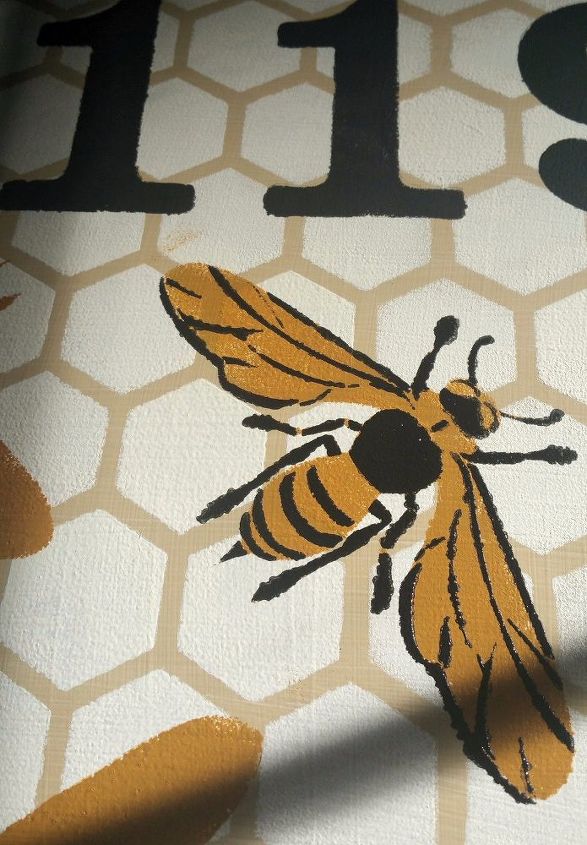
Overlay the detailed bee stencil over the gold bodies and stencil with Carbon paint. Be careful to get the paint into those small areas of the stencil. Do not overload your sponge, as you don’t want it to bleed under the stencil. Allow to thoroughly dry.
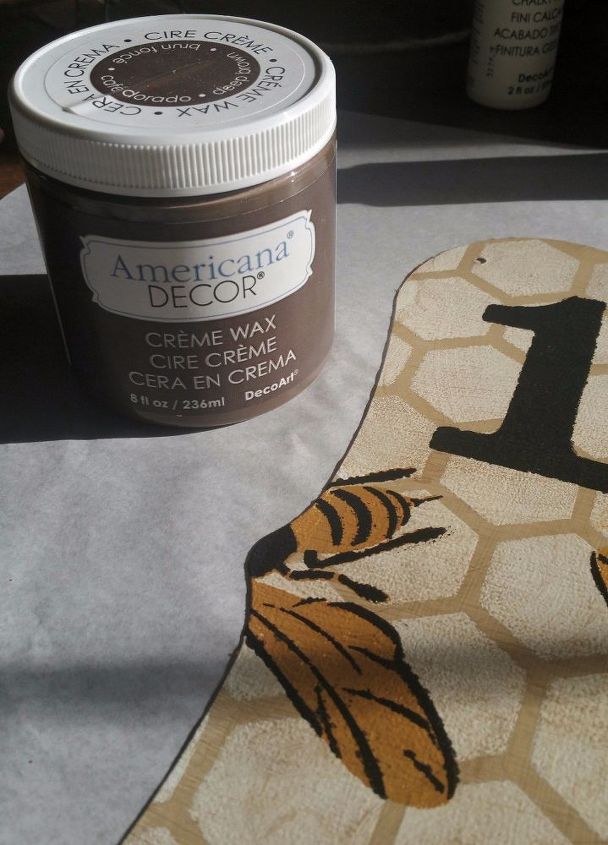
Buff the entire surface with a soft cloth and the Deep Brown Crème Wax until you are satisfied with the look. This step is optional, but I found that it really softened up the stencil to give it a more “hand-painted” and aged appearance. Allow to dry for several hours.
In a well-ventilated area (preferably outside), spray the sign with several coats of Krylon poly to give it protection from the elements. Do this step even if you plan to display your sign indoors, as it will protect the paint from potential wear. Allow this to dry for at least 24 hours or until it no longer has tack.
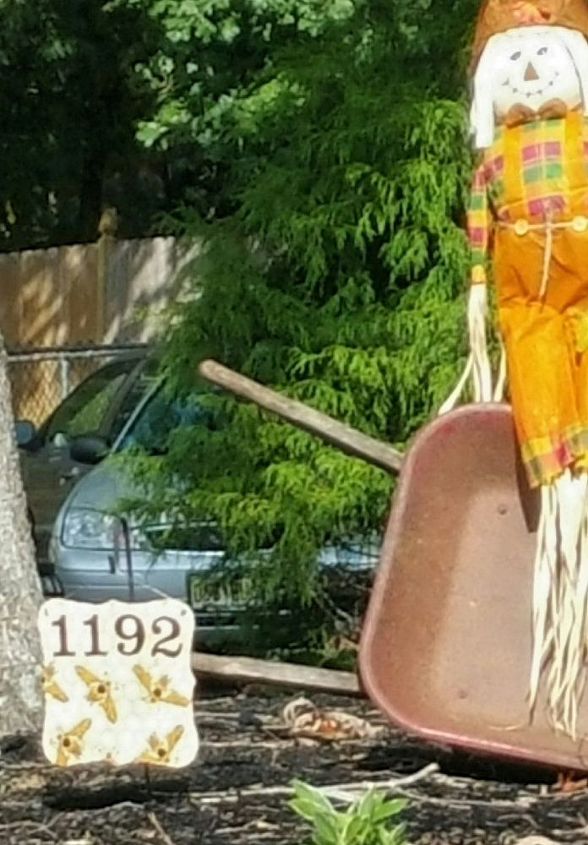
Now my house number is visible from the road!
Using metal wire or picture hanging wire, thread it through the holes in the top of the sign.
Comments
Join the conversation
2 of 25 comments
-
I just moved myself...I will be repainting my sign with a new house number! Best wishes for a smooth transition and a happy new home.
-
I’m definitely doing this! My (husband’s) last name means “keeper of the bees”. It’s Basque! Thanks so much!


Frequently asked questions
Have a question about this project?
what did you use to add the black on the bees?