


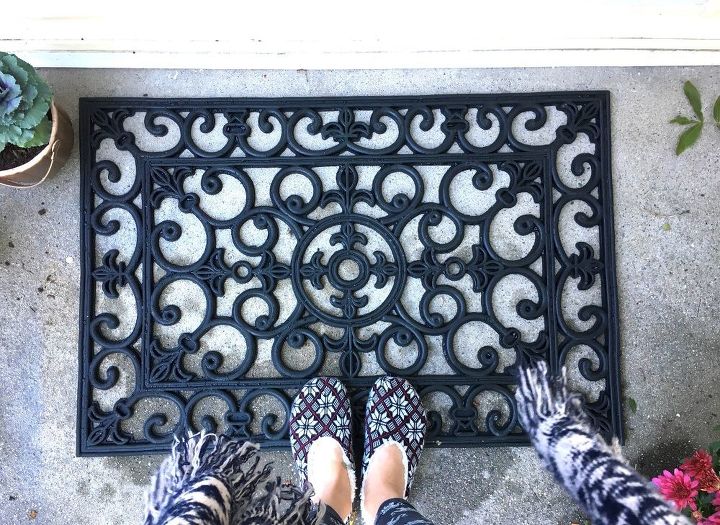
Rubber Door Mat Wall Decor in 30 Minutes

Hey Y'all!!! I'm am so excited about this project!If you're looking for a statement piece for your home decor but don't want to dig deep in your pockets, this is totally the project for you! Who would have thought a door mat could become such a wall beauty?!
We want to help you DIY, so some of the materials in this post are linked to sellers. Just so you know, Hometalk may collect a small share of sales from the links on this page.
Best Rustoleum spray!
Wait 'til you see what this door mat becomes!!!
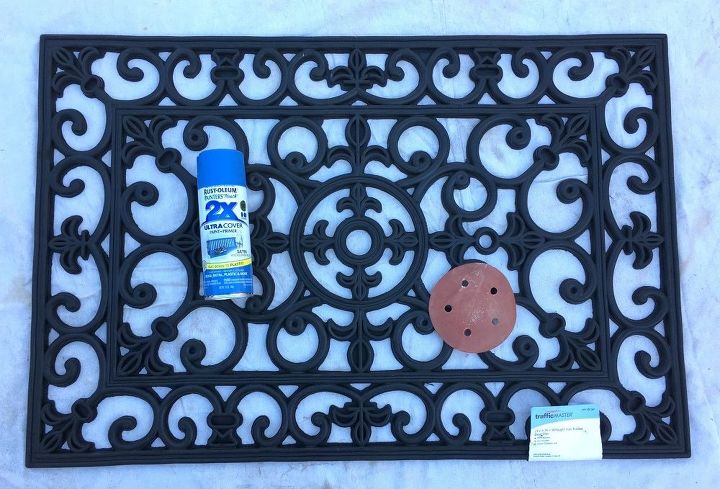
SUPPLIES:
- Rubber mat (Amazon)
- Rustoleum spray paint (Satin Wildflower blue) (Amazon)
- Fine grit sandpaper (Amazon)
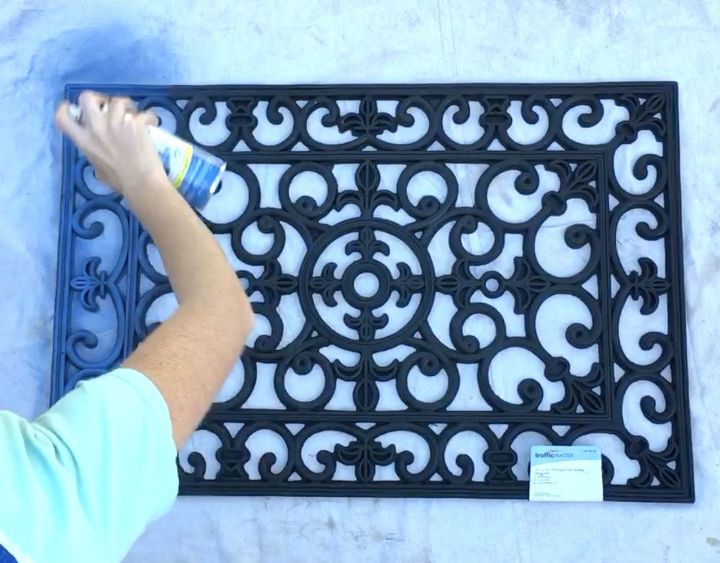
STEP 1: Spray mat First, I spray painted my mat using long, quick bursts. I had a handy dandy spray can attachment but unfortunately, after several years, it kicked the bucket and I haven’t gotten a new one yet. Do one even coat on the front and sides of the mat—I didn’t bother with the back since it was going to be hanging on the wall. STEP 2: Let the mat dry completely.
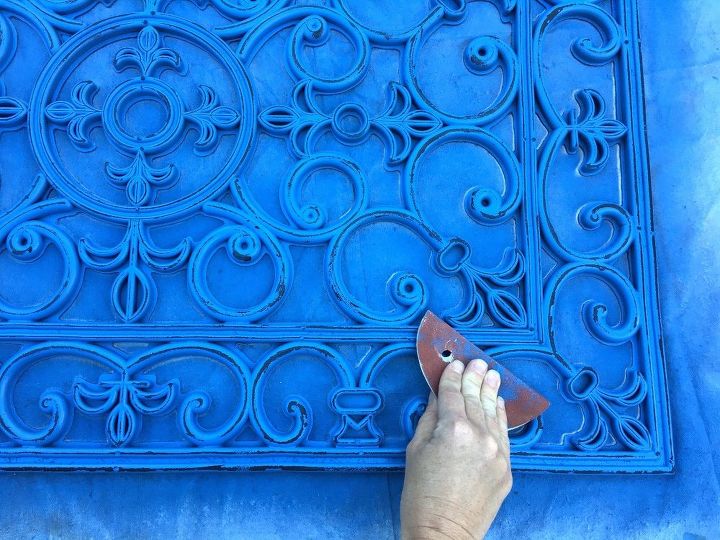
STEP 3: Sand the mat Once my mat was dry, I lightly sanded the top of the mat. You can apply more pressure in some places to give the mat a more worn look.
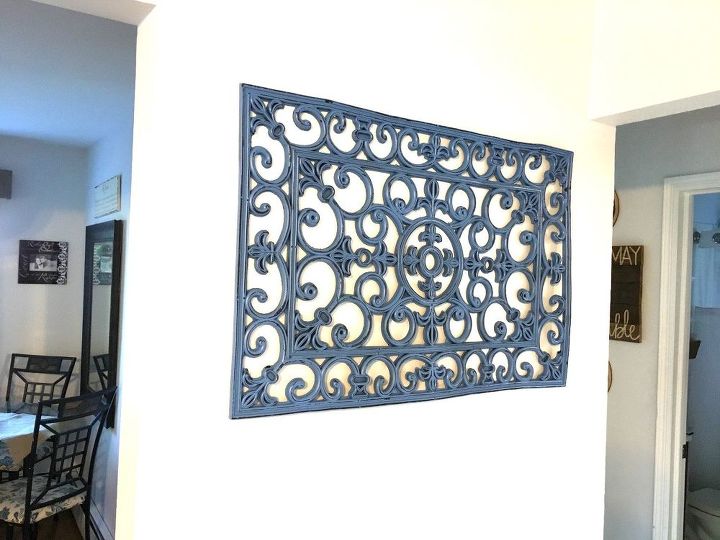
I. AM. OBSESSED!!! I absolutely love the color blue I chose -- I'm half tempted to re-do my entire living room to flow with this color. I am crazy about this project and how quick and easy it was to create a nice piece of wall decor -- you can hang it vertically or horizontally, whatever your decor need is! Score for DIY! :) *The only thing I feel I need to do to is reinforce how my mat is hanging on my wall...I may add a few little small nails on the right side to help it stay flat.
Resources for this project:


Comments
Join the conversation
-
Terrific idea,definitely worth a try!
-
I'm thinking I'll use 2 to make a headboard! What do yall think?


Frequently asked questions
Have a question about this project?
How about those 3M Command Stripes to secure the areas that need it?
Didn't you forget the step about protecting the rest of the wall from the paint or am I missing something?
What was used to hang mat and what size?