


Create a Photo Gallery Wall on a Small Budget
6 Materials
$25
3 Hours
Easy
Have you always wanted to have a show stopper Photo Gallery Wall, but the cost of the frames, the math of figuring out where they all go, or just the work involved with all of it held you back?
For years, at least 12 of them, I have wanted to have a photo gallery wall on my stairs. I finally figured out an easy and very cheap way to have the Photo Gallery wall of my dreams
For years, at least 12 of them, I have wanted to have a photo gallery wall on my stairs. I finally figured out an easy and very cheap way to have the Photo Gallery wall of my dreams
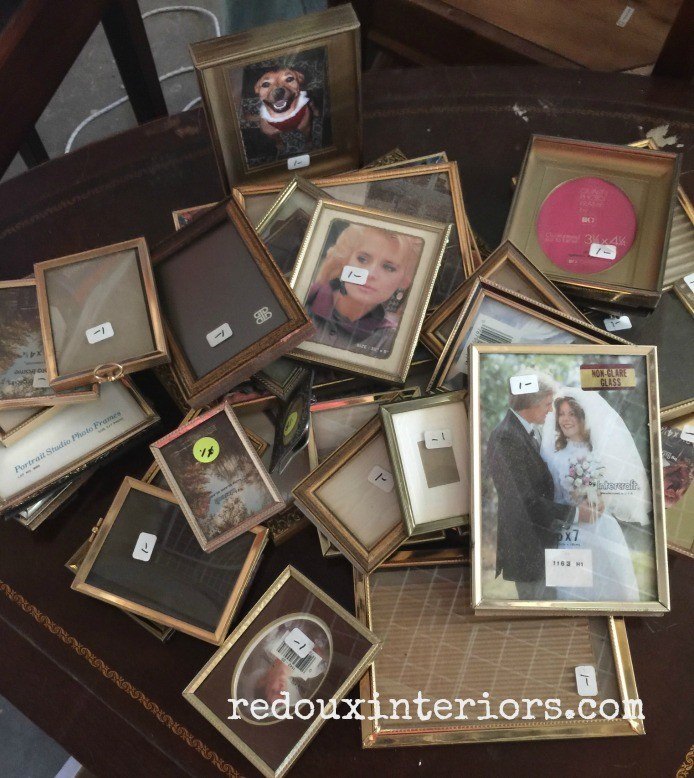
I started with the box of Free Frames I found. They were garage sale leftovers. Most of them were cheap metal or plastic. I also had a collection of frames from several years of curbside picks ups and Thrift Store finds. You could start a collection of Thrift Store frames for a fraction of what they would cost brand new.
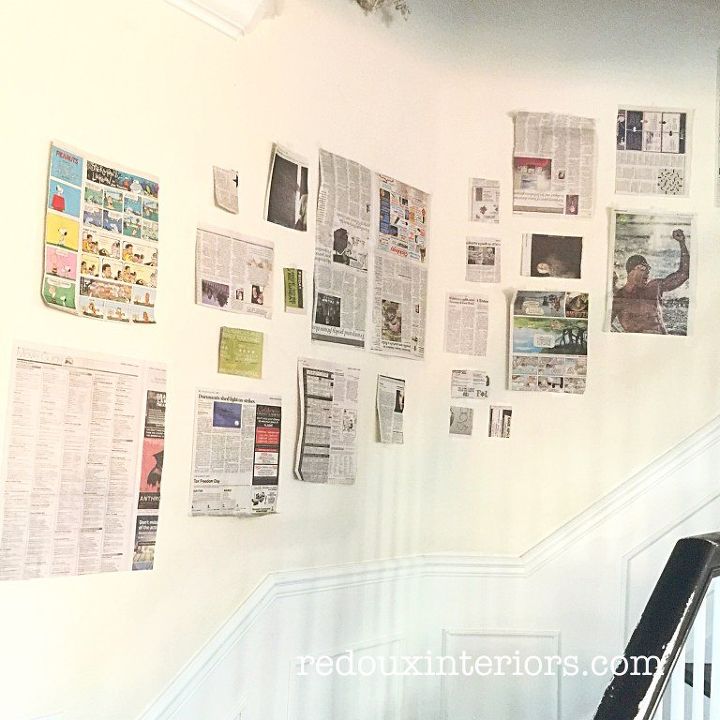
I traced each frame onto a piece of old newspaper. I kept track of how many of each size I had and took the frames apart. Then I arranged and rearranged the newspaper templates on my wall until I had the sizing I and spacing I wanted.
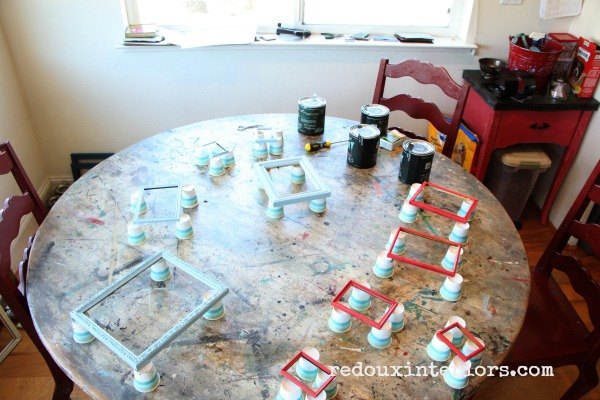
I chose four colors from the Debi's DIY Paint collection. DIY Paint is a 100% natural, Clay Based paint. It paints on easily, the consistency is always the same and the colors are fabulous. But best of all, it adheres to just about any surface. Especially cheap plastic or Metal. I propped up the frames on Dixie Cups while I painted them and for drying.
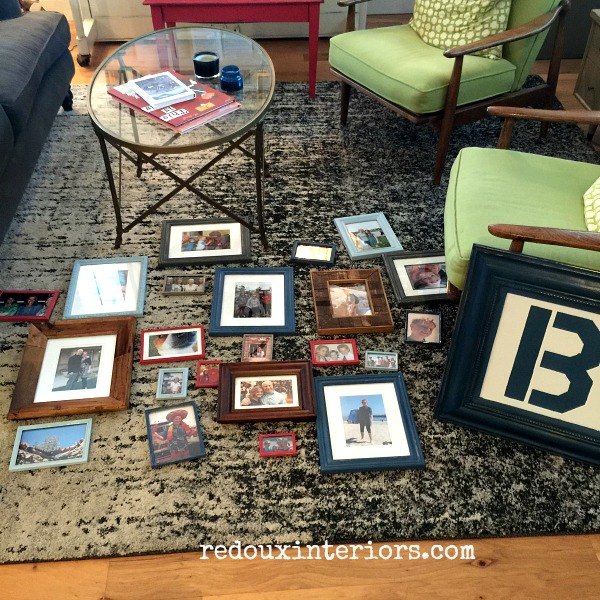
After all my frames were completed, I chose which pictures I wanted to use. For the larger frames, I purchased photo matting from Hobby Lobby. I laid all the pictures on my Living Room floor to just see them all before I put them on the wall.
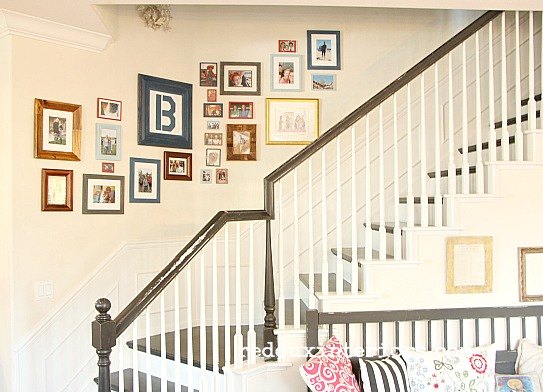
I used a combination of small picture nails, small command strips and poster putty to keep the pictures in place. The poster putty was very useful for the very small frames and to keep the frames from moving as people go up and down the stairs. I am pleased to say the photo gallery has been up for over a month and not one picture has fallen down, or has needed to be straightened.
{
"id": "3573916",
"alt": "",
"title": "",
"video_link": "https://www.youtube.com/embed/acF6jNc8UxM",
"youtube_video_id": "acF6jNc8UxM"
}
{
"width": 634,
"height": 357,
"showRelated": true
}
For more details you can visit my blog post about it and watch my YouTube video for instructions on how I did this project.
Resources for this project:
See all materials


Any price and availability information displayed on [relevant Amazon Site(s), as applicable] at the time of purchase will apply to the purchase of this product.
Hometalk may collect a small share of sales from the links on this page.More info

Want more details about this and other DIY projects? Check out my blog post!
Comments
Join the conversation
2 of 93 comments
-
I have the same problem with command tape. In one area actually took the drywall paper off after cleaning and waiting 24 hours. The frame was light. Needed to sparkle, sand and repaint.
-
I am very curious about this project so I searched for the PAINT online - the website is there - because of COVID we have detected that not everything is available to us in CANADA - the sources that showed that they still had paint has many that are sold out - is Debi's still in business? What is another alternative paint?


Frequently asked questions
Have a question about this project?
Where do you get the paint you talked about? Debi’s DIY Paints? The link to the paint you shared is the junk I always see in the stores. I am allergic to acrylic and would love to find some kind of paint I can safely use.
Thank you just what I was looking for
do you have any ideas for photos on a board type display as well I have lots of pictures small size I want to display but not really sure how to go about it thank you will certainly
be copying your stair gallery
You didn't really mean DIG up all your old picture frames did you?