


Pallet Board Kitchen Island and Backsplash

by
Dejayz
8 Materials
1 Day
Medium
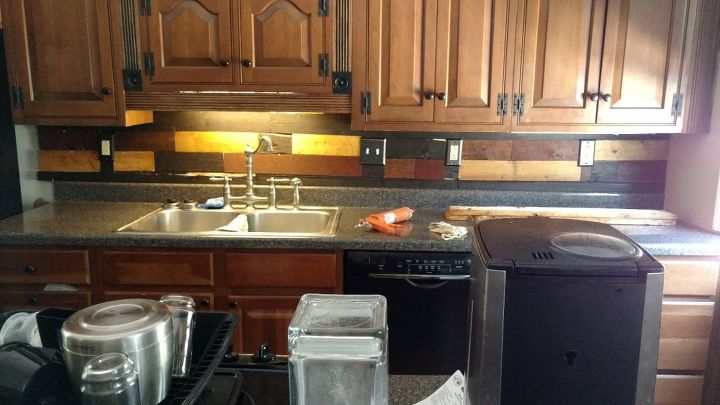
First I got Pallet board basically for free from a supply place that had the wood in between stacks on pallets. Then I chose 4 different color stains. The walls in the kitchen are a Latte Color with Honey hardwood floors and brown cabinets. I chose Kona, Summer, Oak, Cognac and Golden Mahogany.
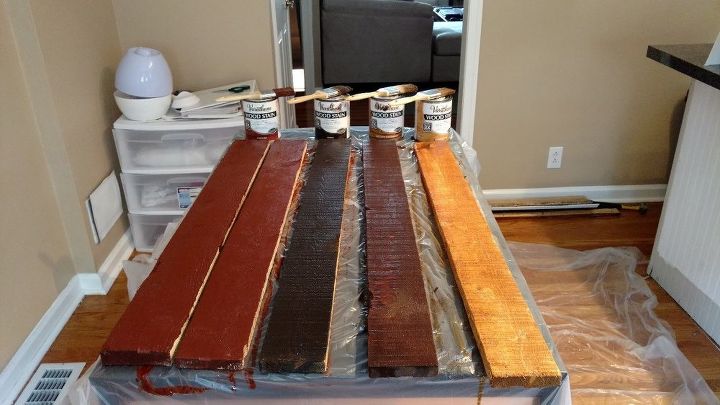
I wanted to get rid of the bead board island look. First I stained about 6 pieces in each of the colors and then let them dry 1 coat seemed to be efficient. I did not sand them smooth cause I wanted the rough look. I did the island first.
Before
Before
Before
Wall Color
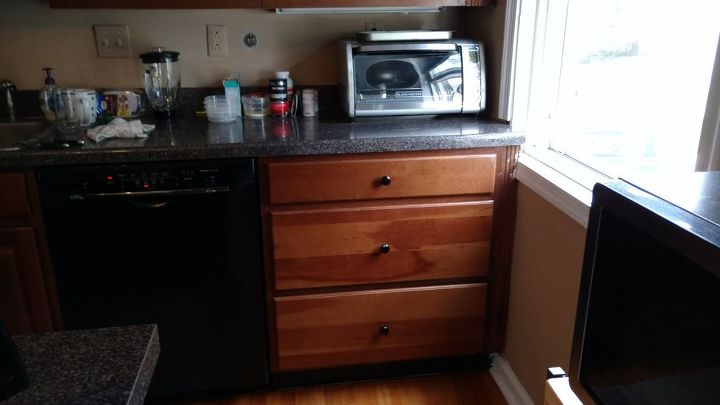
Wall and Cabinet Color
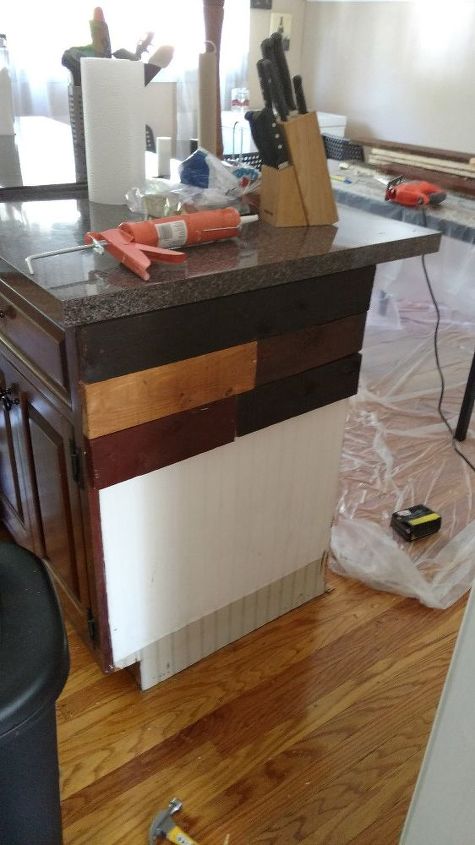
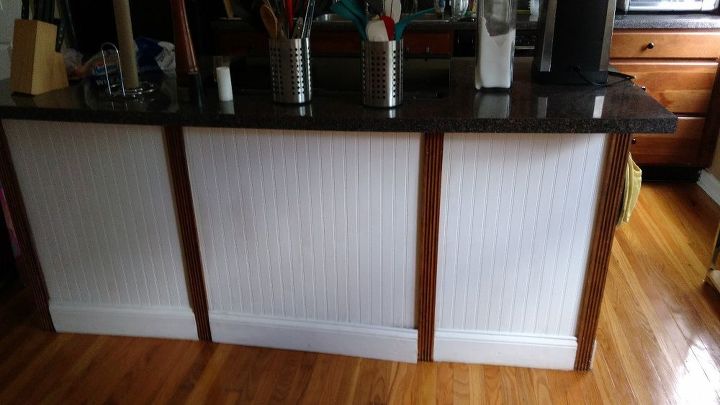
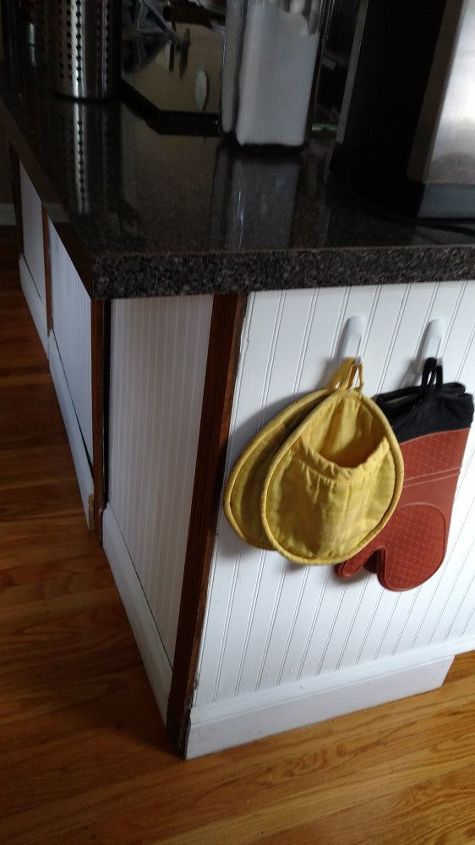
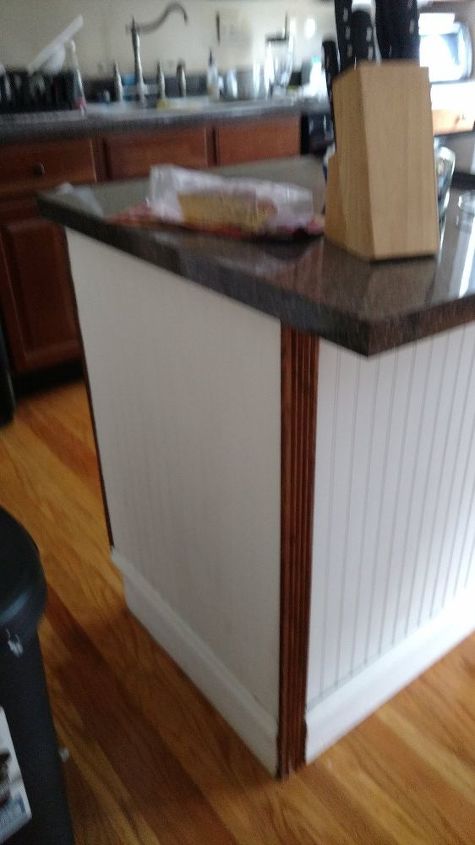
I removed the trim and then started in the sides of the island first, I figured that would be the best way to approach this. I kept the bead board to use as backing for the wood I figured it would be easier and then I used Liquid Nails (heavy duty). To keep the top row from sliding I had to use finishing nails to keep the boards secure. Then I started cutting random sizes and tried my best to give it a staggered look.
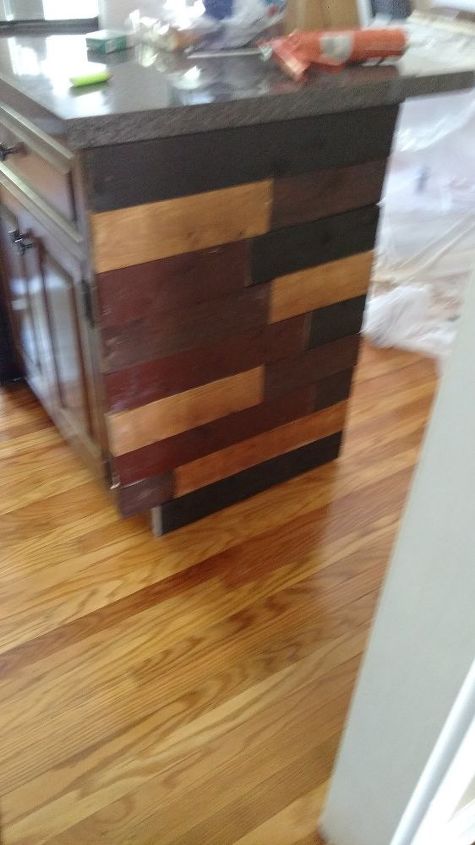
First side finished
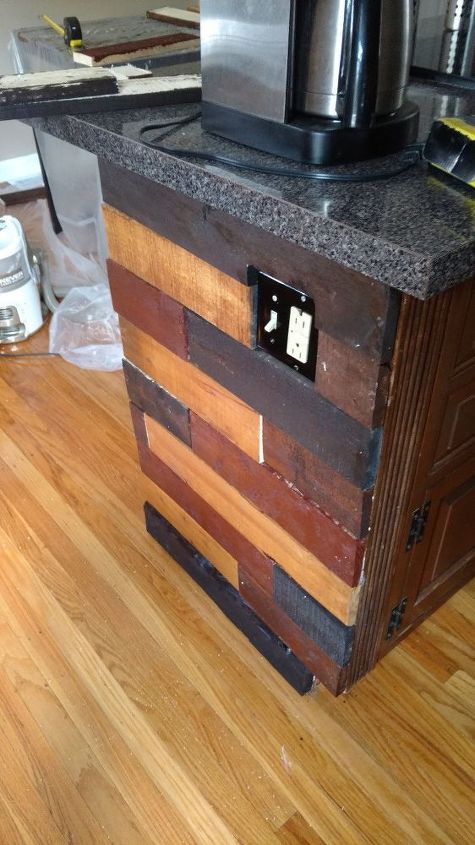
The side with the light switch was a little tricky for me because the wood was just a tad bit too wide and I had to try to cut out the corners with a jigsaw so it would fit around the switch plate. It came out a little crooked but since the light switch plate is black I spray painted the bead board in that area black and then blacked out the ends so it would cover up my mistake.
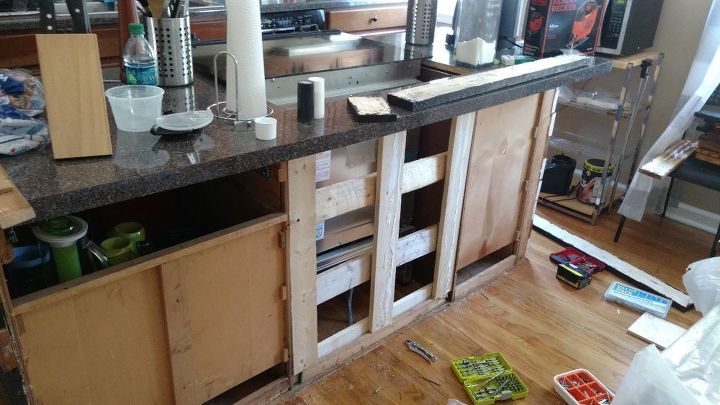
The front took a little more imagination due to the fact that the middle piece of the bead board kept bending back when I would apply pressure or even try to nail the wood to it so I had to build a support behind the bead board and then take it from there.
Since liquid nails did not seem to work best someone suggested Power Grip Ultimate adhesive. I still had to secure the top row with finishing screws because the nails would not seem to work on the front. I made the top row Kona all the way around so this way the finishing screws blended in with the stain.
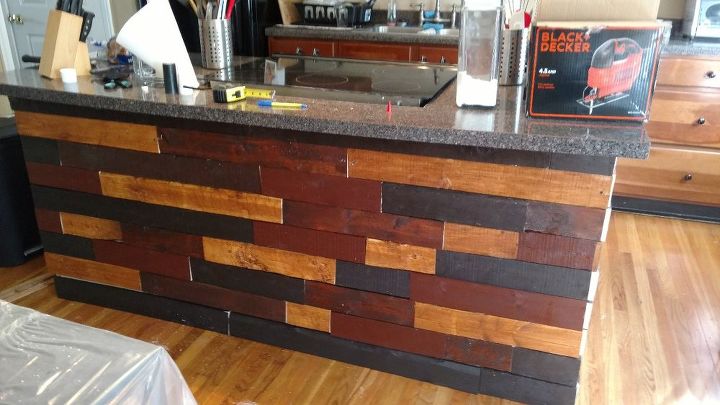
I cut, glued and staggered and then once finished I framed it out on the ends.
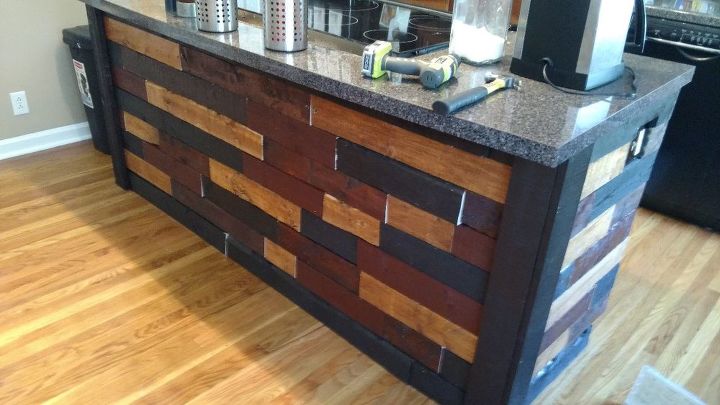
Ends framed out
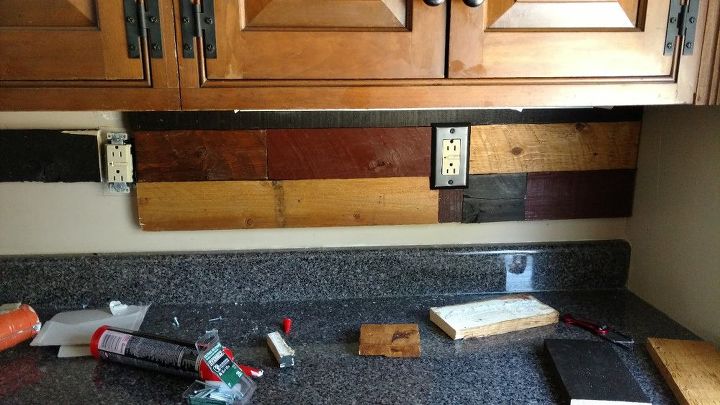
The back splash was alot easier however, this time my neighbor who has a table saw was nice enough to cut the thinner pieces for me at the bottom instead of me trying to cut a straight line for the length of the wood with a jigsaw. I did not seem to get the staggering I wanted with the back splash on the one end due to all the plugs and switches but it still looks good. At least I think so!
Finished back splash
Once all the wood was applied I then used Minwax oil based poly for indoor/outdoor to coat the island and the back splash with a Gloss finish. I applied 4 coats to the back splash to make sure it would water proof it and 2 coats on the island
For someone who has never done this before it turned out really great.
Resources for this project:
See all materials


Any price and availability information displayed on [relevant Amazon Site(s), as applicable] at the time of purchase will apply to the purchase of this product.
Hometalk may collect a small share of sales from the links on this page.More info
Comments
Join the conversation
2 of 78 comments
-
I’m seeing a lot of unstained areas peaking out. I suggest the ends and sides of the pieces should be stained too.
-
Oh, I LOVE it! Thanks for sharing this gorgeous DIY


Frequently asked questions
Have a question about this project?
Just a suggestion for others that may try this on the backsplash. Start on the bottom and move to the top. The uneven, cut boards will be hidden under top cabinets
Oops, forgot to ask.....but is this for your own home, DeeJay, or did Yu do this for a friend? I'm always amazed at the labors of love from a loved one to another -- or the selfless act of service just for the joy of giving to a friend -- and since you're a part of the healing and giving art as a Massage Therapist, I just assumed it wasn't solely for you. I'm right, aren't I?
How did you manage to get the pallets apart? I tried taking them apart and the wood kept breaking.