


Refuse Bin Facelift

by
Samantha
5 Materials
$10
2 Hours
Easy
This project I did isnt really a diy makeover, it's more of a facelift. Our refuse bins are collected 1 a week and then the streets bins are all put together and our son has the duty of identifying and collecting ours. This usually comes with a complaint of them all being black and with the same markings. so I decided to give ours a facelift. really for quick and easy identifying..................and it just looks so much nicer.

This is what our bins look like. Plain and rather boring......... I marked the area I wanted to paint and lightly sanded it down. This will give the undercoat something to grip on seing as though the bins are plastic. I used a white chalk paint for the undercoat, as it sticks to virtually anything. Left the undercoat to dry properly. I sketched my scene and then used acrylic paint to paint it. When finished I sealed it with a clear lacquer. The only costs I really incurred was the paint used (which I already had).
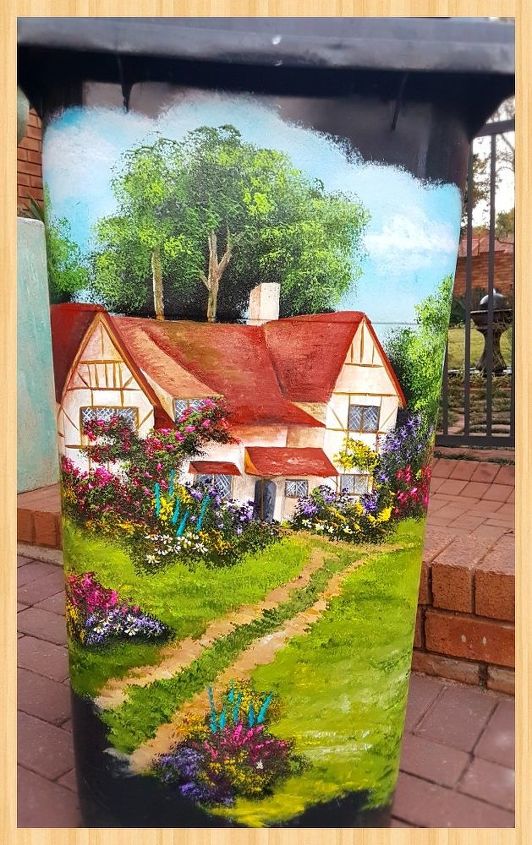
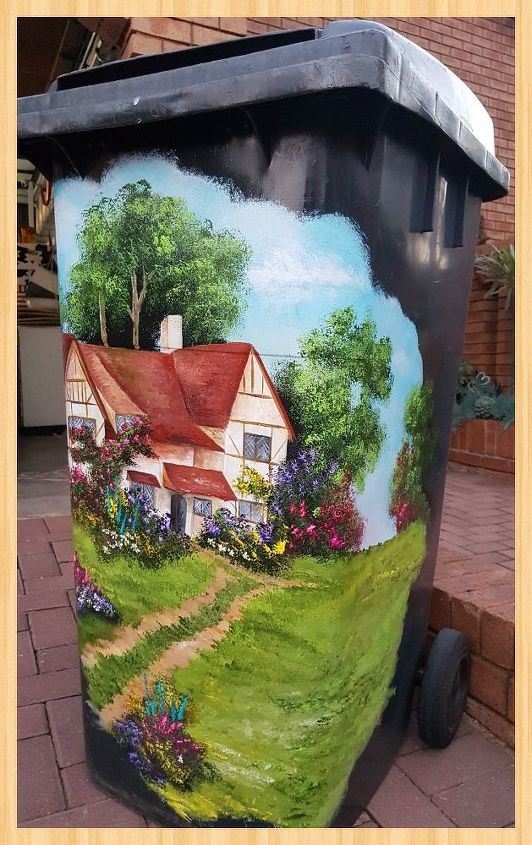
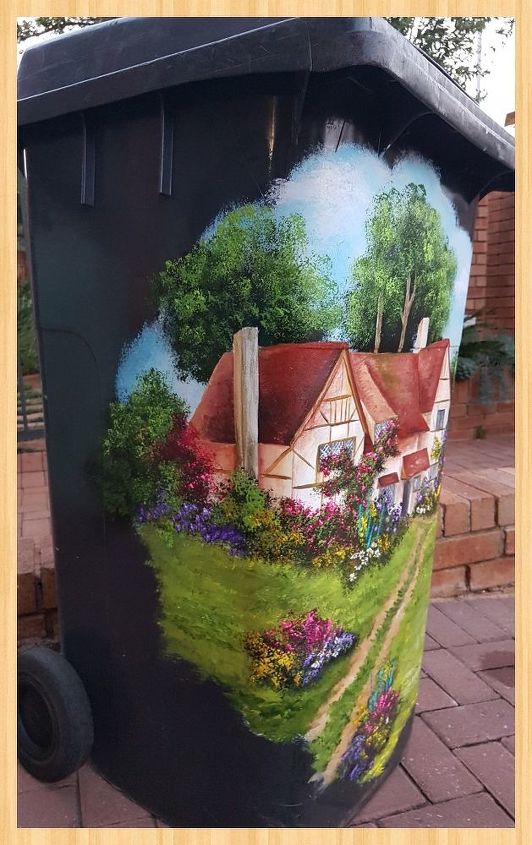
I think this will make it alot easier to identify our bin. I didn't paint the whole bin as the truck lifts it from the back to tip. I'll see this week how it stands up to the tip. I'm happy with the end product.
Comments
Join the conversation
4 of 320 comments
-
I will try this. Maybe stars, fireworks, boats on water watching. Endless possibilities.
-
You are incredibly talented! It's too beautiful for a trash can. Gorgeous!


Frequently asked questions
Have a question about this project?
Being a company owns the bin, did you get permission to paint on the bin? I would hate to waste time on this only to find out I over stepped.
What is chalk paint? You did a beautiful job! I'd be afraid someone would take off with it or the garbage truck would scratch it.
Anyway, very pretty! I'm an artist too, but I 'me never thought of this!
What is your address? I want to come get that trash can.