


A Simple, Non-Traditional Pumpkin DIY In Natural Tones
7 Materials
$30
20 Minutes
Easy
Looking for a different way to decorate a pumpkin? Then check out this simple, unusual pumpkin DIY in natural/neutral tones. It's easy, there's no maintenance & it'll last for a few months.
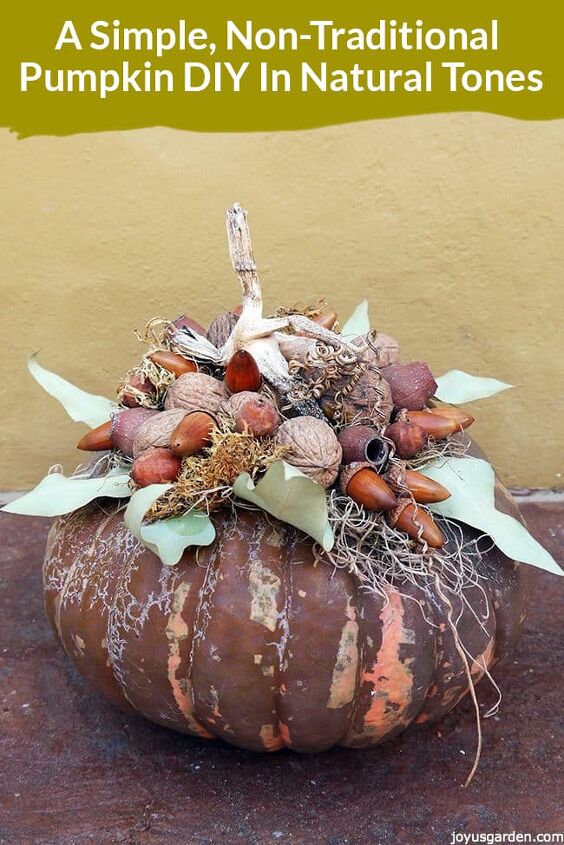
Long gone is the time when you could only buy or grow pumpkins in orange. These days they come in dark to light orange, white, green, blue-grey, peach, yellow, brown with smooth skin, warts, ribbed, and in all shapes and sizes. This brown one caught my eye because I’d never seen one before. It was destined to be – I just had to do a pumpkin DIY in natural tones with this beauty.
{
"id": "4369691",
"alt": "",
"title": "",
"video_link": "https://www.youtube.com/embed/C0R5dRTAMU0",
"youtube_video_id": "C0R5dRTAMU0"
}
{
"width": 634,
"height": 357,
"showRelated": true
}
My client had bought an SUV full of pumpkins and other squashes at Farmer John’s in Half Moon Bay, CA. I was working on a Halloween decorating job at her house and they were all to be part of the display. I took 3 of them home for a little fall decor and later decorated them. This is a really easy DIY which doesn’t take a lot of materials (some I collected) and only involves a few steps. My kind of project!
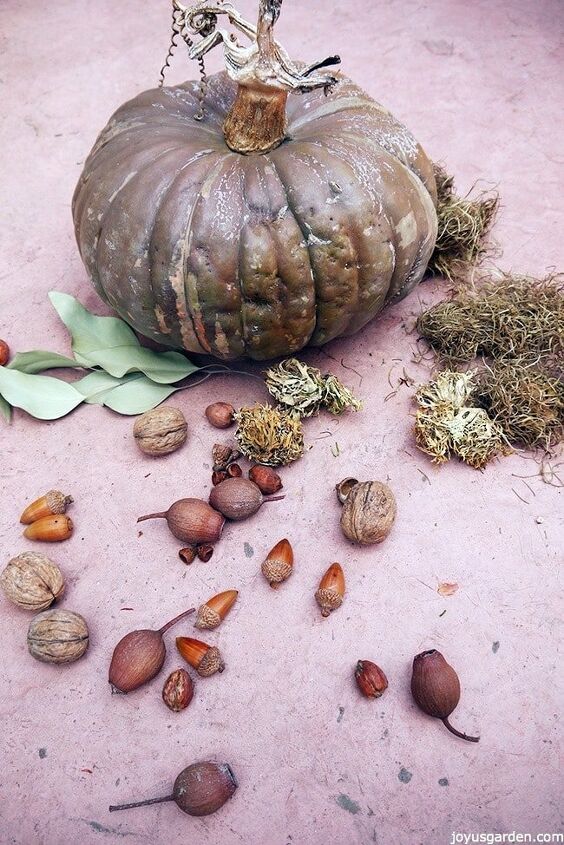
Ingredients:
– brown pumpkin. They’re really hard to find so you could paint or sponge a white pumpkin. I bet acrylic or chalk paint in brown would work just fine.
– lichen
– spanish moss
– walnuts
– acorns (collected)
– red eucalyptus pods (collected)
– king palm seeds (collected)
– seeded eucalyptus foliage (collected)
– hot melt glue
– skillet – I use a large electric skillet which I’ve had for years because I do a lot of crafting.
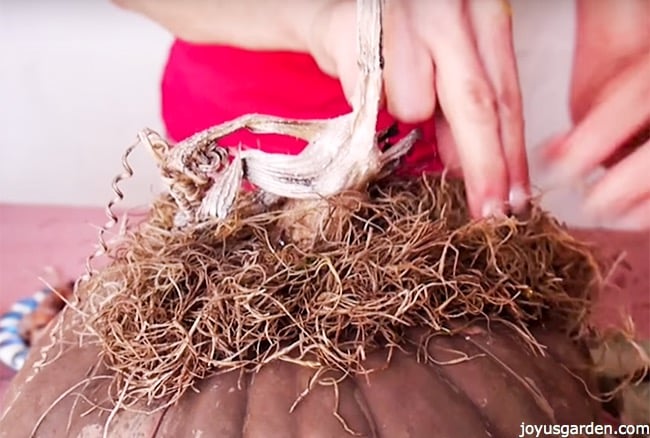
Step One:
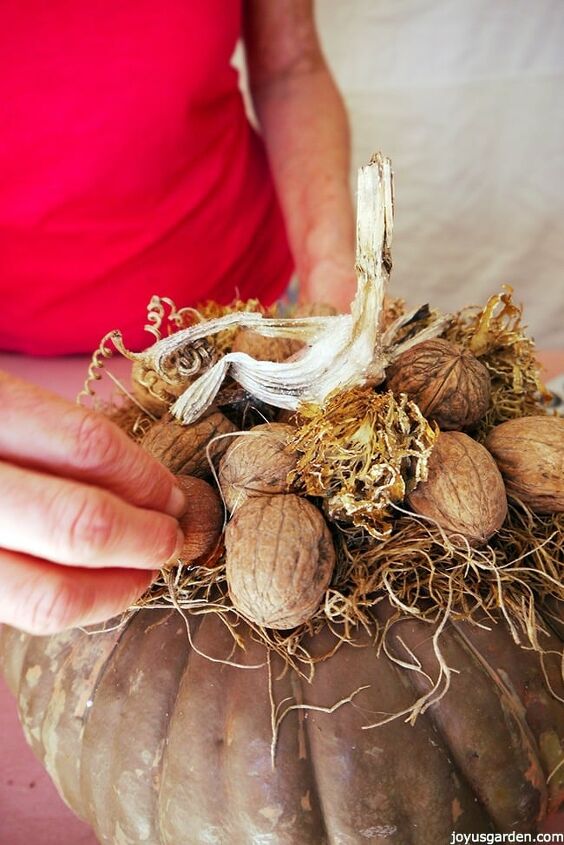
Glue the moss on top of the pumpkin.
The 1st thing I do when I decorate pumpkins, squashes or gourds is glue moss on at the top. This gives the ingredients I’m decorating with something to attach to.
Tip: If your moss has gotten old & dry like mine here, simply soak it in water to revive it. This makes it much easier to work with.
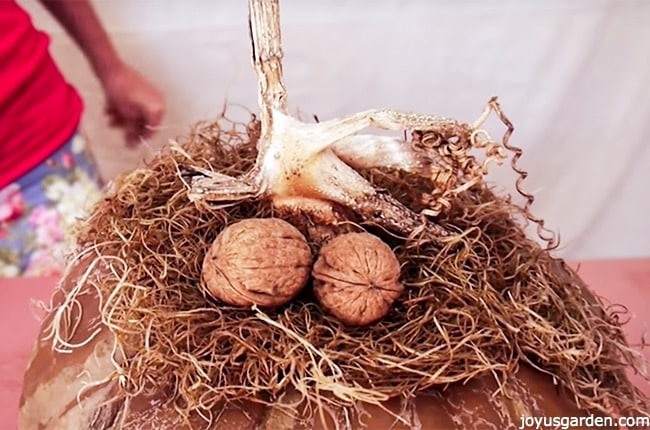
Step 2:
Add the walnuts on top of the moss.
Tip: Walnuts are a bit on the heavy side so I held them in place for about 10 seconds while the glue dried.
Step 3:
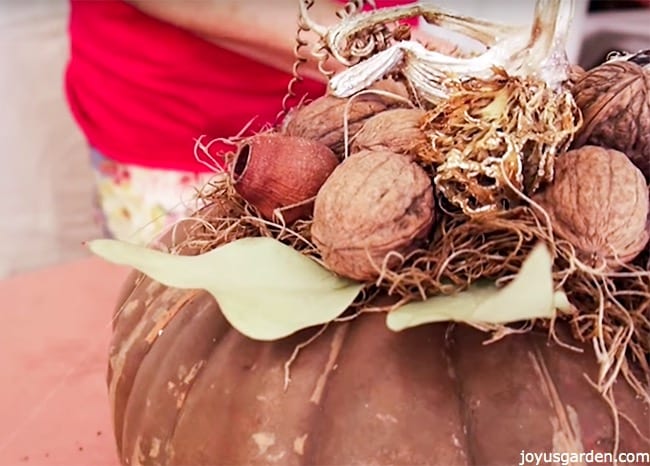
Add the lichen & eucalyptus pods.
Step 4:
Add eucalyptus leaves (I had already dried mine for another project) under the moss.
Tip: If you cut the stems off it’s much easier to glue the leaves in under the moss.
Step 5:
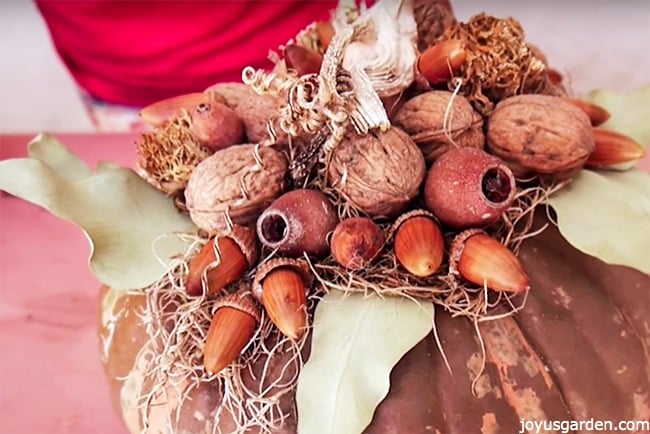
Add in the acorns nestling them at different angles amongst the nuts and pods.
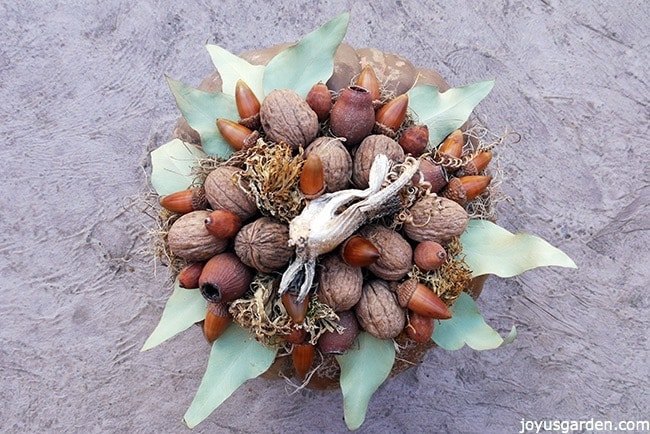
The collected materials were foraged in the Santa Barbara, CA area. Use whatever nuts, seeds, pods and leaves you can get your hands on to create a similar look. As much as I dig bright colors, I just love this natural/neutral look. How about you?
Happy creating, Happy fall!
Nell

Want more details about this and other DIY projects? Check out my blog post!


Frequently asked questions
Have a question about this project?