


How To Use The PVPP Method

by
Holly Grace
2 Materials
$15
4 Hours
Medium
Hey, friends! A lot of people ask me how I make my wood signs. You know those gorgeous ones you see all over Pinterest?
Well today, I am spilling my secrets. To make a long story short, it's the PVPP Method!
Still confused?
To make this as easy as possible, I made a video! So read through this post and then be sure and watch the video at the end to see it in action!
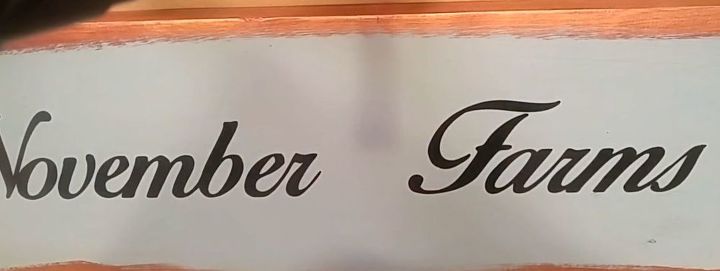
So the PVPP method stands for Paint, Vinyl, Paint, Peel.
The first thing you want to do is paint your piece of wood, the color that you want your lettering to be.
Let this paint dry and then place your vinyl lettering on your piece of wood.
Next, you go over the viny in the same color of paint as your first layer — so the color you want your lettering to be. Let it dry
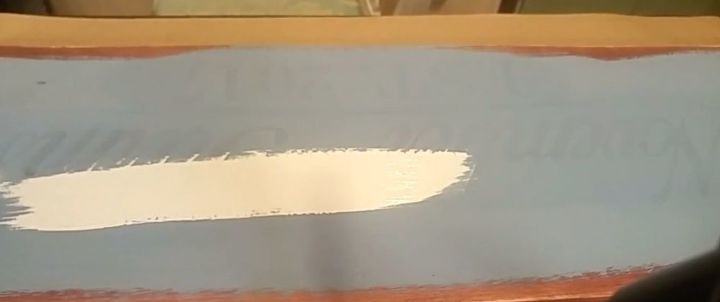
Next, paint your sign the color that you want the background to be. Let it dry till it's about tacky and then using a sharp instrument peel up the vinyl lettering.
Instead of me typing it all out. See for yourself!
Give this video a watch!
{
"id": "4420646",
"alt": "",
"title": "",
"video_link": "https://www.youtube.com/embed/98ZQHjUAIbo",
"youtube_video_id": "98ZQHjUAIbo"
}
{
"width": 634,
"height": 357,
"showRelated": true
}
If you like this video, please subscribe to my YouTube channel.
Honestly, I am just getting started on YouTube, but there will be lots of great content to come!
Feel free to also check out my blog by following the link below!
Want more details about this and other DIY projects? Check out my blog post!


Frequently asked questions
Have a question about this project?