CD Unit Upgrade

by
Clint
(IC: blogger)
3 Materials
$15
5 Hours
Easy
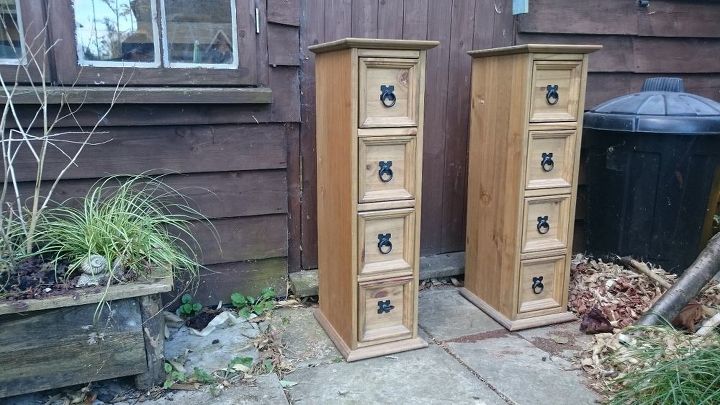
I was requested by my mum to take these two CD units and turn them into one cabinet. They're from a furniture range called Corona and seem to be some kind of pine with a light brown dye added. Her requests were that the back board have that particular shape and that there was a top and three shelves. I used some pine I had stored after taking a desk apart to make all the pieces needed.
If you'd like to see the build then feel free to check out the YouTube video, I'll also include some more description on how I made it below.
{
"id": "4472063",
"alt": "",
"title": "",
"video_link": "https://www.youtube.com/embed/688GKvU3WhA",
"youtube_video_id": "688GKvU3WhA"
}
{
"width": 634,
"height": 357,
"showRelated": true
}
I decided to cut the shelves first as I knew how wide they had to be, after they were cut I could use them to figure out the rest of the measurements. For the shelves I just used a simple pine board that was previously used as a shelf but had been taken down recently. The three shelves were 28cm long each.
Not having a pocket hole jig and wanting to use hand tools only anyway, I decided to just chisel out some pocket holes instead. After using the combination square to make each hole end about 1cm from the edge I started to make the vertical cut with a small chisel. After that it was just a case of taking the waste away at an angle.
To be honest this was a really quick thing to do and maybe its not as fast as a pocket hole jig but its about 100 times more satisfying!
I made these pocket holes in the underside of the shelves and the two back pieces behind the shelves.
The tops of the CD units were a little awkward as once the screws were taken out the backing was still nailed on. So instead of trying to get the nails out of the backing and probably cracking it I decided to cut a deep line under them and then carefully bend the wood to snap it off.
With the shelves cut I decided to do a "dry fit", basically clamping the shelves between the two units. I then got the top board and lied it on top of the units, using a combination square I made it so there was a 2cm overhang on each side (except the back). After it was marked up I cut it out.
I then used the length of the top to measure and cut the length of the back.
This is where everyone will have their own design ideas. I personally liked the unit without this back piece but it was requested so I had to do it. I measured down from one side the height I wanted the decorative part to be. I then went about marking a higher piece in the centre and an angled line down from each side. After all the straight lines were marked I just sketched the angles into curves.
Clamping it down and using a rip saw on the straight parts seemed the most sensible thing to do and then I used a coping saw to cut the curves. A combination of a block plane a chisel was then used to get the final finish.
Check out the video to see more of the process.
After sanding down all the pieces to about 240 grit I cut a piece off an old t shirt and put some of the dye onto it. This is a very simple process though will sometimes require a brush to get into tricky areas. I also found that applying it too heavily to end grain will cause it to bleed further into the wood but it does seem to be fading over time.
The main thing to remember with dye and this dye in particular is that it will often dry to a different colour than when you applied it. I knew that this dye was similar to the Corona furniture as I've used it before but when first buying a dye make sure you do a test piece first to see how it turns out.
With the wood all dyed I could screw everything together. I screwed the shelves on first with clamps holding the units together from either side. This ensured not only that I had everything secured in place but also that the screws didn't push the wood apart when I screwed them in.
After the shelves were attached I put the top on and screwed it in from underneath, using the same screws and the same pocket holes used in its manufacture.
I then took the clamps off and held the back piece onto the unit, marking where I wanted to add screws. I then took it to the bench and drilled some pilot holes through it and countersunk them. After that it was just a case of screwing the back on and then all done!
All in all this was a pretty easy project but also quite rewarding. To see the amount of extra storage space that was created and also how well the dye matched was pleasing.
Thanks a lot for viewing that project, if you enjoyed that then please give the a like to see behind the scenes photos and to keep up with my future projects.
As always, all comments, criticisms and general greetings are welcome!
Enjoyed the project?
Suggested materials:
- Pine boards (Recycled shelves)
- Screws (Hardware shop)
- Wood dye (Hardware shop)

Want more details about this and other DIY projects? Check out my blog post!
Published November 14th, 2017 7:38 PM
Comments
Join the conversation
2 comments


Frequently asked questions
Have a question about this project?