


Winter Wonderland Challenge Hand Painted Saw

by
Dorinda
6 Materials
1 Week
Medium
Wanting to use the new Precision Decorator kit I received from Hometalk, I thought this would be a great project for it. I found an old saw that couldn't be used any more because of a crack in the handle, and thought it would be perfect for my project. This project didn't cost me anything, as I had all at home. I listed it as a week to do, mainly so I could let the paint dry between coats, and to paint all the ideas I had. This project was listed as a medium challenge, as it takes a little talent to use the Precision Decorator kit.

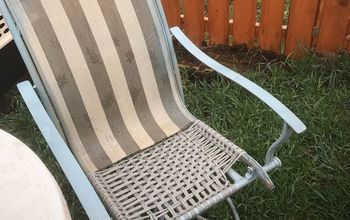
This is the saw I decided to use for my project. As you can see, it has tape on the handle where it is split. I washed the blade, then I took 220 grit sandpaper to it to get some more of the grit off, and smooth it a little. It still has a lot of rough areas, but the paint went on just fine.

Next thing I did was gather some things I would be using. These are my smaller brushes, and the paint pallets beside them. You can get them at most stores. There were three brushes I mainly used. One bigger one to paint the sky and snow. One that was good for dabbing the green on the tree, the snow on the tree, and the snow falling. The other brush I used only has 5 or 6 bristles on it.

I also needed to gather some paint that I wanted to use, so I grabbed the box I had used in other projects.

Next thing I did was to get my Precision Decorator kit out, and decided on the tan tip. I suggest painting a little bit on a scrap piece of paper so you can get the hang of using the tips, and the bottle.

I painted the top part of the saw a light blue, and the bottom white for my snow. I put one of the paint pallets under the end of the saw to make it more level.

When the paint was dry, I took a little drip of the blue paint, and mixed it with white paint until I got a very light blue. I painted a spot to look like a frozen pond. I then painted a child skating on the pond.

Next thing I did was to paint a tree. I started off making a line that got bigger at the bottom by the snow with brown paint. Then I took some green paint to make the branches of the tree. Next thing I did was to dab white paint on the tree to look like snow. Then I painted a child sledding down the snowy hill. I then added a bunch of white dots to represent snow falling.

This is what it looked like when I finished. It is cute, but I thought it needed more.

I then painted a snowman by the tree, and also another skater. The line under the tree is actually the saw and not paint.

I also painted a child skiing down the hill.

This is what it looked like after painting all that. There was just something missing. Thinking overnight, I decided to paint on more child.

What is having snow without making a snow angel? I painted the child laying down, then I mixed up some more paint to make the pattern of the snow angel. I went all around the child so it looked like the child had made it.

Here is a picture of my finished project. As you can see, there's nothing cuter than seeing children enjoying what winter has to offer...a winter wonderland.


Any price and availability information displayed on [relevant Amazon Site(s), as applicable] at the time of purchase will apply to the purchase of this product.
Hometalk may collect a small share of sales from the links on this page.More info
Comments
Join the conversation
3 of 37 comments
-
Thank you Judy! I'd never heard of naval jelly before, and I will keep it in mind for other projects. I took no offence of your post, I love suggestions!
-
This is just adorable! You did a great job with this!!


Frequently asked questions
Have a question about this project?
2 questions: Can you tell us a little about how a Precision Decorator is used, & some of the things you can do with it? (Never heard of it.) Also, would you recommend a final coat of spray poly to seal the acrylic craft painted on the saw? It's a darling picture on the saw! Thanks!
Dorinda, thanks for answering my question about the Precision Decorator. Would it work to put my black paint for the lines, and also the glass paints to do my faux stained glass painting? I have a really hard time trying to do faux stained glass painting with even a tiny paint brush, especially the black lines. Thanks, again for such a cute idea!!
Did you use a sealer?