


How To Age a Pot With Texture for an Antique Vintage Look

by
Lindsey
3 Materials
$10
20 Minutes
Easy
I recently wrote a post about how to age a clay terra cotta pot with paint. To my dismay it didn’t create enough of the “antique vibe” I was looking for. I came to the conclusion that in order to really get that authentic “patina,” you need texture. After all, a true antique piece shows it’s age with more than just color, but texture and shape too. That’s when I knew I needed to find a way to age a pot with texture for an antique vintage look.
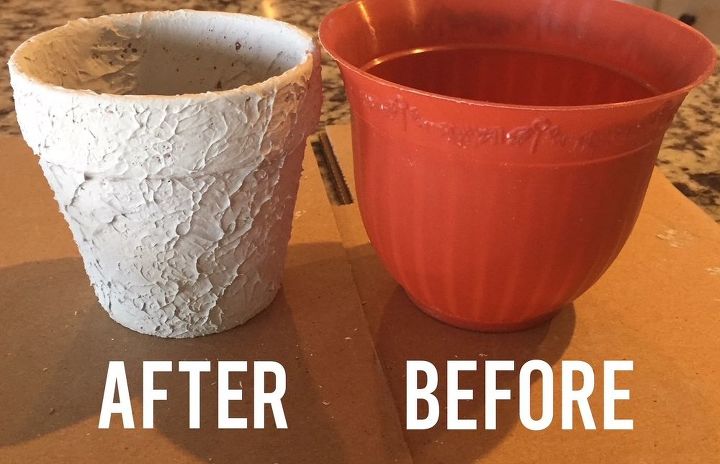
So how did I get from the before picture on the right to the after picture on the left? Joint Compound!
JOINT COMPOUND IS SUPER EASY TO WORK WITH AND QUICKLY CREATES THAT VINTAGE, AGED TEXTURE THAT MAKES ANYTHING LOOK OLD AND ANTIQUE.
I was super pleased to find an affordable product to help age my pots. I purchased a small can of joint compound at the local hardware store and it was only $3.
This project is simple and easy.
- Put on your gloves
- Open the joint compound and grab a decent clump of the “goup”
- Start applying over the pot as you see fit. Dab it in places to create more texture
- When you are done, let it sit at least 12 hours. This stuff needs to dry well.
- Paint or wax as you see fit
As far as painting goes, I prefer to use dark wax to give anything an aged look. A dab of green paint would have added a vintage touch too.
Check out my video below for all the good details.
{
"id": "4848964",
"alt": "",
"title": "",
"video_link": "https://www.youtube.com/embed/r0eH2nh1Pas",
"youtube_video_id": "r0eH2nh1Pas"
}
{
"width": 634,
"height": 357,
"showRelated": true
}
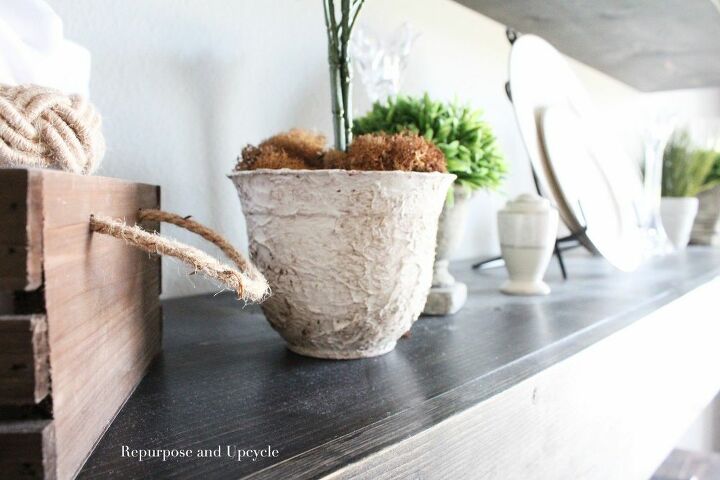
I love creating that “vintage look.” Now that I know how easy it is with joint compound, It’s going to be hard to keep myself from adding this stuff to everything! LOL, just kidding (maybe).
I hope you enjoyed this little project!
Lindsey**

Want more details about this and other DIY projects? Check out my blog post!


Frequently asked questions
Have a question about this project?