


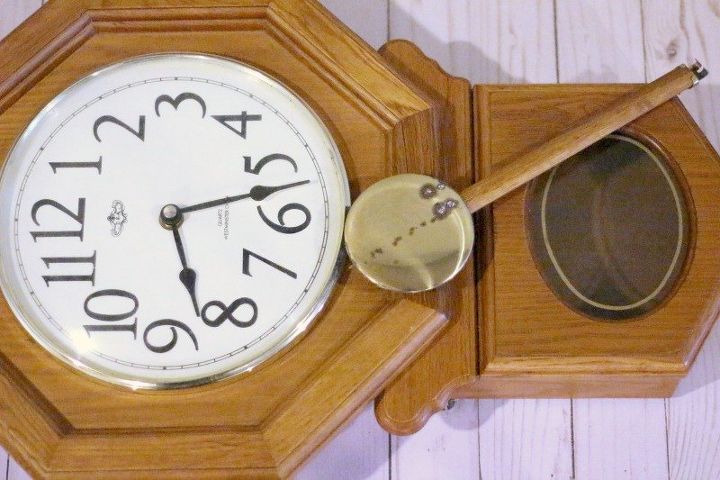
Regulator Clock Makeover
Our Regulator clock had seen better days and was not working. The fix was easy. The batteries had corroded. A good cleaning and new batteries solved that problem. The other problem was the clock no longer fit with our decor. We gave the clock new life with this very simple makeover.
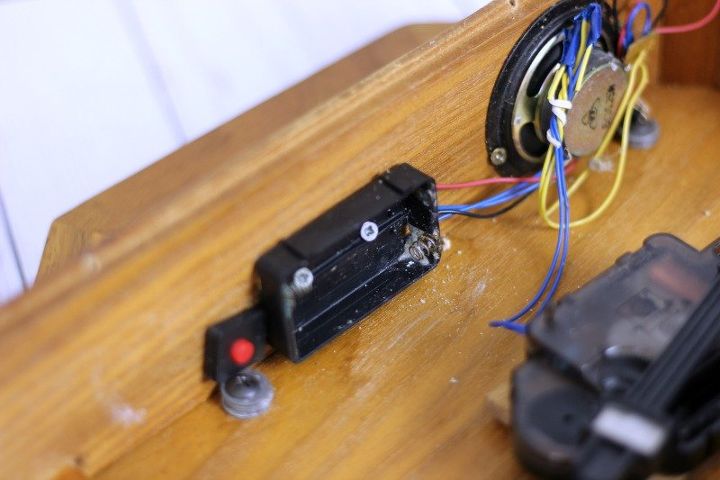
In order to get the clock working again, we took out the corroded batteries and cleaned the battery compartment with q-tips and acetone. A fresh set of batteries was added and the clock began working perfectly.
For the makeover, the first thing I did was to repaint the rim around the clock face with a antique gold leaf paint. Goodbye shiny brass!
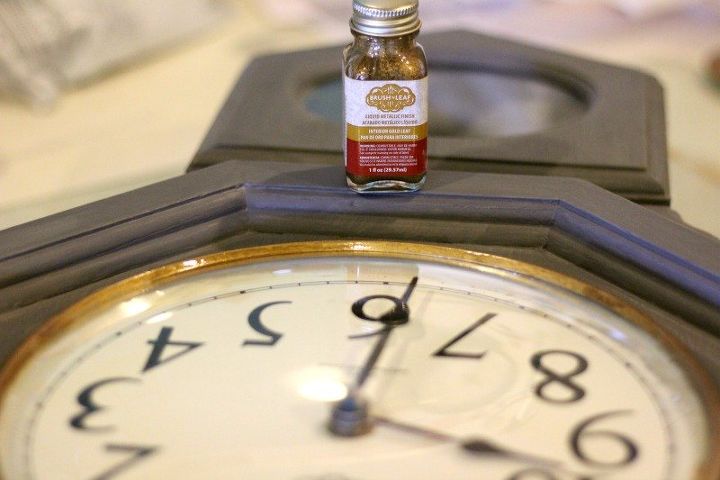
I tried to be careful, because I didn't take the time to tape off the glass, but I did get a little paint on the clock face glass. It was easily removed with a razor blade.
In this picture you can also see that the clock is gray. I did initially start painting the clock gray, but changed my mind and decided to go with a completely different look. Read on . . .
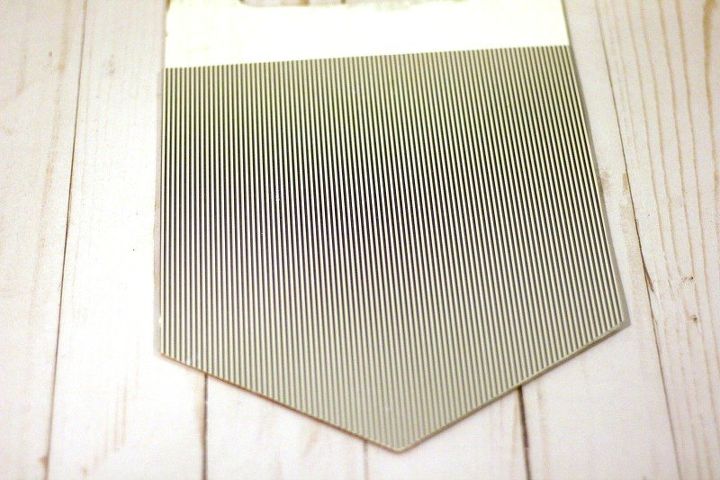
To add some interest to the back panel of the clock, I glued on a piece of scrapbook paper in thin black/white stripes using household glue.
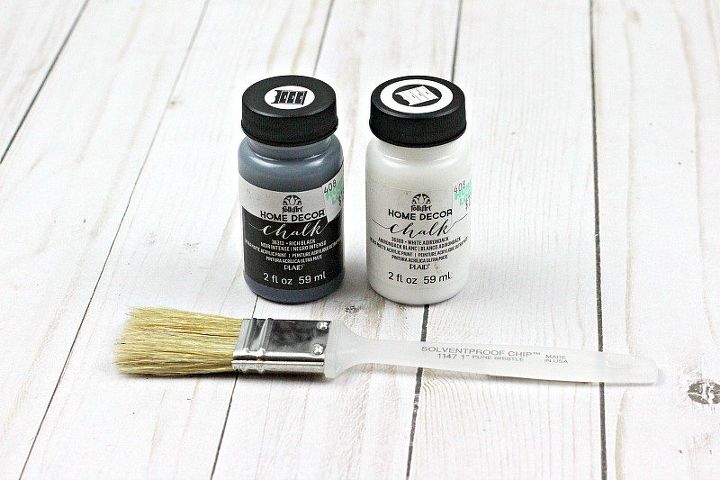
I decided to use black and white chalk paint for this project and give the clock a modern look and try out a dry brush technique that I learned from another blogger.
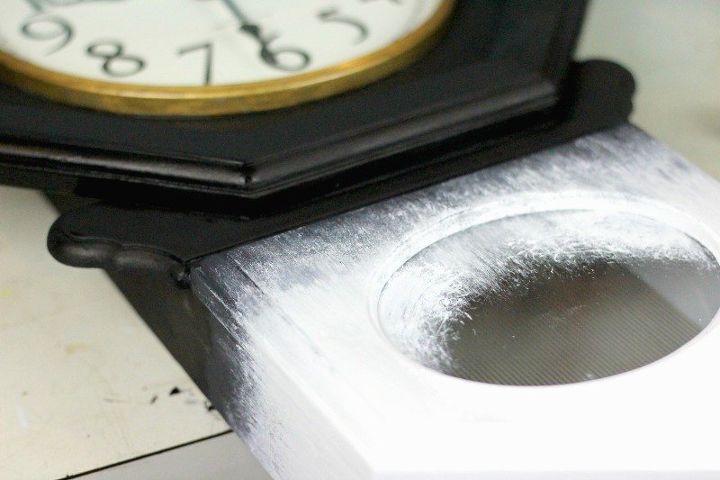
The top half of the clock was painted with black and the bottom portion of the clock was painted white. I mixed the black and white paint together to make gray and I used that as a go-between color between the stark white and the black, using a dry brush method. You can find out more about that on the blog and a link to the post from ThirtyEighthStreet.com which gave me the inspiration for this project.
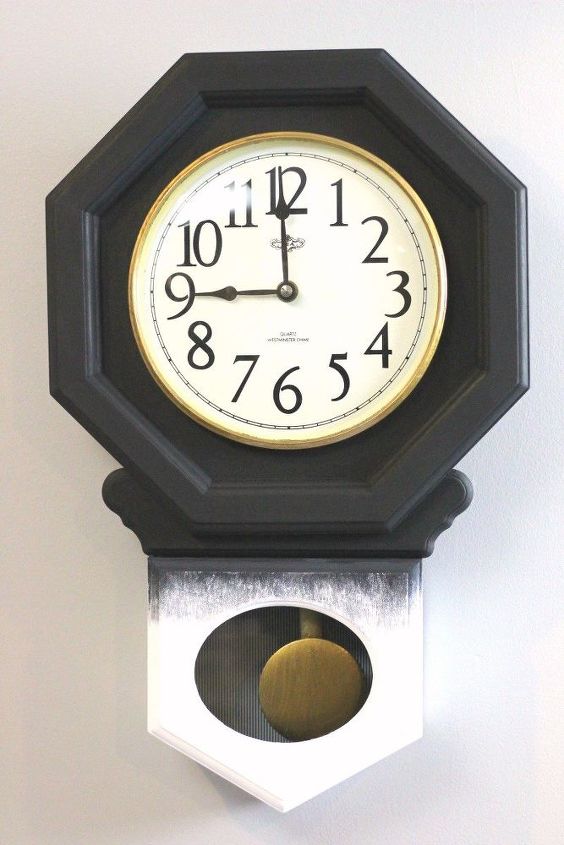
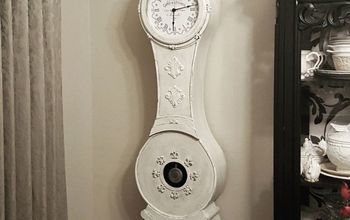
This is what it looked like. You can see that I also repainted the pendulum with the antique gold leaf paint. I liked it, but then decided I would prefer a little less white area. So I simply painted a portion of the bottom section of the clock black and changed where I added the gray using the same dry brush technique.
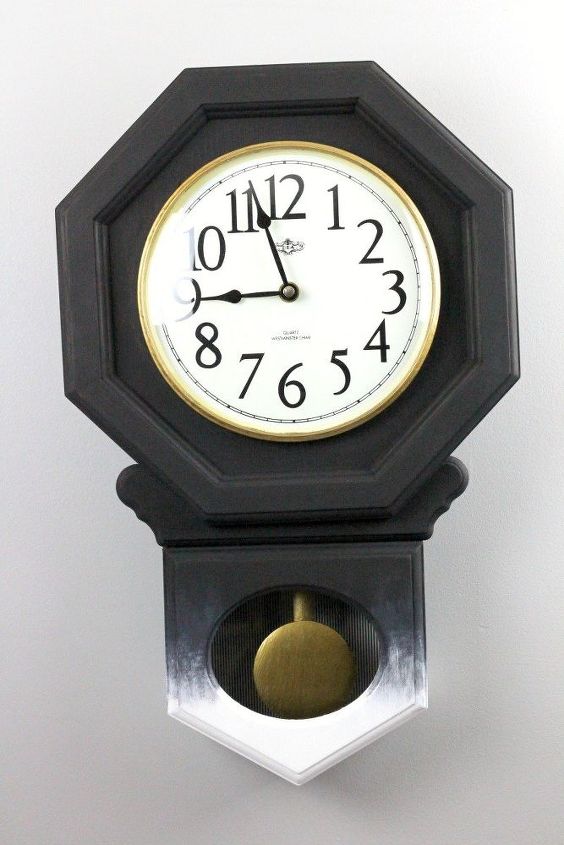
This is our finished clock. I love how it turned out to be quite a statement piece. I get a lot of compliments on this clock and it looks amazing with the rest of our decor. This makeover took only an afternoon to complete and was well worth the time spent to go from drab to wow!
For more information on this project, visit our blog post.
Resources for this project:
See all materials


Comments
Join the conversation
-
I have this clock in my dining room. I'm doing a make over to the room and was going to replace it. I never thought of painting it. I think I'll be a "copy cat" and paint mine black. It would go perfectly with the wall decor I have. Thanks for sharing.
-
Much more attractive and I agree, reducing the light area was the right thing. It’s lovely


Frequently asked questions
Have a question about this project?
Great idea! Why don't I see the striped paper?
Nice job...dud you have to sand the clock surface down before painting or use a primer?