


Cheap and Easy "Rustic" Bucket Stool

by
Rhonda B
Have you seen the $5 bucket stool? It is ingenious! Well, I decided to make one of my own but with my own twist since I like creating things with what I happen to have on hand. In fact, the $5 bucket stool probably cost me less than $2 in supplies. Not only is it cheap-it is easy as pie to make! So here is how I did it.
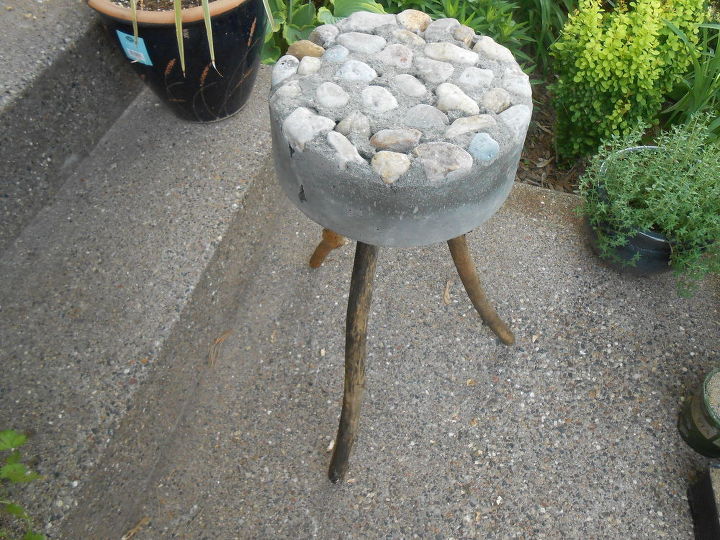
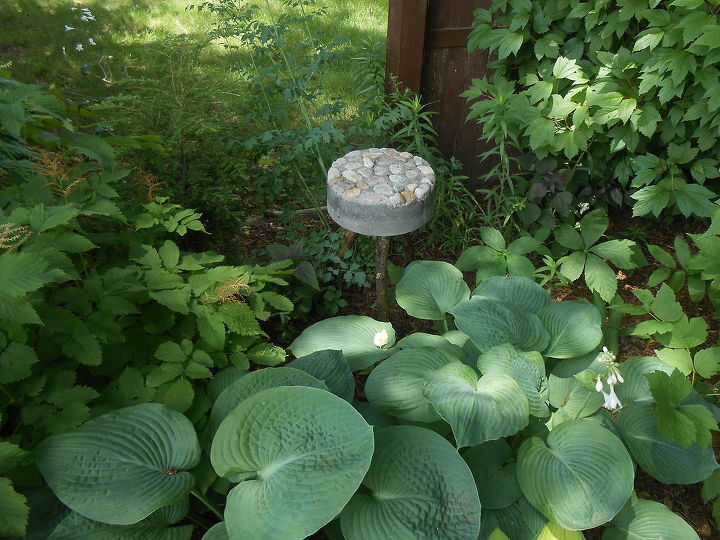
My "rustic" bucket stool
Supplies needed:
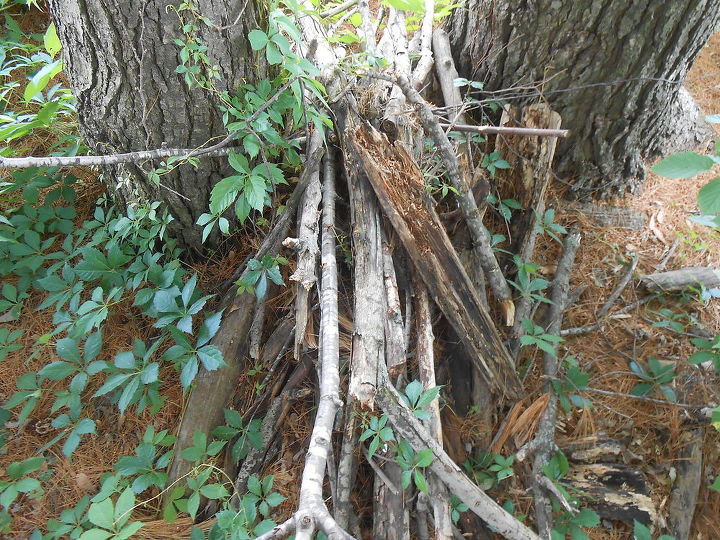
My stick pile
4. Gloves (always)

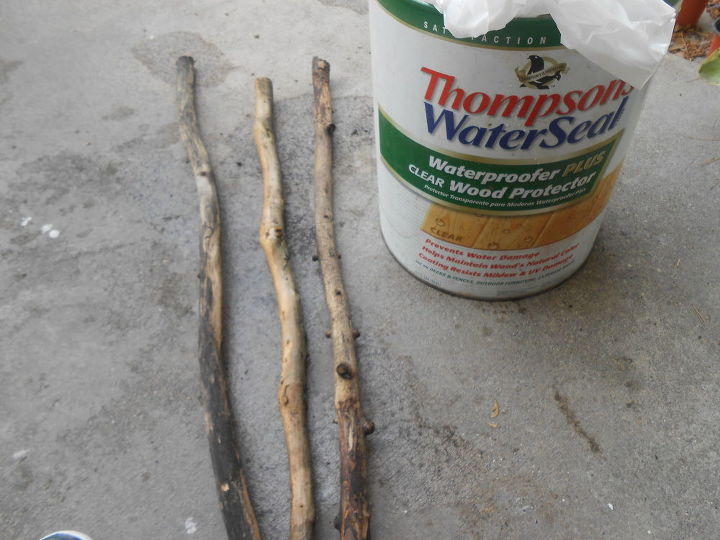
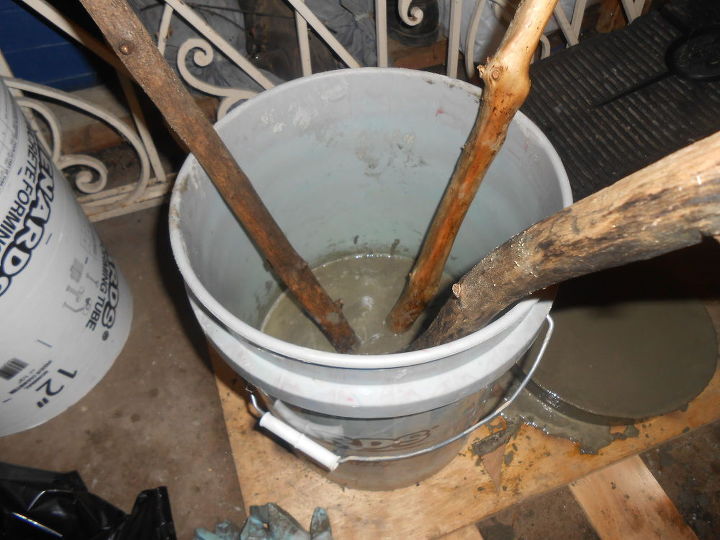
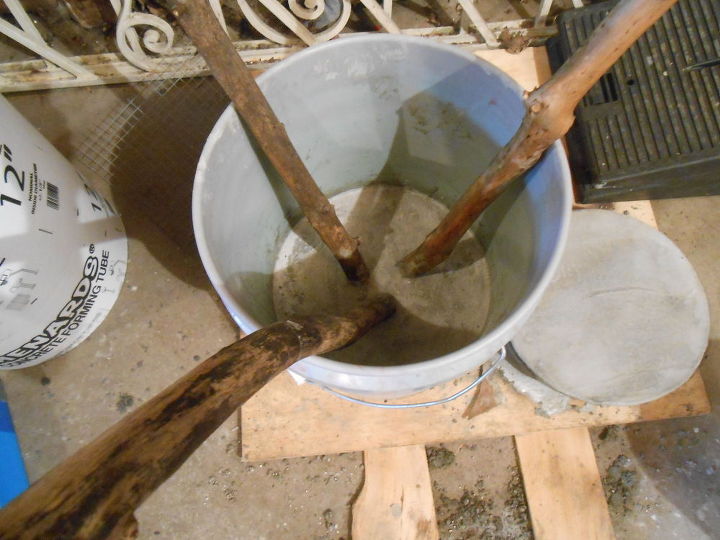
2. When dry, mark the sticks at the end you are going to insert in the concrete at 1 1/2 inches-this is how far they need to go in the concrete. Also, to make it easier mark the inside of the bucket at 3 inches (that is how much concrete you will need).
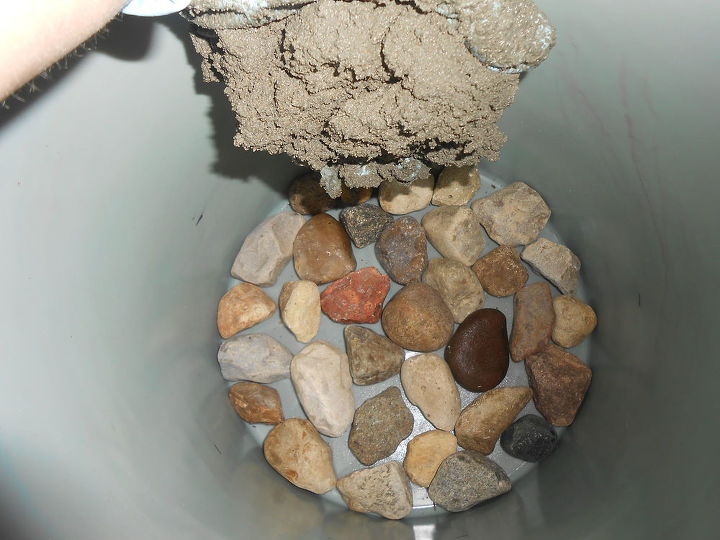
8. When you hit the 3 inch line smooth the concrete, then start tapping the sides to release air bubbles (or you can vibrate the sides to release them).
10. What at least 10 hours to unmold.
When you are ready turn it up on it's legs-hopefully they are strong enough to hold it:-)) It should lift right off. If not, tug (pull out) on the sides of the bucket to loosen it.

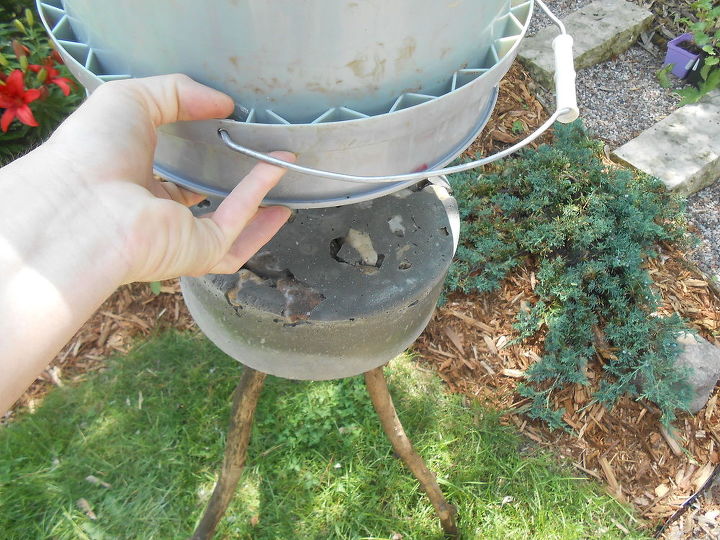
12. Next, I cleaned up the top-knocking off the extra concrete with a hammer and chisel to expose my rocks. If you unmold while the concrete is still somewhat wet you can just use water and a brush to scrub off the concrete.
Visit my blog to see more detailed photos of this project:
Want more details about this and other DIY projects? Check out my blog post!
Comments
Join the conversation
2 of 194 comments
-
Cute
-
Love it


Frequently asked questions
Have a question about this project?