


Welcome to the NORTH POLE!

I wanted to do something different for the holidays. So, I put my thinking cap on and came up with this beauty. I think everyone can enjoy this fun Christmas project a North Pole sign. I'm not sure if I'll us this outside for my porch or inside.. most likely outside. I also thought this would be great for hanging our stockings since we don't have a fireplace. I hope you're as excited as me to make this!
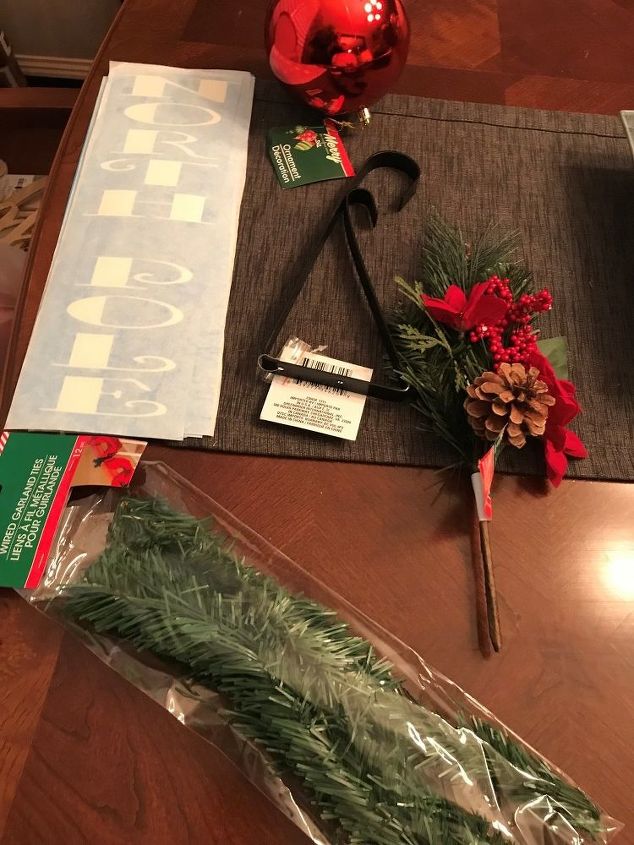
What you'll need:
North pole stencil
Bulb
Garden Hanger
Christmas Pick
Some piece of tree greens
Wood
3x3 post
16x16 square wood
9x9 square
Painters tape 48mm
Mod podge
White and red paint
Stain
Two round Hook and eye (screw eyes)
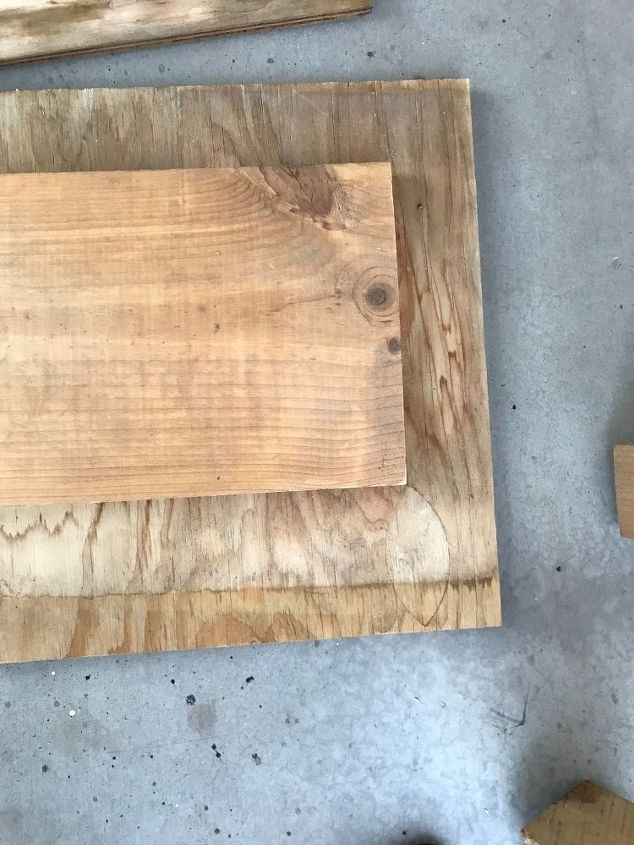
This is my base platform for the bottom I cut one board at 16"x16" and another one at 9"x9". These will be stacked on top of one another like the picture
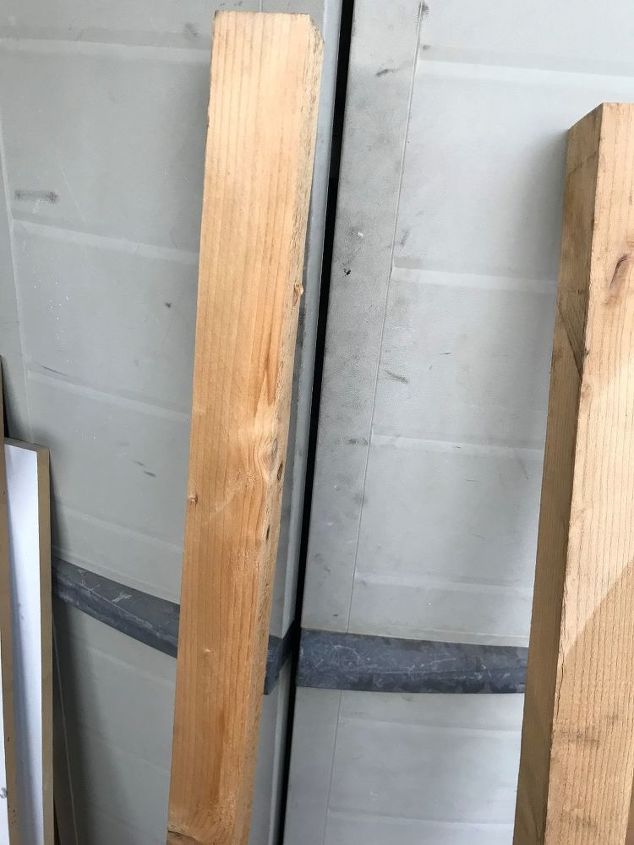
Next my post this is a 3"x3" board that is a special order. I didn't like the 4x4 I think it is to big, but you could use that if that's all you have or can find. Well will use 3.5" screws to attach the pole and base together. Once that is secure paint it all white.
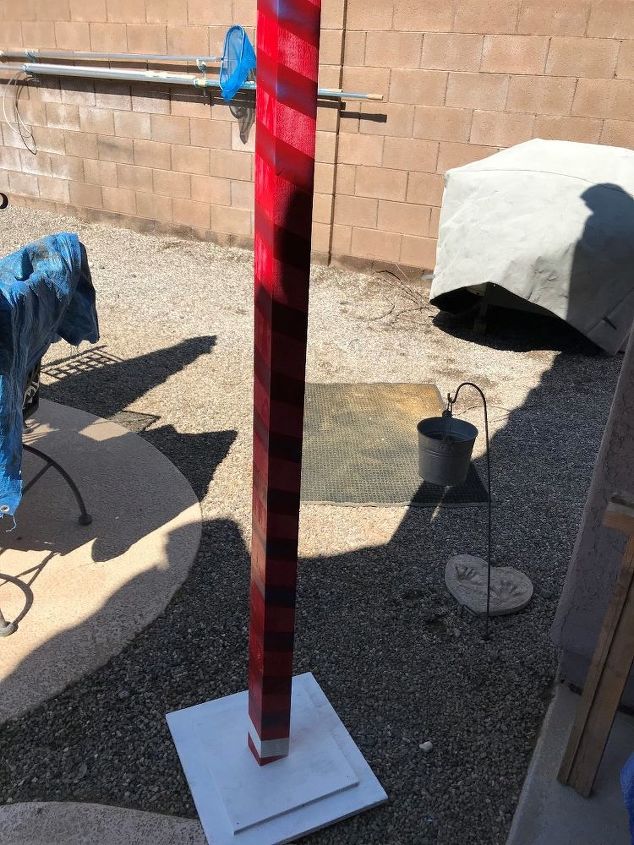
Now that the post is dried with the white we will begin my using painters tape 48 mm to wrap around the pole. Make sure it really bonds good,
then spray that red in my case, but you could do any color.
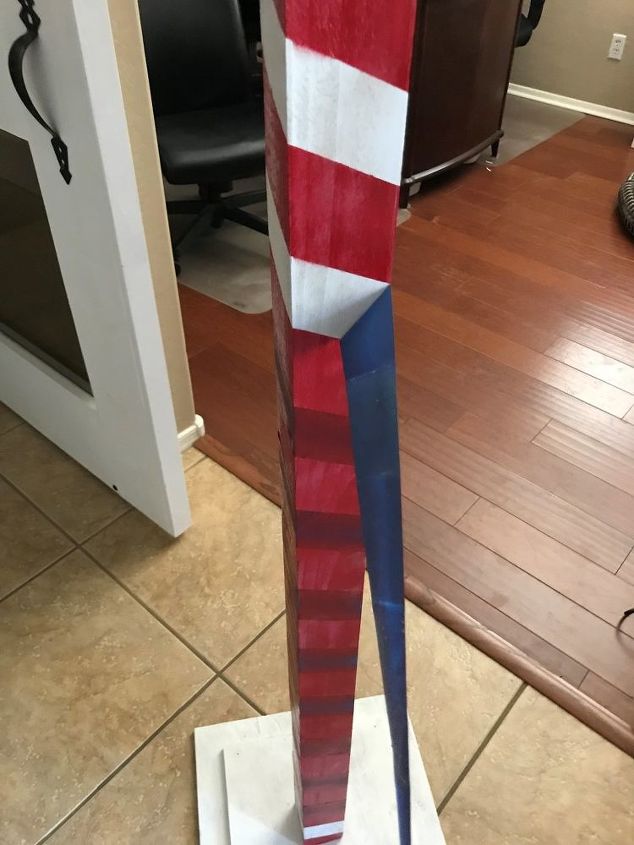
After you spray the post red and let it dry, remove the tape.
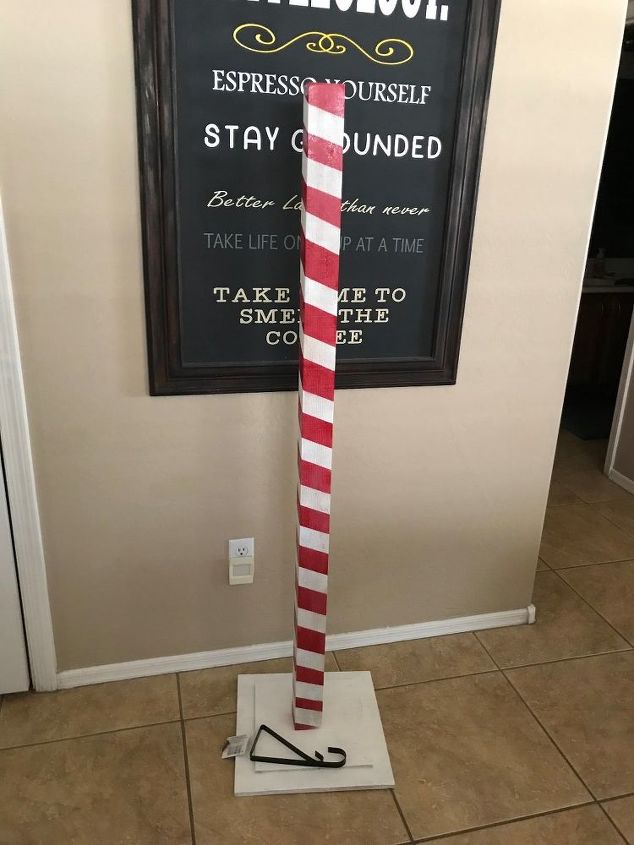
You should have a north pole at this point!
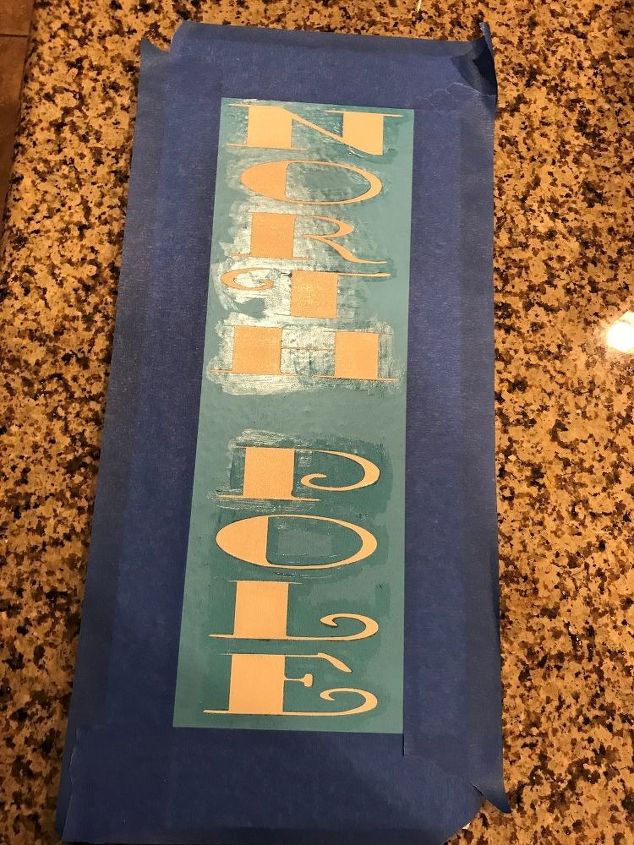
Next, I will begin making the sign to attach to the pole. Find a font you like and make a vinyl stencil to fit in a 17"x6" frame. The frame will be made from 1x1". Take the stencil and apply it to a thin piece of wood that is 18"x7" and painted white. Make sure before you apply the stencil that the paint is dry. I then centered and taped off the stencil. Then I applied a thin coat of pod podge over the letter so when I paint it, it will not bleed. When that is dry take it outside and paint red.
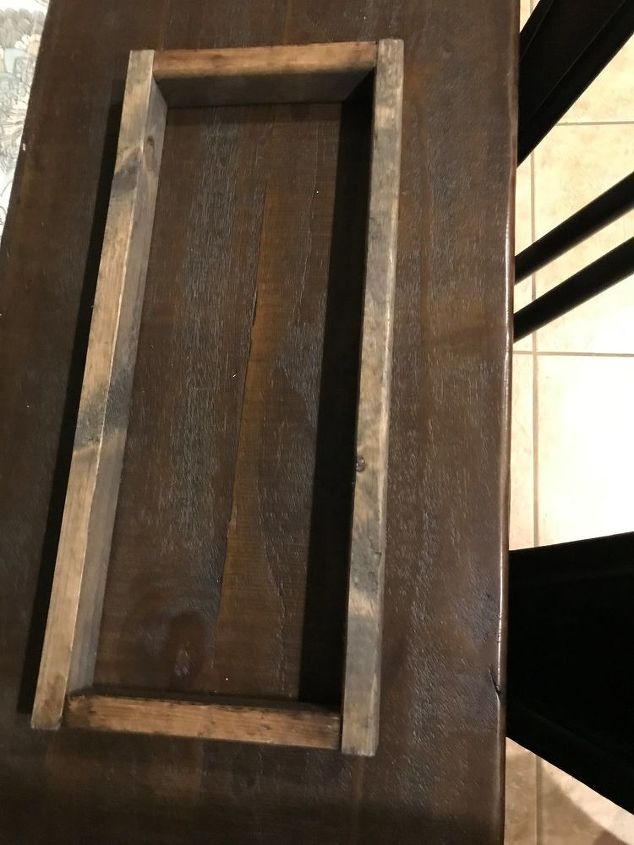
Cut out 1x1" wood and build a simple box that we will use for our sign frame. You will want 2- 17" sides and for the bottom/top 2- 6" pieces. Then stain your desired color. From here take the stenciled North pole piece of wood that we just finished and nail to the frame. Next, you'll need to attach the bracket to the pole with the 2 screws which are generally provided with the brackets.
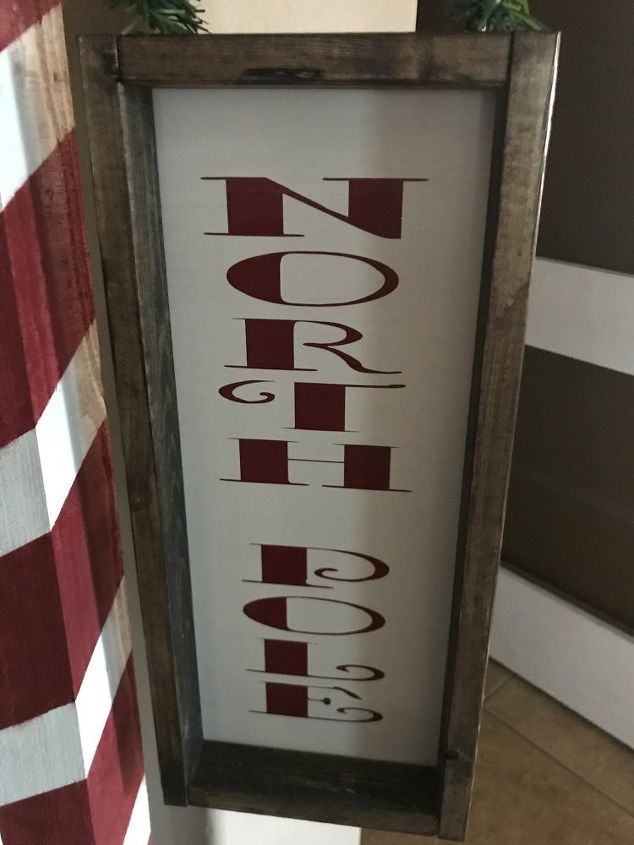
Here is how the sign should look done and put together. We will add two screw eyes to the top to hang it.
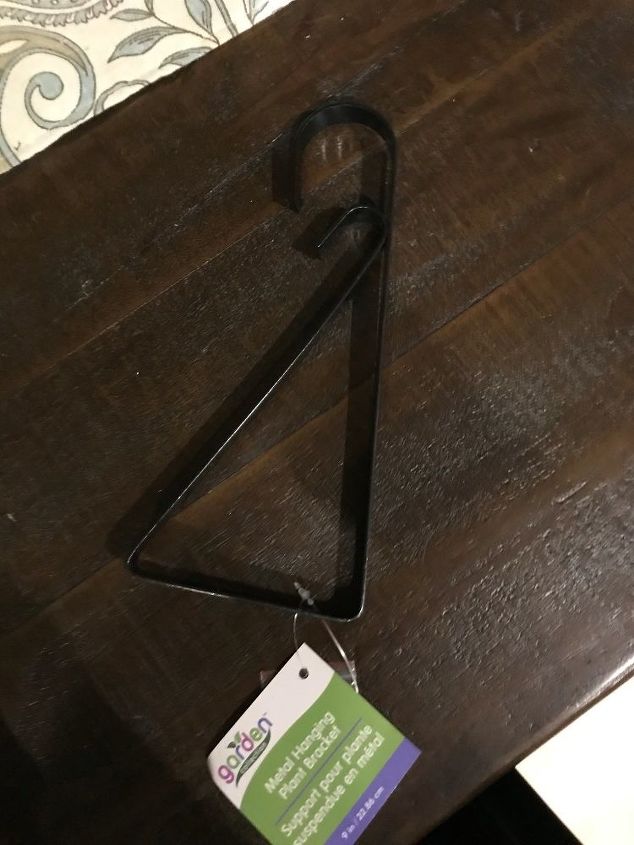
This is the bracket that I used to attach to the pole to hang the sign from.
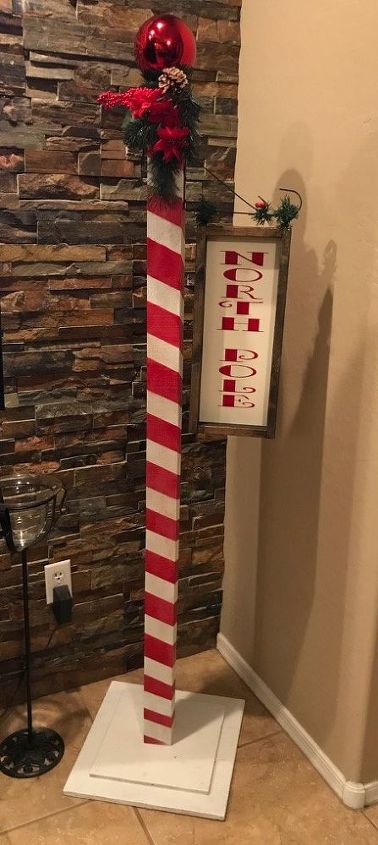
This is your pole and it should be looking good, you'll top it off with the bulb being glued on with some liquid nail and staple on the embellishments. Here you have it the North Pole!
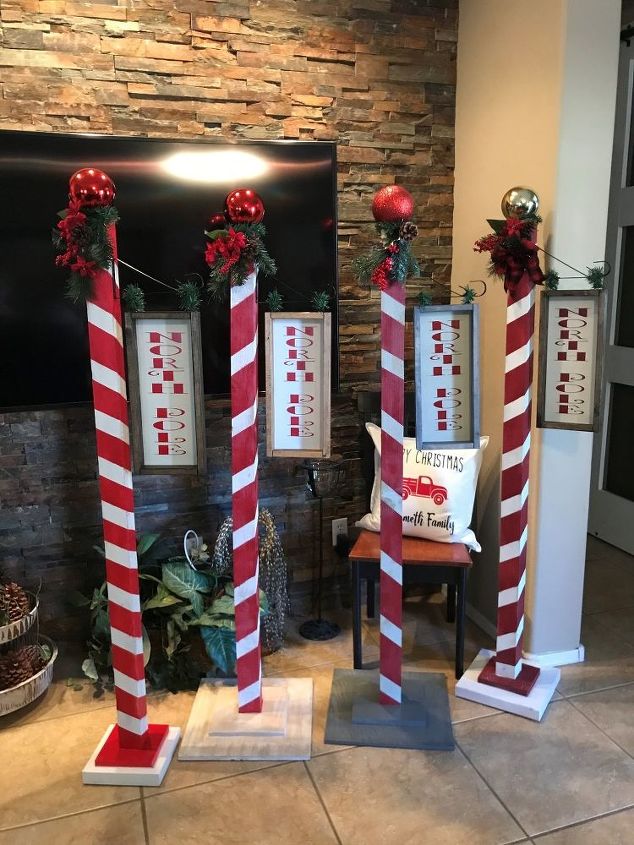
You can add hooks to use as a stocking holder or use it just like this for the porch! Happy Holidays to everyone near and far! Please check out my page Gilbert Marketplace for more details on this project and other DIY projects.


Comments
Join the conversation
-
That’s awesome! Love the picture to!!
-
The name of North Pole font


Frequently asked questions
Have a question about this project?
Stencil were to buy? Brand name?
Ive got to try this. It's so sweet. Only one question (I did try looking it up first). What are elites???🙄
Amazing! When you used the Mod Podge, did you paint just the stencil itself or painted the letter (inside the stencil) and overlapped onto the stencil? Just a little confused but very curious as I am starting to make signs using stencils and looking for any tips I can get. Thank you!!