12 Tremendous Jewelry Organizer Ideas to Show Off Your Collection
A glittering jewelry collection is nothing without a place to hang it. Unless you’re going to become the real-life Mr. T, there will be times you need to organize your jewelry. Thanks to our community of makeover masters, you can hang your trinkets in a stylish way. To give you some inspiration, we’ve picked out 12 of the best jewelry organizer projects out there. From rustic and elegant to creative and crafty, we've found you some truly impressive creations.

Dainty DIY Jewelry Organizer
This dainty DIY jewelry organizer required little more than a piece of quality fabric, a corkboard and some garden wire fence. After cutting a section of the fence using wire cutters, Donna stapled patterned fabric to the corkboard. Once the insert was made, she glued it to the back of the fence. To turn this piece into a jewelry organizer, copper wire was stretched across and wrapped around the edges of the fence to create an impressive hanger. Get tutorial here
Fabulously Framed Hanging Jewelry Organizer
For the jewelry owner with more pieces than hooks to hang them on, there's this idea from Amanda. By cutting lengths of wood into eight pieces, she created a double-sided frame. Between the batons, she inserted a union jack metal sheet which was pre-sprayed and cut to size. Once complete, the frame was screwed together and additional hooks were added to the bottom. To finish, jewelry was hung from the natural holes in the mesh insert. Get tutorial here
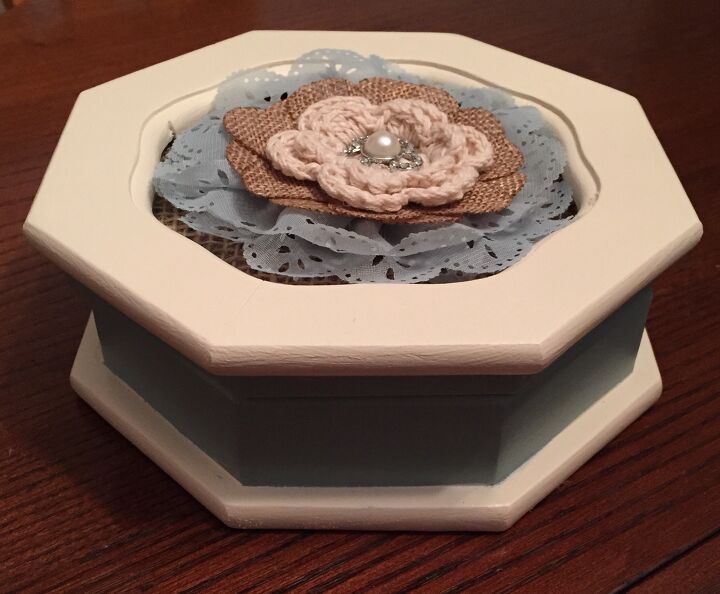
Tiny Travel Jewelry Organizer
You don’t need to buy travel jewelry organizers. With a creative touch and the right materials, you can make this creation from Nancy. After removing the lid and painting with white acrylic, this Hometalker covered the glass insert with burlap and glued it in place. To finish the portable piece, she cut contrasting fabrics into petals, glued to the burlap and reassembled for the perfect travel jewelry organizer. Get tutorial here
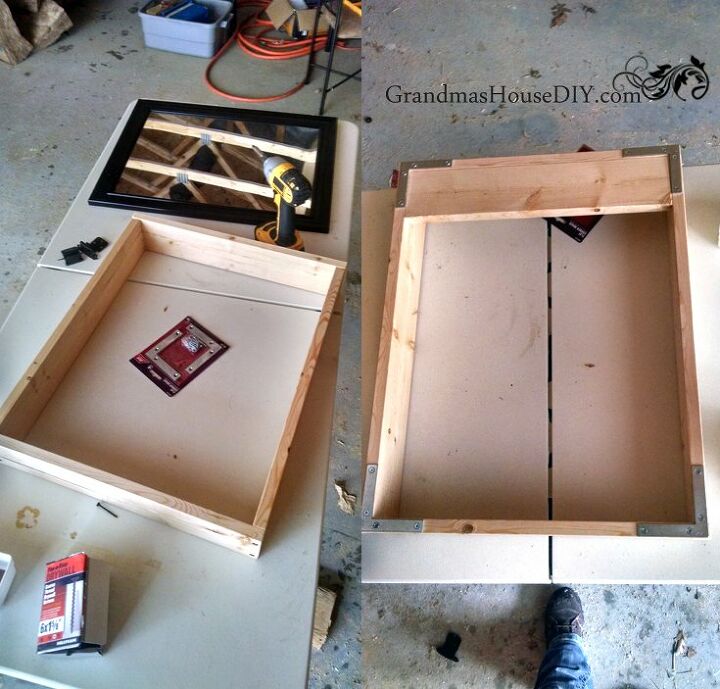
A Crafty Over the Door Jewelry Organizer Alternative
Instead of an over the door jewelry organizer, how about this super-cool concealed unit? After making a simple box frame out of 1”X4”, this Hometalker reinforced it with steel brackets and added a hinged door. Black felt was stapled to the inside of the box before two wire hangers and a wooden hook-base were screwed into place. To finish, the piece was painted and the mirror was glued to the door of the cabinet. Get tutorial here
Terrific Table Runner Jewelry Organizer
Taking a sheet of a black table runner, Hometalker Rachel used her initiative to hang her jewelry in a neat way. After spraying a set of white plastic hoops silver, Rachel cut and stuck the table runner to their center. Next, she glued wire to the hoops and hung from standard picture hooks. To complete her deconstructed look, Rachel screwed mini hooks into a stick and used it as a floating base for this intriguing jewelry organizer. Get tutorial here
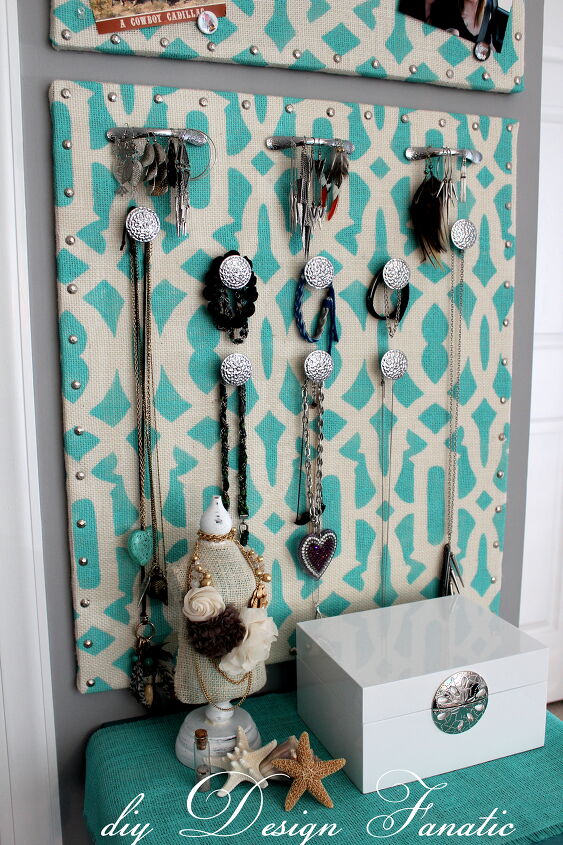
Stylish Stenciled Jewelry Organizer
A stencil, some paint and a piece of burlap were all this Hometalker needed to create this stylish jewelry organizer. After painting a piece of ply and corkboard white, she cut burlap slightly longer than the boards. A custom stencil was secured over the top and Valspar Nautical spray was applied. Once dry, the burlap, ply, and corkboard were stapled together. Finally, upholstery tacks, knobs and drawer handles were pressed into the cork to create this elegant hanger. Get tutorial here
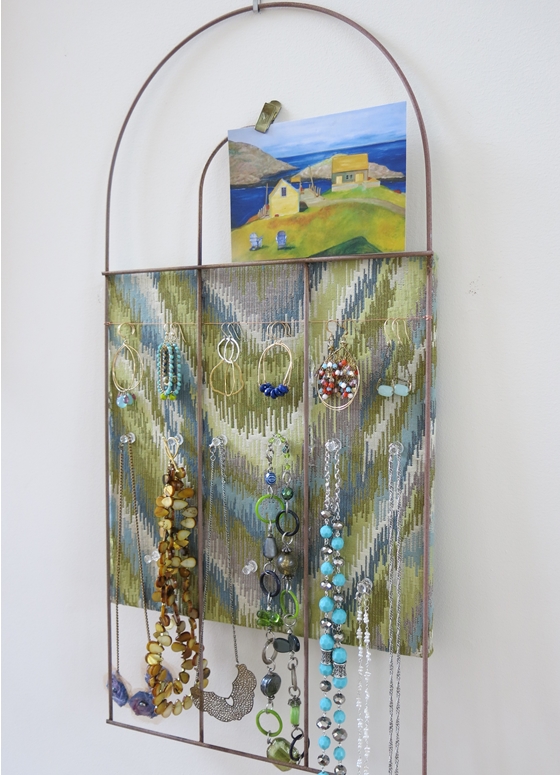
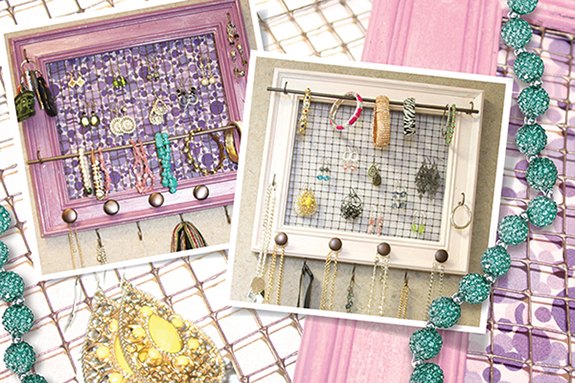
Picture Perfect Wooden Jewelry Organizer
The right jewelry collection can be just as beautiful as any painting, which is why Lori Haught Harper chose to frame her prized pieces. Once she’d removed the glass from a picture frame, Lori cut and color matched a sheet of hardware cloth and dowel. To finish, she stapled the cloth to the back of the frame, covered with fabric and then painted the front. Finally, she fixed knobs in place using screws and a cup hook held the central dowel in place for a picture-perfect organizer. Get tutorial here
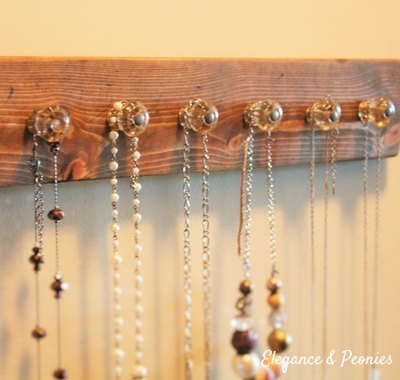
Bold Jewelry Organizer with a Rustic Vibe
The rustic look is all the rage when it comes to home decor. For this simple yet robust jewelry organizer, Alysha needed nothing more than a base, hangers, and some wood stain. After sanding and marking holes at even intervals, Alysha used a light stain to retain the wood’s natural grain. Once it dried, beaded hooks brought a touch of elegance to the natural base. To finish, picture hooks allowed the organizer to hang from the wall and create a bold, practical focal point. Get tutorial here
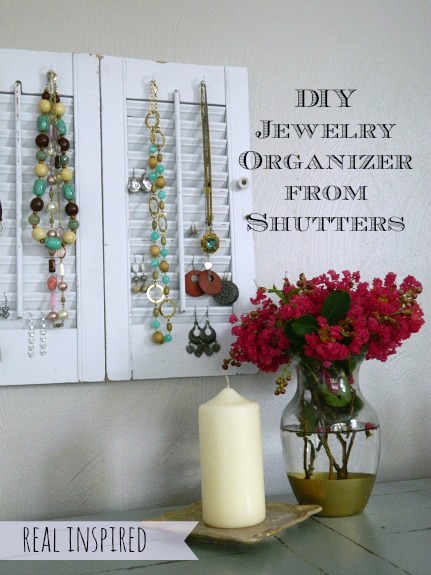
Ingenious Shutter-Style Jewelry Organizer
DIY wall jewelry organizers are all about creativity, which is why we love this ingenious idea from Elizabeth. Looking to re-purpose a pair of shutters, this Hometalker sprayed them white and distressed them using sandpaper and a hammer. After it was suitably “shabby chic,” she screwed cup hooks into the top for her necklaces and used the shutter’s natural contours hold her earrings. Get tutorial here
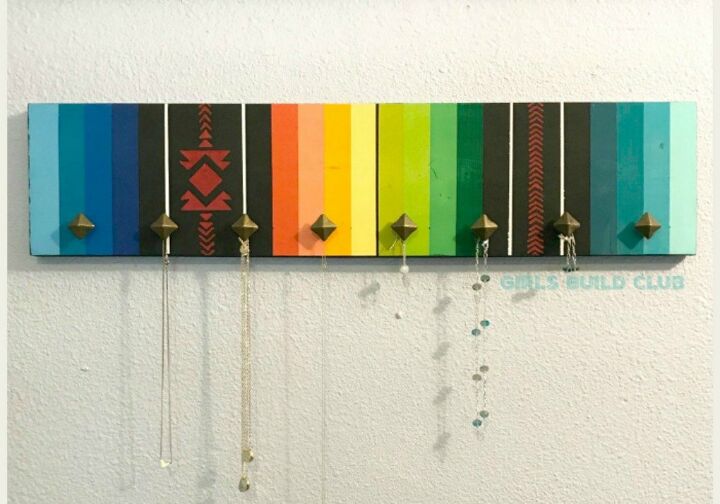
Pretty Paints for Your Jewelry Organizer
For this jewelry organizer, Girls Build Club started with a 24”-long piece of wood. After sanding and smoothing, this Hometalker added strips of tape before painting the exposed sections in black. Once dry, she removed a selection of strips, covered any painted areas and then went over the exposed wood in her favorite colors. She repeated this process until the wood was fully covered before finishing the piece with a stencil and furniture nails. Get tutorial here
Double Decor Jewelry Organizer
For practicality and eye-catching beauty, this jewelry organizer ticks all the right boxes. To create a hanger that’s not only useful but capable of standing alone as a piece of art, Anika started with a cork board. After spraying it in chrome, she stapled a metal union jack sheet onto the board. 7/8” hook cups were screwed into place before 3/4” dowel was placed inside the hooks. Finally, jewelry was hung from the grill and the dowel. Perfect. Get tutorial here
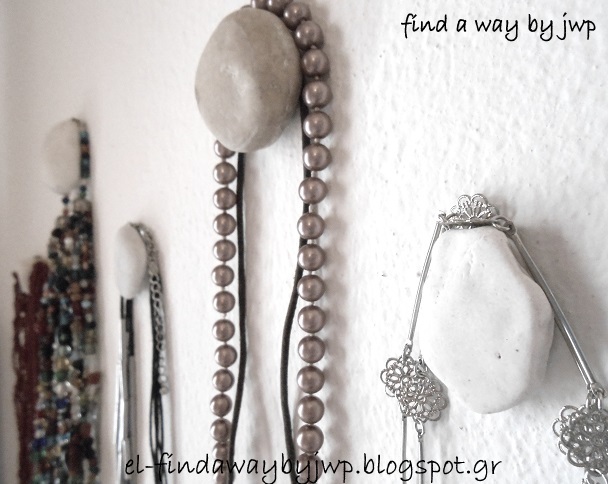
Precious Pebble Jewelry Organizer
Sometimes the best DIY products feature the smallest details. This DIY jewelry organizer by Joanna is a perfect example of that. Wanting a minimalist way to hang her necklaces, this Hometalker opted for the natural look. To create this neat jewelry organizer, she took a selection of attractive pebbles and buffed them. Once they were clean and sparkling, she added double-sided mounting tape to the back and stuck to the wall. Simple! Get tutorial here