


DIY Ornament Wreath
Just in time for the holidays! Here is a pretty easy project to deck out your door or any space in need of some cheer.
More easy holiday crafts:
Several years ago I tried this project when I was looking for a low cost way to make a wreath. I loved it so much that I made ones for my office at work. When my husband and I last moved, I gave the wreaths away in an effort to downsize. Here we are about to host Thanksgiving for the first time in our new house and I didn't have anything decorative on our door.
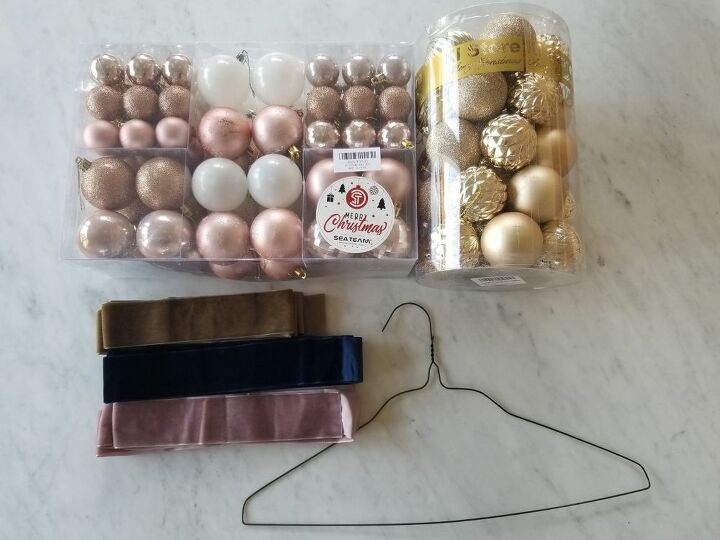
Last year I got a great, fresh boxwood wreath at Trader Joe's. I haven't seen them this year, so I started to browse online. The fresh wreaths wouldn't arrive in time. I remembered the ornament wreaths I had made and figured one would spruce up our entry. There is a huge selection of ornament wreaths online, ranging from $20 to over $200. To get the exact color palette I wanted, I decided to make my own. In previous years I purchased ornaments from The Dollar Tree, but now there aren't any close by. This year I purchased from Amazon. I definitely paid more compared to The Dollar Tree, but this time convenience won. Besides the next day delivery, Amazon also had a larger color selection. I went with champagne and rose gold balls in various sizes. Other than the ornaments, I already had the wire coat hanger, which is the frame for the wreath. I also had some beautiful velvet ribbon which I've had for ages. I purchased it years ago at a fabric shop that was going out of business. I was hoping to finally use some, but spolier alert, I decided against it. Read on for instructions.
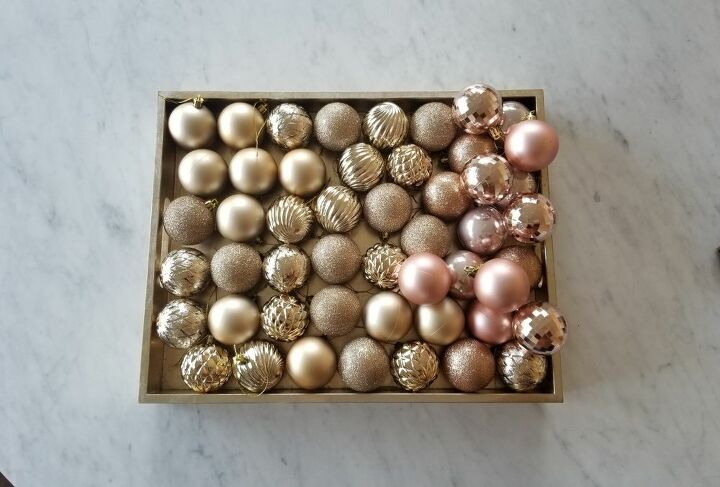
I opened the ornament packages and spread the ornaments out in a tray. I did this for easy access, to prevent them from rolling off the table, and to look at the patterns and colors together. The packs I chose have glitter covered ornaments. Beware if you are glitter averse! My table and I and other surfaces in the vicinity were covered in a fine glitter mist. Nothing like some sparkle to make you feel festive.
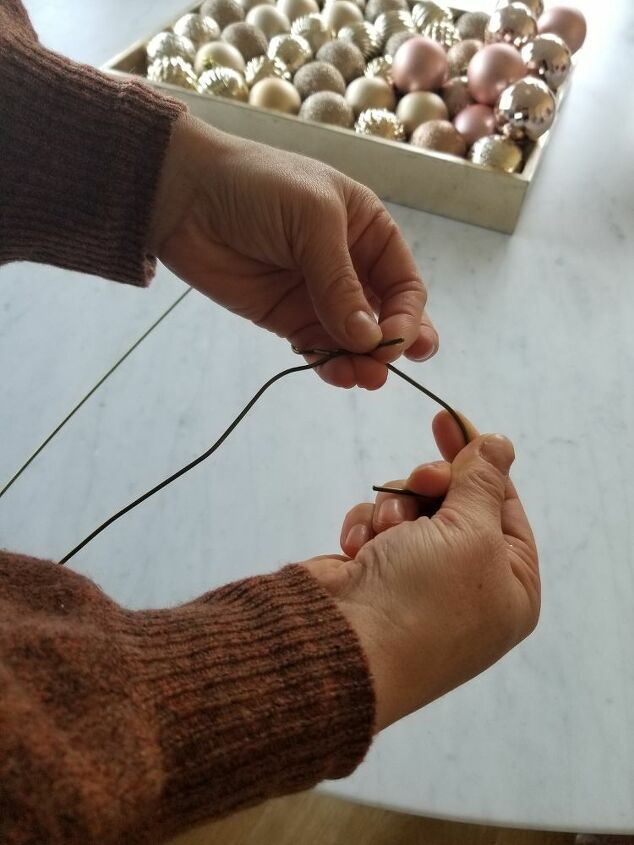
With ornaments ready and a pattern in mind, I opened up my wire coat hanger. Bend the curved part away from you as you pull the end that is wrapped toward you. The wire then unravels really easily.
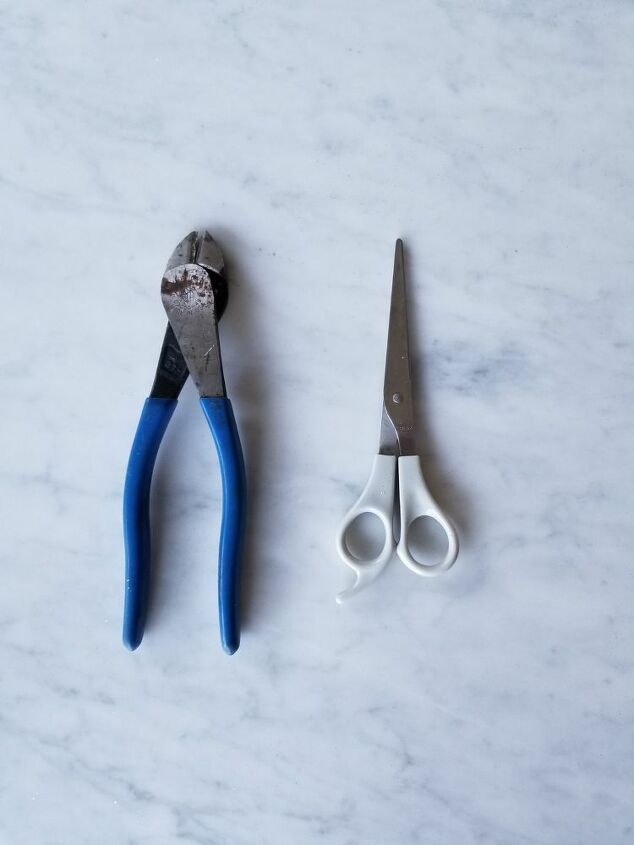
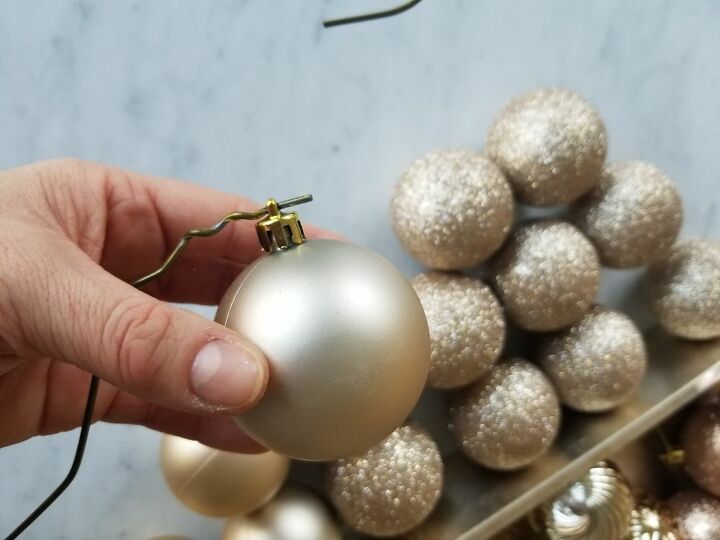
Once I opened the packs I realized the ornaments had strings for hanging, so I had to cut all the strings off. I also decided to grab my wire cutters just in case.
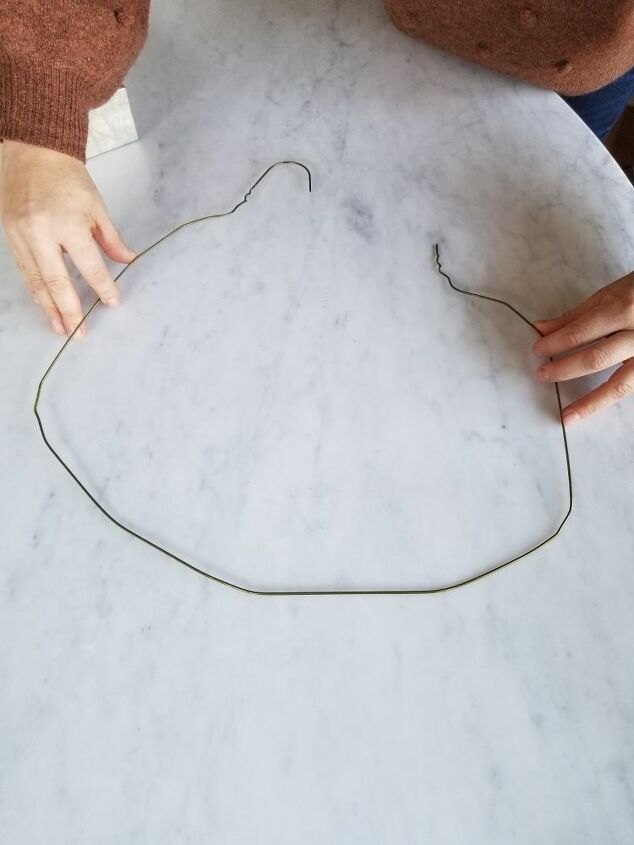
After unwrapping the hanger I laid it out and began to shape it into a circle. It doesn't need to be flawless, as the ornaments will cover the wire. However, you do want the shape to be as circular as possible. After taking the picture above I made a few more adjustments to round out the wire.
Time to add the ornaments. In the photo above you can see I left all the ridges in the wire. After the ornaments have been strung on the wire, you will wrap the two pieces again to close the wreath loop.
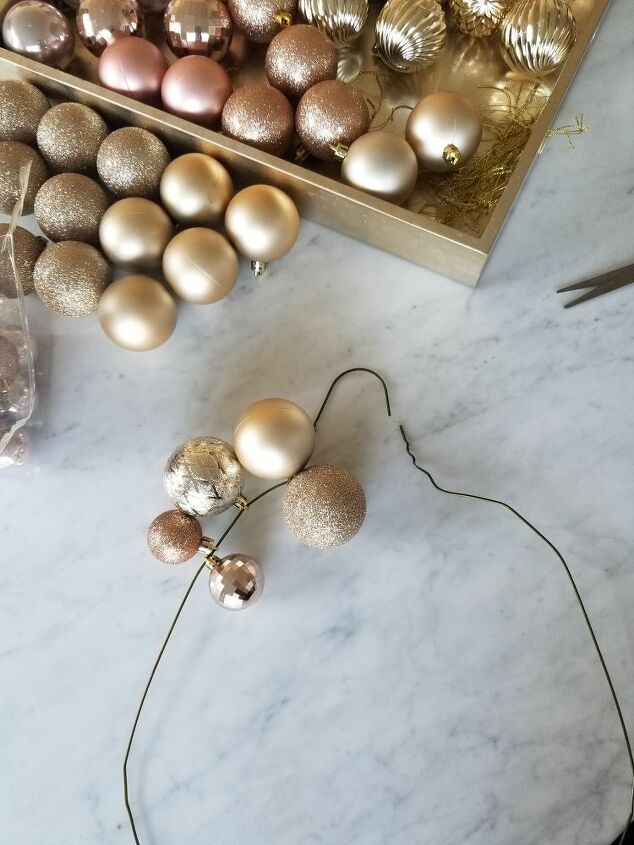
String along several balls to get a visual of your creation. Initially, the wire seems to show too much. Keep adding more balls and the emptiness will fill in. Feeling doubtful? See below for a more filled in look.
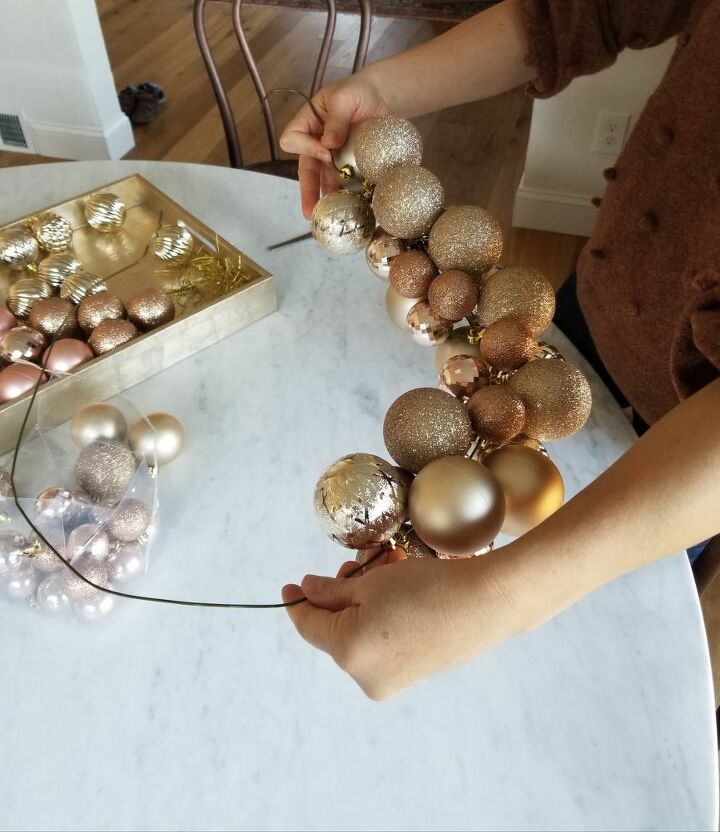
At about half midway through, you actually start to see a wreath! It was at this point that I did a quick inventory and realized I was running low on one of the champagne color balls in my pattern. I undid all my work and started over, adding several more of the rose gold ornaments to my mix. This turned out to be great, as it added more textures and sizes.
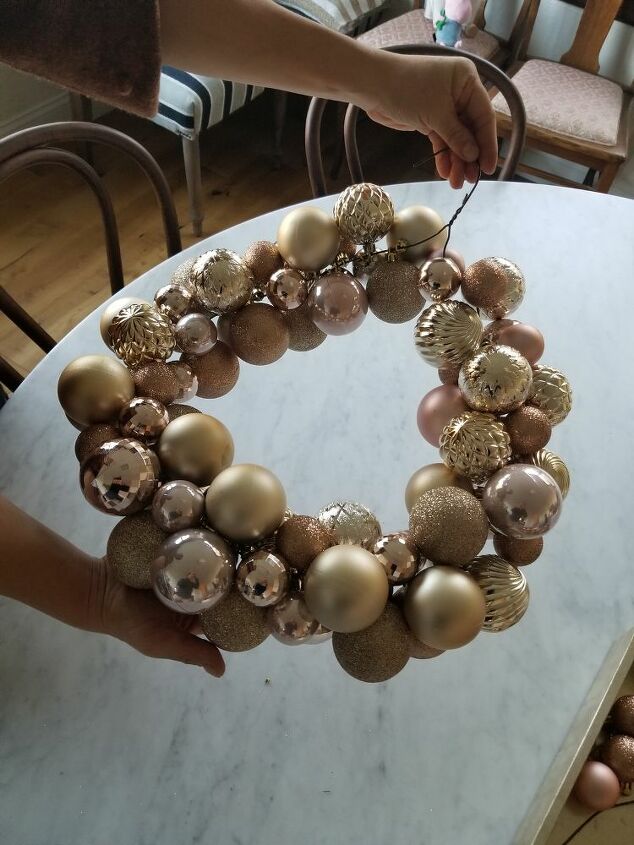
Once you reach the other end, you twist the wire back to its original hanger-like state. When I closed the loop I noticed one side was a bit sparse. I untwisted the wire and added a few more balls. I attempted to tie a bow out of my pretty velvet ribbon, but it was too floppy. The wreaths I made in the past had large bows that I fashioned out of wire-edge Christmas ribbon. I hot-glued these bows on the wire to camouflage the hook of the hanger. This time around I did not have the wire edge ribbon and decided I didn't need a bow after all. I trimmed the wire just enough to keep the entwined section intact, but still be hidden while on the wreath hook.

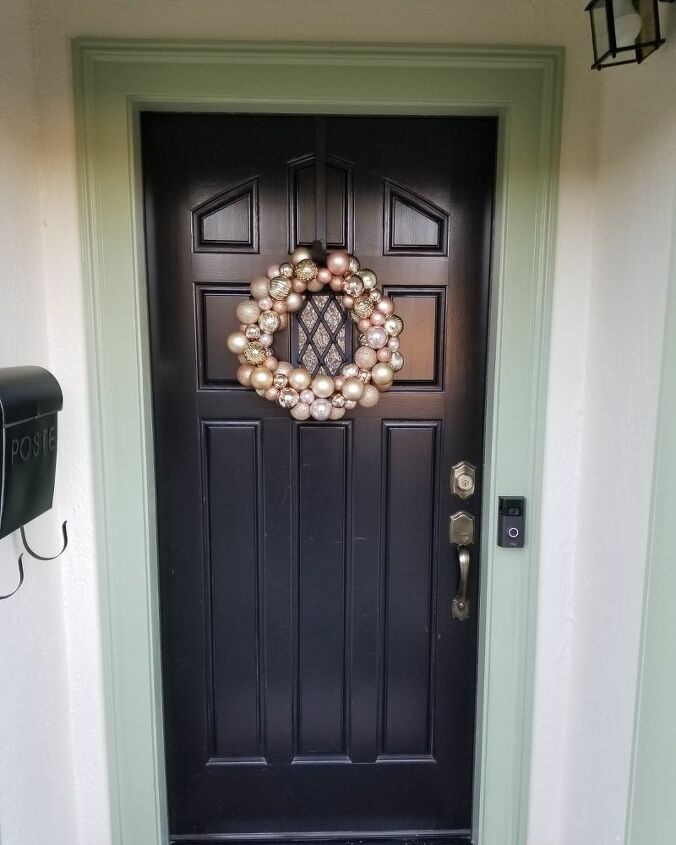
After hanging the wreath I moved around the ornaments to create more balance. Looking at the photo above I still see the left side needs a tad more adjusting. I also see that I need to finish painting the trim ha ha! Overall I'm happy with the result. The entry looks cheerful and ready to greet our guests!
Thanks for reading! Let me know if you have made a wreath; what materials did you use?
Follow me on Instagram to check out my home renovation posts and other tidbits. http://instagram.com/this.dear.casa
Resources for this project:
See all materials


Comments
Join the conversation
-
-
The caps keep coming off my ornaments. What kind of glue would be best to use, for this?


Frequently asked questions
Have a question about this project?
lovely idea!! now where are those wire hangers
What did you do with the ribbon?