


Upcycled Light Fixtures To Holiday Decor
When I painted my main room and entry way earlier this year, I was undecided on what to do with the old light fixtures that we replaced. But then it hit me, these fixtures would make awesome holiday lanterns with a few adjustments. It’s the best kind of project, the upcycled kind of project!
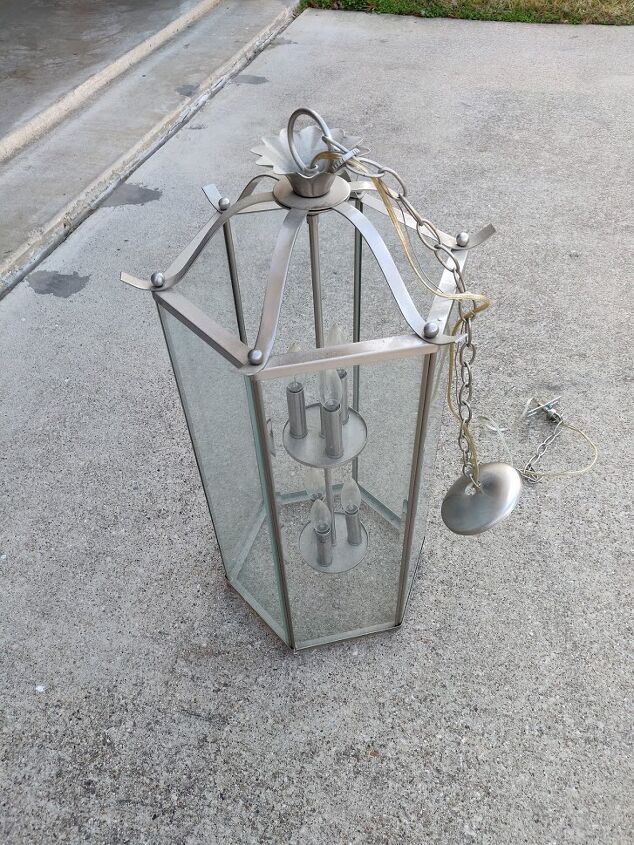
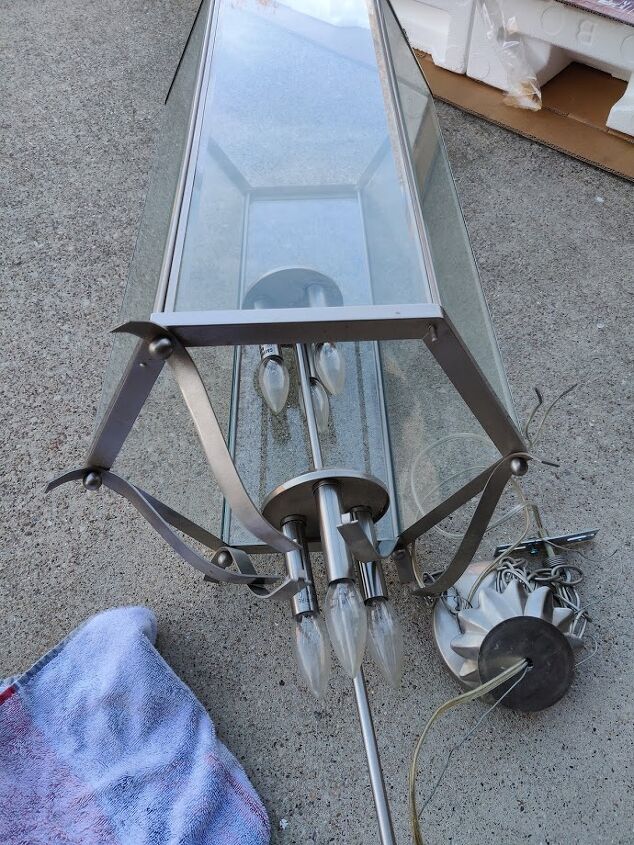
These fixtures come apart quite easily, I didn’t even need any tools. Start by unscrewing the very top ring and continuing piece by piece working your way down until you can remove the inside light unit.

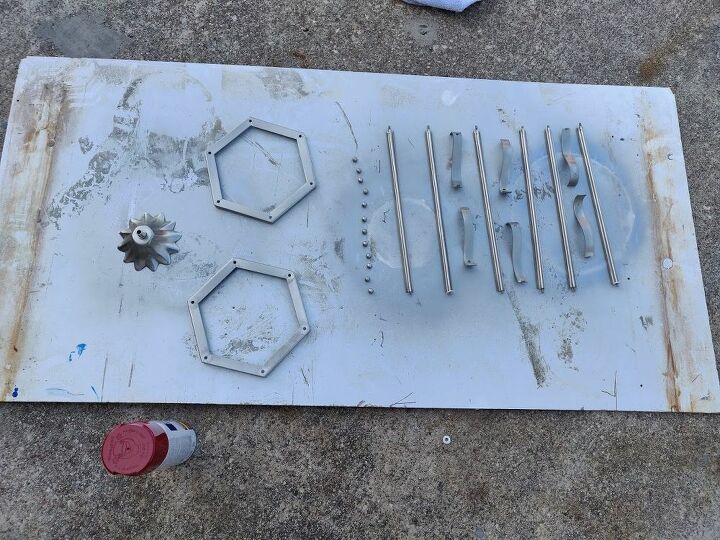
After the light bulb center and cords have been removed, unscrew the top and bottom round head screws. This will allow for the glass panels to come out for cleaning and then you can spray paint the rest of the lantern piece by piece.
It may sound like a lot of work but this was far easier than trying to cover the glass and spray paint the entire fixture.
I chose the red above because my plan was to make these holiday lanterns. You could easily do black or any metal you prefer. Once dried, it’s time to reassemble:
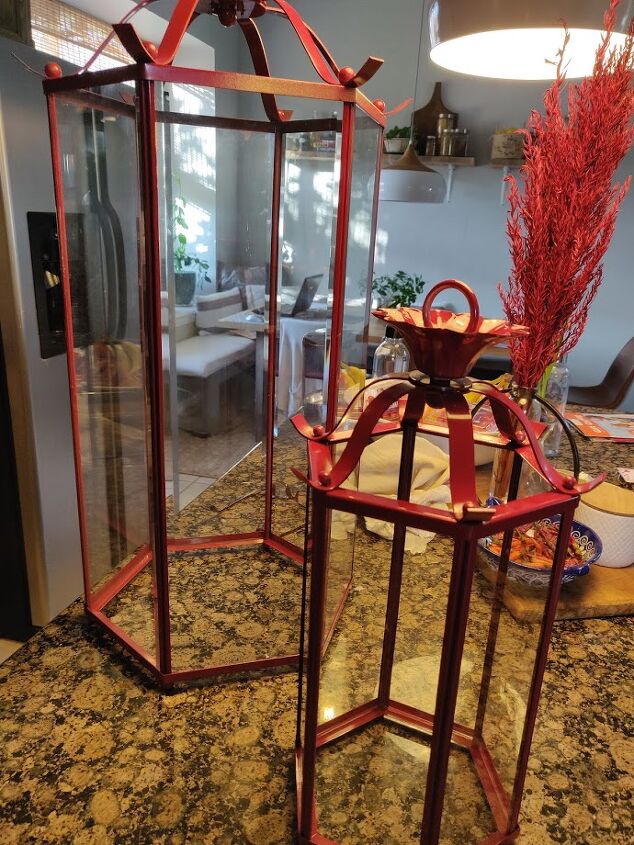
These could go anywhere inside or out but my plan was for outside the front door.
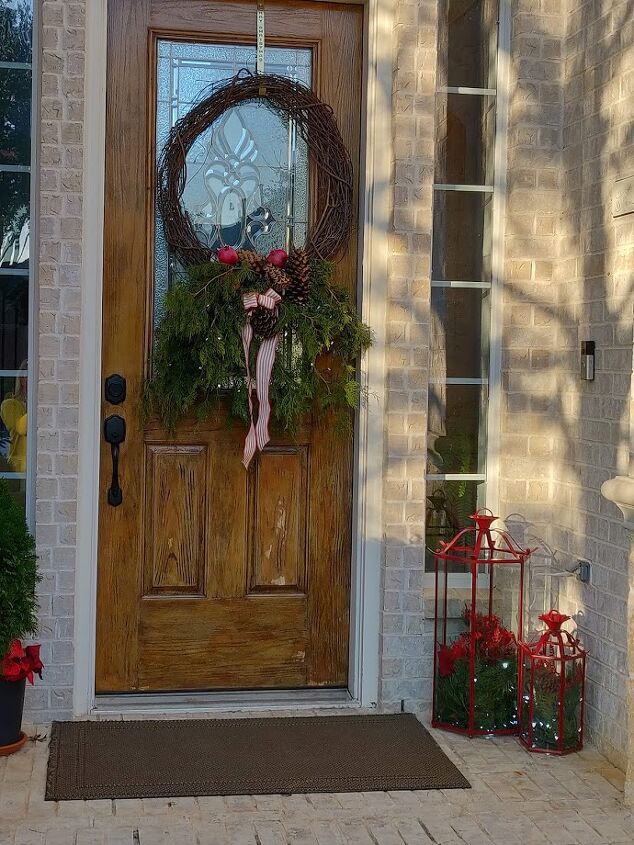
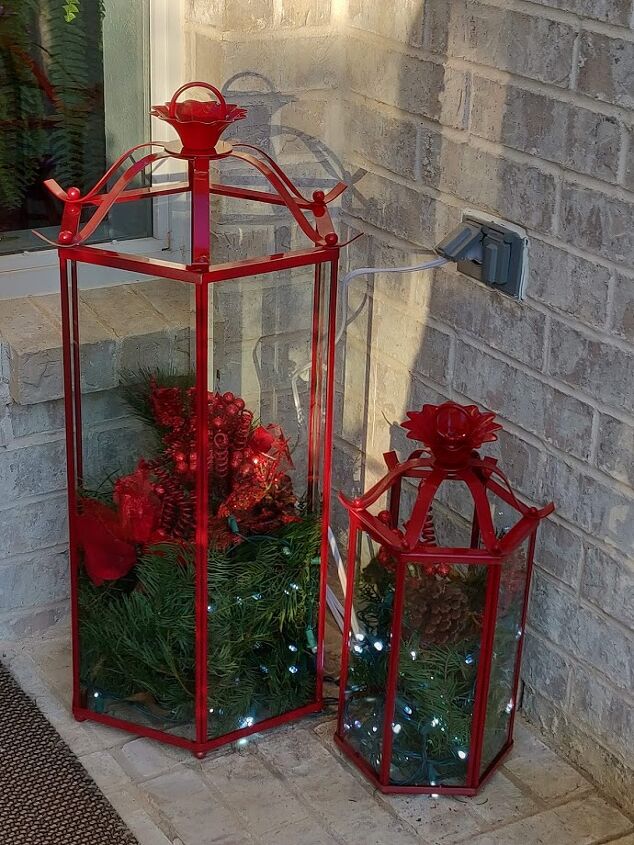
Finished, but I will eventually add the battery operated large candles but for now I made due with a strand of LED lights in each around greenery and pinecones.


Comments
Join the conversation
-
fabulous upcycle!!
-
Love the red. Would work for Valentine’s Day and Fourth of July too. Fall devote also ❤️


Frequently asked questions
Have a question about this project?
Cute!!!?