


Repurposed Hutch Top Using Dixie Belle's Farmhouse Green
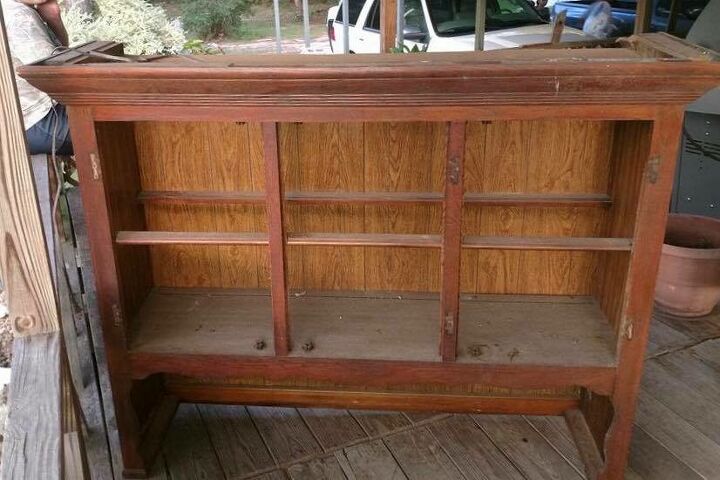
I am so excited to share with you one of my absolute favorite pieces of furniture to repurpose. Old hutch tops! People tend to get rid of these, and either set them on the roadside or sell them for cheap. I found this one on Facebook Marketplace for $20.00.
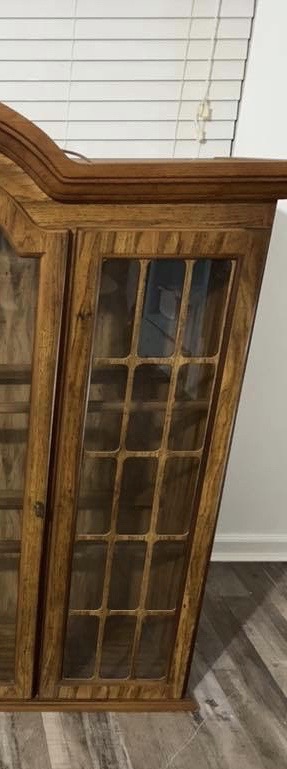
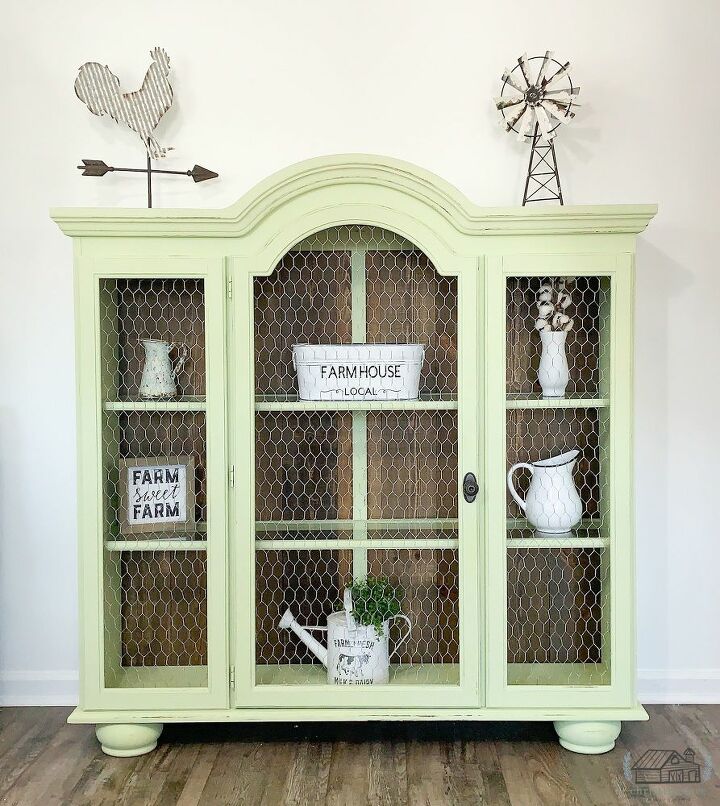
Y’all know I am not going to let a hutch top getaway! Nope, can’t do it. It’s kind of like my obsession with thrift store trays (haha). Hutch tops are so versatile. They can be used for beautiful shelving, bookcases, displaying old quilts, just about anything! Like this one, I repurposed into a farmhouse cabinet. See it HERE.
How do I decide how to repurpose a hutch top? I get this a lot. This is what I do.
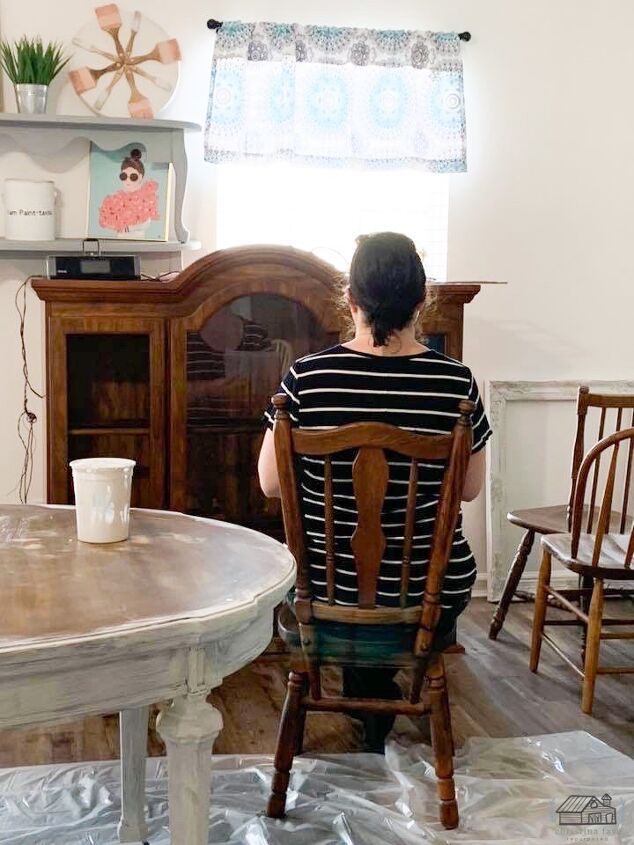
Yep. Sit and just stare and brainstorm. I take notes on colors, ideas, what haven’t I done before, etc.
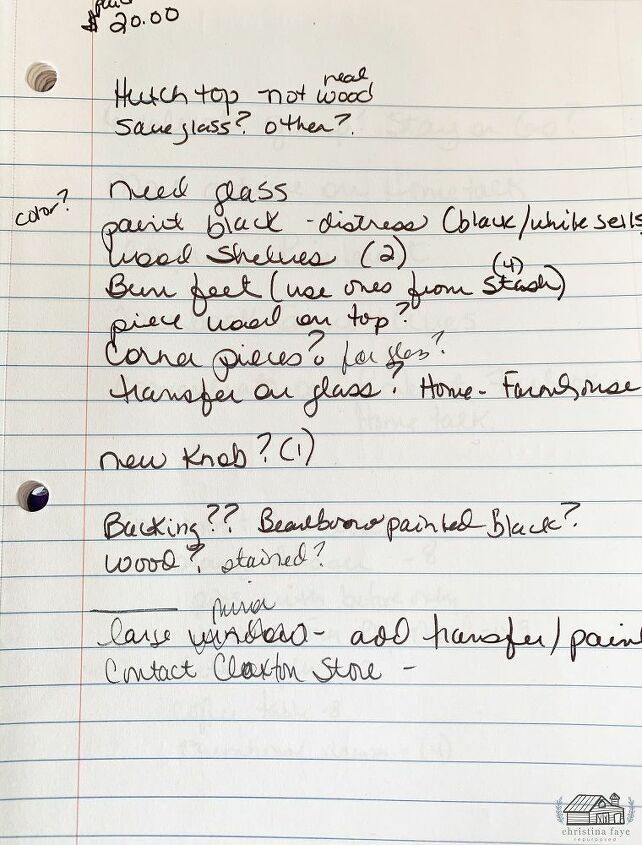
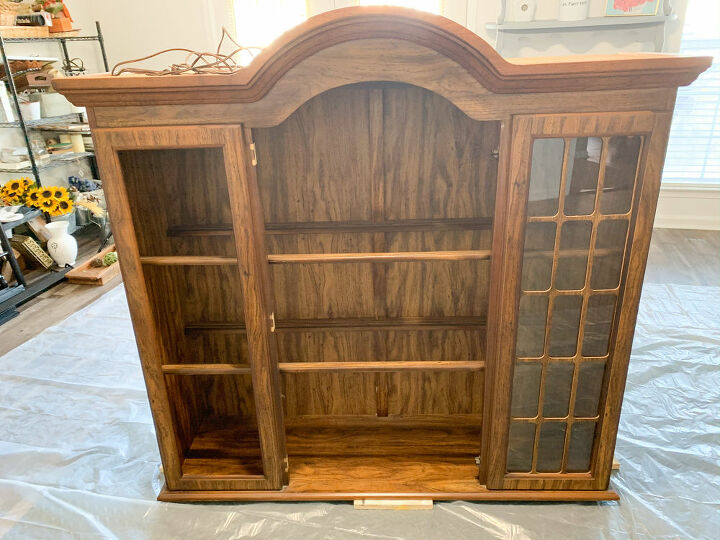
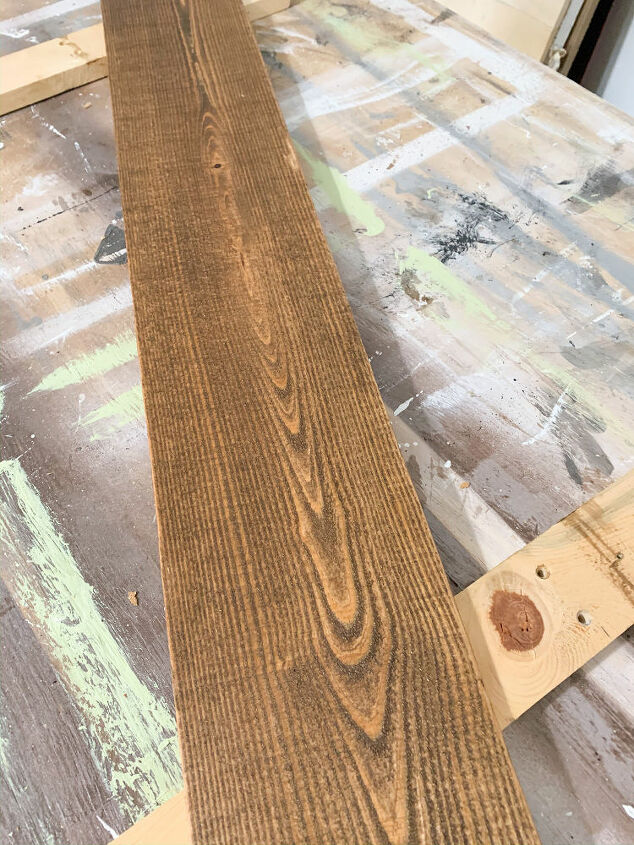
Although sometimes I do not follow my repurposed hutch top plan accurately as I map it out, it’s pretty close. I know some artists can just look at a piece of furniture or an old item and automatically know what they want to create. I, on the other hand, am not. Sometimes I have ideas that go off in my head late at night.This particular hutch top was missing a glass shelf and the glass on one of the slender faux doors on the side. That had to be taken into consideration when planning. Before I started, I called my local glass company. The glass shelves were not expensive at all, so I ordered two for the shelves. $20.00 bucks for two pieces.Part of my plan was to change the back. It was damaged and needed to be replaced. The Hubs to the rescue! He had a few pieces of scrap rough pine board in his workshop. He measured the back and cut them to size and sanded for me.
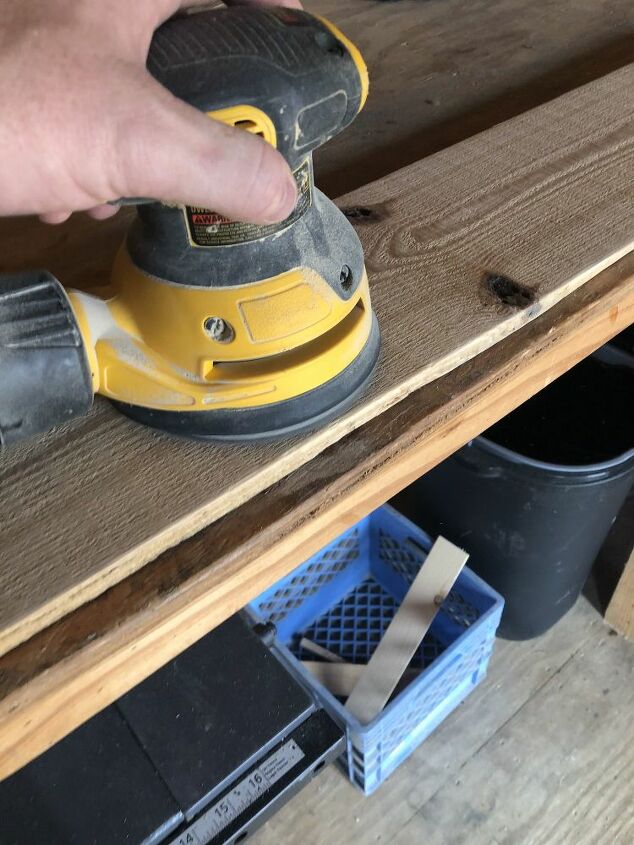
While he was cutting the boards, I removed the back. Unfortunately, it was stapled and not screwed, which sometimes is a pain! Every single staple had to be removed. I used a flat-headed screwdriver to raise the staple and then used a small pair of needle-nose pliers to remove the staple.
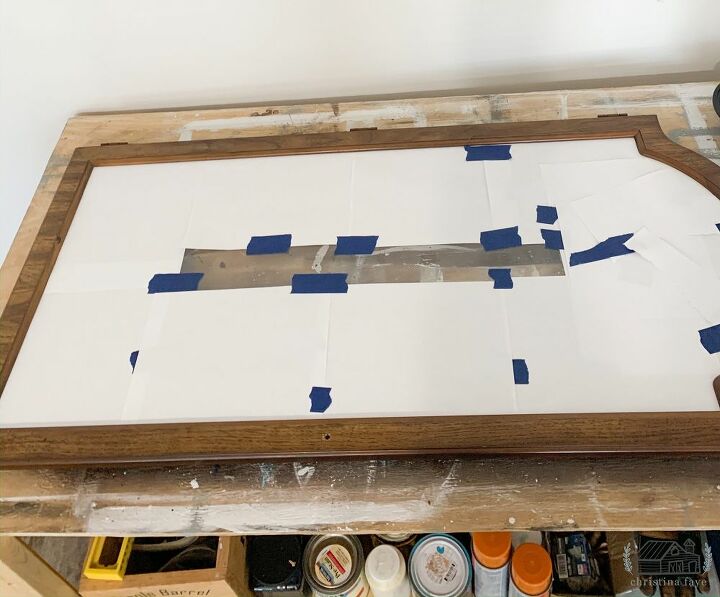
I also removed the middle door and prepped it for paint. I used regular xerox paper to protect the paint from getting on the glass. It slides right under the glass edge, keeping any paint from getting on the glass. (This was before we decided to remove the glass and use poultry wire. We decided after the door was painted to add the poultry wire).
The two slender side doors were actually not doors. I was not feeling the wood panels and one was damaged, so I removed them. We were going to be adding poultry wire.
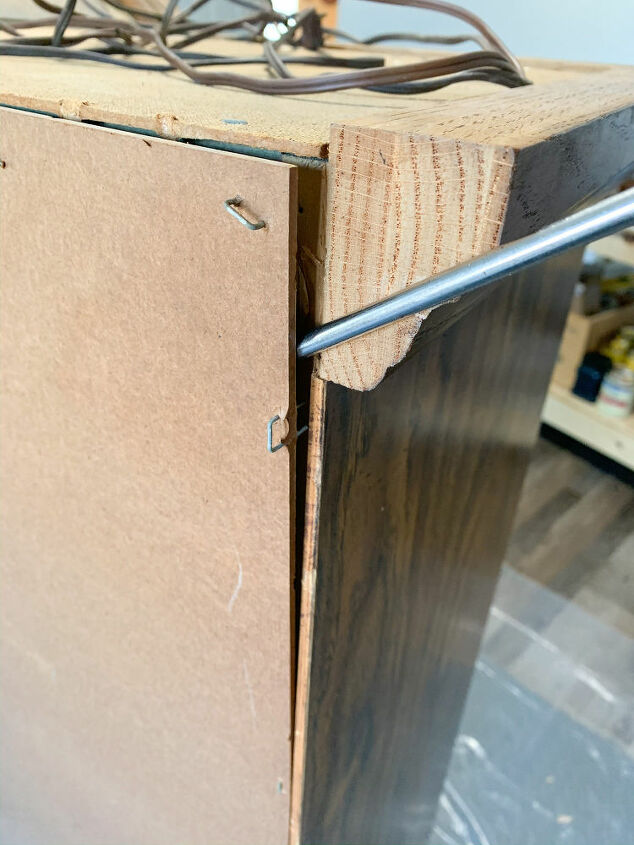
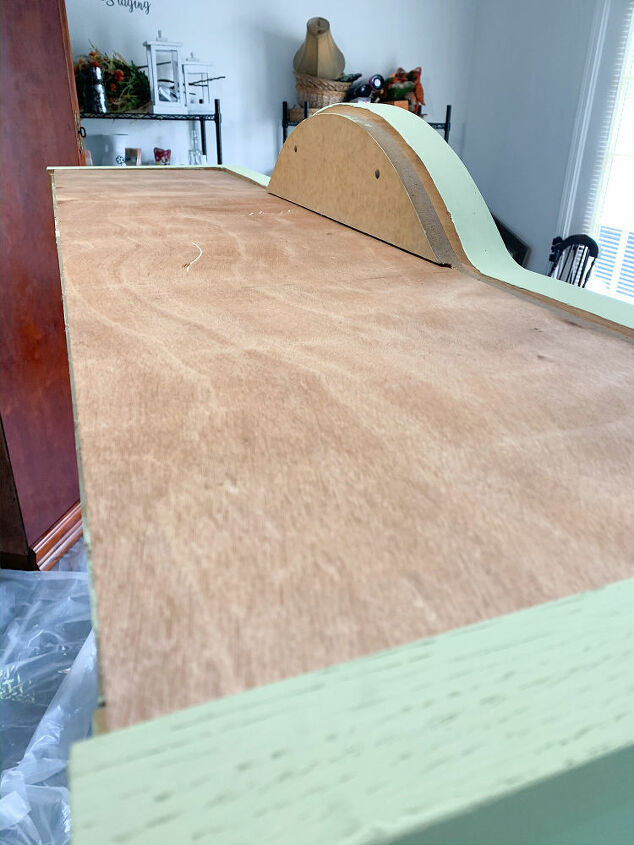
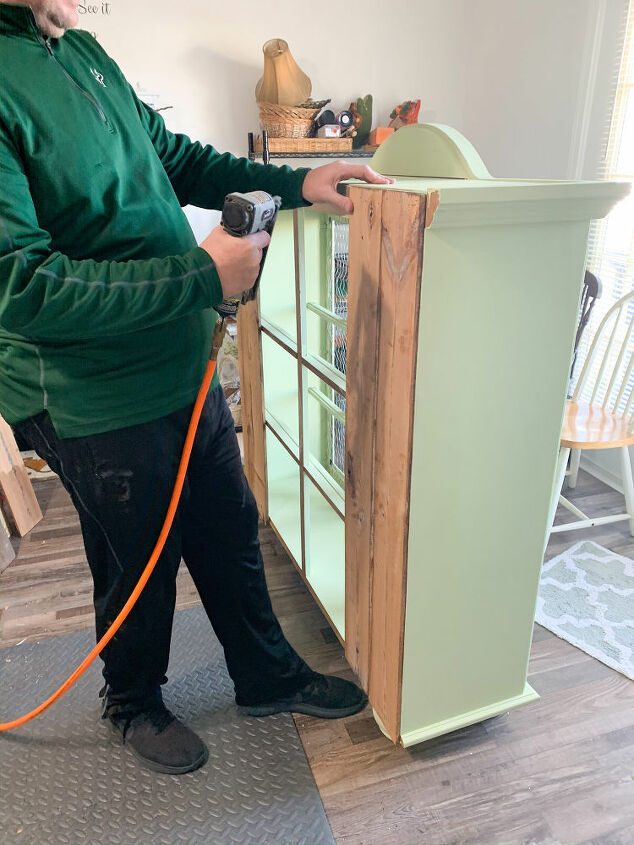
The last thing that had to be removed was the particle board piece on the top. It was damaged in a few areas. It was stapled as well, but not as many staples, thank goodness. The Hubs did not have any birch wood pieces in his stash, so we improvised! I had purchased a wood dresser a few weeks back, and it had a wood back that was in great shape! He removed the back from the dresser. Then, he cut me a piece to fit on top of the cabinet in place of the old particleboard. (Note: The dresser was missing all the drawers except for two. I know I would be adding a new back to the dresser once I started the repurpose job).
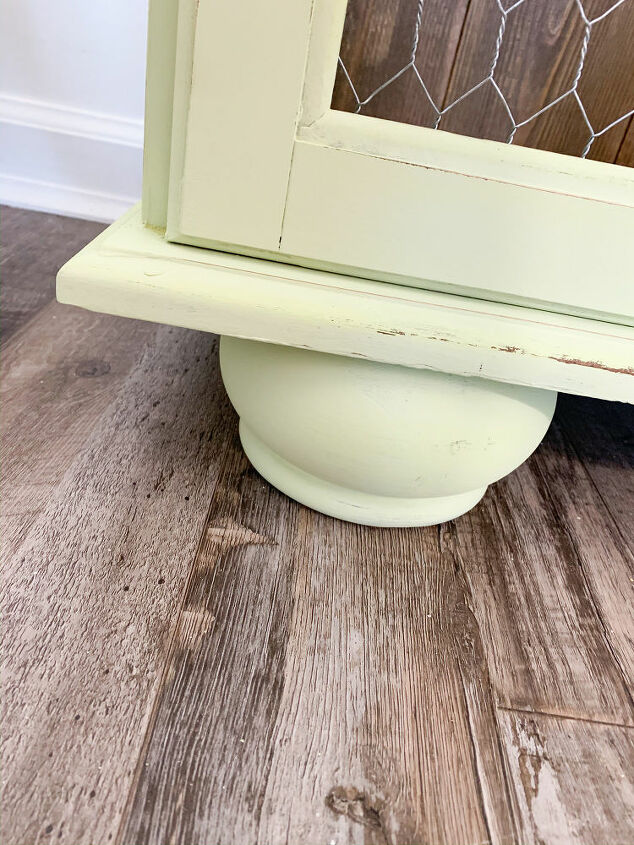
The last problem we had to solve was lifting the cabinet off the floor. I always like to add feet to my hutch top repurpose jobs. I feel they look like, well, hutch tops, when they are left as is and not lifted off the floor. Luckily, the Hubs and I found an old leather ottoman on the side of the road and picked it up. Most of the leather was gone, but the bun feet were GORGEOUS! Sometimes the feet on a piece of old furniture can be salvaged when nothing else cannot.
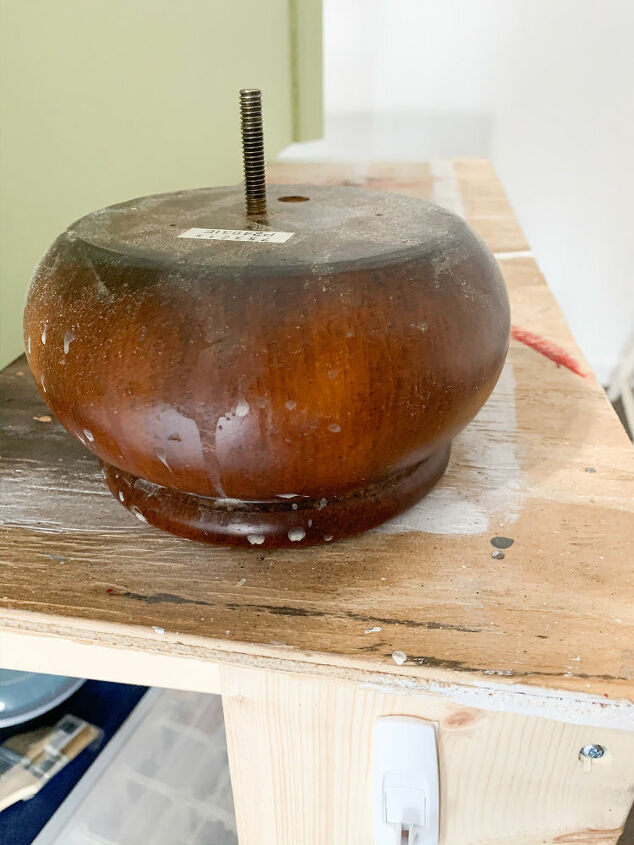
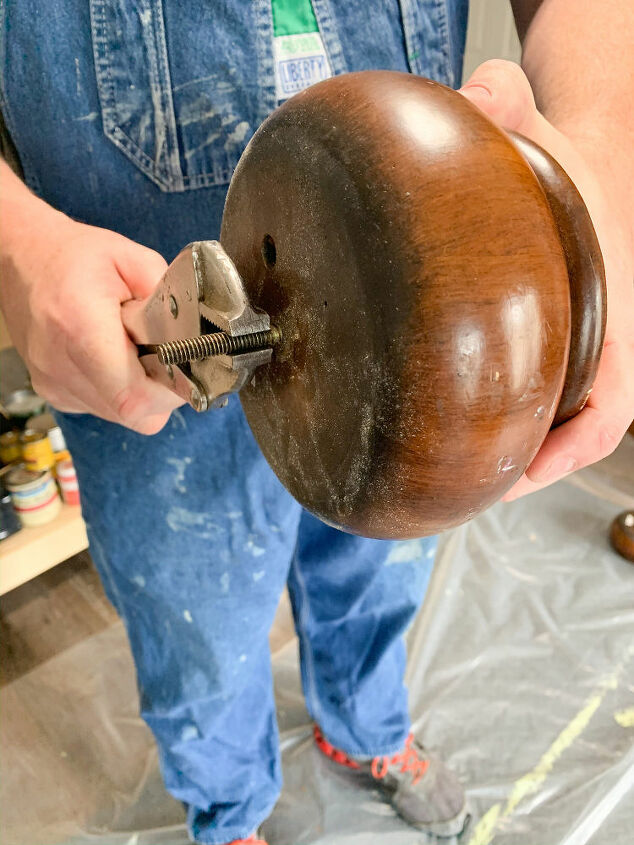
The feet had large screws that had to be removed. I wanted the smaller part of the bun to be at the top once attached to the hutch. A pair of pliers was used to remove the screw.
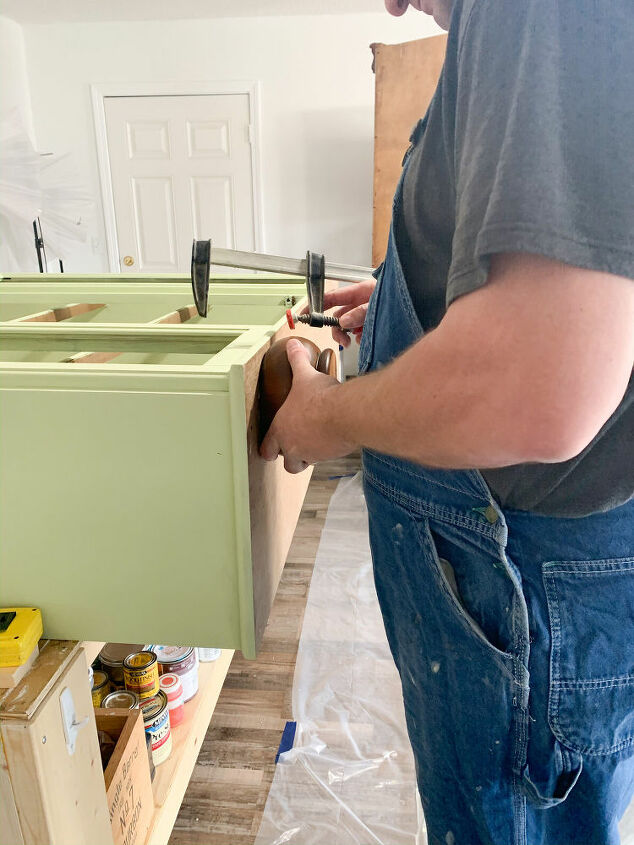
The Hubs attached the feet using drywall screws. We had to use drywall screws because the piece of wood on the bottom of the hutch top was THICK. He also added wood glue for extra adhesion.
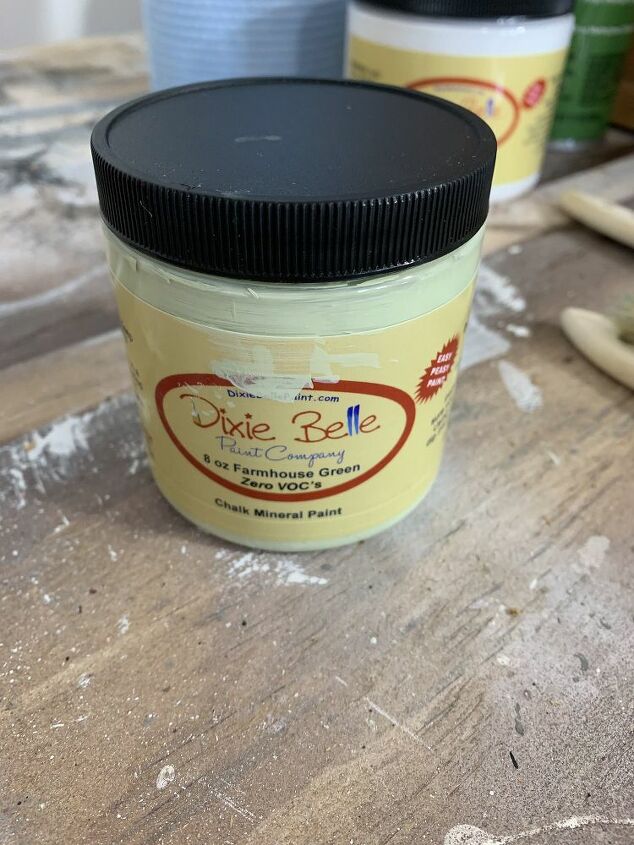
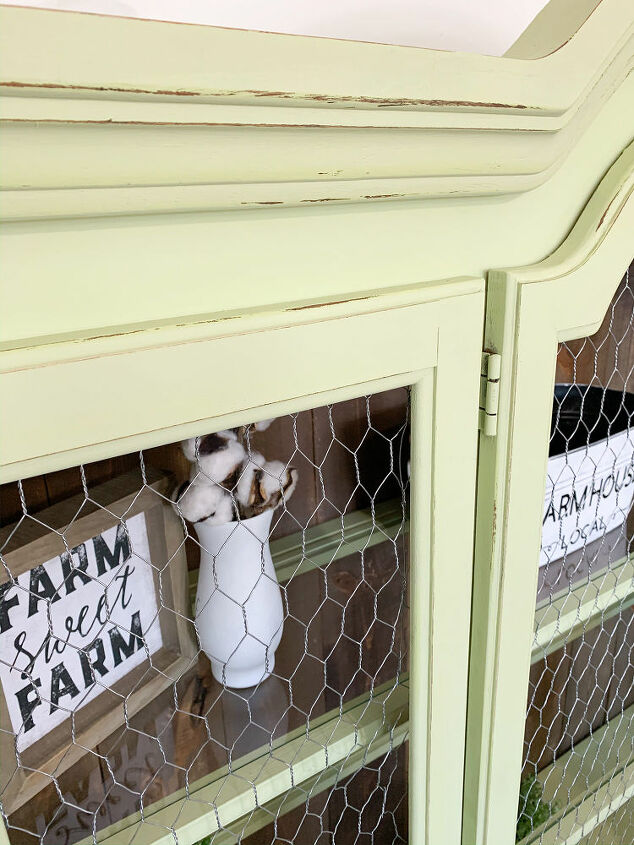
My paint color choice was Dixie Belle’s Farmhouse Green. I just love the color! It would be perfect for my repurposed hutch top.
Before I started painting I applied one coat of Special Walnut Stain by Minwax to the wood strips for the back. I set them aside to dry.
I painted the inside of the cabinet as well as the outside, the bun feet, and the top board we replaced. It took two coats of paint.
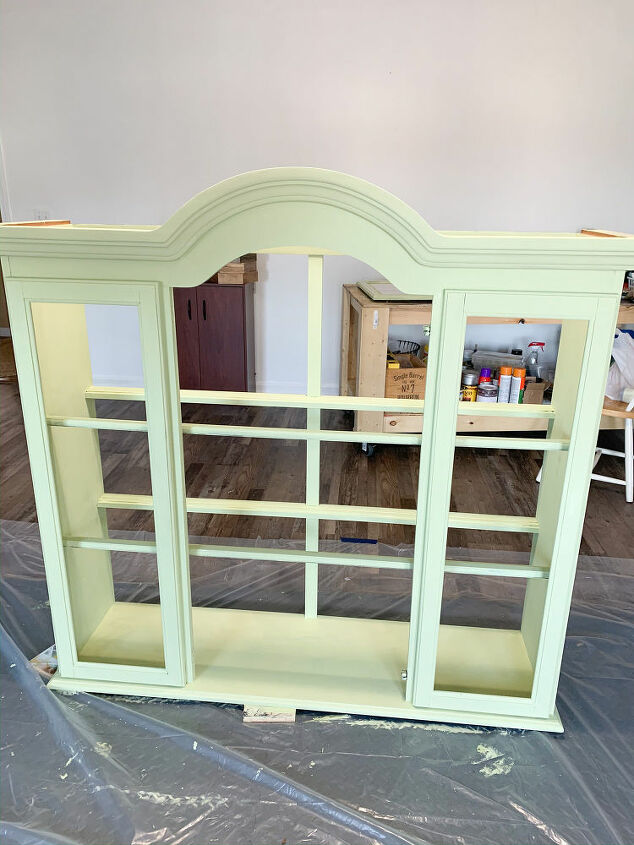
Once the cabinet dried for 24 hours, I distressed around the edges of the hutch top and the door with a piece of 120-grit sandpaper. I wanted it to look old and worn.
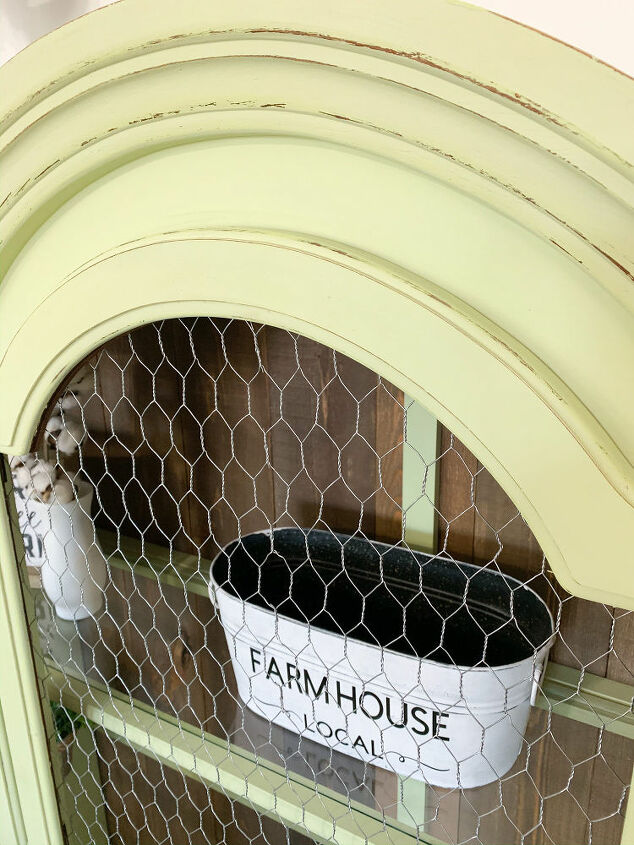
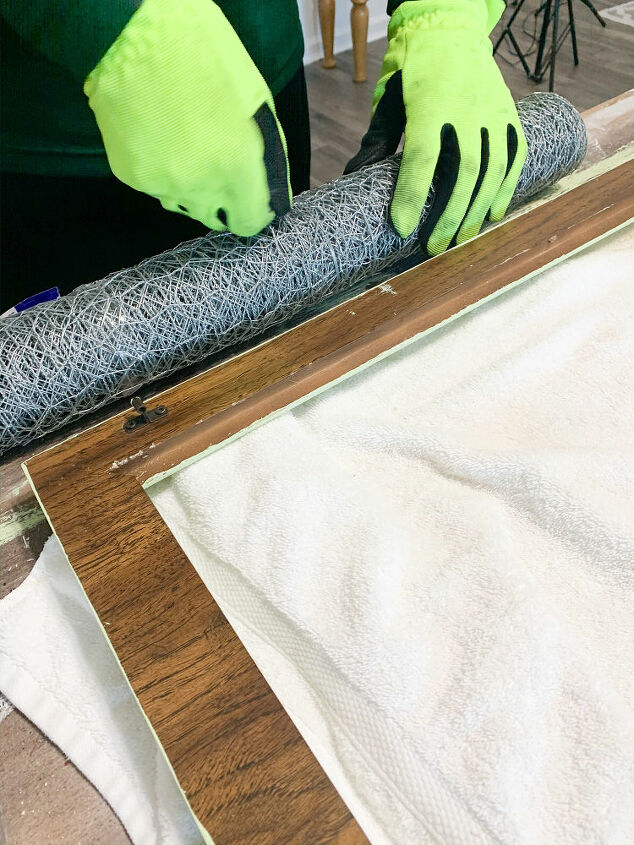
Once I was finished distressing, I applied one coat of Dixie Belle’s Best Dang Wax to the entire cabinet. We also added the glass shelves while the back was off. This made it easier to work with the glass.Before adding the back, the poultry wire was attached to the two faux doors. The poultry wire was stapled to the backside of the doors. (NOTE: Be sure to wear gloves!).

The Hubs also added the poultry wire to the middle door before we fastened it to the cabinet after he removed the glass.
We added the wood strips to the back using an air staple gun (well the Hubs did).
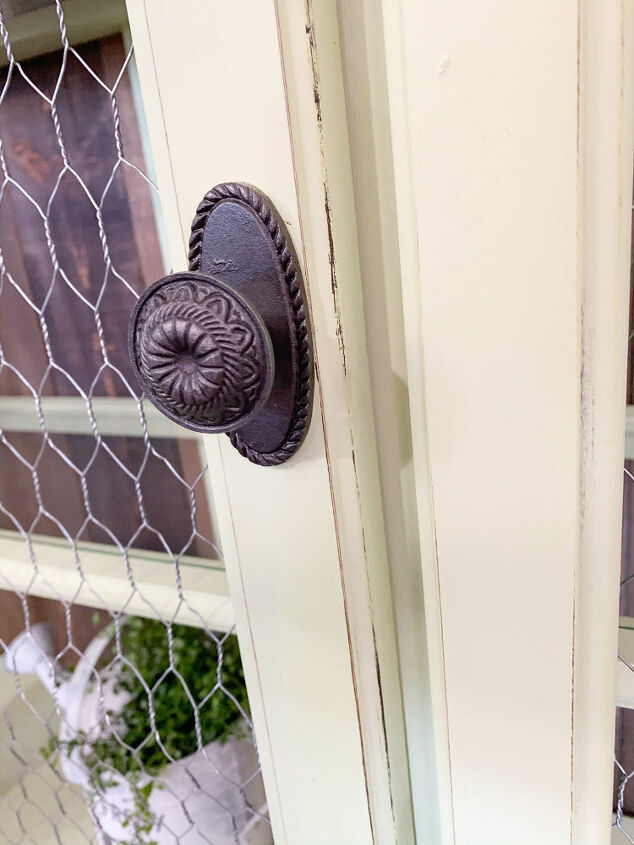
Lastly, we attached the door. I purchased new hardware from Hobby Lobby.
In conclusion, I was thrilled to be able to save this hutch top! Number 5, to be exact! Yep, I am keeping a tally. I want to save as many of these as I can and keep them out of our landfills.
Always remember when looking at something that you think is junk. "It's not about what it is, it's about what it will be." Head on over to the blog at www.christinafayerepurposed.com and subscribe to my mailing list and you will receive my FREE Ebook!
Check out this project!
Also, if you are interested in starting your own furniture flipping business, head on over to the blog and subscribe! In the next few weeks I will have a FREE Resource Library that will help you get started! You do not want to miss out 
Resources for this project:
See all materials


Comments
Join the conversation
-
Absolutely gorgeous!!
-
Just picked one of these up on MP for free, can't wait to get started!


Frequently asked questions
Have a question about this project?
I would like to send this to my sister but how? It won't let me tag anyone
This would make a great child's wardrobe!!!! Perfect size.
Truly amazed at the imagination on here and all the repurposing. I have no room anymore (!) my house gets "smaller" every time I go to an estate sale" and I have over 400 s/f! Maybe I should stat to sell some repurposed things!
I have a 60's chest with great lines and wonderful brass V-shaped drawer pulls. Our TV sits on it in front of the treadmill. Looks like wood but I can't really tell. I don't want to ruin it. I will paint it black. It has lines routed in which I will paint gold/brass. It will compliment my vintage Paul McCobb dresser bequeathed to me. I bough Magnolia Home charcoal black "oil-enriched" water base paint.
Any direction/instructions on how to start this puppy off? I used to do more of this when my children were home.
Remember the crackle paint? we had to go to the wood store and get hide glue because there were no kits for this! I'm, old school, but now I'm just "old"! :)