


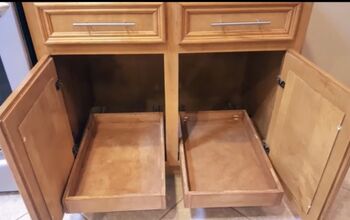
Organize Your Cabinets With Pull-Out Drawers
4 Materials
$100
1 Hour
Medium
Maximize cabinet storage with mesh pull out drawers! Step by step instructions on how to install multiple drawers inside of a cabinet.
{
"id": "6044417",
"alt": "",
"title": "",
"video_library_id": "4373",
"thumbnail": "https://cdn-fastly.hometalk.com/media/2020/02/06/6044417/organize-your-cabinets-with-pull-out-drawers.jpg"
}
{
"width": 634,
"height": 357,
"showRelated": true,
"noautoplay": ""
}
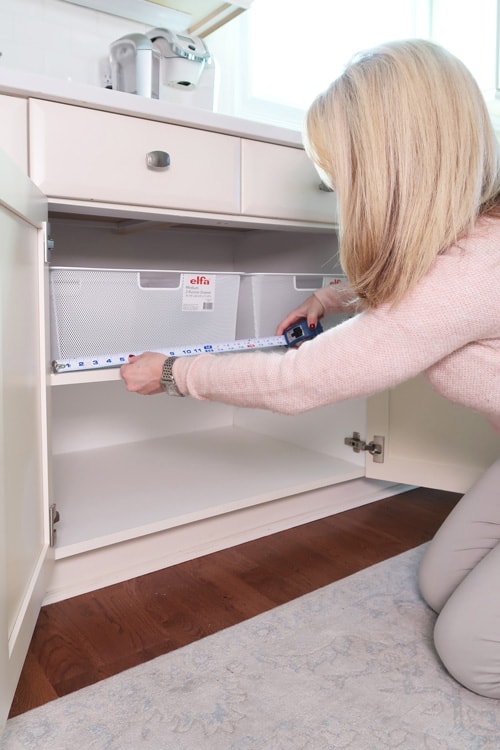
STEP 1:
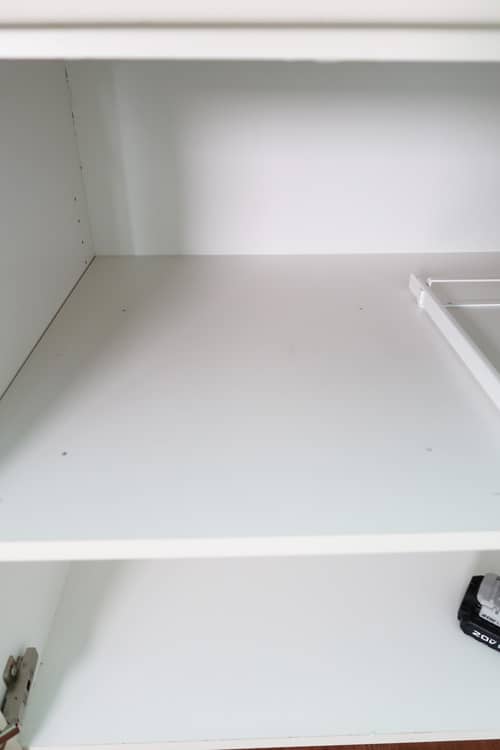
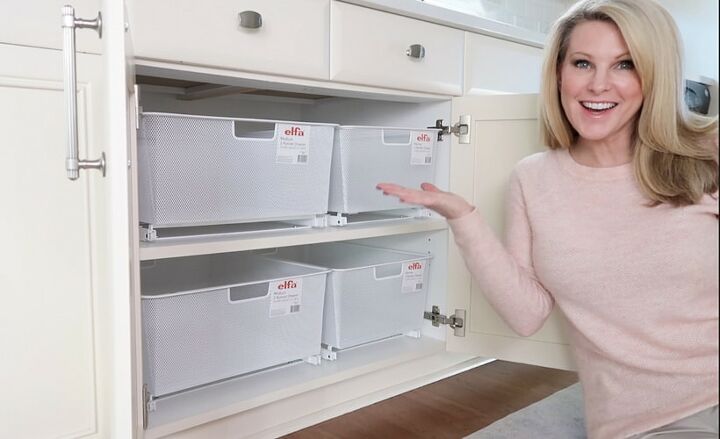
- Measure the inside cabinet width between hinges/door frame and depth of cabinet to determine the amount of space you have for mesh drawers.
- The inside of my cabinet was 30 inches wide between the concealed hinges and 23 inches deep.
- 2 ea. Elfa Narrow 2-Runner Mesh Easy Glider White (12-7/8″ x 20-3/4″ x 8-1/2″ h)
- 2 ea. Elfa Medium 2-Runner Mesh Easy Glider White (16-7/8″ x 20-3/4″ x 8-1/2″ h)
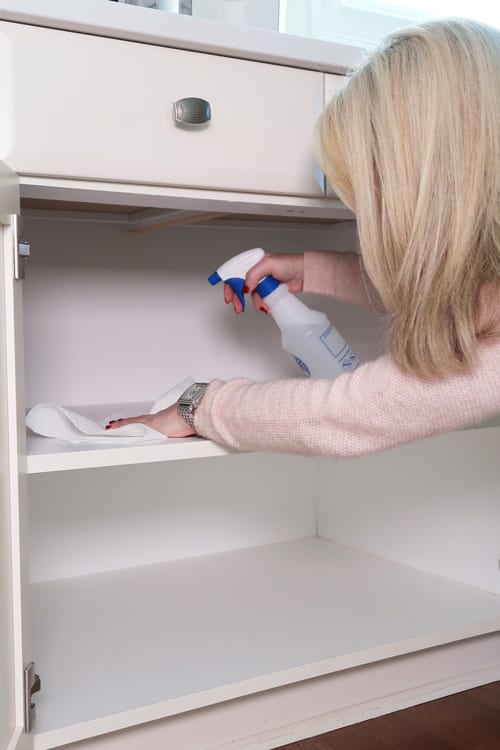
STEP 2:
- Empty cabinet completely and clean thoroughly.
- I used a 1/3 bleach 2/3 water spray and paper towels.
STEP 3:
- Place drawers on frames in cabinet to determine general drawer placement.
- Ensure cabinet doors can close and drawers can be full closed. Recommended installation is 2 inches back from the edge of the shelf.
- Mark end of each rail with a pencil.
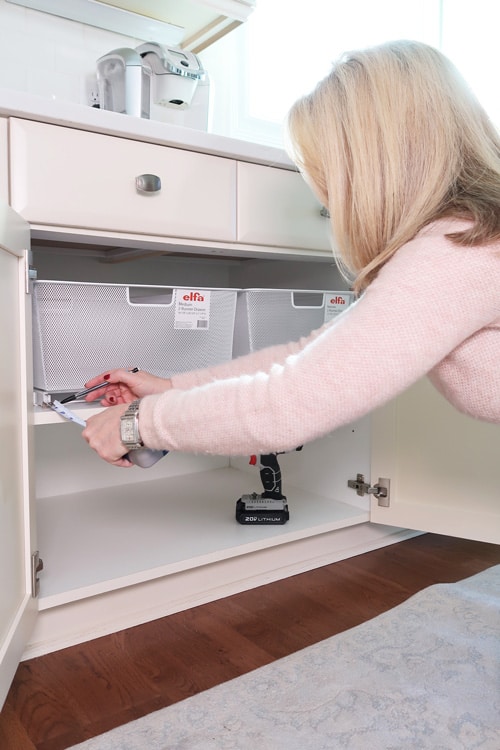
STEP 4:
- Gently remove drawers from frames and make sure they stay on the marks you just made.
- Using a pencil mark the 4 holes of the bottom frame for screw placement.
STEP 5:
- Remove frame from cabinet to expose marks where screws will be installed.
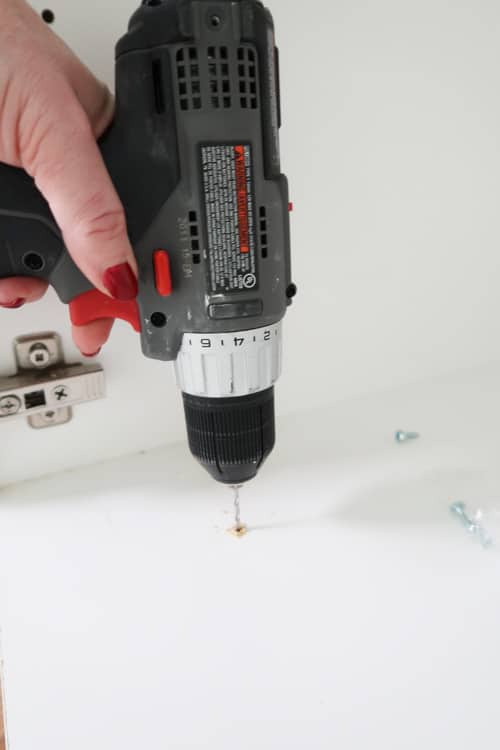
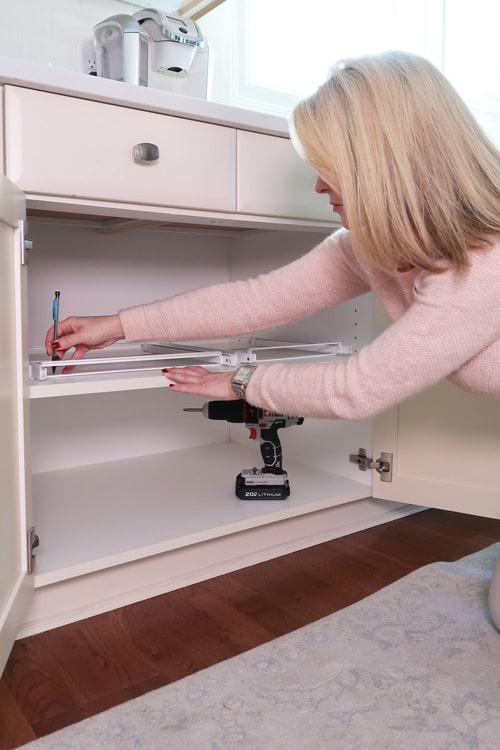
STEP 6:
- Attach a small drill bit to drill and create 1/4" pilot holes for screws.
- This makes it much easier to install the frame in the exact location marked.
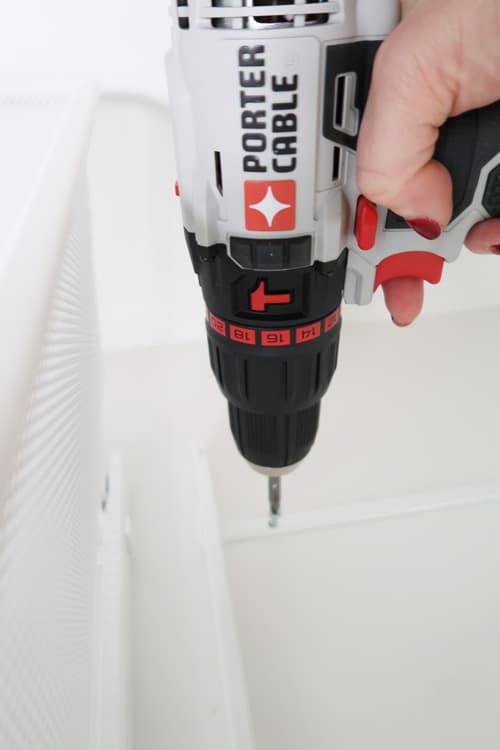
STEP 7:
- Using a Phillips head attachment, install screw through frame onto the cabinet shelf.
- Reinstall frame rail that the drawer attaches to.
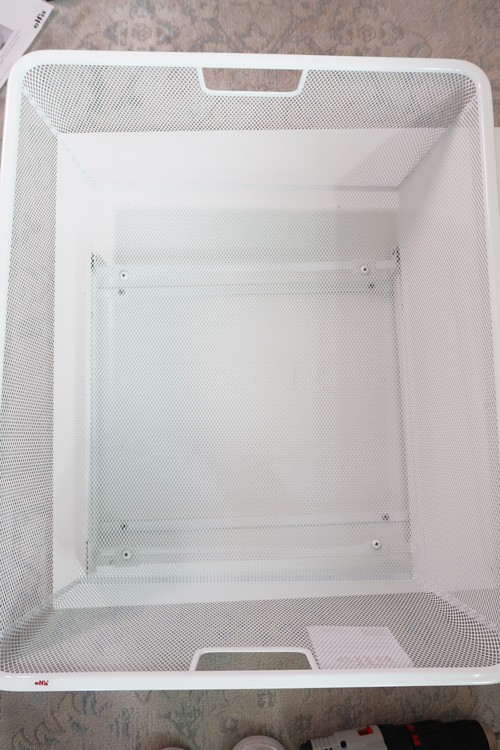
STEP 8:
- Attach plastic clips to frame 1 inch in on all 4 corners.
- Ensure clip hole placement is to the inside of the frame. Set drawer in place paying attention to the overhang in the front and make sure it's centered side to side.
- Screw into place with white screws provided.
STEP 9:
- Install all drawers in cabinet.
- Make any necessary alignment adjustments by removing white screws from clip and adjusting drawer placement on frame...side to side or front to back.
STEP 10:
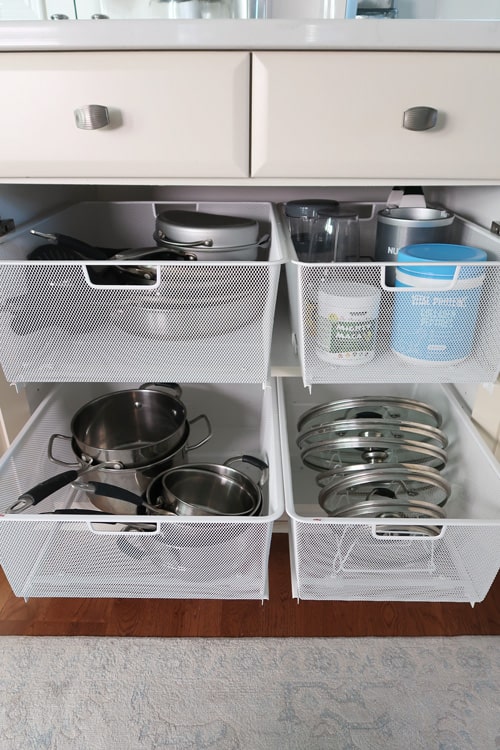
- Reorganize cabinet and fill with items that make the most sense in the new drawers!
Resources for this project:
See all materials


Any price and availability information displayed on [relevant Amazon Site(s), as applicable] at the time of purchase will apply to the purchase of this product.
Hometalk may collect a small share of sales from the links on this page.More info

Want more details about this and other DIY projects? Check out my blog post!
Comments
Join the conversation
2 of 14 comments
-
When I first moved into my condo with very small kitchen; hence not a lot of storage, I called "the guy" to construct some sliding shelving in a couple of the lower kitchen cabinets. SO expensive! So, what I did instead was go to the $$ store, pick up a couple of cheap serving trays and because they're plastic, slide in and out easily. That's about a year ago and they still are working at doing the trick. There's always an alternative. Like what you've done "Porch" but I don't have a drill and don't really want one ;)
-
This is great!! It’s exactly what I was hoping I could find. Thanks so much for sharing!


Frequently asked questions
Have a question about this project?
Very cool idea!! I love it. But I am thinking it is expensive?
Were you able to buy the sliding drawers separate or did you buy two units and cut the slider parts off to mount in your cabinet? I've scrolled through and can't find the sliding drawers separate....Am I just overlooking them?
Ok this looked toooo easy!! Was it? I have a large cabinet under my stove top, it’s electric. I could use this method.