


How to Repair a Wobbly Chair
4 Materials
$3
10 Minutes
Easy
Do you have a wobbly chair or table? Don’t throw it out! Today we are going to show you How to Fix a Wobbly Chair or Table. In fact, this quick and easy furniture repair can be done without any special tools. Not only is this step by step tutorial easy to follow, but when you try it, you will be amazed that it took no time at all.
Alright, you know that Steph and I love thrifting, shopping garage sales and vintage markets. It is one of our favorite past times! We love finding a discarded piece of furniture, giving it some love and turning it into a treasure. It’s the perfect DIY!
We love finding a discarded piece of furniture, giving it some love and turning it into a treasure. It’s the perfect DIY!
{
"id": "6051422",
"alt": "",
"title": "",
"video_link": "https://www.youtube.com/embed/jSea1f9MgB4",
"youtube_video_id": "jSea1f9MgB4"
}
{
"width": 634,
"height": 357,
"showRelated": true
}
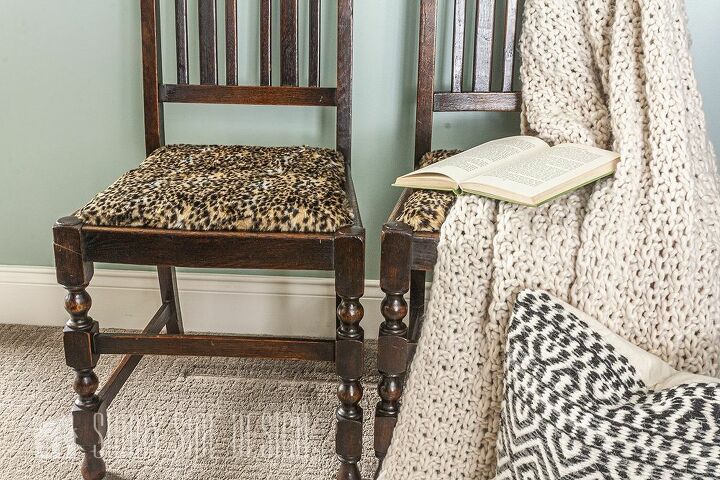
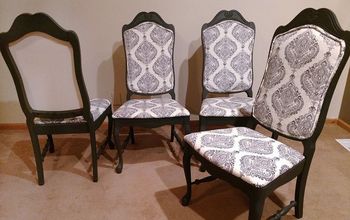
See the chairs transform from start to finish.
- Wood glue
- Small old paintbrush
- Straps, rope or clamps
- Damp cloth
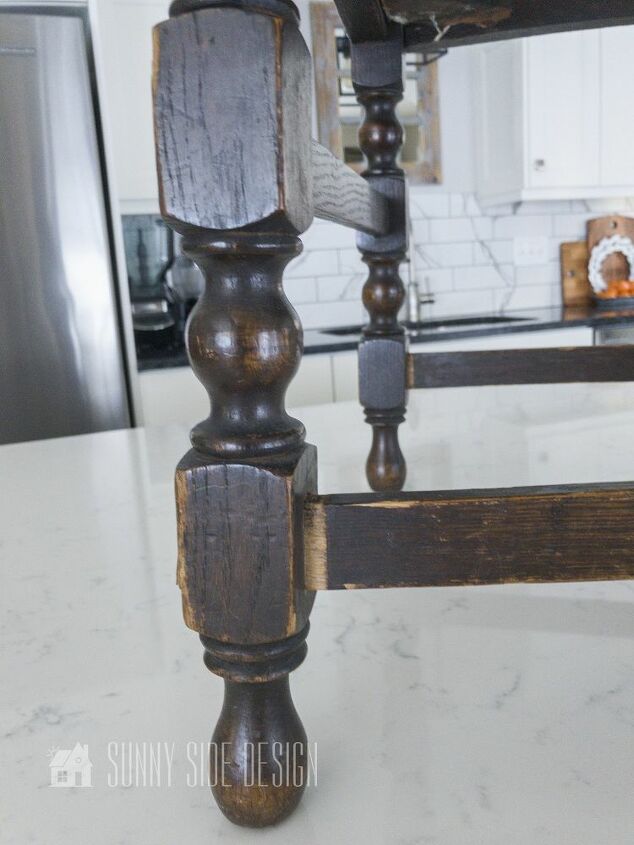
Examine the chair for any other loose joints. You will want to repair them all at the same time.
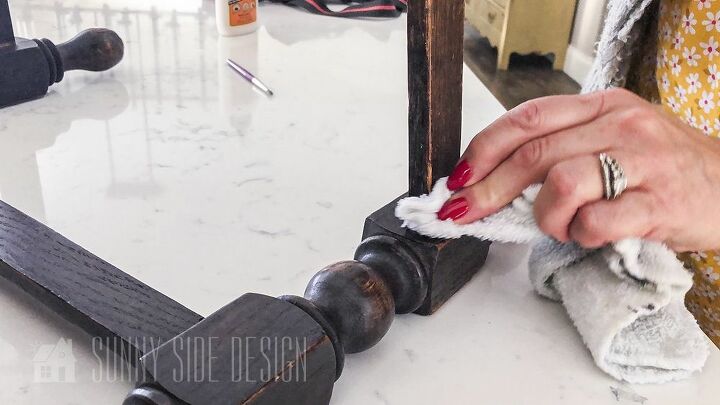
With a damp cloth wipe off any excess glue.
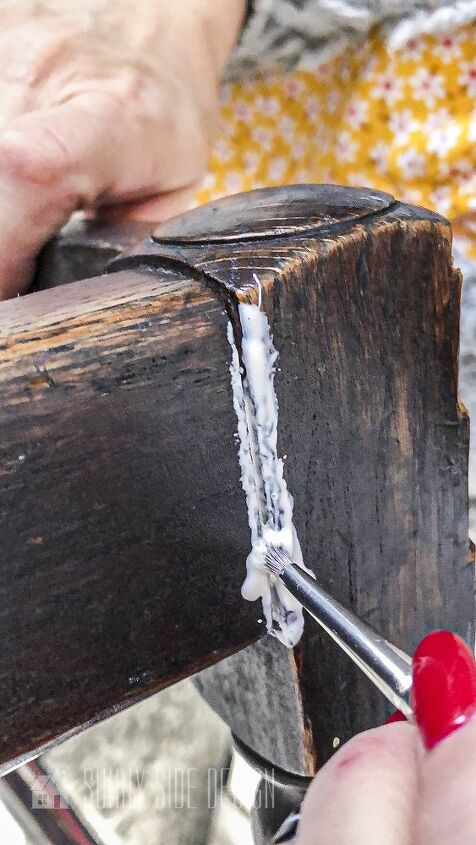
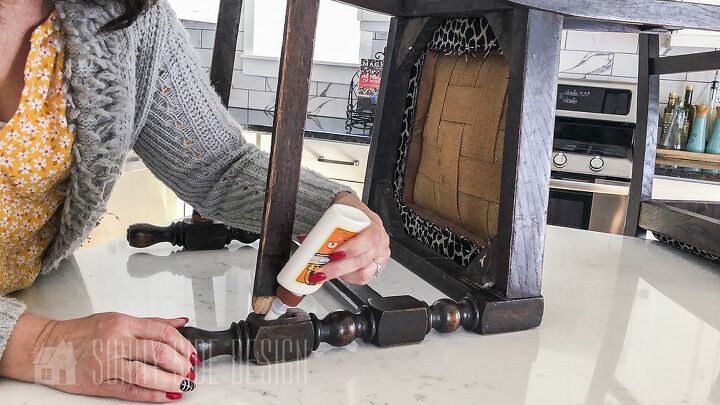
There was an area near the seat that was starting to separate. In fact, the joint itself was still tight enough that it would not come fully apart. Nevertheless, I wanted to secure this area while I was repairing the chair. With this in mind, I used a small paint brush, then worked the wood glue into the joint.
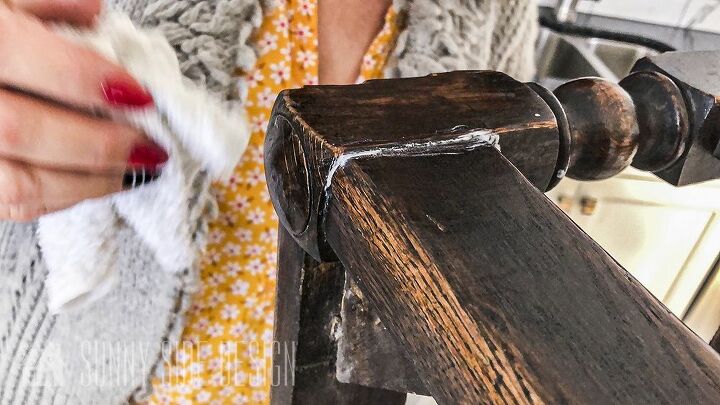
Once again, remove any excess glue with a damp cloth.
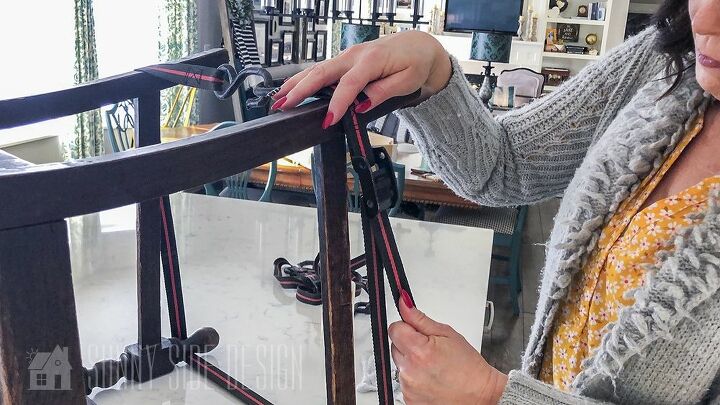
Now secure the joints either with straps, rope or a clamp while the glue dries. The side stretcher joints were easily secured with a strap.
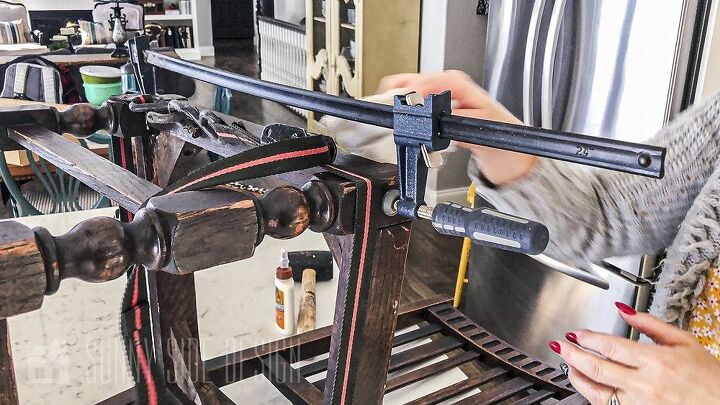
However, it was difficult to get the strap tight enough to pull the joint near the seat together. I tried tapping it with a rubber mallet and I still couldn’t get it tight enough. So, in order to pull that joint together I used a 24″ clamp.
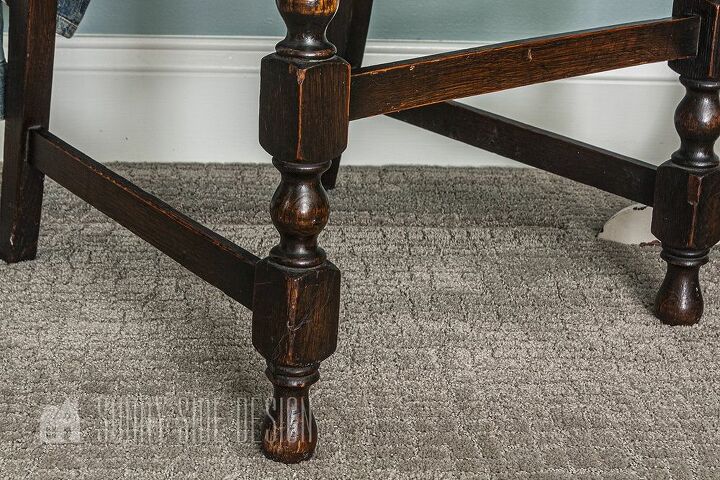
The next day, I removed the straps and clamp. I now have a perfectly sturdy chair!
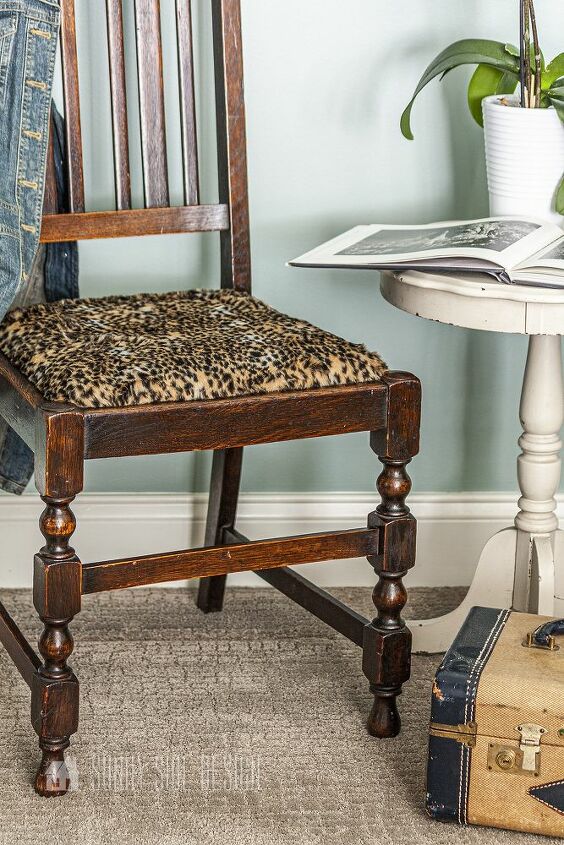
It is so rewarding to repair and refinish furniture pieces that might have ended up in the trash. We love the way this chair turned out!
For more furniture refinishing ideas click here.
Resources for this project:
See all materials


Any price and availability information displayed on [relevant Amazon Site(s), as applicable] at the time of purchase will apply to the purchase of this product.
Hometalk may collect a small share of sales from the links on this page.More info

Want more details about this and other DIY projects? Check out my blog post!
Comments
Join the conversation
3 of 17 comments
-
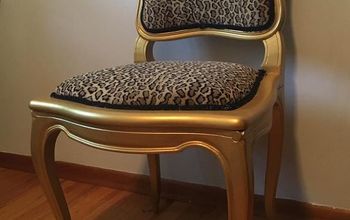
I am so glad that no paint was involved in refurbishing these chairs! They're beautiful just the way they are, and I LOVE the cheetah print seats! Great job!
-
Where possible,I've found it's better to go ahead and completely separate the 'broken'joint,try scraping/sanding/dremeling as much of the old glue off,then regluing and clamping with proper clamps.Let set for 24,preferably 36 hours and that joint should be good for many years.


Frequently asked questions
Have a question about this project?
How do you repair a crack in the leg of the dining chair?
Beautiful old Chairs. I love old chairs to👍❤️