


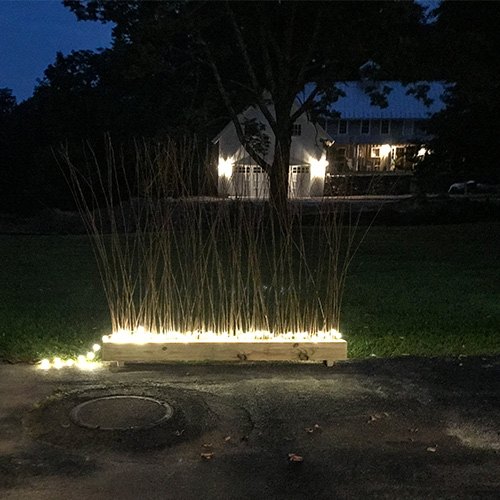
Make A DIY Lit Privacy Fence Using Ikea Branches
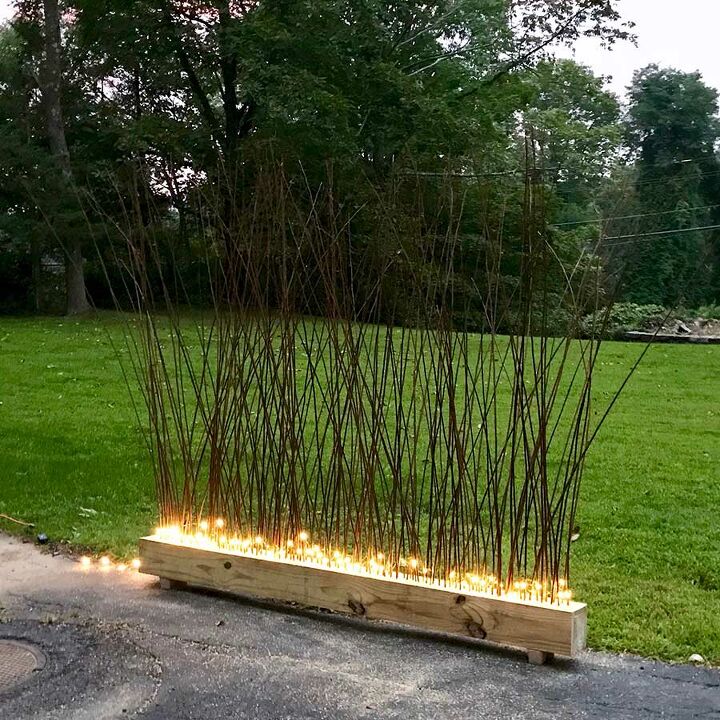
Have you thought about doing a DIY privacy fence? Get privacy from neighbors with a pretty outdoor fence made with twigs and fairy lights.
Years ago when I was living in a loft complex, I had a patio that faced a busy road. I always felt watched by passersby. I was renting this loft so was limited to making any kind of permanent construction, so I had to spend some time trying to come up with a way to get privacy. I finally came up with the idea to use a 6x6 and Ikea branches to do a DIY privacy fence with lights.
The privacy fence/screen you are seeing in the tutorial is one I made last year. This lit fence has less branches than the one made initially because back then, I really wanted that privacy and it’s not as necessary for where I was living last year, so add more than 2 bunches of branches if you want the fence to be less transparent.

PROTECT THE BRANCHES
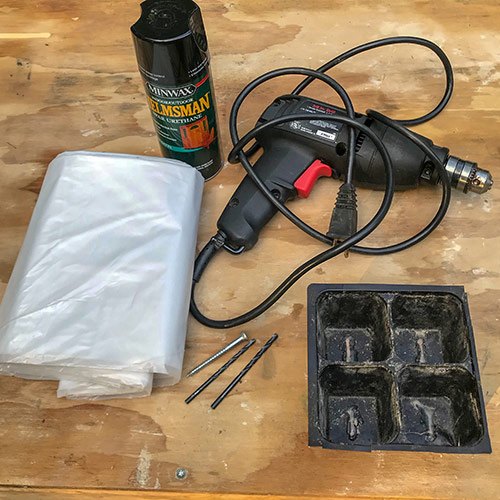
Take these Ikea branches and spread them out on the plastic (I forgot to get a photo of them spread out for spraying).
Spray the Torka branches with the Spar Urethane all on one side. Then after about an hour, you should be able to flip these over to spray the other side. Repeat two more times, or more if their final location will be exposed without overhead cover.
If you are wondering, I did also try to spray them once they were inserted into the holes in the beam, but that wasted a lot of urethane because most of it went in between the branches, rather than on them.
MAKING THE DIY PRIVACY FENCE LEGS
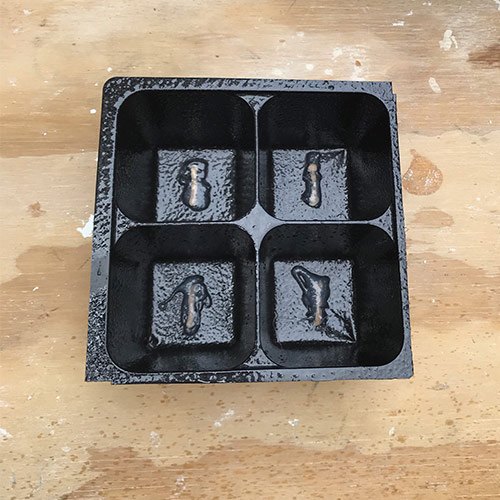
Get the cement mix together and mix it up to the consistency of a very thick shake, using your gloved hands.
Spray the vegetable oil into the planter mould and pour in the concrete. Wait about 10-15 minutes, then push the head of a screw into each container with concrete so that they are about an inch in.
Make sure they are in the center and are straight and level.
Note: These will cure in about an hour, and you shouldn’t attach them until they have hardened more. The following day is ideal.

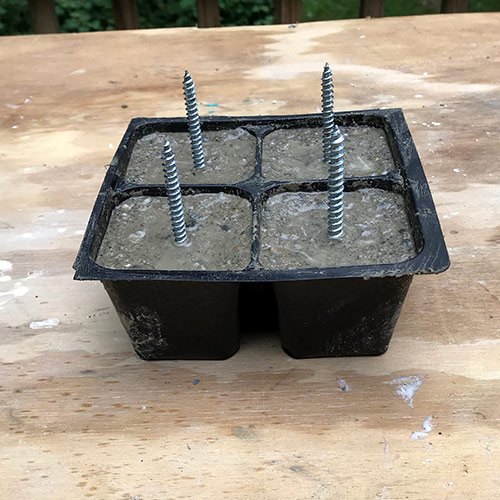
While they are curing- during that first hour, you should check back a couple of times to make sure they stay centered, straight and level. I tried using tape to keep these upright, but it was just easier to fiddle with them.
Also, I recommend not moving them too much within the concrete or they will be too loose to screw into the beam. If one does get loose like one of mine did, it’s okay because I have a fix, which I’ll get to in Step 6 below.
DRILL THE HOLES FOR THE FEET
First you will want to check each side of the beam and look for the side that has the least amount of knots. That’s the side you will want for your branches.
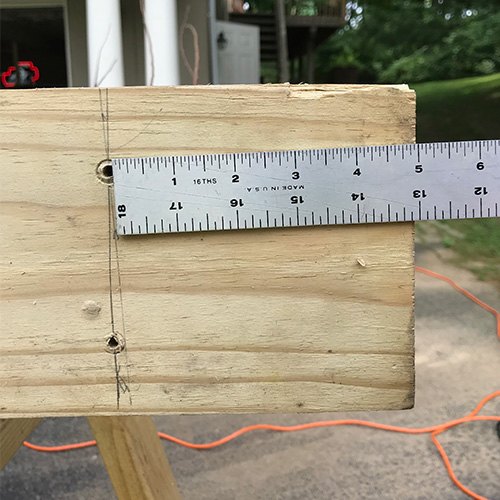
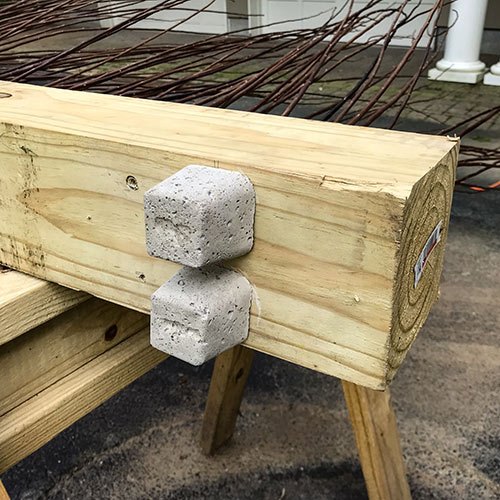
Flip the beam over to the opposite side, that’s the side you will drill the holes for the feet. Mark the center location for two of the concrete feet for each end. Now mark them out at about 5″ down from the end.
Next, to mark the center of each foot, measure in at 1 ¼” from each side. Then drill a pilot hole that fits the width of the screws in the concrete feet. You’ll want to make sure you will be able to screw in your legs without hitting the one next to it, but these will be attached in Step 6.
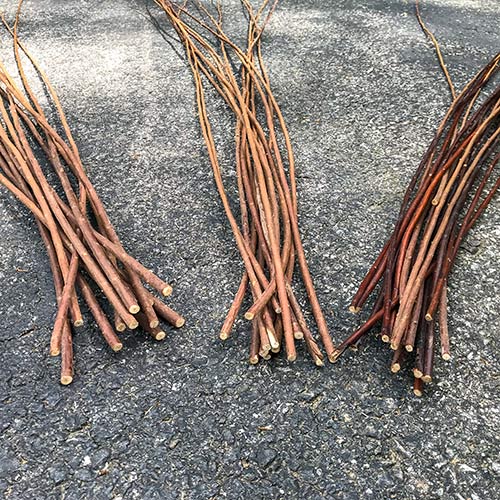
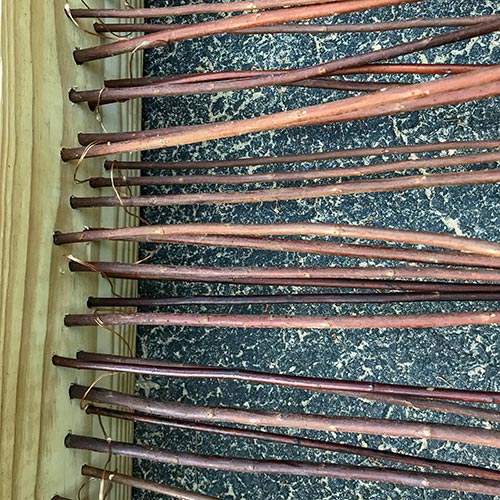
ORGANIZE THE IKEA BRANCHES BY SIZE
Next, prepare for drilling the holes. Divide up the branches and group them by the size of the base of the stem. Separate them into large, medium and small piles.
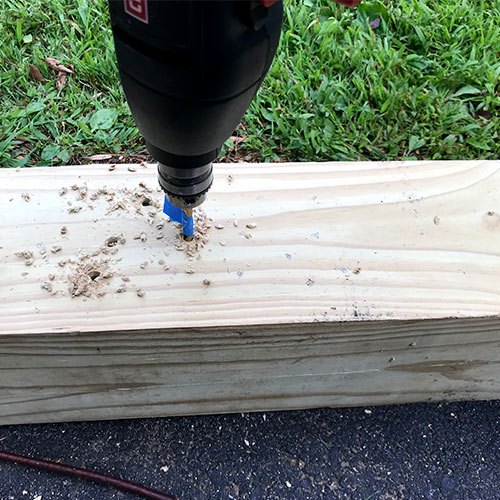
DRILL THE HOLES FOR THE BRANCHES
Choose your drill bit sizes according to the diameter of the branches you got and start by drilling, with the corded drill, the largest holes and drill these down the center of the beam.
You will have to test these as you go to make sure you drill enough holes of the right size for the size branches you have. It’s a bit of trial and error.
** For another cool way to spruce up your patio, check out my Cinder Block Planter Wall! 
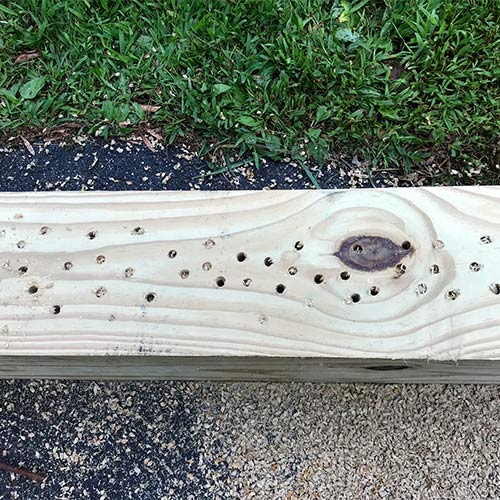
Next, move to the medium size bit and drill to each side of the large holes in an off center pattern.
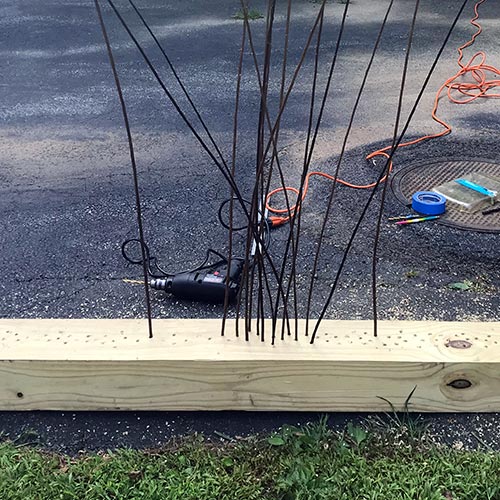
Go ahead and put all the medium and large branches into the holes. Most of your branches are not likely to be straight, so think about what direction you want them to go.
This bunch that I got from Ikea for this project was very flexible, almost rubbery which made them less likely to break in the process.
When I originally made the first version years ago, the branches were straighter and more brittle.
The branches for this privacy fence were pretty curvy and so I let them flare outward, but you may want them facing more inward or sideways.
AFFIX THE CONCRETE LEGS TO THE BEAM
After the concrete has cured 24 hours, you can de-mould the legs. Carefully flip the beam onto its side. Have someone assist you so you don’t break any branches. Screw in the legs.
If you end up with a screw that is loose within the concrete and it won’t screw it in, then make the hole a little larger and add some construction adhesive (or similar) to the hole.
Construction adhesive is nice and gooey so it fills in the space decently. Then just push in the foot with screw, rather than twisting it and let it dry an hour or so before moving on to the next step.
STRING THE LED FAIRY LIGHTS
Lay the beam back down on its side and add the fairy lights by stringing them carefully between the branches, wrapping and winding as you go.
**Keep the lights on the roll they came with, take special precaution not to let the string slip off the roll or you will end up with a knotted ball of lights like I did, and you will have to constantly unknot.
** To make it easier, you can weave the lights mid-way up the branches and then slide the wire down after.
Get someone to help you gently flip it over to stand up right and position it. Sit down with a glass of wine, beer or coffee and enjoy some privacy with your fence.
General materials

Concrete materials
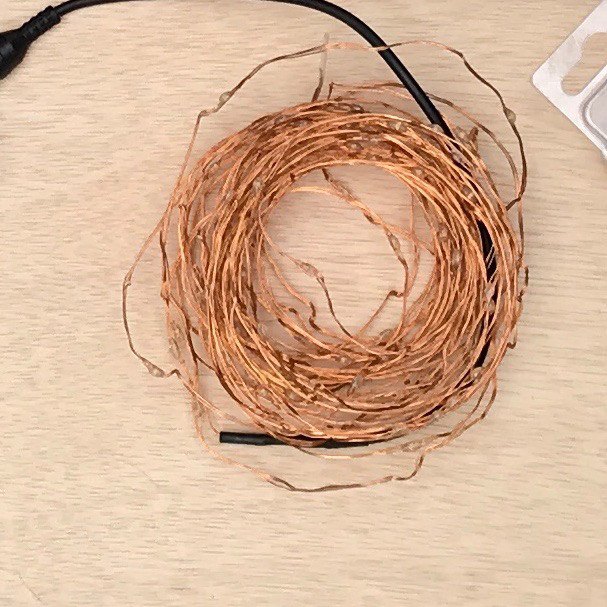
LED fairy lights
Resources for this project:
See all materials


Comments
Join the conversation
-
Clever and it looks nice!
-
Actually I’m thinking that I would like to use the idea.


Frequently asked questions
Have a question about this project?
Love your project! Do you think it would work to put casters on it instead of the concrete legs to make it more portable and move it out of the way when not needed?
It's very pretty but not necessarily very private. Are the lights battery operated or hard wired so you need to turn them on and off manually or is there a timer? Nice job.
Wonderful, lovely idea. May I RESPECTFULLY say that it’s “passersby” not “passerby’s.