


One Way to DIY a Horizontal Privacy Fence

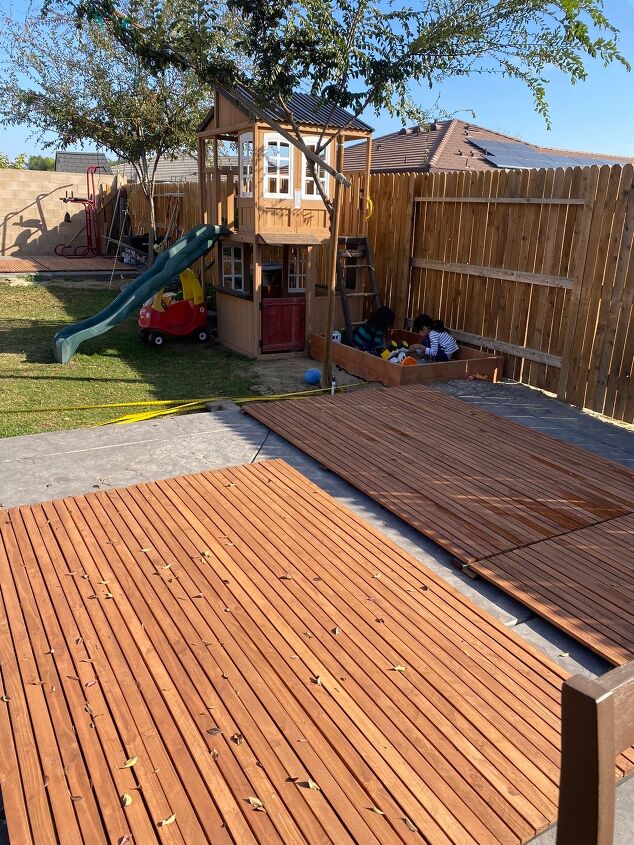
On a trip to San Diego , I came across a home a block from the beach that had a beautiful tall horizontal fence . It’s beauty captured my attention and I knew I wanted to replicate something similar for my home . I went to The Home Depot and purchased 2x4’s and started the process .The original fence we had had large gaps and I could see neighbors walk by as I was in my yard. I wanted to make a nice seating area where we could enjoy some family time and have it be as private as court be. Let me show you what I did to a corner of my yard.”♥️
Best wood fence!
Step 1: Cut your boards
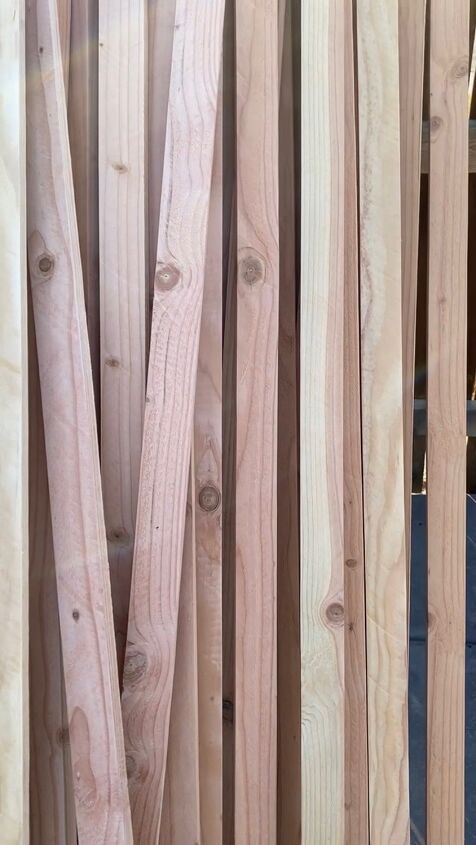
The very first thing I did was cut each of my 2x4’s ( Douglas For) into 4 equal parts .
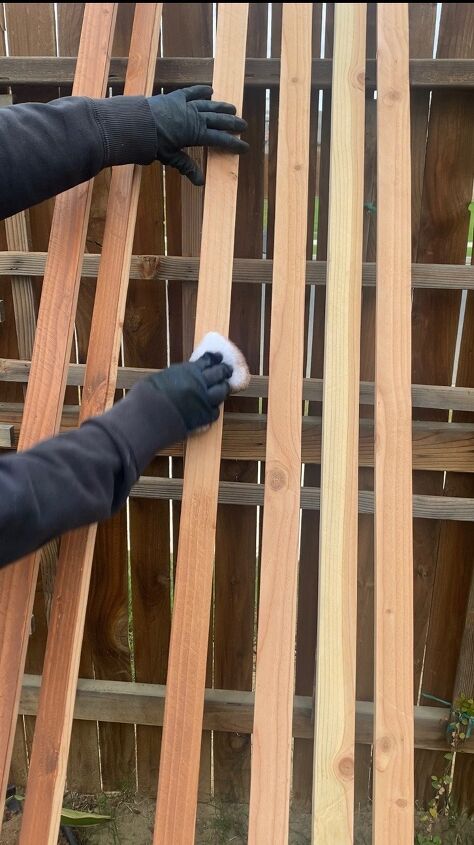
Step 2: Sand the boards
It must have taken me a few days to sand each individual board , but sanding is important . Some boards have really rough edges and if you want your stain or paint to go on easily and have a great finish to it , you sand your heart out 😂. I think I ended up sanding about 198 pieces of wood.
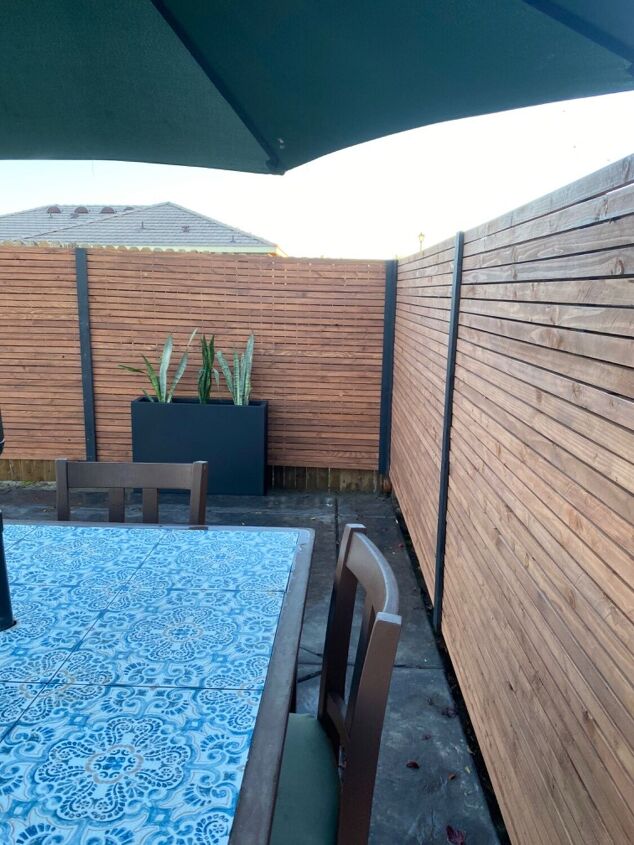
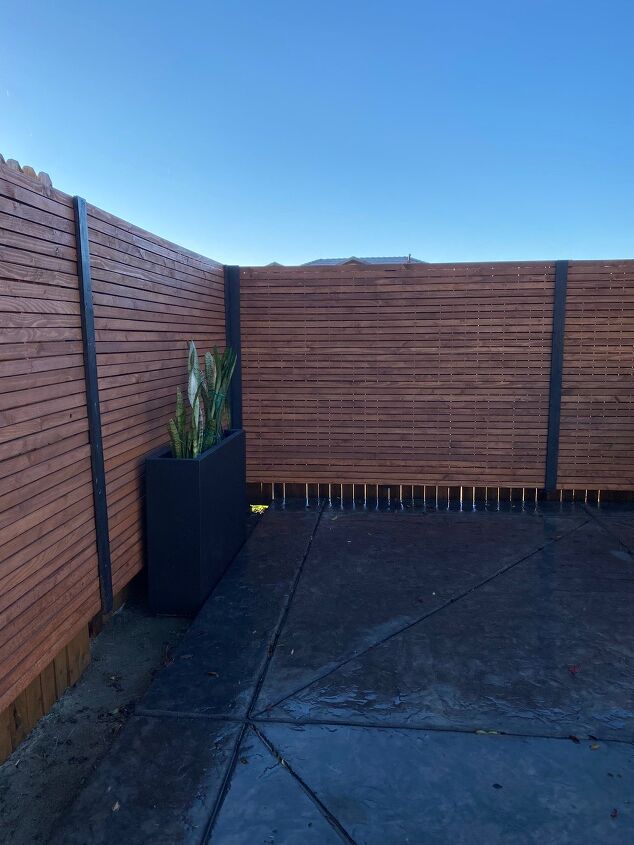
I figured that I was going to need to make 6 panels to the areas in my yard I wanted to cover. Each panel would consist of 33 boards and the separation between each board would be 0.25 inches.
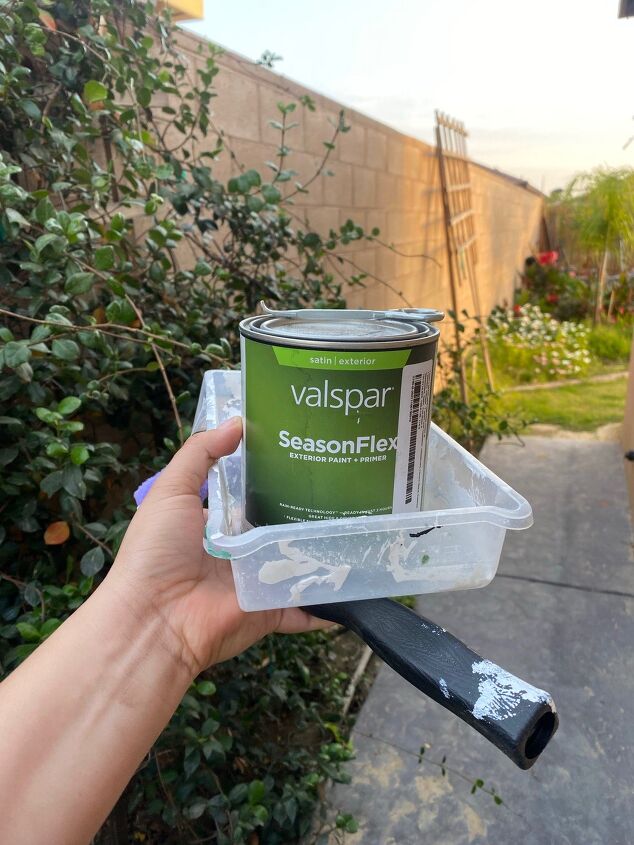
Step 3: Stain the boards
I would say that I almost got to the point of despising staining . 198 boards. All 6 sides of each board had to be stained so that I can be satisfied with the finish. Sometimes you have to take some time off from a project because some parts are draining , but I pushed through!
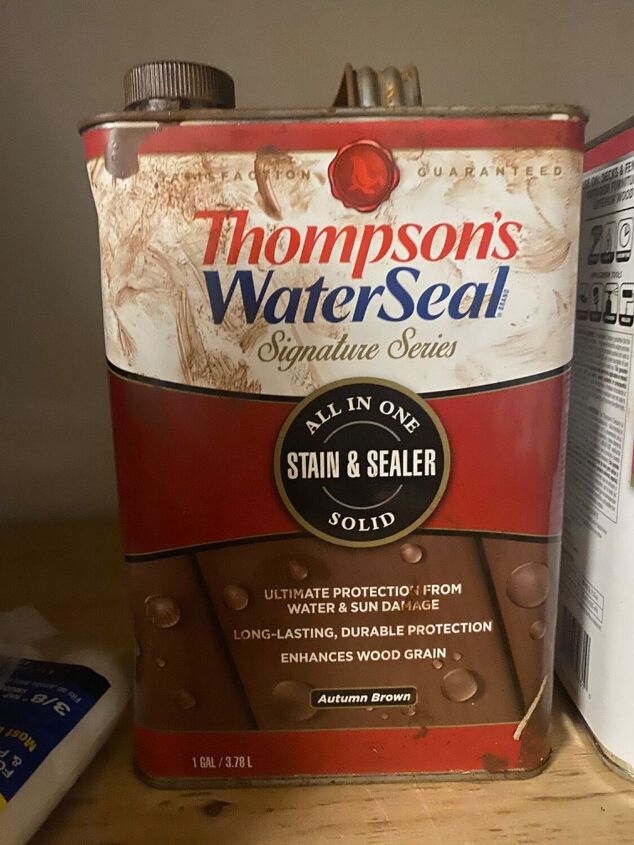
I used Thompson’s All on one Stain and Sealer in the color Autumn Brown .
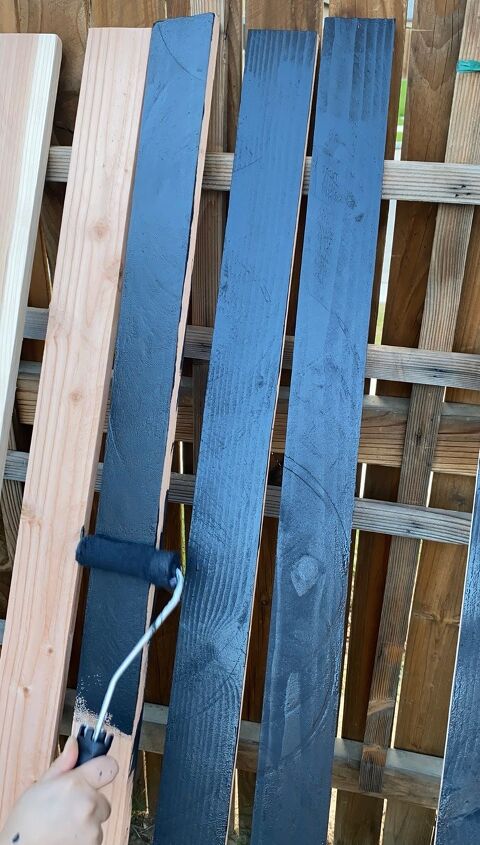
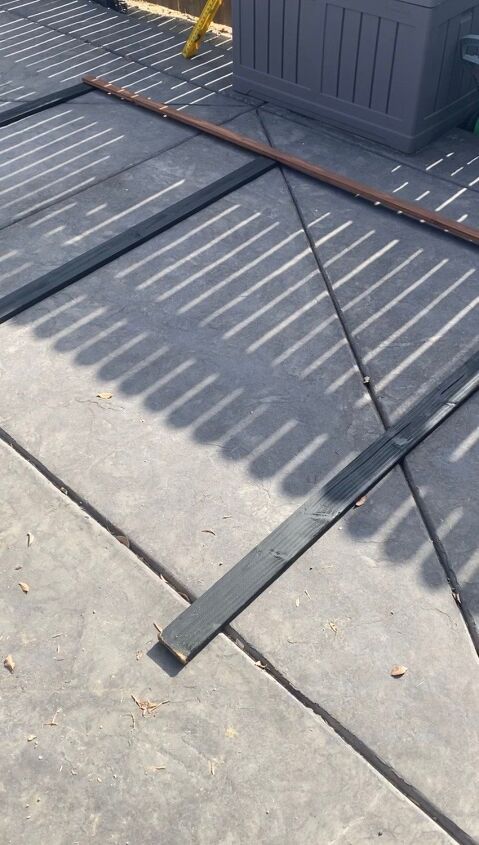
Step 4: Prep and paint my support and accent boards
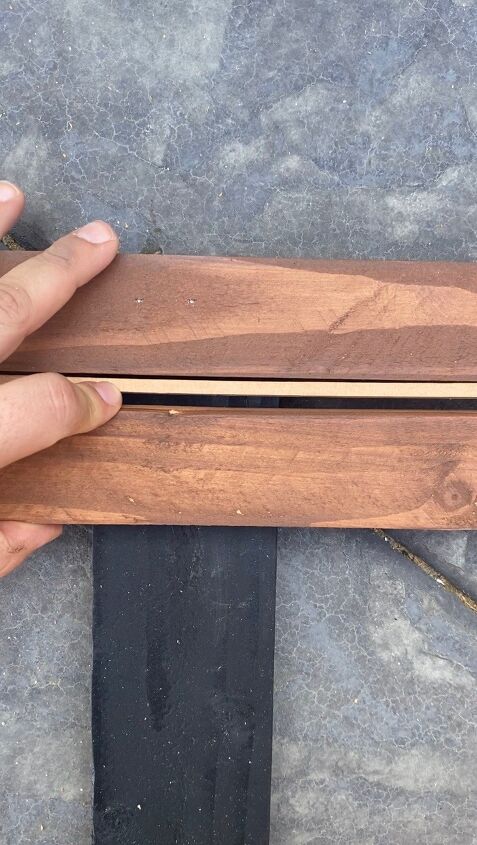
✨ Each of my panels will consist of 3 black vertical support boards and 33 stained horizontal boards .Something else I wanted to add to my horizontal fence was some blank accent boards that would mend each panel together . It was the Aesthetic I was going for , but it also covered the places I put a screws in perfectly ! I split a few 2x4’s down the middle so they would be a bit thinner
I used the color Tricorn black for those boards .
Step 5: Set up the panels !
As I mentioned above, each of my panels will consist of three support boards. Once those boards are spaced out evenly on the floor. Start attaching your stained horizontal boards with a nail gun .
The separation of each of my boards was 0.25 inches, but you can separate as much as you’d like . It’s your preference . I was given advise on the spacing to allow for more air flow , but my boards are pretty sturdy and we do not live in a windy state !
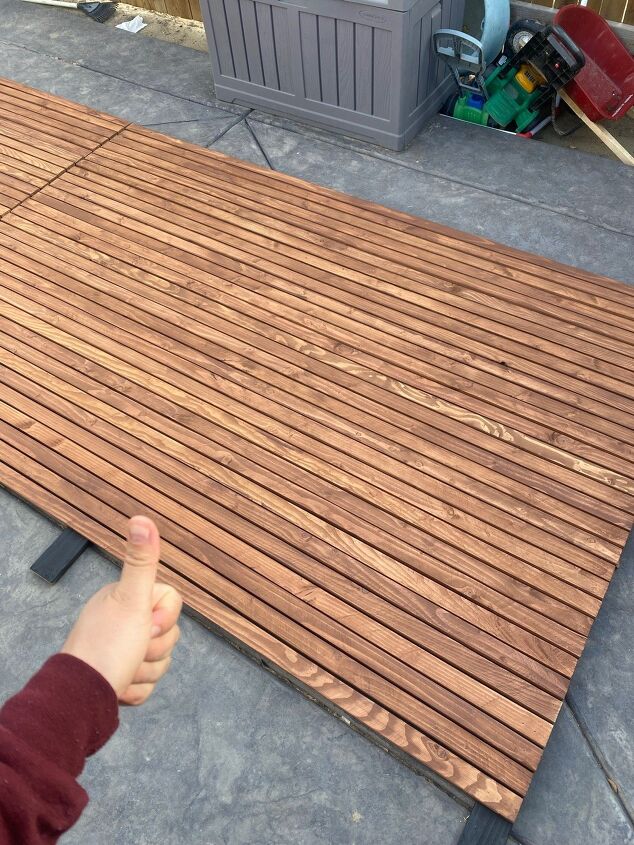
Here are my finished panels!
They looked pretty light weight to me on the floor ,but when I tried picking them up it was tough ! I asked my husband for help putting them up on our fence ! You definitely need an extra pair of hands putting them up .
Step 6: Put the panels up !
We put the panels up with deck screws . We attached them securely to the 4x4 on our original fence .
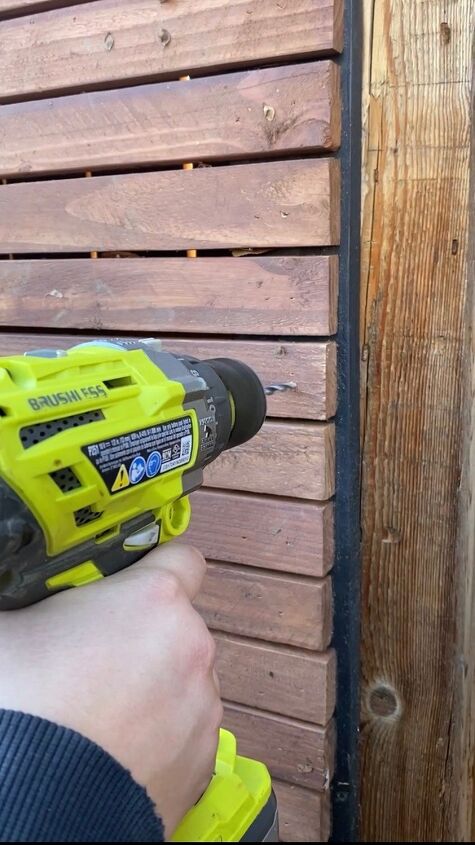
Step 7: Lag screws for extra support
You can never go wrong with extra support . We didn’t want to take any chances that our fence would wobble to fall.
First: drill your pilot holes through the panels and the 4x4.
2nd: Make your hole for the lag screw with a spade bit
3rd : Insert the Lag screw
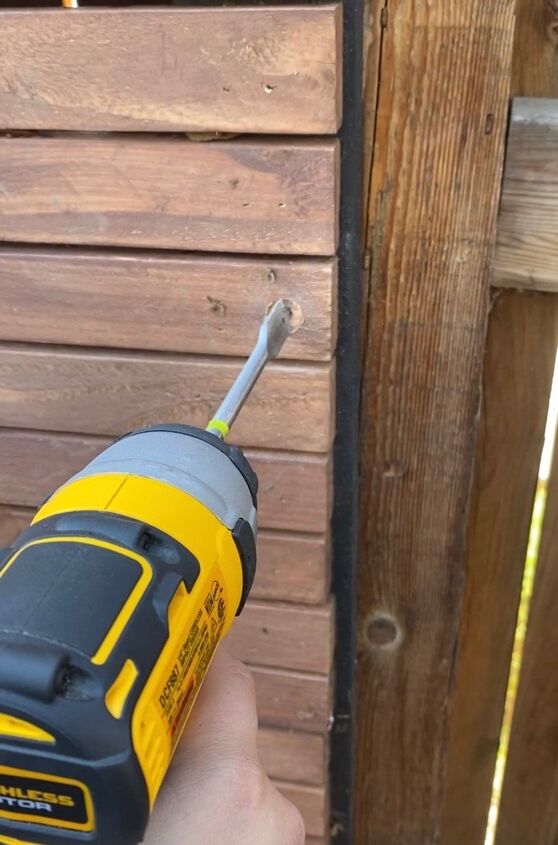
Spade bit
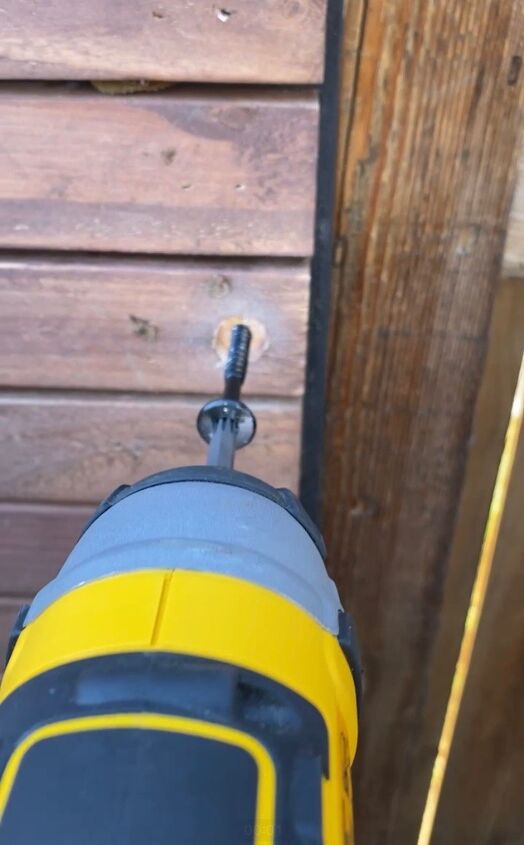
Lag screws
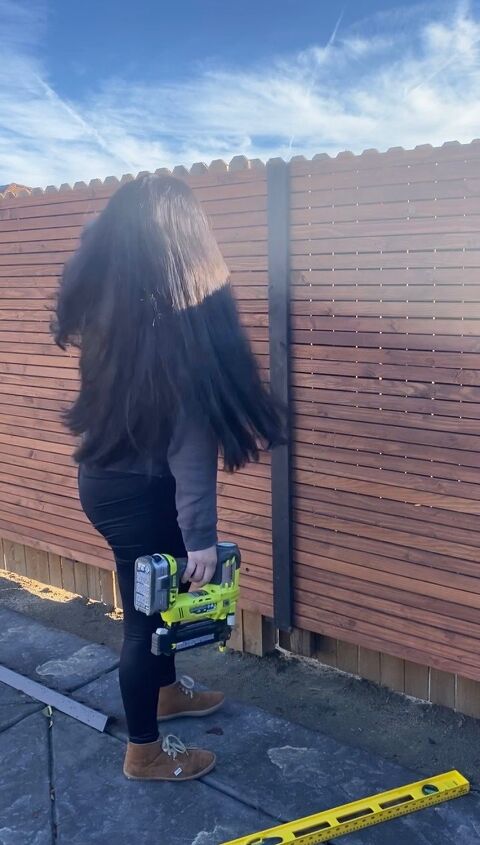
Step 8: Place the Black accent boards where each panel meets and you have yourself a beautiful finished project . Take a look !
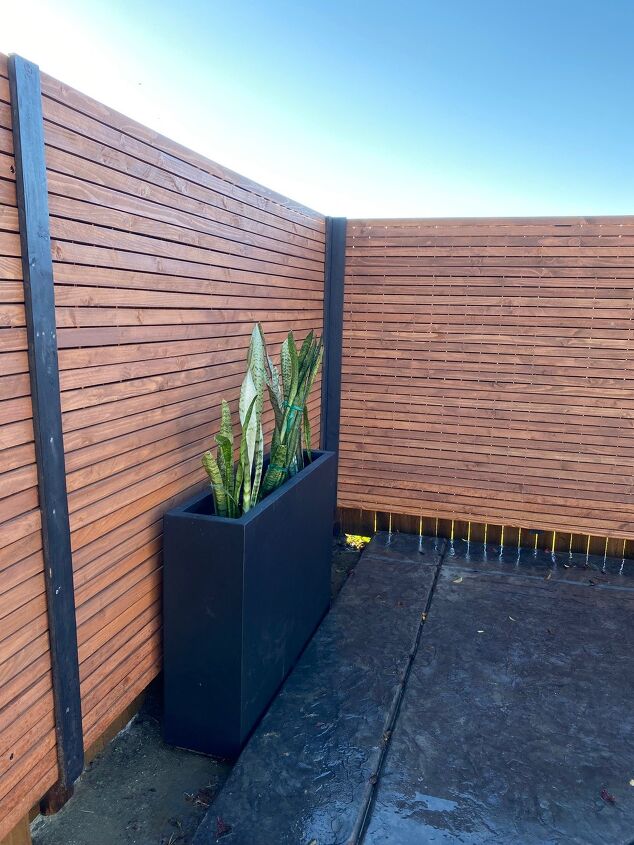
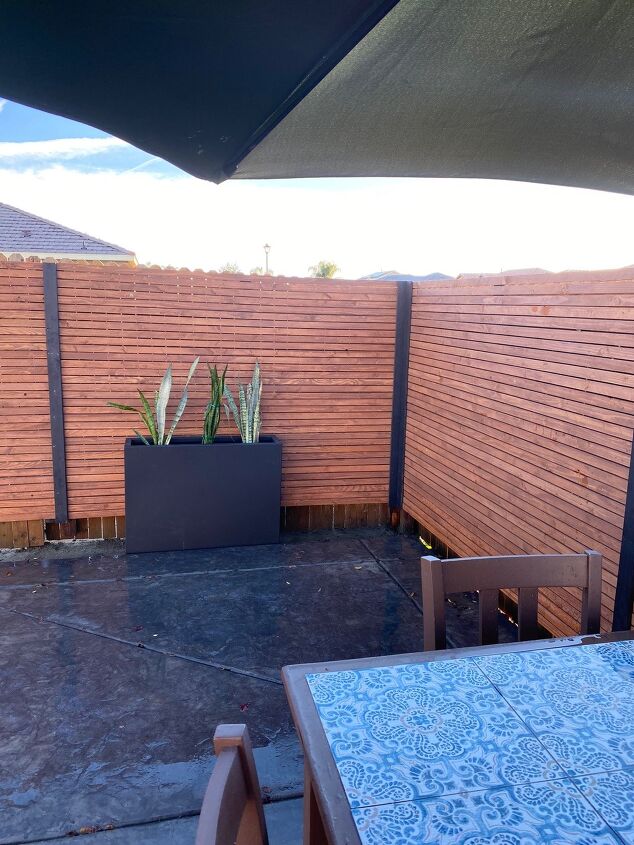
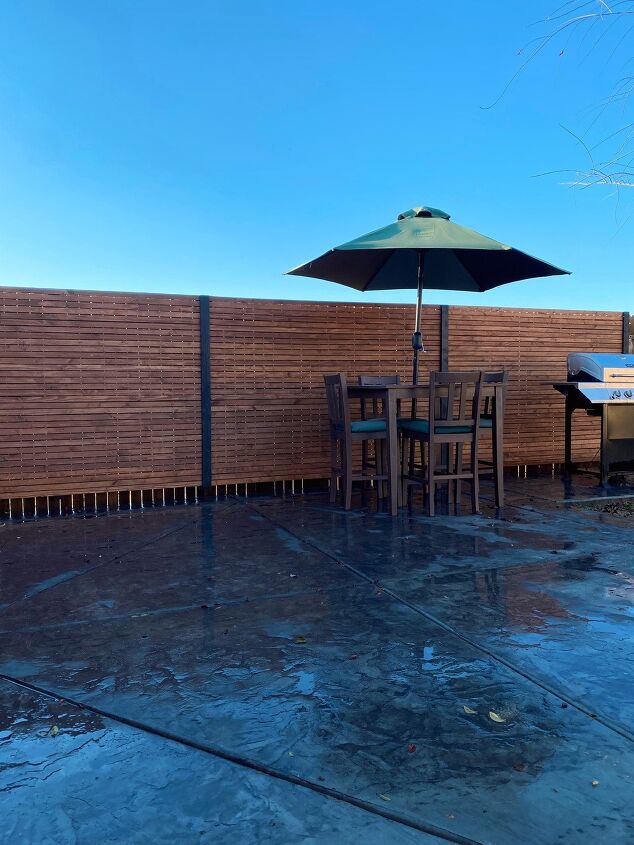
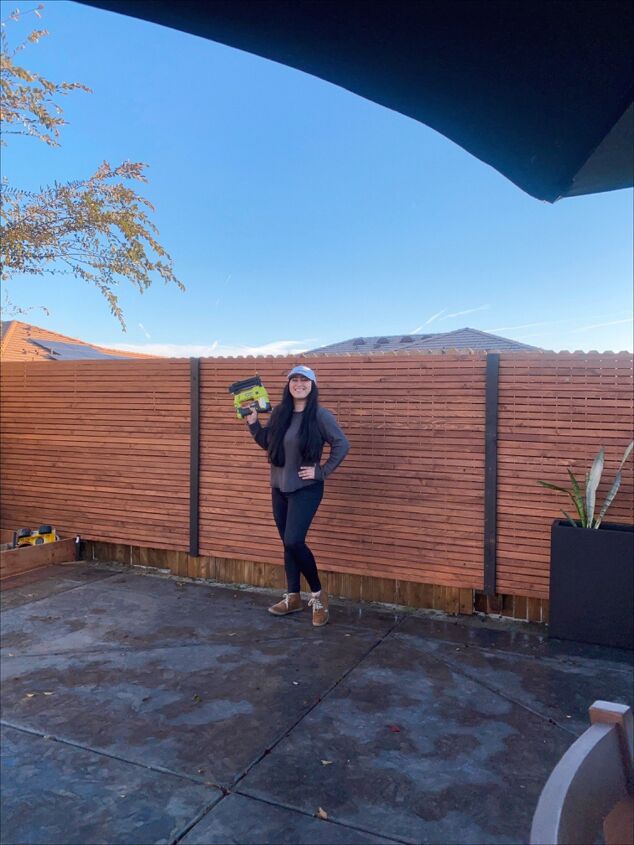

I put my blood , sweat and tears into this project . It was my first big project after the bed I had helped make early last year . I used the very little time I had of my weekdays and most early mornings and late nights on my weekends . I love the outcome and it totally upgraded my space . I no longer see anybody's face when they walk my my fence . I call it our temporary fence , but we plan on sticking it to a brick fence later down the line .
I know that the price of lumber is through the roof right now, but it made sense for us at the moment since we had just recently built a brick fence between our side neighbors and our half was around 3000$ This project cost me around 200$ . I only paid for the wood and stain because I already had most of the material 👌🏼
I will put an estimate of the price for those who need the extra material or tools !
DIY Home Security Ideas
Resources for this project:
See all materials


Comments
Join the conversation
-
This turned out so nice
-
Great job!! You should be proud of yourself!
That is hard work.
I agree you also have beautiful hair.


Frequently asked questions
Have a question about this project?
I love thé fence, I love your hair! I do NEED to know… where did you get the planter that is in front of the fence with the snake plants in it? I NEED some of those!
thank you!
Why didn’t you go all the way down to the ground with this fence? I would have. It’s gorgeous!!❤️❤️❤️
Is your patio stained concrete. If so, what color.