


When Your Belt Looks Better Against The Wall Than Around Your Waist

Women with a certain hip-to-waist ratio know the angst - does wearing a belt make you look even fatter or thinner? I'm settled - my belts look better as home decor than as fashion accessories.

So there it is, the confounding object -miles too flimsy for my substantial girth. But hey, it also offers me an instant strand of beautiful macrame chord - since my defective knotting skills is another of my insecurities.
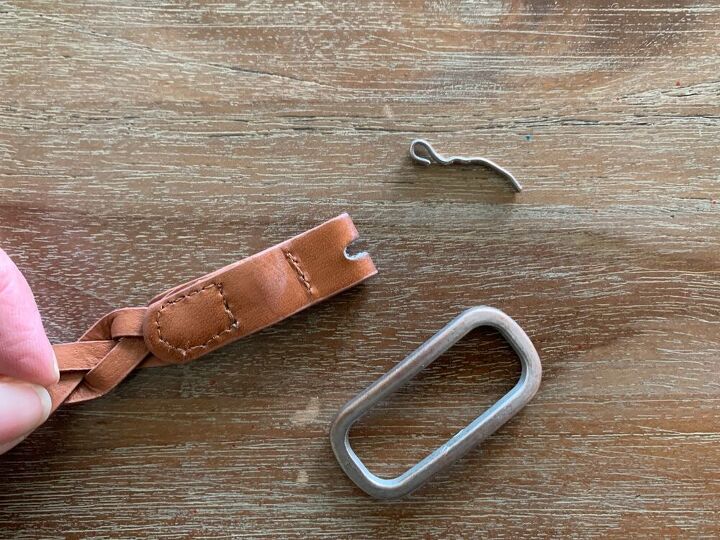
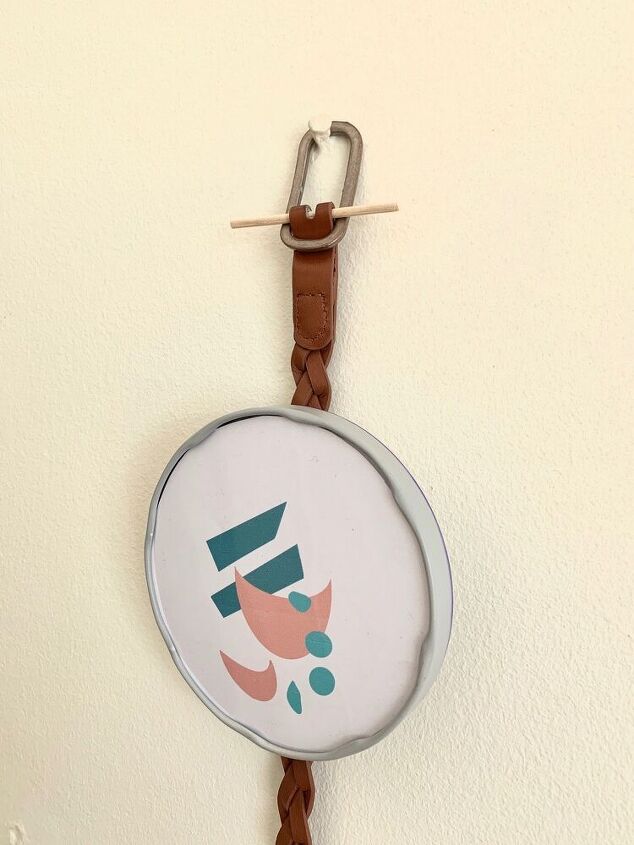
I meant to only remove the metal pin from the central buckle bar but managed to break the whole thing.
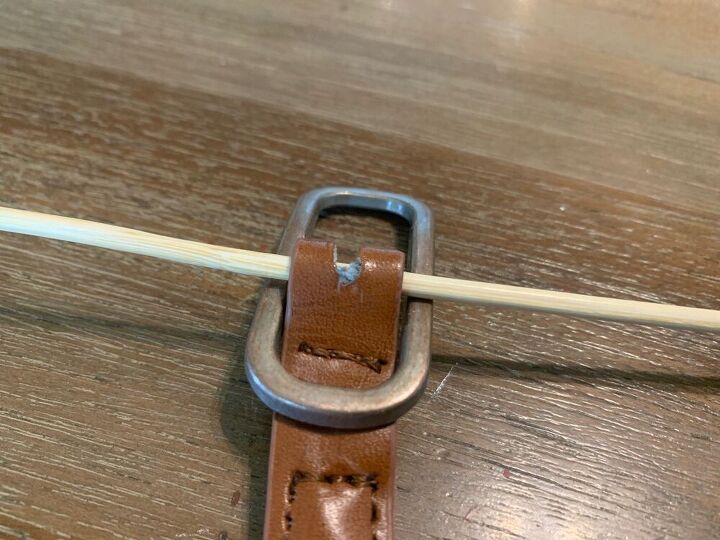
The solution was to thread a wooden skewer as pictured above and trim it to size. I suppose you could also glue it in place to make it extra secure. But then again, this step probably won't be necessary at all...
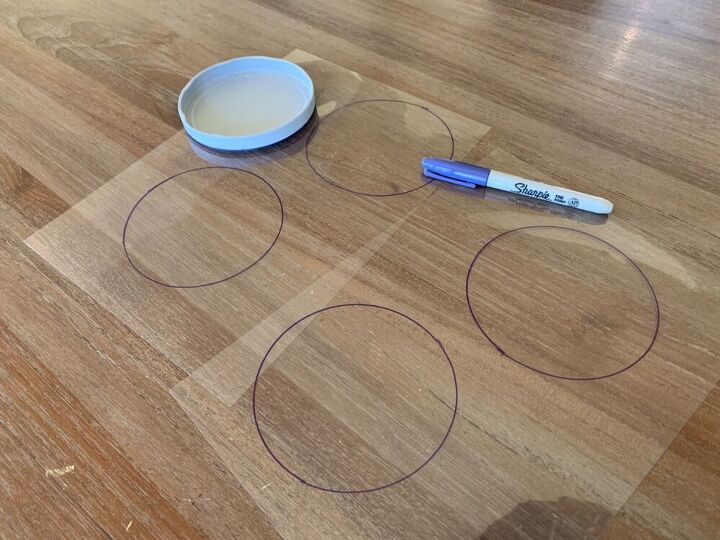
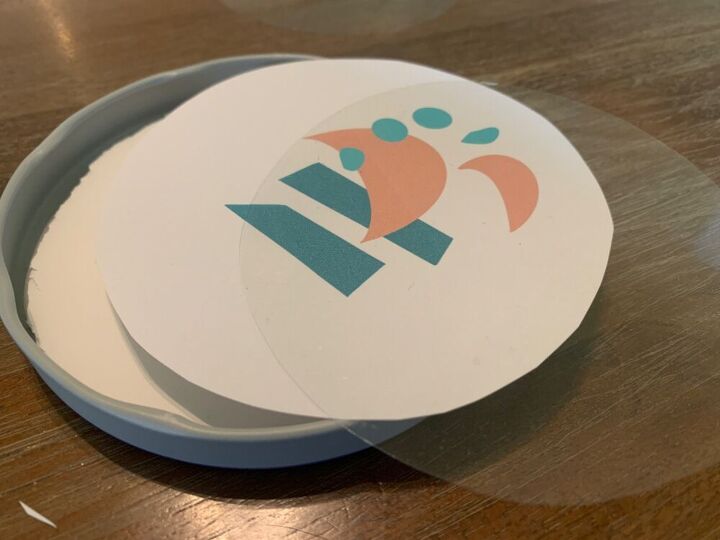
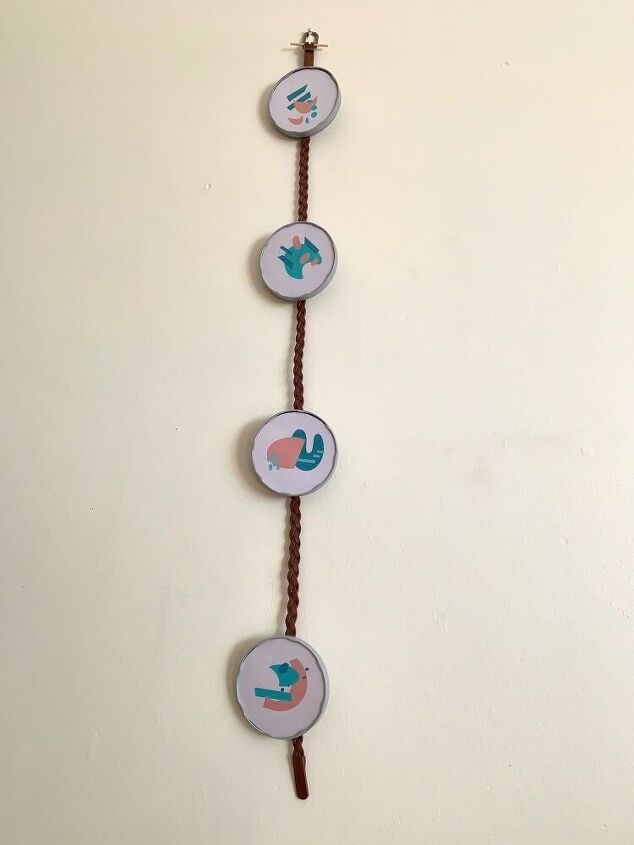
I used 4 large jar lids as frames. I cut transparent, unscratched file covers in circles. To do this I tried a couple of options including a protractor, but I ended up tracing the outside of the lids with a pen and then cutting slightly inside that line to provide for the slightly smaller inside circumference. Getting the correct sizes for everything inside the frame is key. Be careful not to get Sharpie marks on the lids, it shows through the paint.
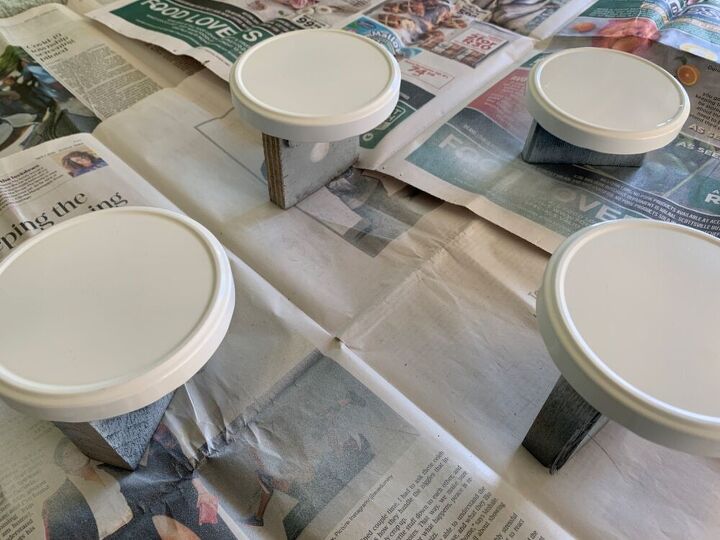
I primed (Rustoleum Painters Touch Primer in Flat White) then spray painted (Krylon Chalky Finish in Misty Grey) and sealed (Rustoleum Ultra Cover in Matte Clear) the jar lids. You really do need to wait a good length of time between layers as it takes the paint longer to dry in the crevices.
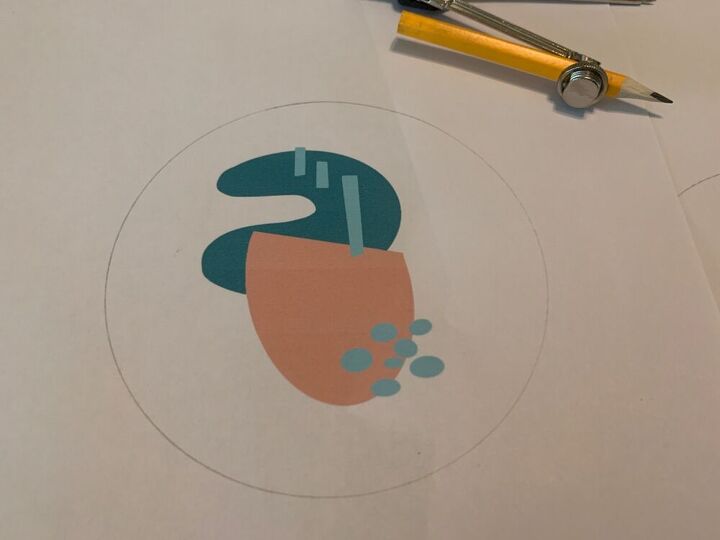
Using a protractor I cut out my printed pictures. Once again, make sure they fit perfectly into the lids - not too big or too small and taking into account that you may have a rim. The rim is actually a good thing since it gives you a bit of room for error.
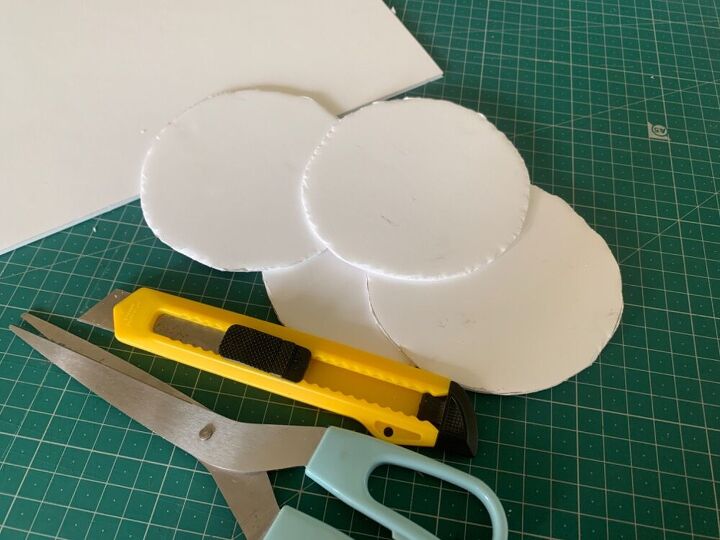
Using the acetate circles as a template, I cut disks of foam board. The jury is still out as to the easiest method. I started with a stanley knife but quickly resorted to scissors. I’m sure yours will not be as jagged as mine!
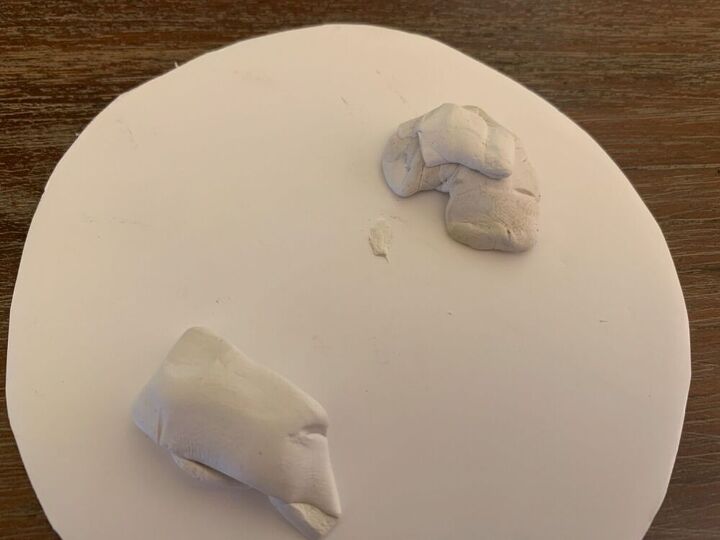
I didn’t like the gap created by simply sticking everything directly into the lid so I used two blobs of tack to elevate the backing board to closer to the rim. This will also help so that nothing jiggles around and will prevent you from having to use extra glue to stick everything down. The tack works well because you can squish it down to exactly the height you need.
Once the backing board is in place the rest can be positioned.
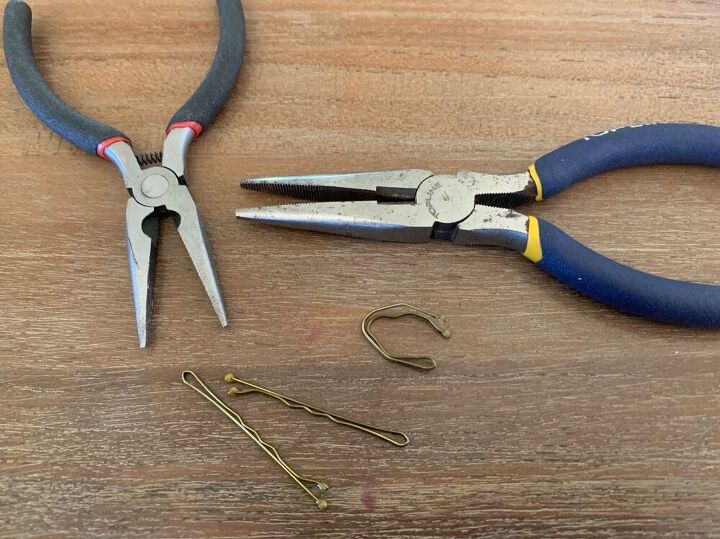
I bent metal bobby pins into a U-shape and then separated the two tines into a V as pictured below. My thinking was that this would give the hooks more stability.
If you are using a solid belt you could probably use velcro instead or stick the frames directly to the belt. I just thought the hooks would be a nice touch and would make it easier if you wanted to change the pictures at a later stage.

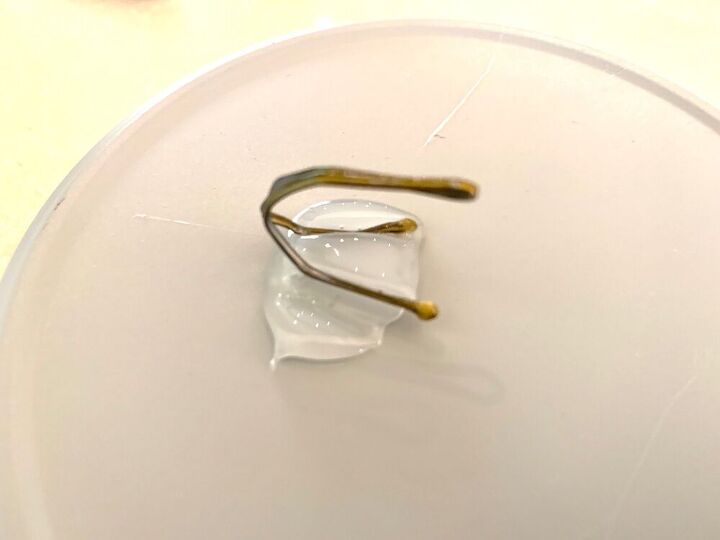
I used a glue gun to stick the hook to the back of the lid at about 3/4 of the way up.
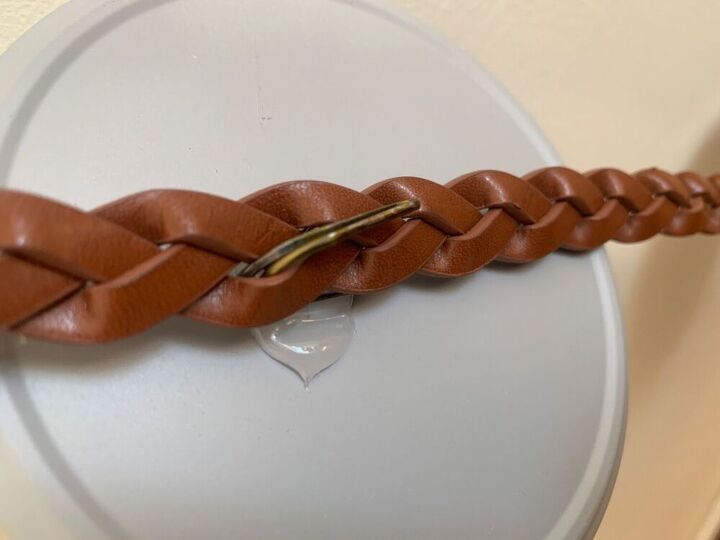
I spaced my pictures and stuck them through the holes in the belt. The hooks also make it easier to reposition if you need to.
Once hung on a hook, I adjusted everything to face straight forward. A handy display for a tight space!


Comments
Join the conversation
-
The pink glitter one would be great for a teen with photos of her music idols. The fairy/mermaid would be work for a preteen.
- See 1 previous
-
Perhaps small curtain hooks would work as well as bobby pins.


Frequently asked questions
Have a question about this project?