


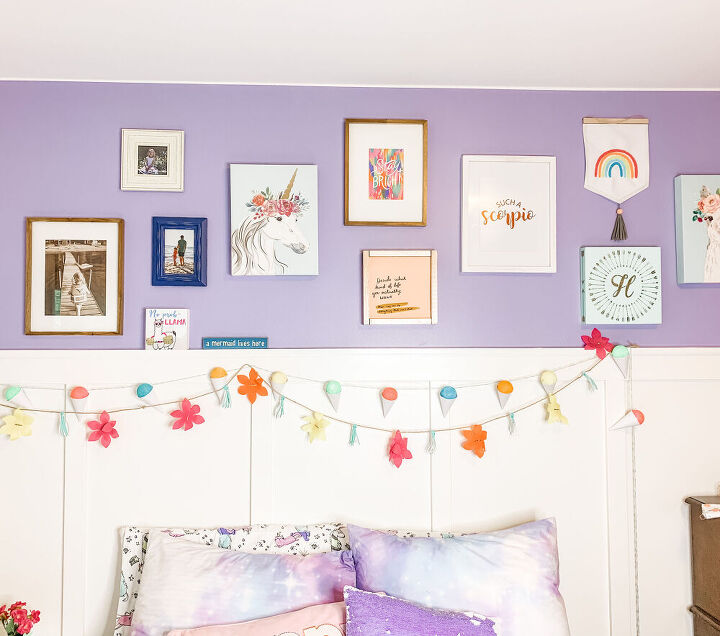
Snow Cone Garland

While many have switched over to fall crafts and decor already, we are hanging on to summer and are going to enjoy every last minute... it's only 2/3 over after all!?! So to keep the summer fun going, my daughters decided to make this cute garland to brighten up their bedrooms. It's fast and easy, and older kids (8 and above depending on their experience level) will have no trouble completing this mostly on their own.
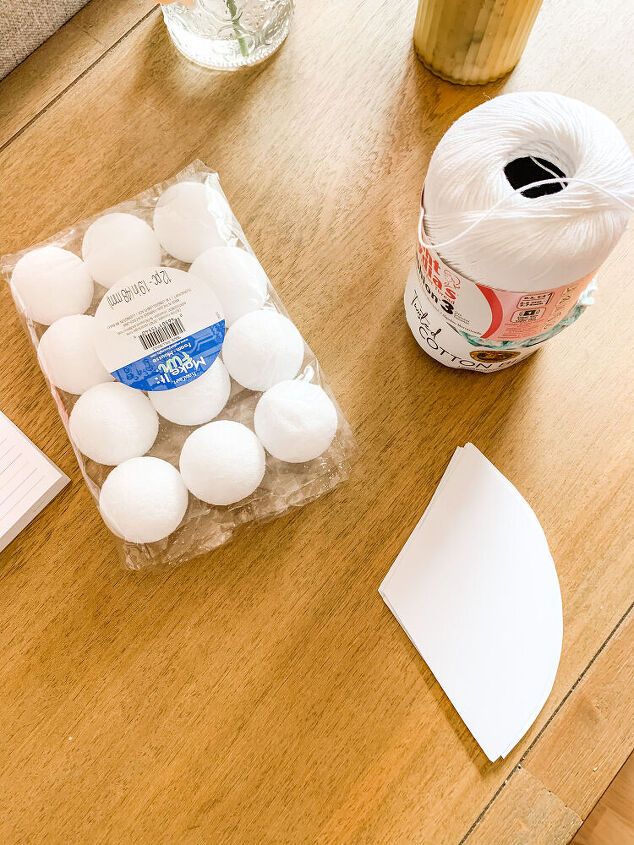

8.5"x11" paper is perfect, just make sure it is thick enough it doesn't collapse on itself, but not so thick it won't roll into a cone. This paper is made by Park Lane and it's their solid core paper, available at Joann Fabrics.
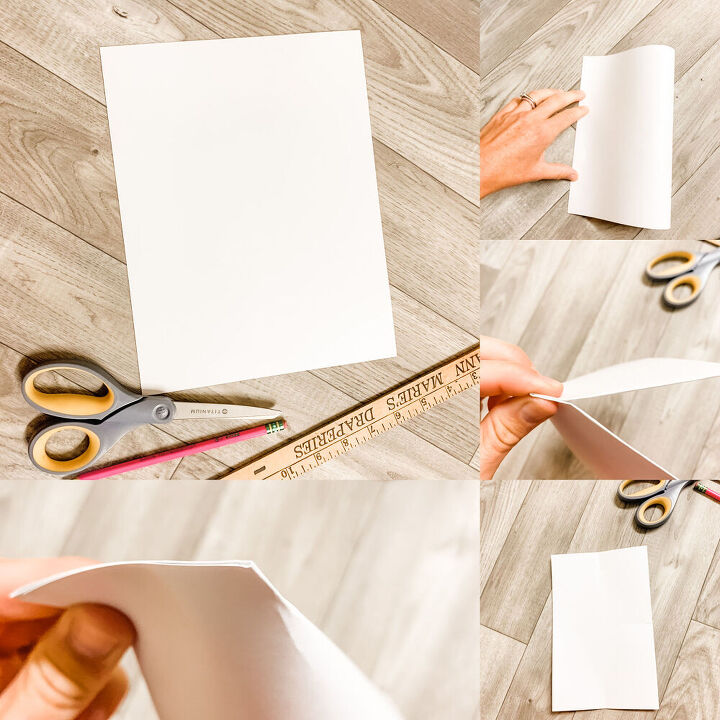
First fold the paper in half. Now for the rest of these steps you will just make a small crease to mark the halves, but you don't actually fold it or crease all the way down. You can also measure and make a small pencil mark. Find the half way mark on each side and make a tiny crease or mark. When the half sheet is laying flat, you should be able to see these small marks for the next step.
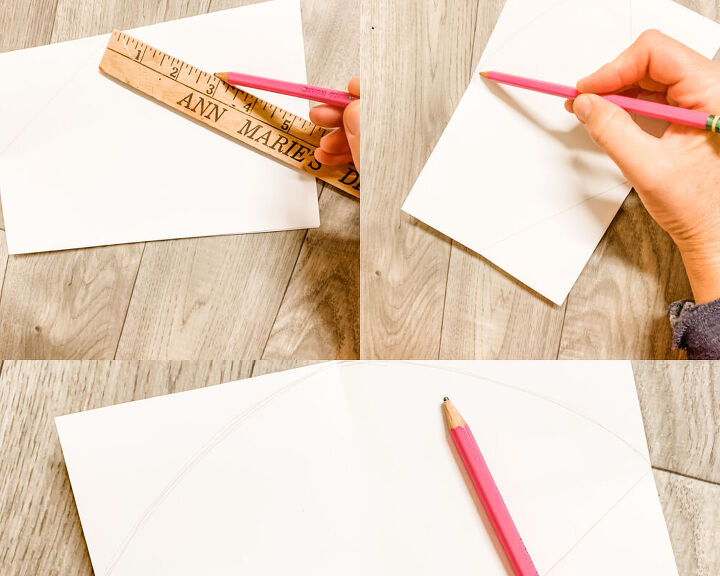
Then you will take a ruler and draw a line from the center to two points on the side perpendicular to it. Then on the side parallel to the what will be the bottom of the cone, make an arc from each side so it makes a half circle.
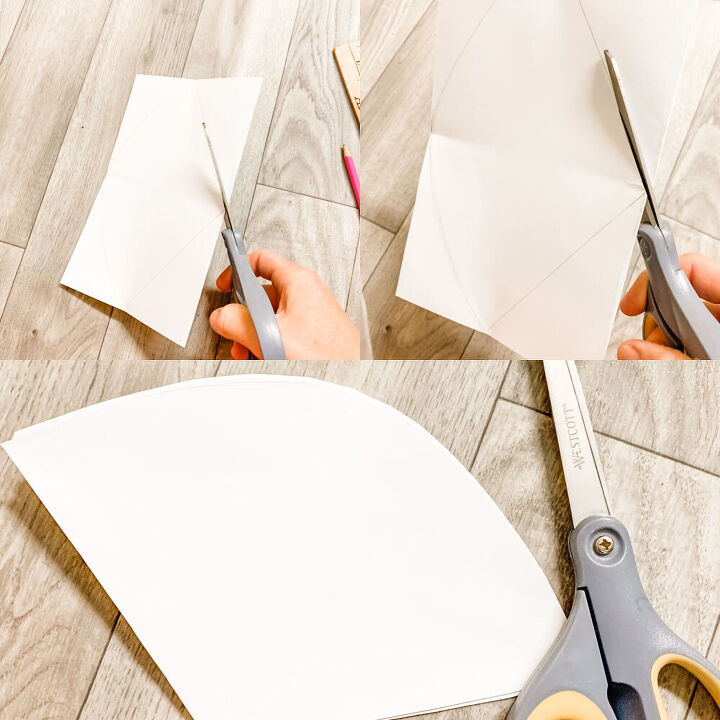
Now just cut out where you marked and since the paper was folded in half, you have two! For the rest, you can just fold the paper in half and trace the one you already did. You'll need 12 total.
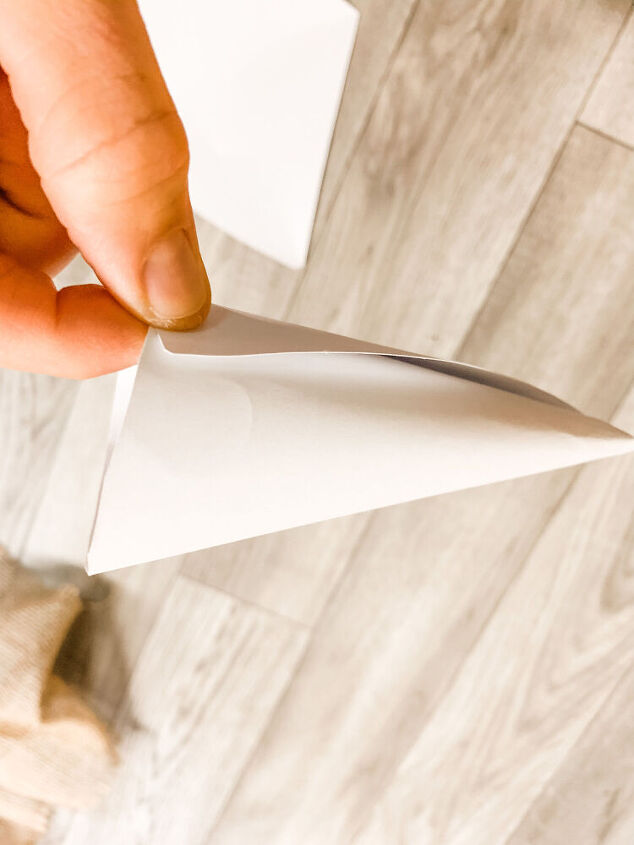
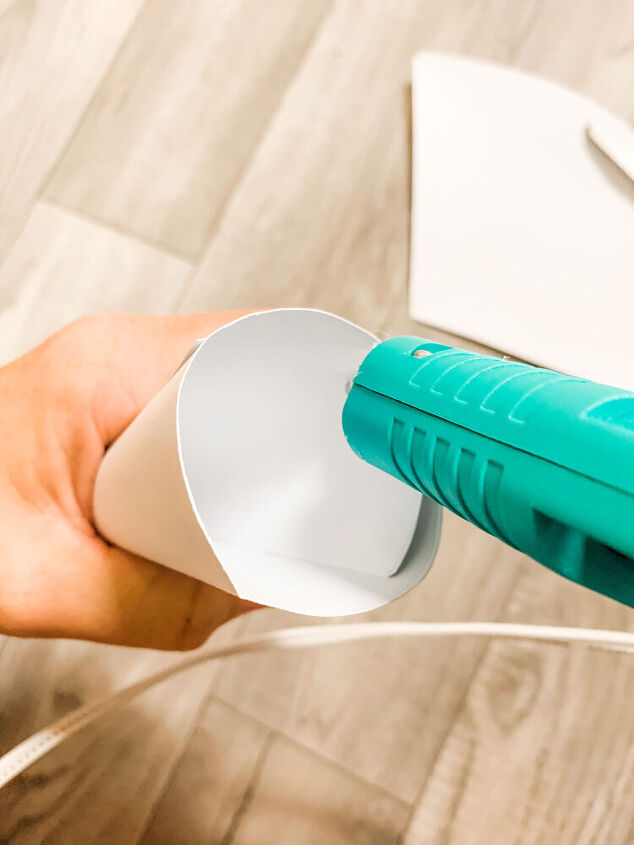
Next you will roll each cutout into a cone shape and use a hot glue gun to secure it.
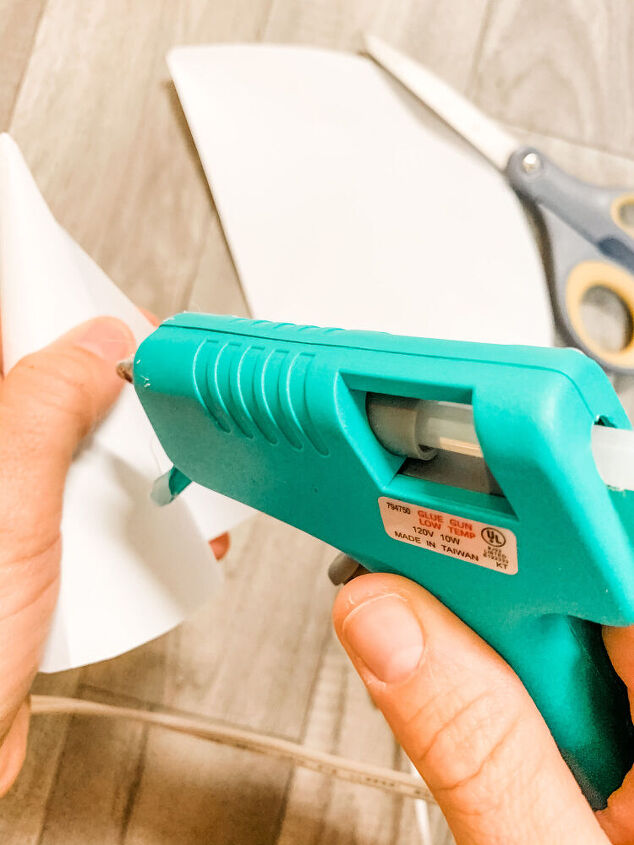
Glue along the outside edge and press to secure it. Now repeat 11 more times.
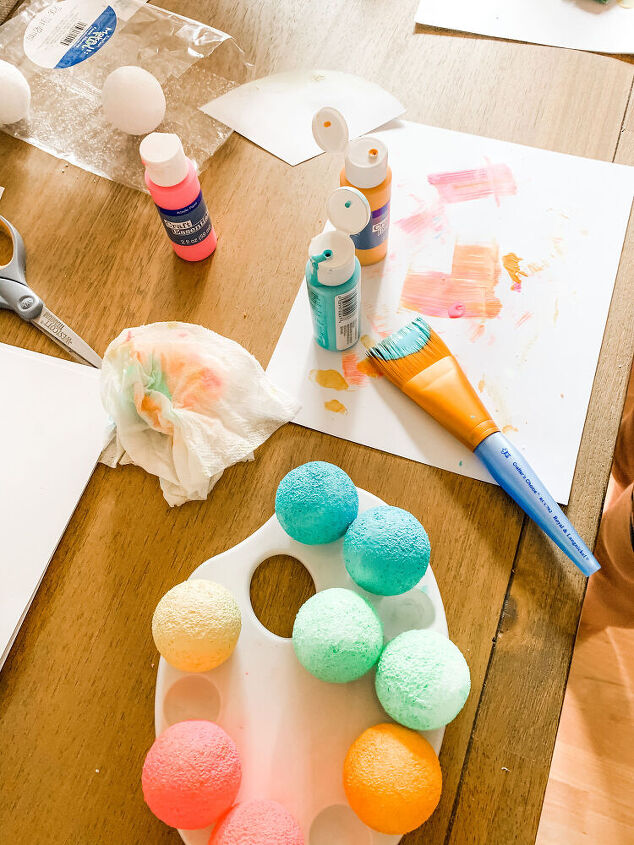
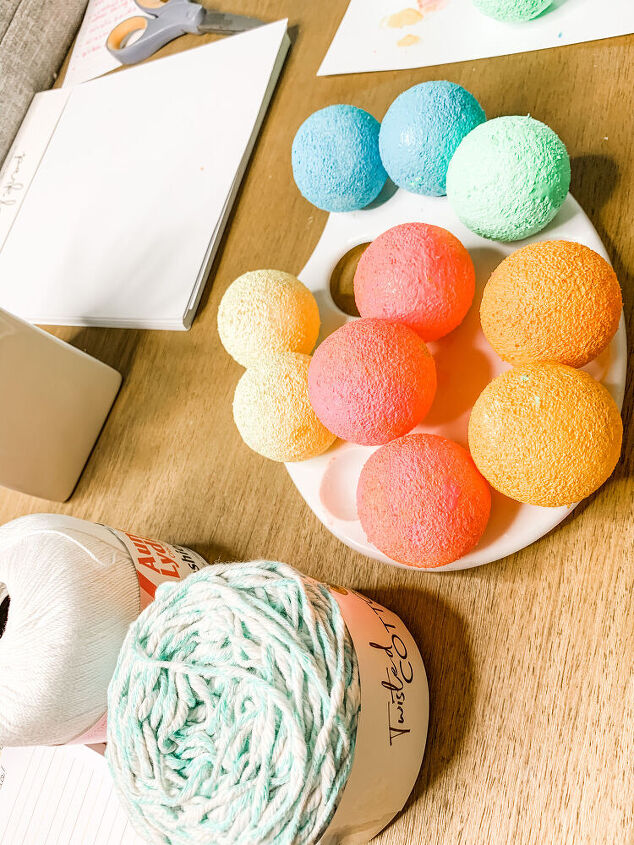
You can do whatever colors (and however many) you'd like. We picked 5 vibrant, bright summer colors (hot pink, bright orange, yellow, neon green, and a bright blue. We painted two of three colors, and three of two colors so we could have a variety.
Drying time will vary, but check and make sure they are dry before adding to the cones so you don't make a mess.
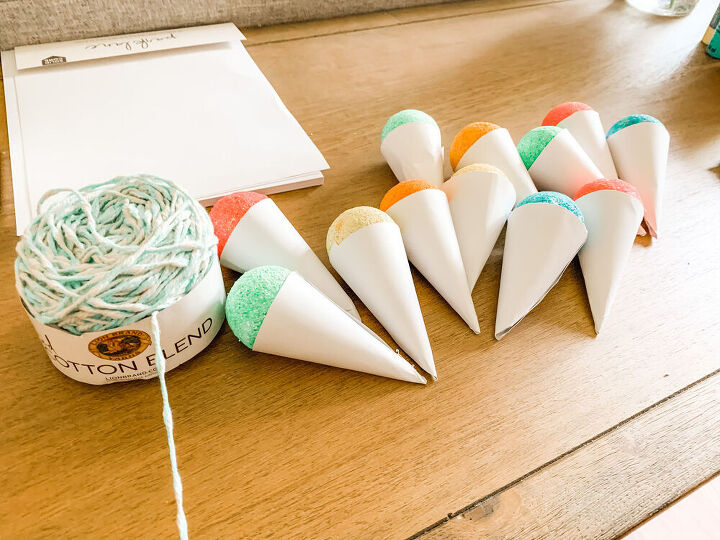
To secure the balls to the cones, just add glue around the entire inside rim of the cone and place the painted ball in the cone. Repeat for the rest.
Now that you have completed the snow cones, it's time to add them to the string. Cut it as long as you'd like the garland to be. I would recommend placing the snow cones about 4"-6" inches apart and you'll need extra string for the ends for hanging. Somewhere around 84", depending on your preference, should do.
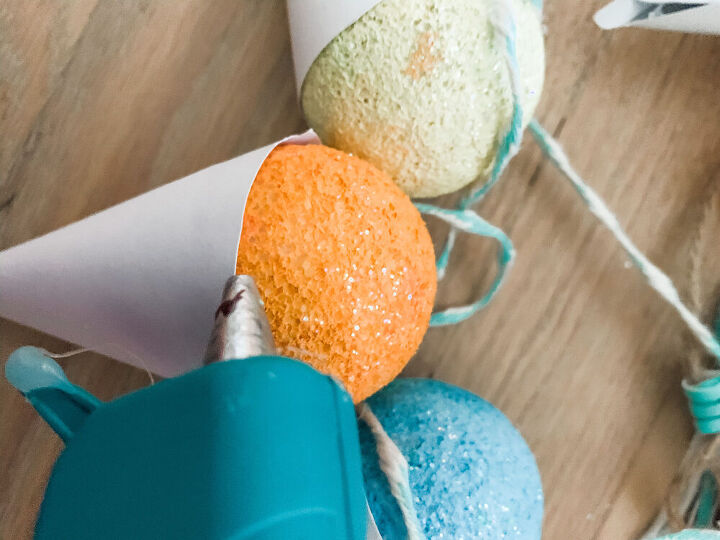
Put a large dab of hot glue on the backside of the snow cone, right near the rim fo the cone.

Then decide where you want your first cone situated on the string and hold both sides of the string and place on the glue. Give it a second to start to dry and cool off, then I usually press on the glued area to ensure good contact. Space the rest of the snow cones out as desired, again, around 4"-6" inches works nicely, but there is no right of wrong here.

Finally, find a place that needs a little summer spirit and fun!
Resources for this project:
See all materials


Comments
Join the conversation
-
Cute and fun! Thank you for sharing!
-
Very cute !


Frequently asked questions
Have a question about this project?
Couldn’t you use paper cones used in making snow cones? Might save some time.