


Epoxy Phone Stand

I recently discovered that if my phone is standing by my side when I am working, I interact with it less. For that reason, I built myself, with my lovely hubby, a phone stand for my home office.
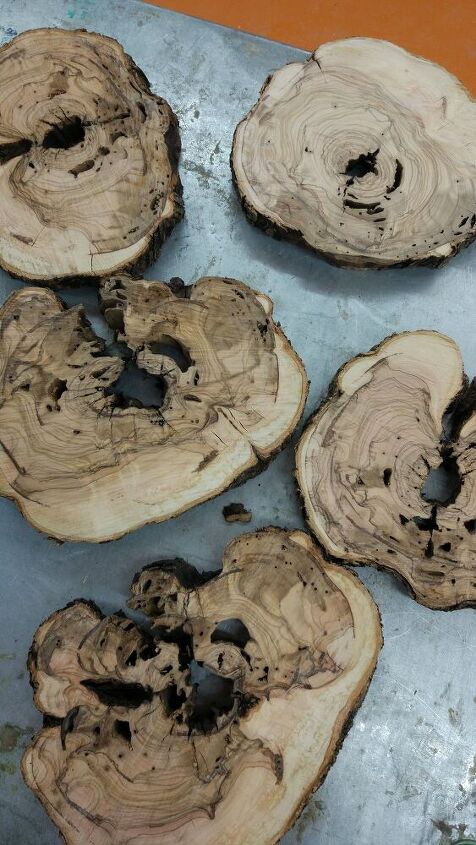
As all good love stories, it was love at first sight. We were driving to a family dinner when I noticed a tree log in the ditch. I stopped the car and placed it in my boot.
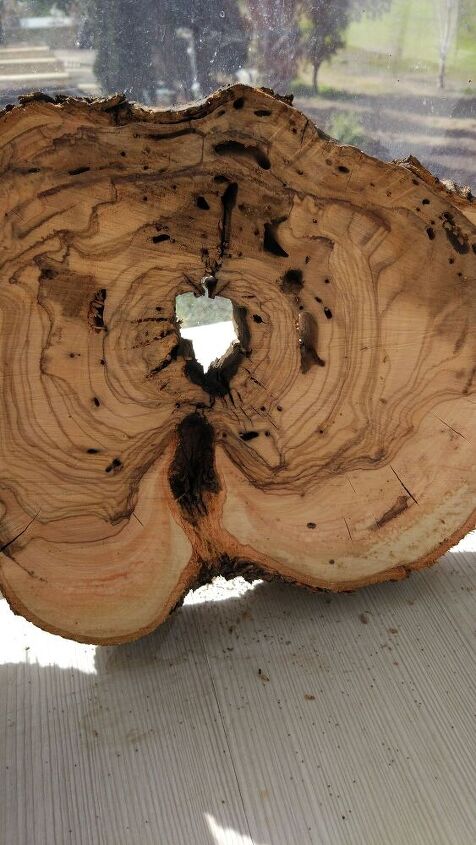
The very next day, my husband sliced it up for me, using a chain saw, and I picked one slice to be the new phone stand. With the chain saw, we sliced it again in the middle. I covered the wood with white glue, using a thick brush, to seal it and prevent air bubbles to appear inside.
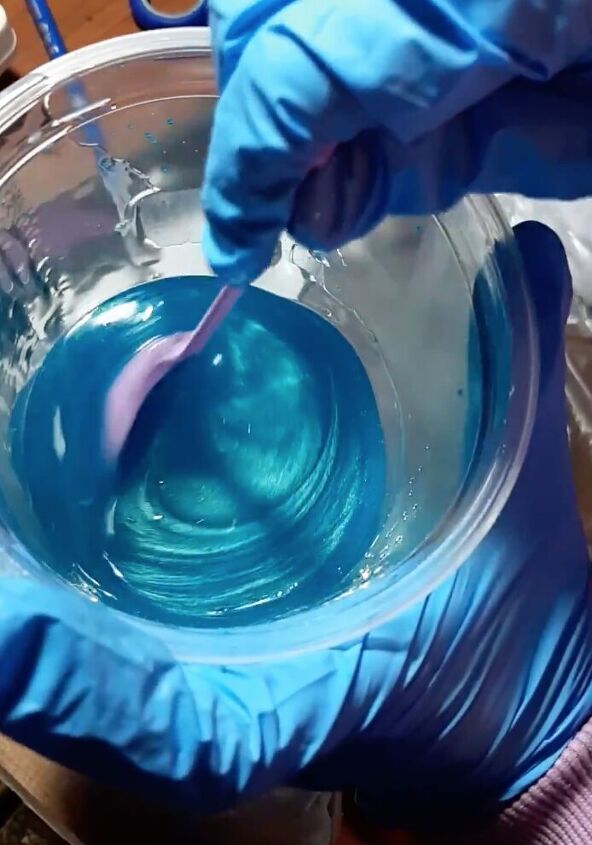
In a small plastic container, I mixed out 1:2 epoxy resin, and I added 2 pigment colours. One of light blue with glitter and another of royal blue. I mixed it, wearing gloves for protections.
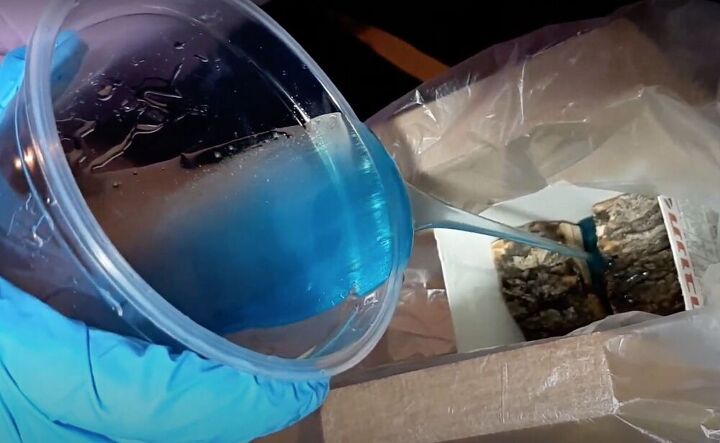
I placed the two pieces of sliced wood in a milk container, the one that has a waxed layer inside. Therefore, it would be easy to peel the box off. As the container is flexible, to some extent, I placed two pieces of beech wood on the sides, to make sure it would stay flat and square. Then, I poured the epoxy mix inside the container and let it cure for 24 hours.
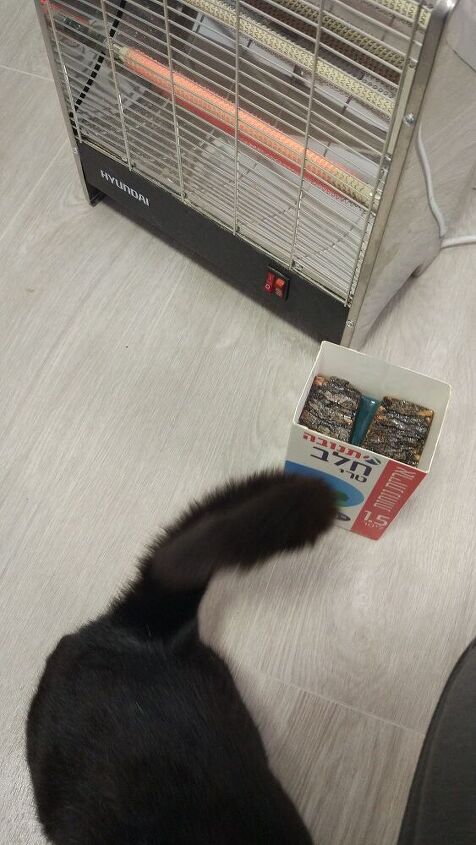
Usually, it takes 24 hours to cure, however, it has much to do with the ambient temperature. The next day was a cold rainy day, so I took the container with me to the office, and placed it next to the heat. The cat got curious and came sniffing around.
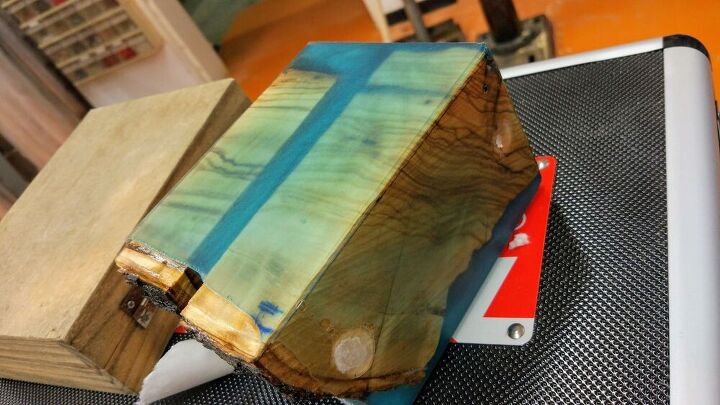
48 hours later, it was cure and ready. I peeled the cover off and this magnificent wood-epoxy creation appeared. I love it how you could never know exactly how it would turn out, as if the creation has its own life.
Stoping to admire it before continue working.
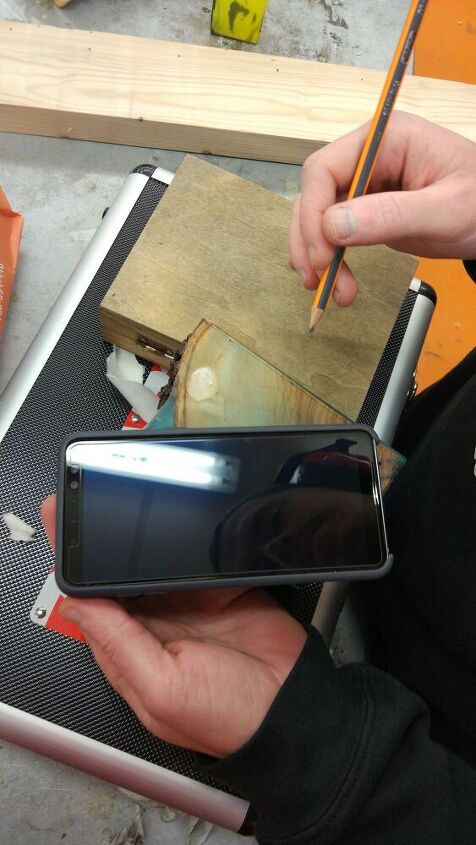
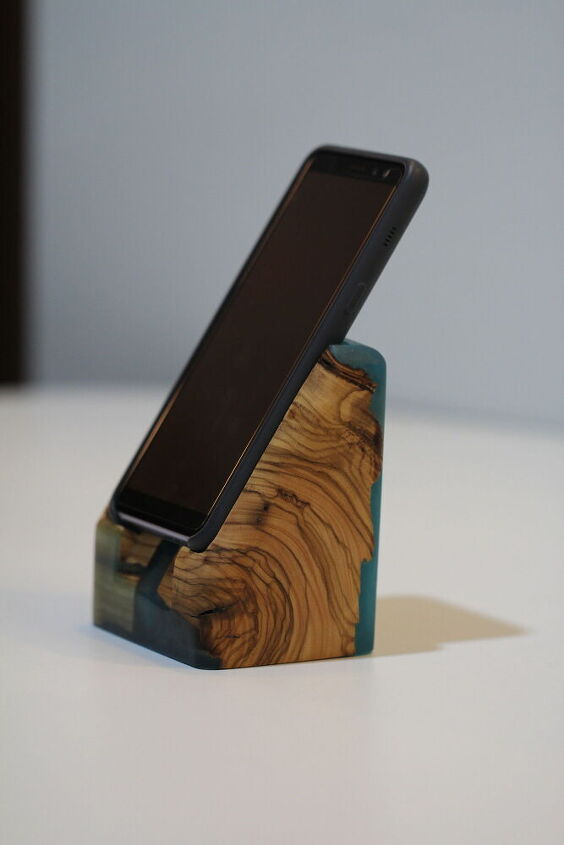
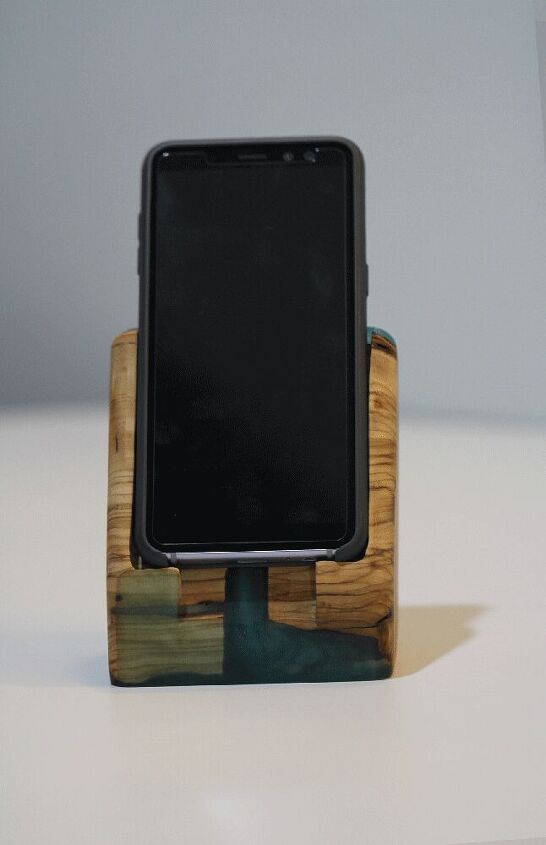
The wood was too big to the size I wanted, therefore, my husband helped me to cut it off. We measured the size of the phone, and how big it should be in order for me to engage with the phone on the stand. Using a chain saw, we made a 45 degree cut, and trimmed the top off.
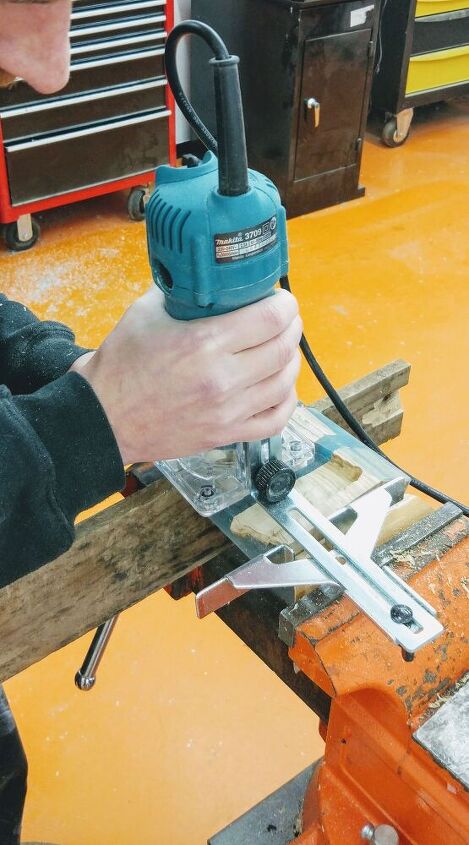
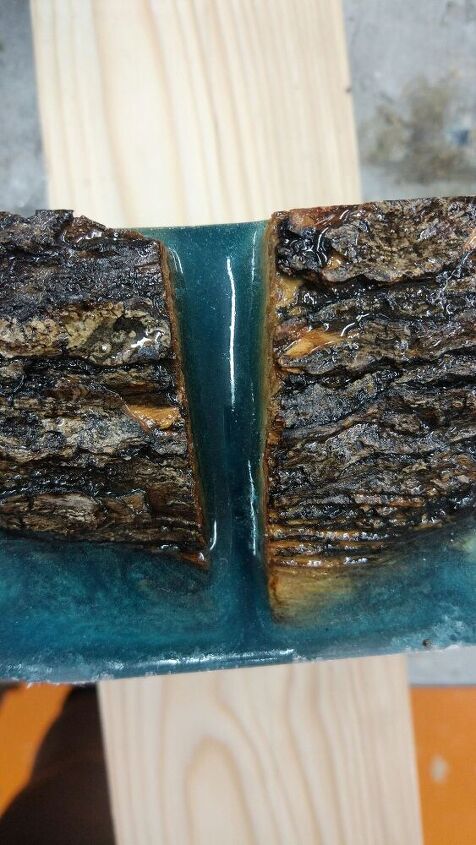
Using the router machine we made a groove for the phone to stand in, and remove the bottom part of it, in order to be able to connect the phone to the charger while it is on the stand. Using a different bit, we made the edges smoother. Once we were pleased with the outcome, we sanded the surface using an Orbital sander with different sand pads.
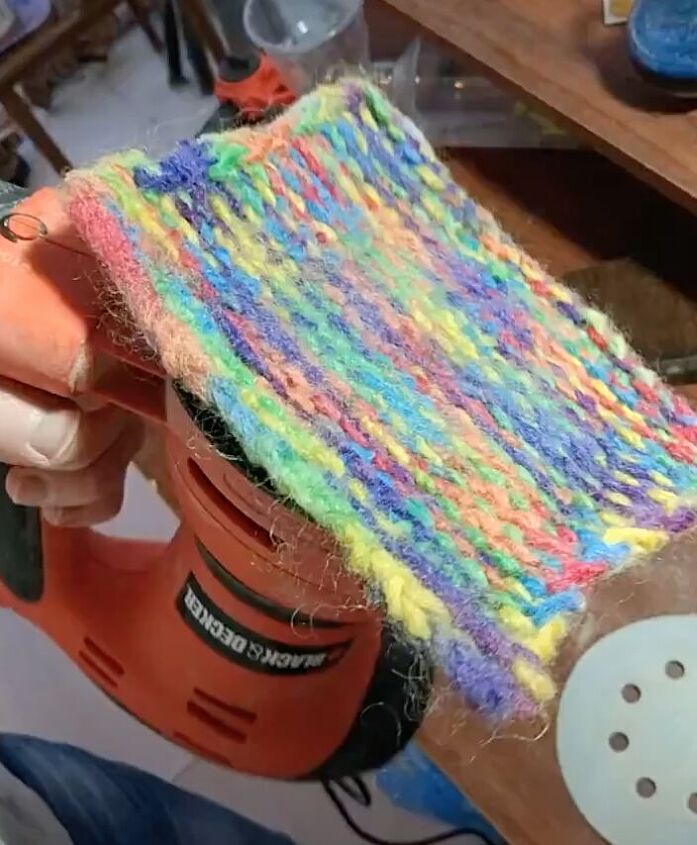
The last pad is a polish had my mom made us. It is made out of wool and it makes the best polish pad.
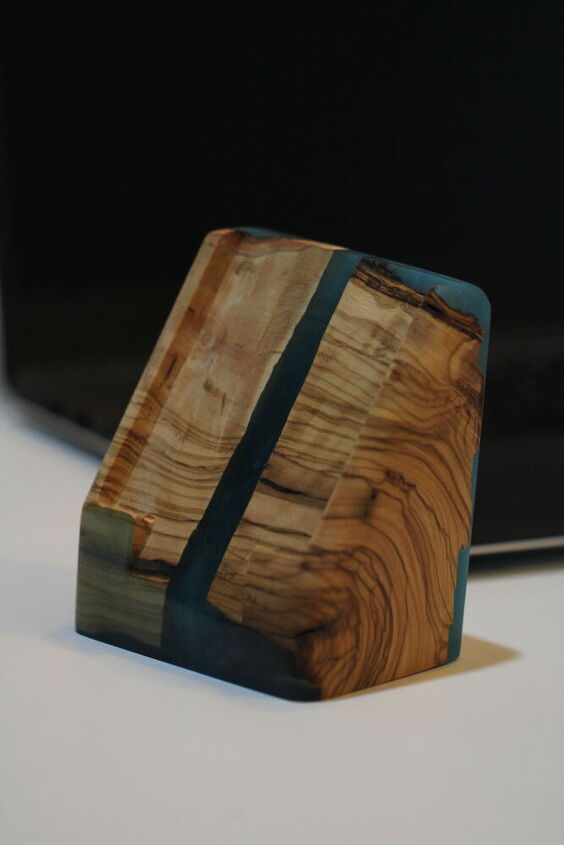
Once it was polished, we added oil to seal it.
Then, we waited for about 2 hours before removing the excessive oil.

Finished
Resources for this project:
See all materials


Comments
Join the conversation
-
Wicked cool!! Where can I order mine?!!!

-
Very cool


Frequently asked questions
Have a question about this project?
Beautiful, Thank you for sharing your project. I was thinking that you may be in the UK from the use of the word boot in your description. Do you know what kind of wood that is ? It is beautiful. Looks like Olive but I am most likely wrong.