


Petite Vintage Buffet Makeover

Follow along as we take this outdated and worn out vintage buffet to a modern beauty with a few simple changes.
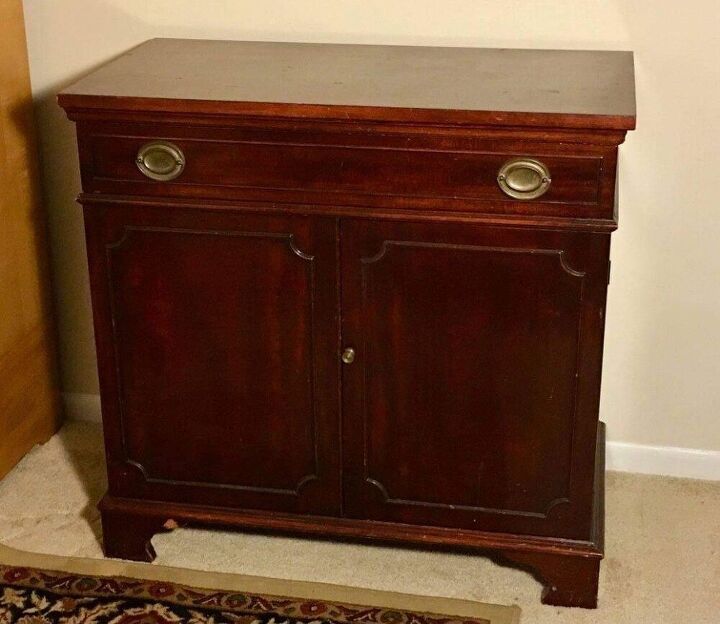
We had been on the hunt for a two door buffet to makeover as they are so versatile and can fit in with many sized homes and decor. When we found this one on Marketplace as part of a moving sale I knew it would be perfect for a glam up! We started the process by removing the hardware and cleaning the piece. We love krud kutter followed by a rinse. It always amazes me what comes off with some elbow grease and a good clean. At this early stage we decided to remove the curvy feet base and started thinking about which feet we wanted to add for an updated look. We did this by unscrewing the feet and knocking off the base molding with a good old hammer. Next it was time to sand and fill.
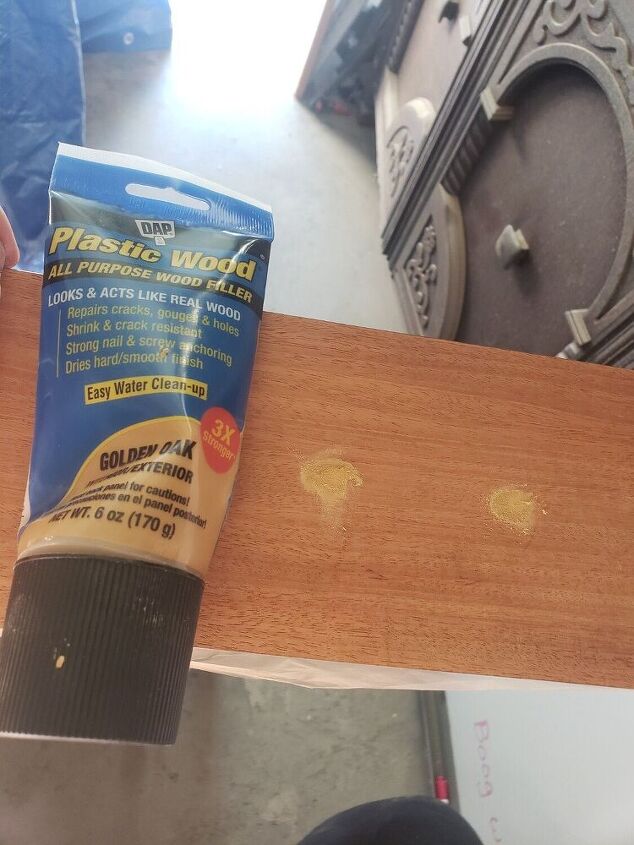
We sanded the piece using 120 in places and 220 in others. Sanding helps not only to smooth out the surface, but it removes scratches and build up of old failed finishes as well. This piece had scratches, a couple gouges and hardware holes that I knew we didn't need. We used dowels in the hardware holes with a heavy amount of plastic wood on top. After lightly sanding the plastic wood we did another round as the filler did not completely cover where the dowel was used. After that second round and another sand with 220 it was great.

We used our Surfprep Electric 3 x 4 ray for all the sanding on this piece. The Surfprep is a great tool because you can use sanding sheets and screens for flat surfaces and then switch it up with foam pads to get in curvy and raised areas with precision. It makes my job so much easier! You can find Surfprep at Surfprepsanding.com and use my code AMINI10 to save 10%.
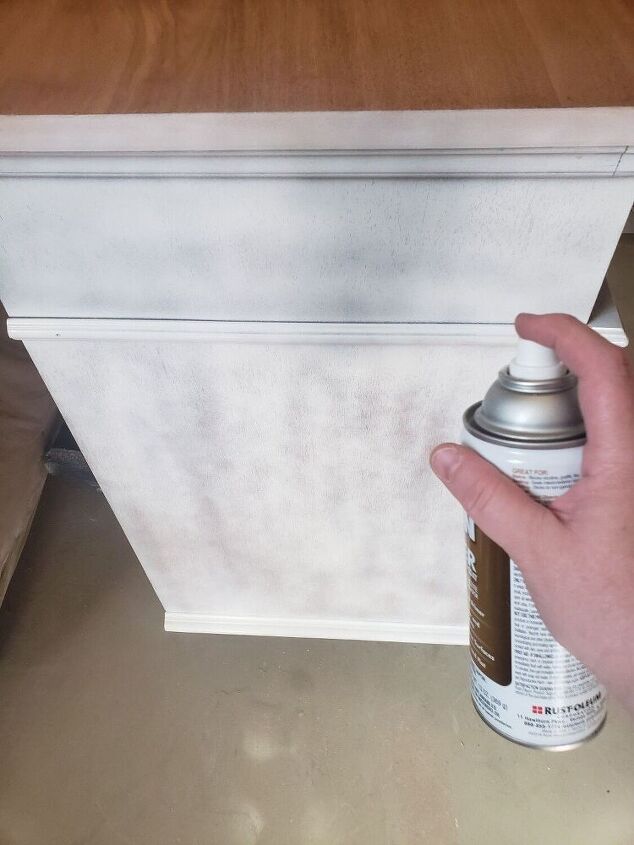
After sanding and removing all dust with a tack cloth we primed with Bin oil based primer. Since this was a mahogany piece, it was likely to have a lot of bleedthrough so I wanted to minimize that happening as much as possible. After two coats and lightly sanding and removing the dust, it was time to plan the design.

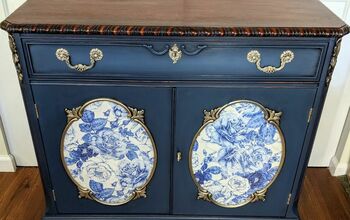
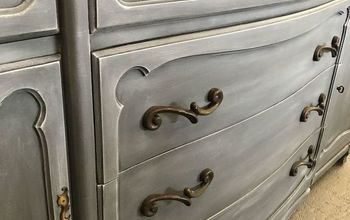
After looking online for fancy pulls and backplates I came up with nothing that wouldn't cost at least $80 for what I envisioned so I decided to use what I had and made resin molds from a kit and spray painted them to use as backplates for the new hardware. I used a Redesign with Prima mould with Amazing Castin Resin then painted with Design Master Pure Gold Spray Paint. We used quatrefoil wood appliques for that extra design feature. We also removed the back as it was cracking and cut a new one for replacement.
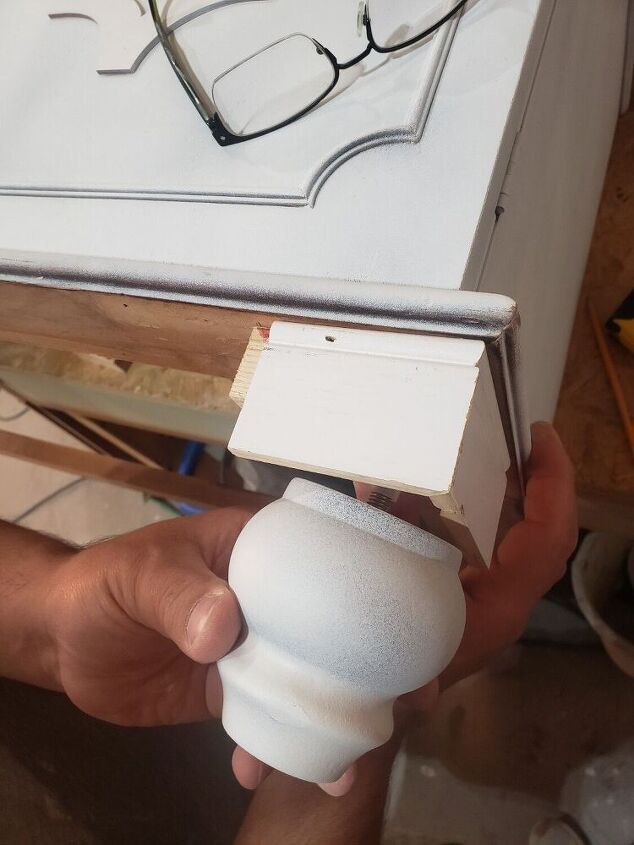
Ok so since we removed the old base and feet we needed to build it back up again so we decided to add four wood squares - one on each corner that would serve as the support for our new moulding and bun feet. These were put into place with screws and woodglue, and the new mouldings were nailed in with a brad nailer.
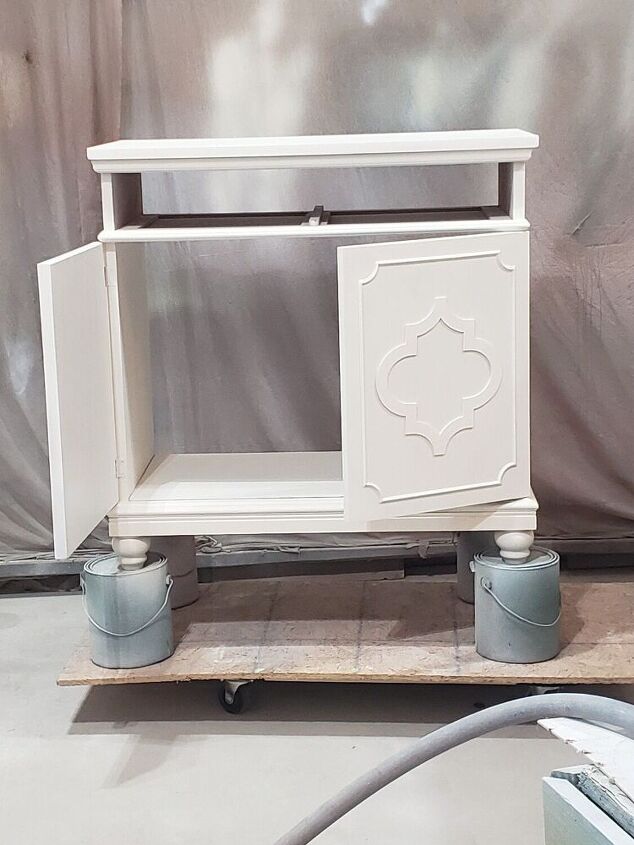
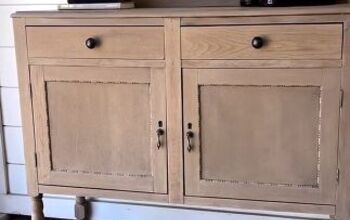
Here it is after the addition of the wood applique, base moulding and new feet. What a change right?
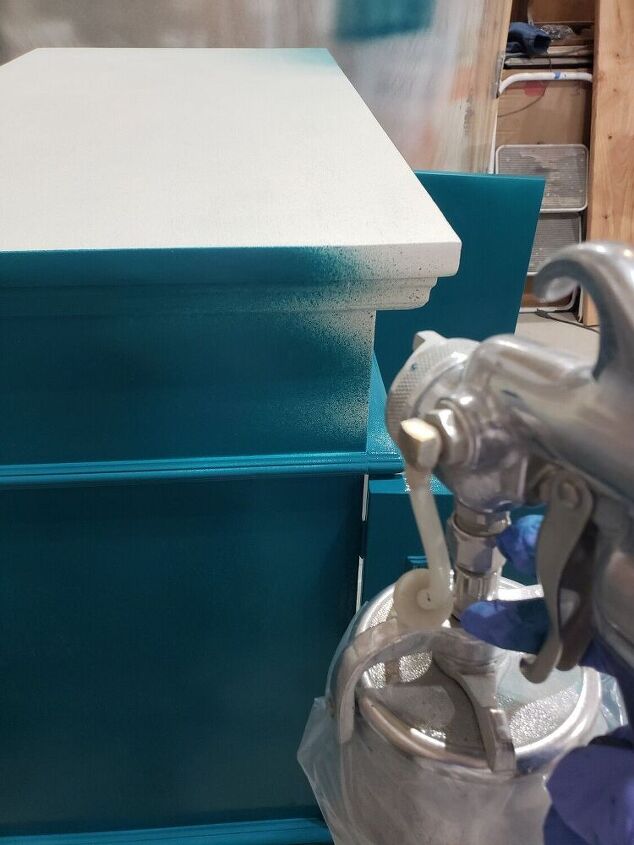
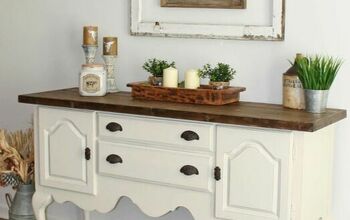
Finally it was time to paint! We chose Peacock by Paint Couture for this rich teal color. It was the perfect color choice for this piece. We sprayed three coats using our Fuji Semi Pro 2, followed by three coats of General Finishes Enduro Top Coat in Satin.
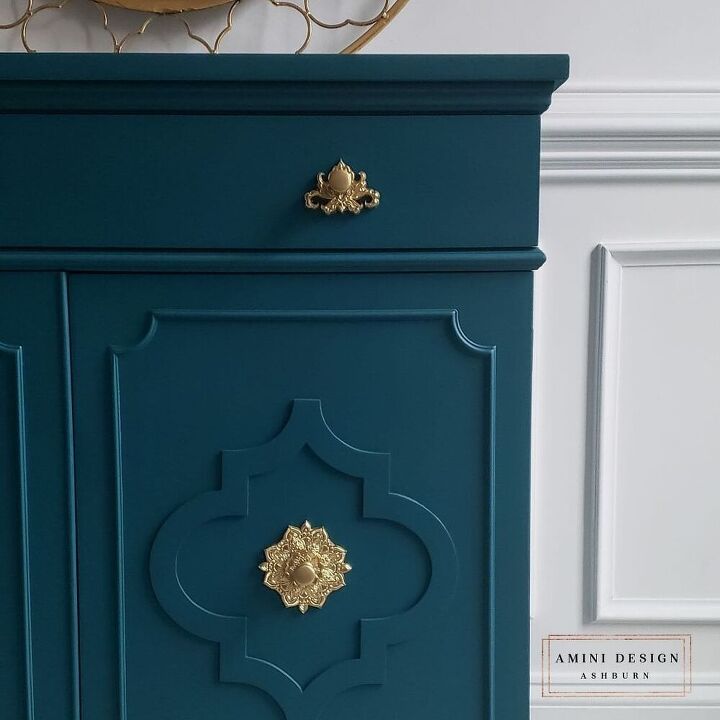
The moulds gave it that touch of glam it needed, so we drilled holes through the center of each moulding for the new hardware and attached these adorable pulls.
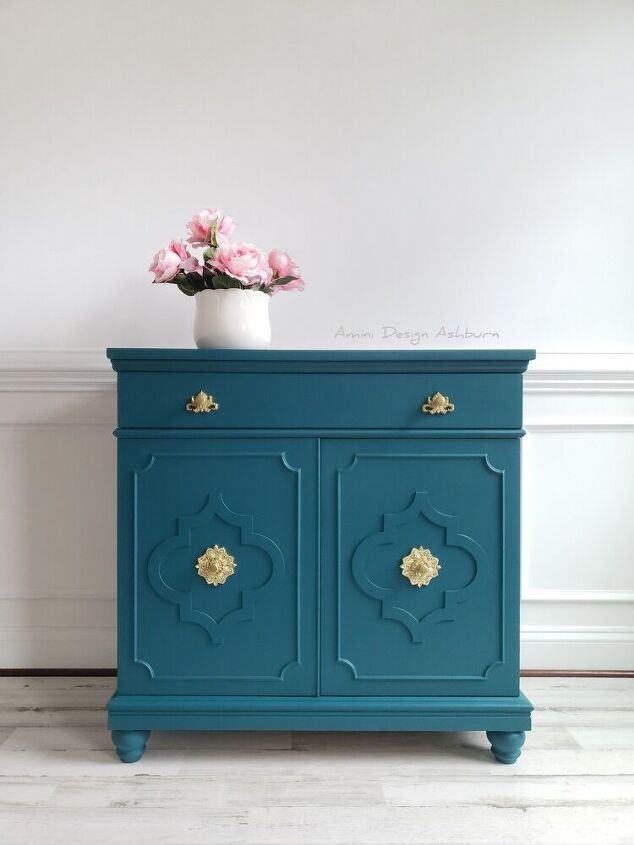
Here it is madeover and ready to serve in style!
Resources for this project:
See all materials


Comments
Join the conversation
-
Amazing what you ladies do, I’m always blown away how you change old pieces of furniture, beautiful.
-
I love this. Fantastic job!


Frequently asked questions
Have a question about this project?
Can you make a new post describing how you made those backplates with resin molds? WOW, just WOW!!! Love your project! YES Cabinet paint using a sprayer gives the best makeovers! Love it!
WOW....need I say more???
That is just stunning!!! Every choice you made for this project was perfect!! Can I ask you about the paint sprayer? I've been wanting to buy one and there are so many options! The one you mentioned is $560 here in Canada! Yikes. Do you find a lot of overspray? Have you used other sprayers that you can compare it to? I have a Wagner, but I find it runs out of paint quickly and ends up with spatter on the project. Not ideal! Again, such a fantastic job.