


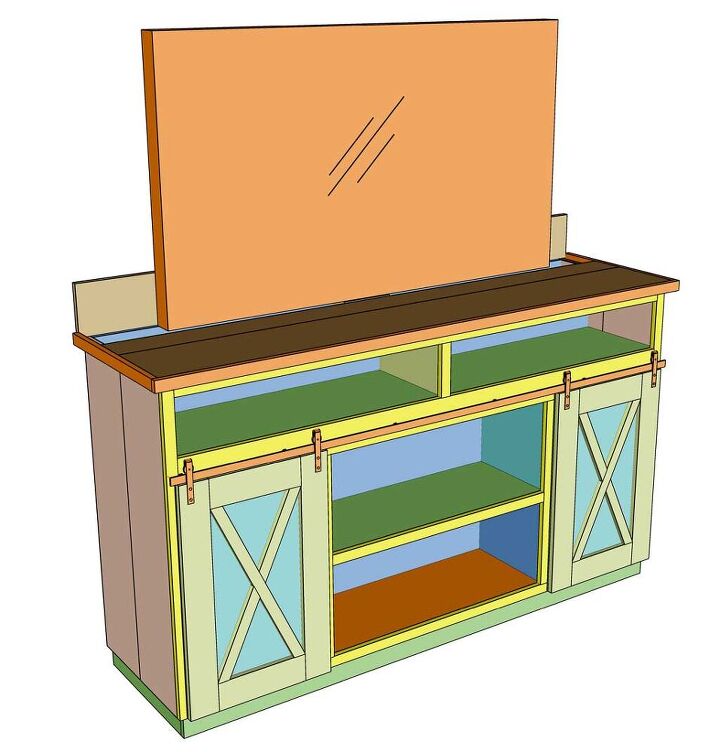
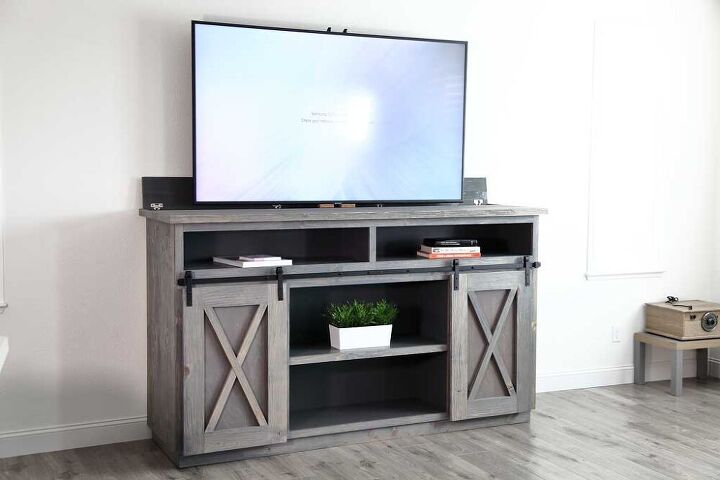
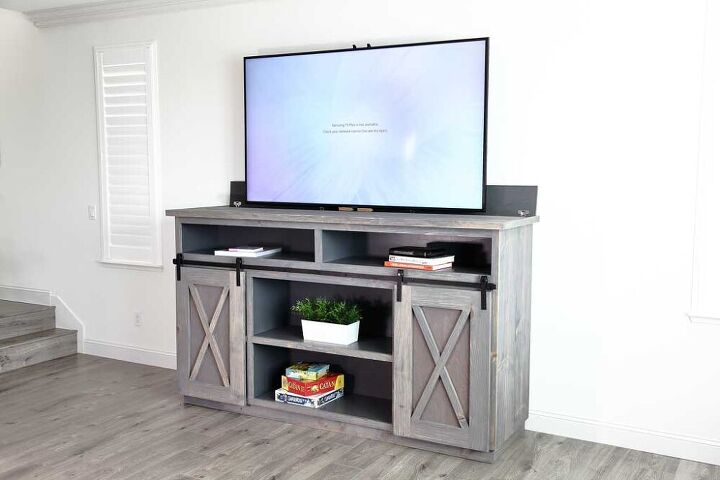
How to Build a DIY Farmhouse Media Console With a TV Lift

How do you protect your flat-screen TV from getting damaged when you have small kids? It’s quite surprising just how fragile modern TV screens are, and it doesn’t take a lot to cause damage. If you have small kids running around and throwing their toys across the living room, it’s only a matter of time and your TV would need to be replaced. Or what if you don’t want to see that massive screen on your wall every day, that is also in conflict with your living room decor. So to fix this problem, I build a DIY Farmhouse Media Console with a TV lift to hide the TV when it’s not in use.
Instead of a large TV on your wall, you could have a beautiful painting to compliment the design of your room. Having a media center with a TV lift gives you the ability to slide out the TV only when you need to use it.
For more information and to download printable PDF plans visit my website, TheDIYPlan.
Tools for this project
- Tape Measure
- Drill
- Miter Saw
- Table Saw
- Nail Gun
- Kreg Jig
- Surebonder Staple Gun
- Pipe Clamps
- Threaded Wire Cup Brush
- Angle Grinder
- 1 3/8″ Shank Forstner Drill Bit
- 7/64″ Self Centering Drill Bit
- Sander
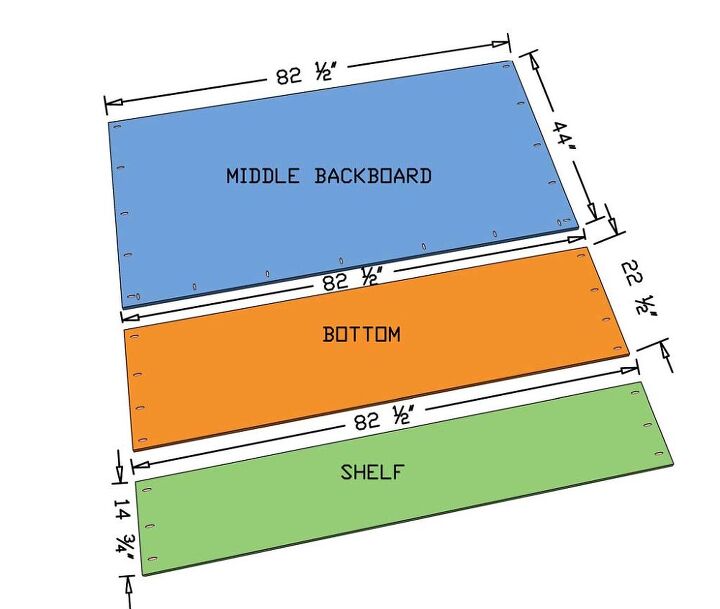
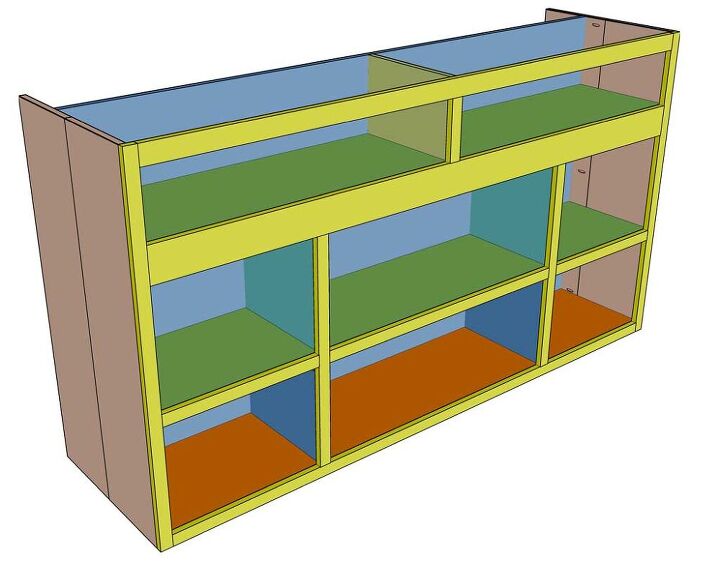
Step 1 – Cut Bottom, Shelf, and Middle Backboard
First, start by cutting the large pieces. Take 3/4″ cabinet grade plywood and cut the bottom piece to 82 1/2″ x 22 1/2″ and one shelf piece to 82 1/2″ x 14 3/4″. Then cut a middle backboard to 82 1/2″ x 44″. This board is placed between the TV lift and the media console shelves. Next, drill pocket holes as shown in the picture having the Kreg Jig set to 3/4″ wood thickness.
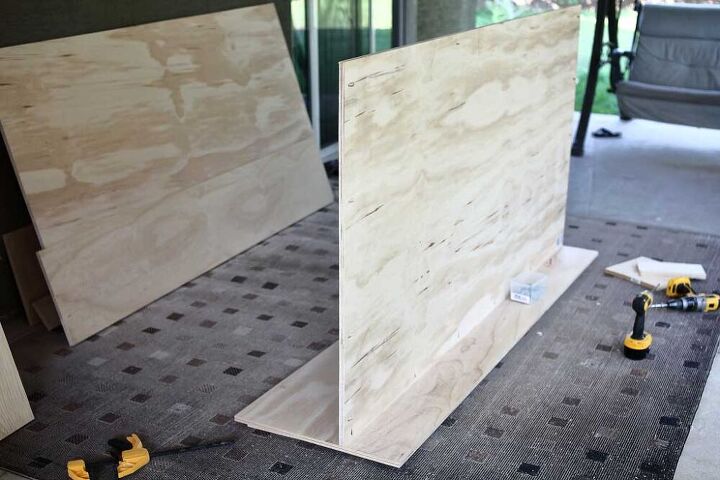
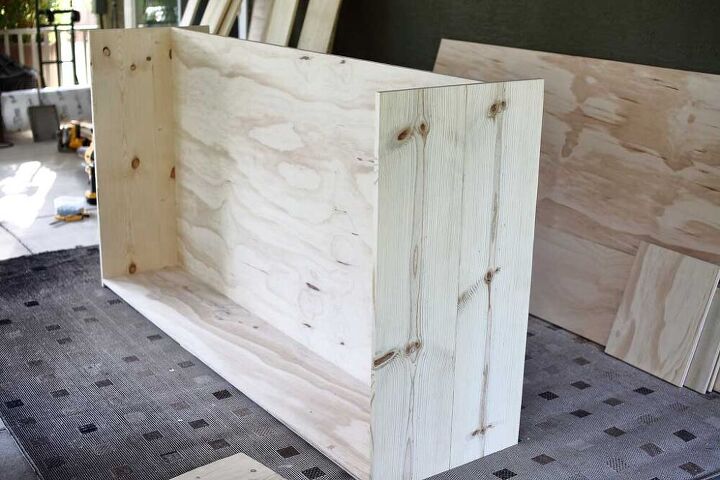
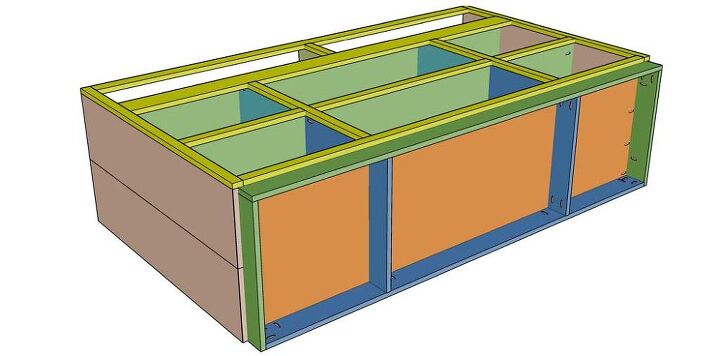
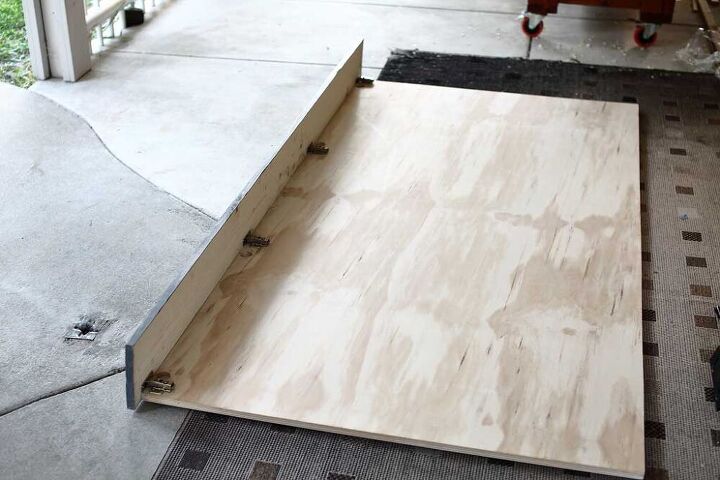
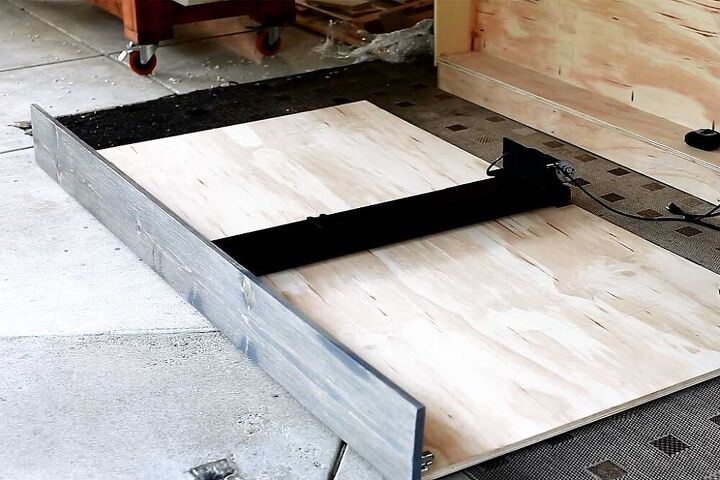
Step 2 – Glue and Attach Middle Backboard to the Bottom Piece
Place the bottom board on the floor with pocket holes facing down. Take the shelf board and clamp it temporarily to one side of the bottom board. Apply a strip of wood glue right next to the clamped shelf board. Then place the middle backboard into the glue, having pocket holes facing to the back of the media console. Drive in 1 1/4″ pocket holes screws attaching backboard to the bottom board. Once the backboard is attached, then unclamp the shelf board.
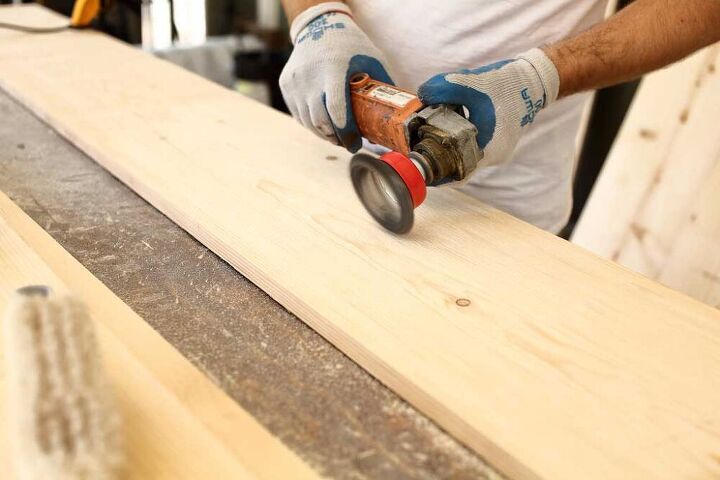
Step 3 – Distress Wood and Connect the Sideboards
To accomplish this I used a knotted wire cup brush on an angle grinder to distress the wood. The wire cup brush removes the soft areas of the wood and leaves the hard grain areas, creating a weathered rustic effect. Practice on a scrap board first to get the feel of how much pressure to apply before using it on the project boards. Hold the angle grinder at about 30 degrees to the wood grain for the first pass and then rotate it to be parallel with the wood grain. The more pressure you apply the more wood it removes.
Step 4 – Connect the Sideboards to the Media Console Table
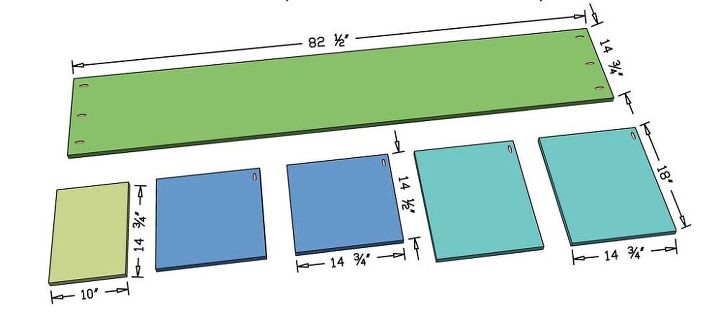
Step 5 – Cut Shelf Boards for Inside of the Media Console
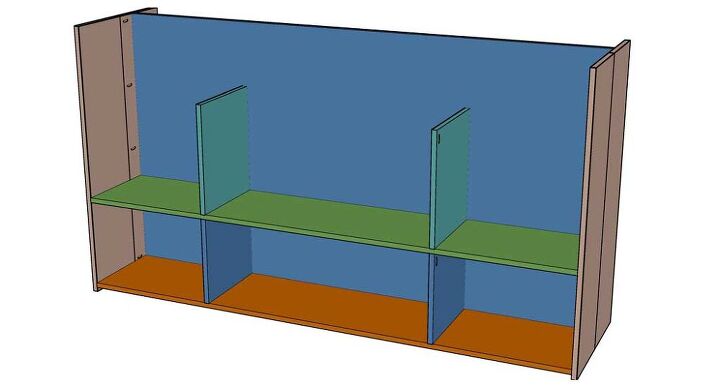
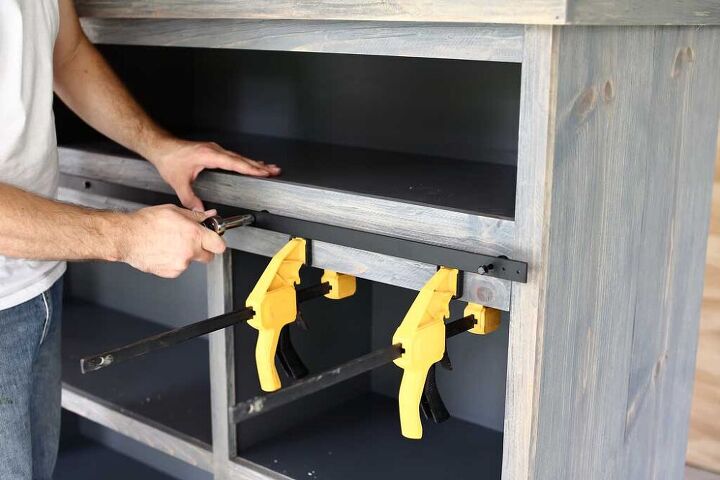
Step 6 – Set the Bottom Shelf Dividers and Attach to the Media Center
Start by attaching the shelf divider from the bottom of the media center working up. Measure 21 3/8″ from the left and 21 3/8” from the right of the media center and mark on the bottom board and the backboard. This is where the shelf dividers will be set. Attach the 14 1/2” tall shelf divider using wood glue and nail gun from the back of the media center.
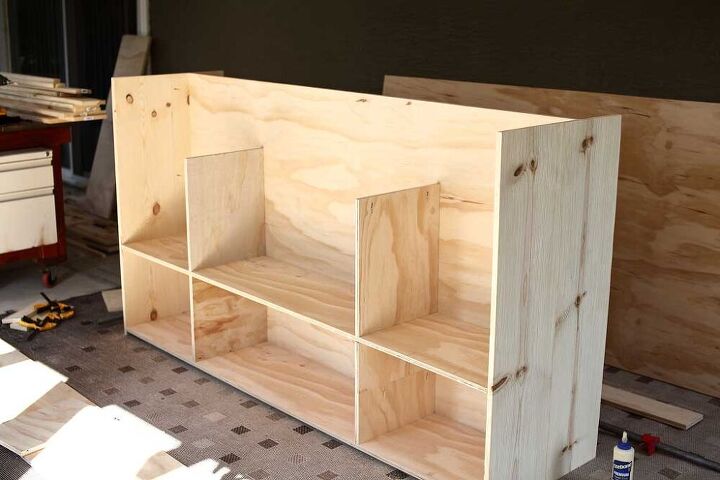
Step 7 – Build and Attach Middle Shelf and Dividers
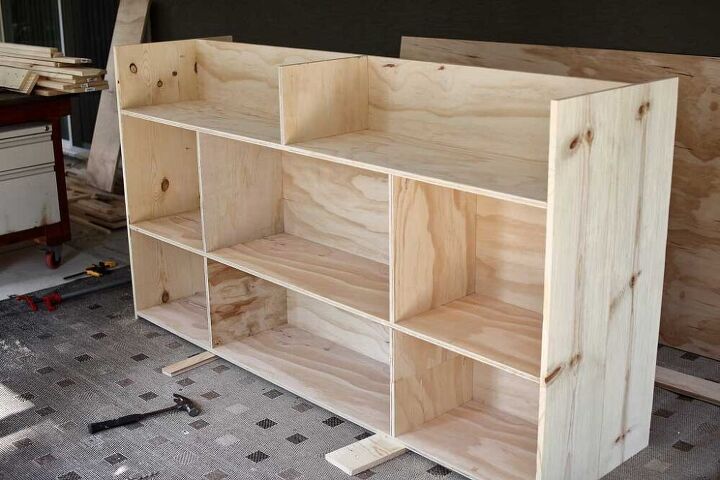
Step 8 – Build and Attach Upper Shelf and Divider
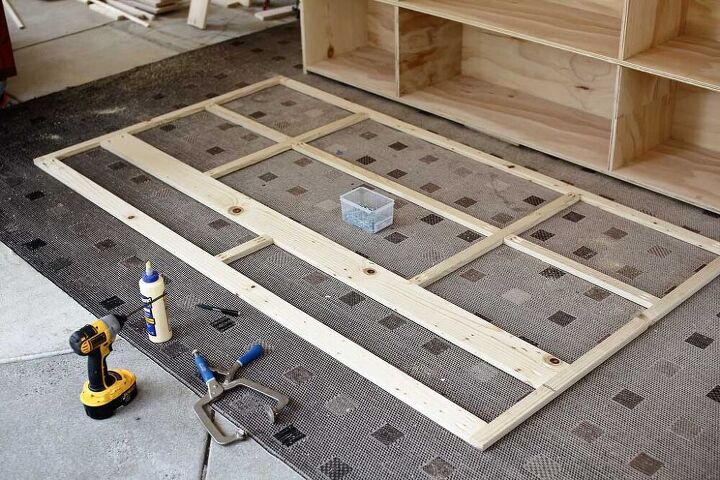
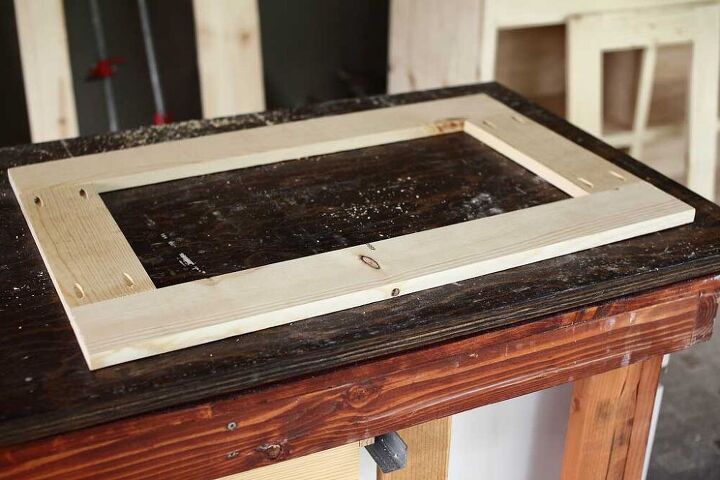
Step 9 – Assemble the Face Frame
First, assemble the outer perimeter of the face frame with wood glue and 1 ¼” pocket hole screws. Then hold the rectangular face frame against the front of the media console and mark the exact locations where the shelf boards are. This will help you to attach the frame board perfectly without any misalignments. When the face frame is complete, set it aside for staining. It will be attached to the media center once everything is stained and painted.
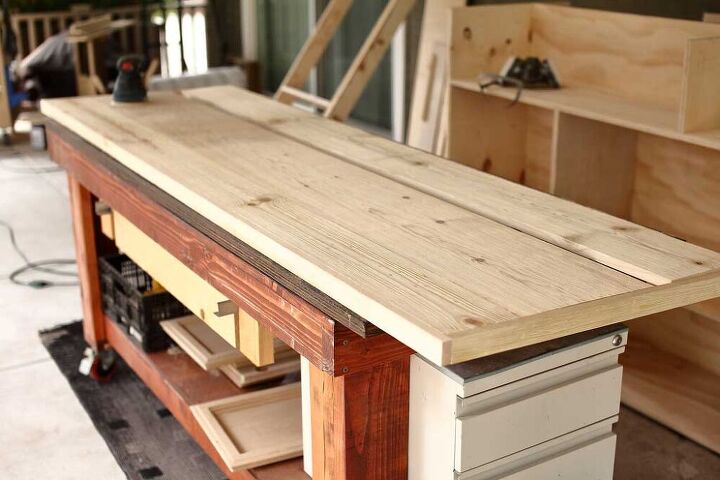
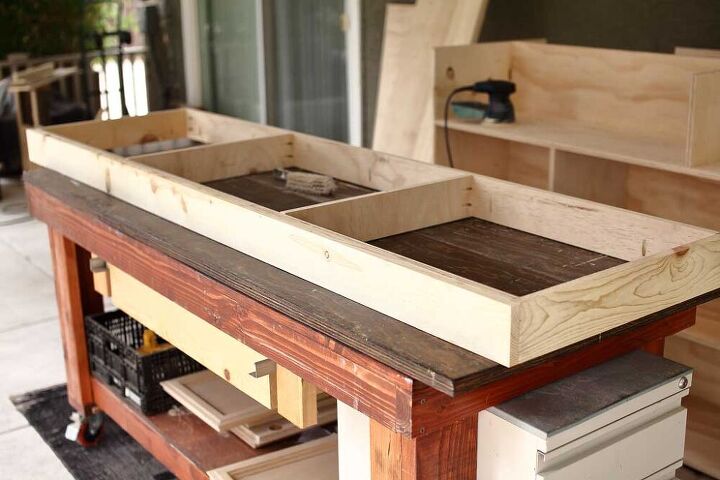
Step 10 – Cut and Assemble the Top Cover of the Media Table
Step 11 – Make the Base for the Media Console
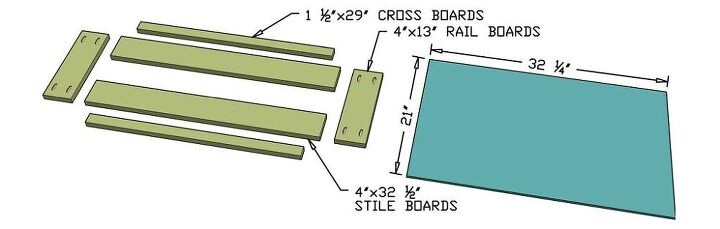
Step 12 – Cut Boards for the Barn Doors
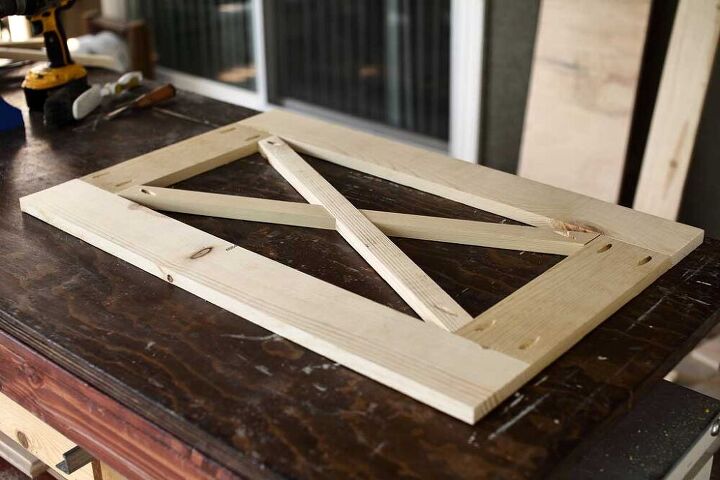
Step 13 – Assemble the Frame of a Barn Doors
Step 14 – Trim and Install Cross Boards for the Barn Doors
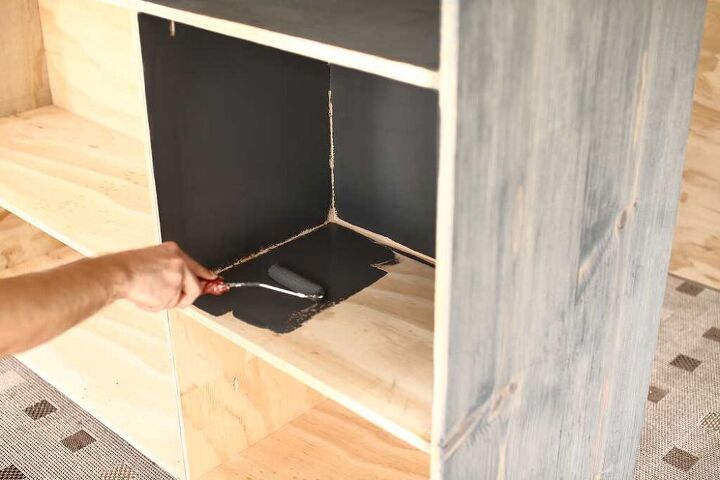
Step 15 – Stain and Paint the Media Console
Step 16 – Attach the Face Frame to the Media Console
Step 17 – Attach the Base and the Top
Step 18 – Attach the Barn Door Sliding Kit
There are a few DIY methods out there explain how to make your own barn door sliding kits, you could see them here at Ana-White and Shanty-2-Chic websites. But I decided to buy a 7 foot long kit on Amazon to save time. Follow the installation instruction for the exact placement of the rail. The metal rail is attached to the media center with 2” screws. You might want to pre-drill the holes before driving the screws in. This will prevent the board from splitting or cracking. The rail needs to be installed leveled so that the doors will not slide down in one direction.
Place the 1/4″ plywood on the backside of the bard door and staple it using a staple gun. Then attach the rollers on both sides of the barn door. Hang the doors on the rail.
Step 19 – Attach the Lid Board to the Backboard
Step 20 – Attach the TV Lift
Step 21 – Attach the TV to the TV lift
Slide the TV lift all the way up and then attach the TV to the TV lift with the screws that came in the package. You’re done with the DIY Farmhouse Media Console with a TV Lift.
Resources for this project:
See all materials


Comments
Join the conversation
-
Well done thank you for sharing. May I ask did you research which lift to get because that one seems a tad expensive. I found similar that are more cost friendly.
-
Impressive


Frequently asked questions
Have a question about this project?