


German Schmear Brick Backsplash

When planning our kitchen & dining room renovation, I knew that this "German Schmear" style brick had to be incorporated somehow! I love that it can fit any style, adds warmth and texture to the room, and of course- can be DIY'ed.
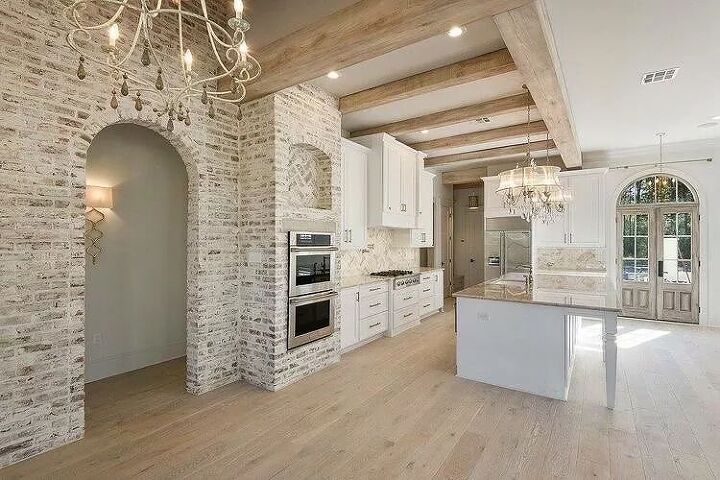
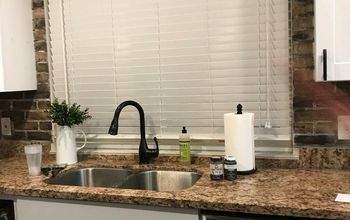
Inspiration photo... isn't this kitchen's brick wall drool-worthy?!
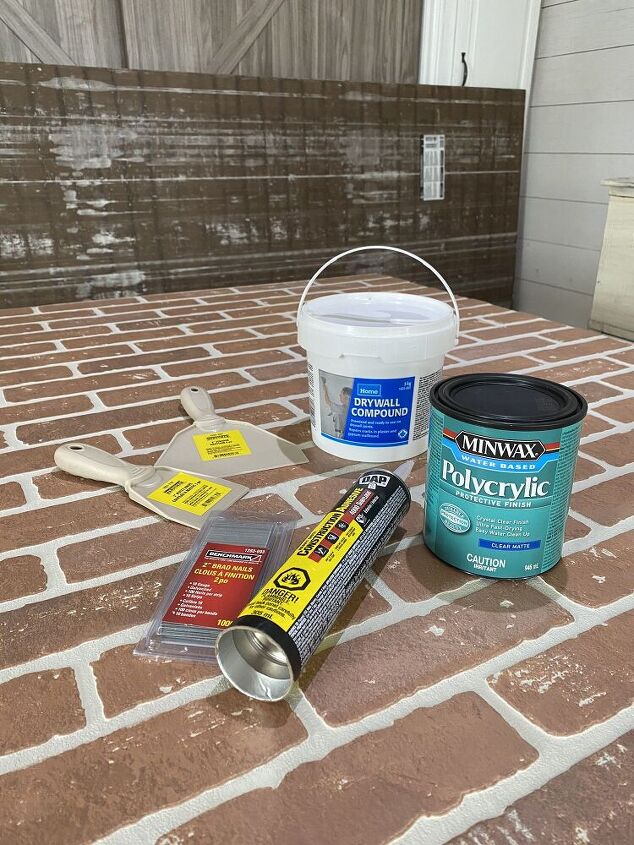
Supplies for this project:
- 4'x8' textured brick sheets from Home Depot (1/4" panels similar to plywood sheets- about 20 lbs. each)
- Drywall compound
- Plastic or rubber putty knife
- Construction adhesive
- Water-based polycrylic (optional)
- Sanding blocks
- 2" brad nails
- Painters tape
- Rag & a bit of water
Tools you will need:
- Jig saw
- Brad nailer
- Caulking gun (if using a tube of adhesive or sealing around countertops)
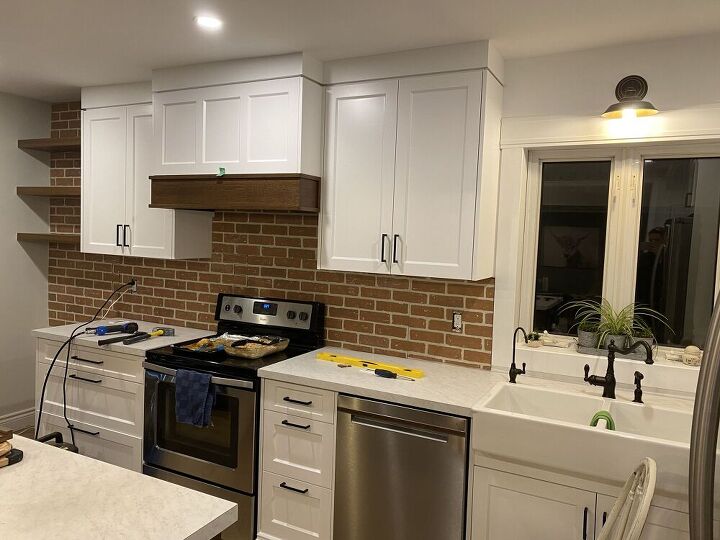
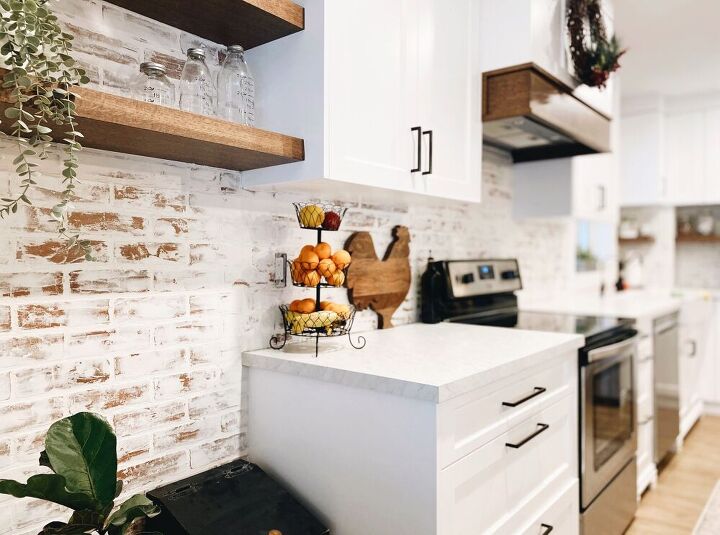
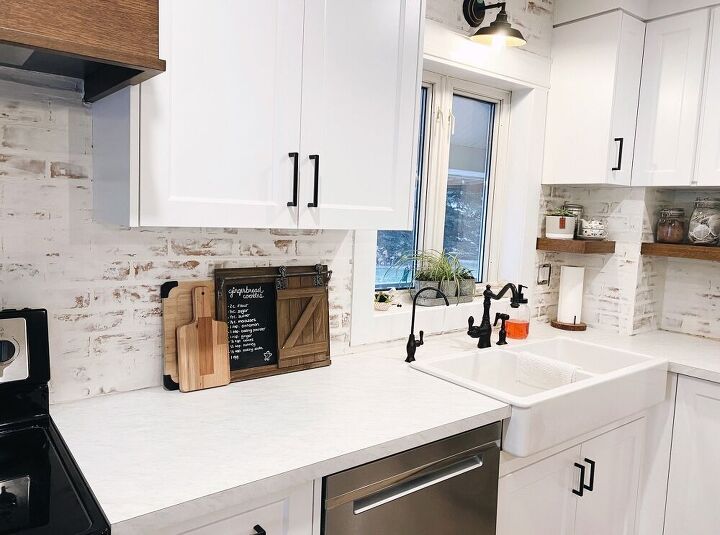
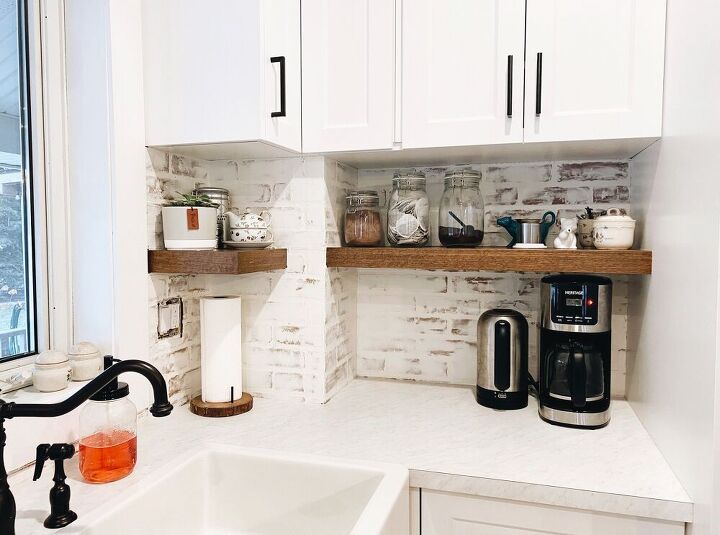
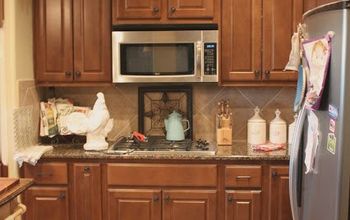
This is our newly renovated kitchen! We just left the backsplash to do ourselves and I fell in love with the idea of doing a whitewashed brick. It will add so much more warmth and dimension to an otherwise white and bright room.
My plan is to do not only the backsplash, but the whole exterior wall plus the small corner that comes around to the left side of the fridge.
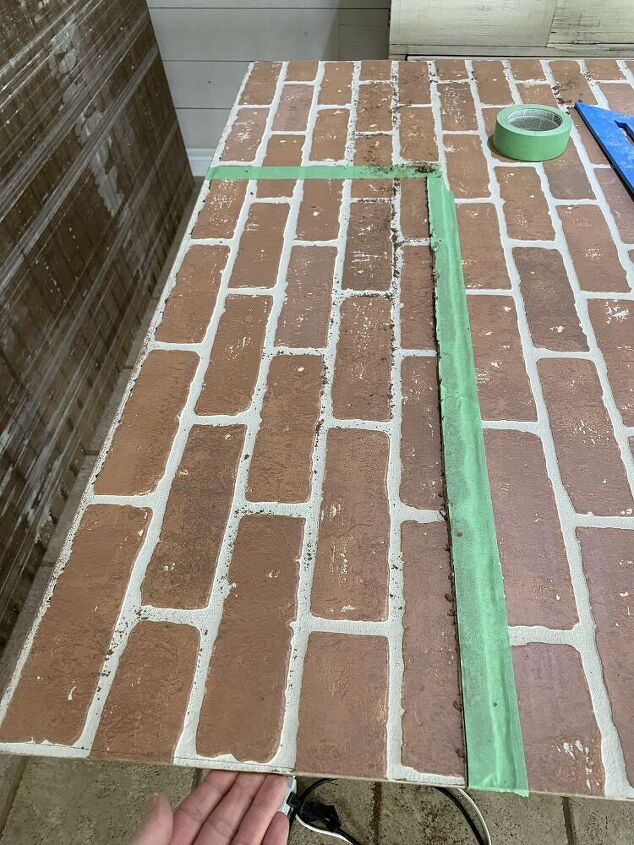
Measure and cut the brick pieces to fit your space.
I found it very helpful to put tape down along the line where I was cutting to keep a straight line as well as preventing slivers/chips coming off the sheet.
Hang the brick pieces with a bit of construction adhesive on the back as well as securing with brad nails on the corners and edges.
**It might be helpful to find where the studs are in your wall to hang the brick appropriately. Our walls have solid pieces of barn wood running across the entire wall, so there wasn't a need to find studs.
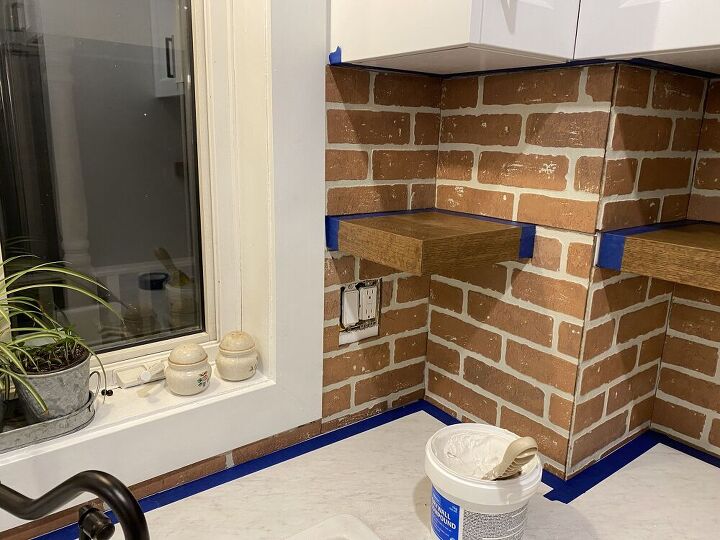
Tape off the walls and surroundings you don't want getting compound on and begin the schmear!
This compound had the consistency of (and kind of smelled?) just like icing, so it felt just like icing a cake!
Depending on the look you want to achieve, put on more or less compound. The grout lines between the bricks should be covered for the most part, giving it a more realistic look.
This compound dries in 24 hours, so you will have plenty of time to go back and smooth out some spots. I found that the really thin layers started to dry after about 10 minutes, though.
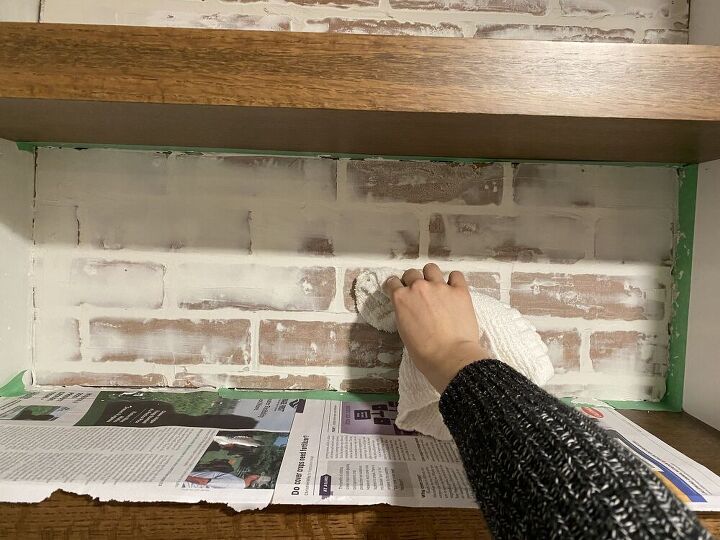
Using a damp cloth, wipe away some of the compound if you want to have some spots more exposed than others.
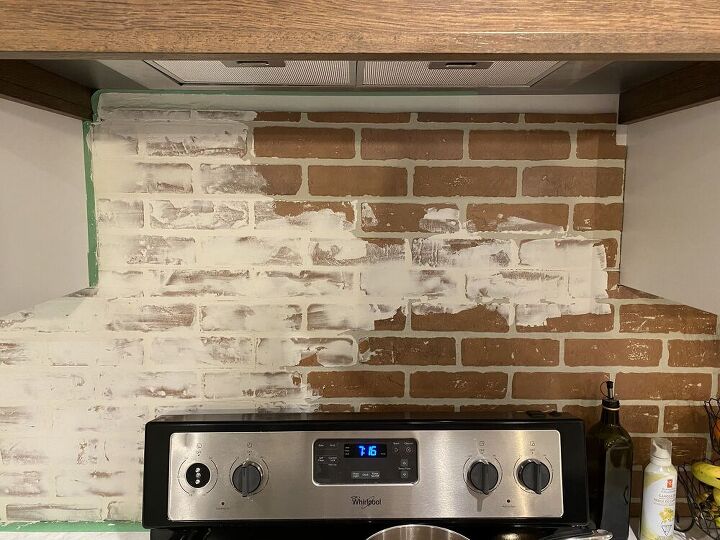
As you can see, I accidentally cut this top piece 1 inch too short! Thankfully, the "schmear" covers up a lot and is very forgiving. I'm going to put some extra compound near the top to make that area more white, and no one will ever know!
Once the compound is dry (about 24 hrs), sand down the rough spots with a sanding block.
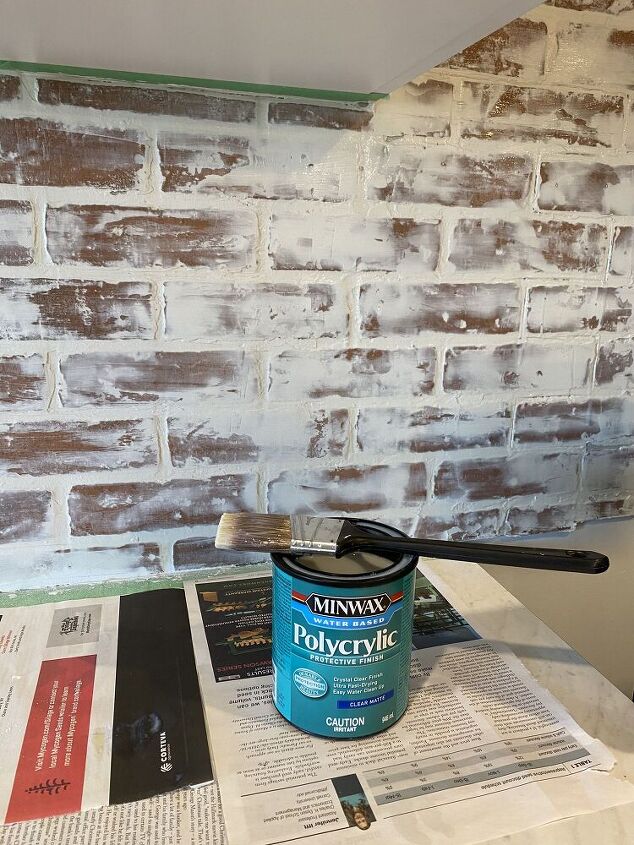
Since this wall is being used as a backsplash, I needed to seal it to make it easy for wiping off splashes of food, grease, etc. This water based polycrylic worked great and will not yellow after time like an oil-based seal would. I'd recommend doing at least 2 coats if your brick is in a bathroom or kitchen.
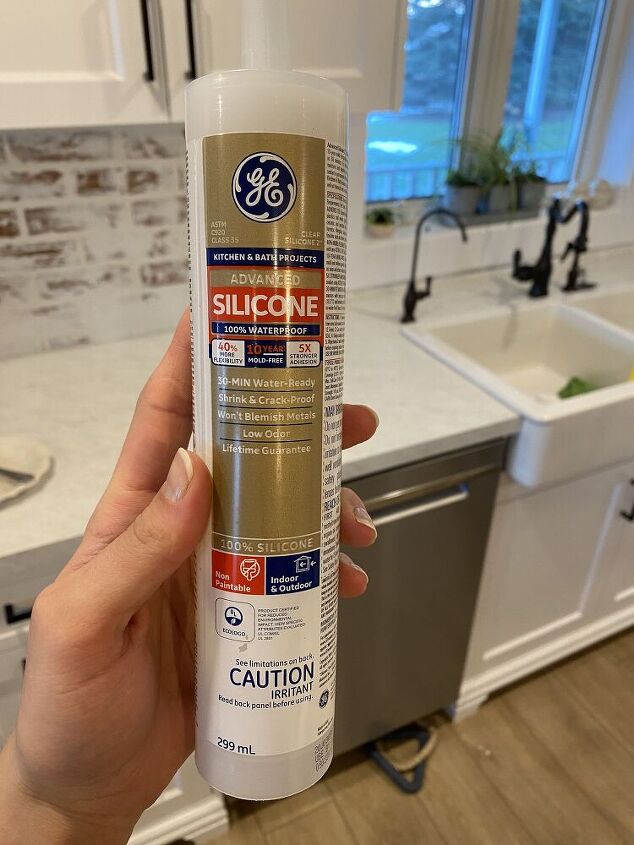
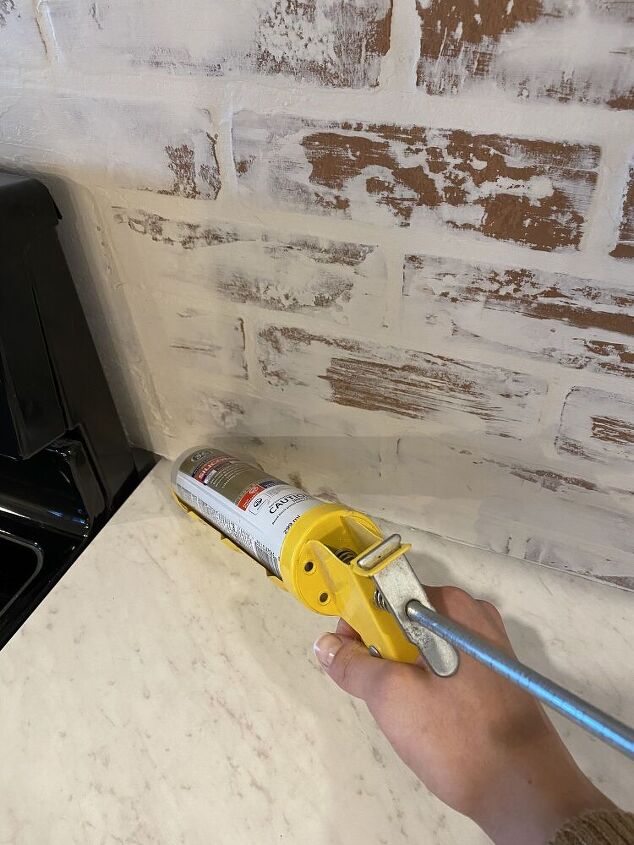
Caulk along the edges that need to be sealed.
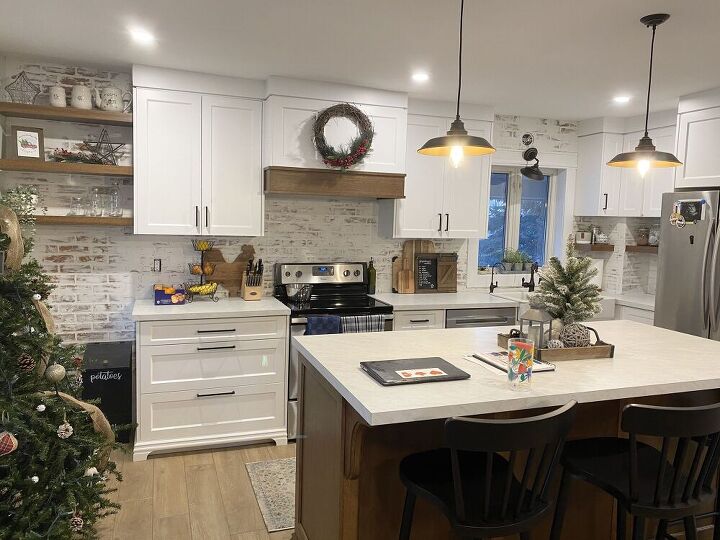
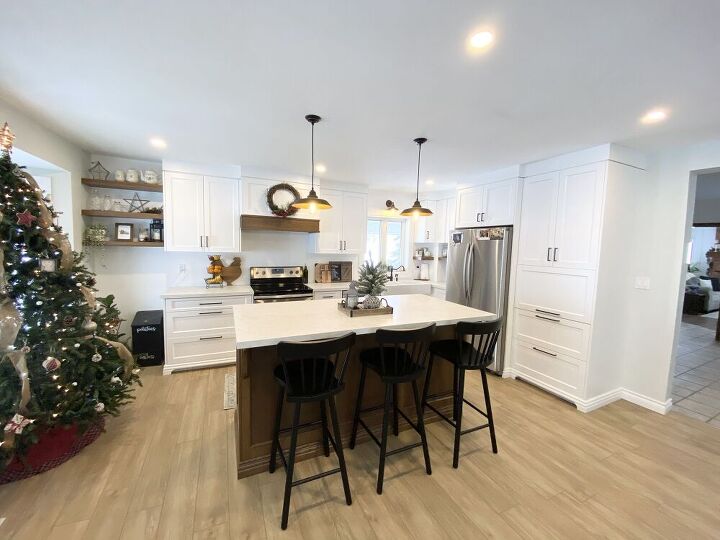
This is our kitchen with the brick wall all done!
And yes, my one light needs to be hung up again but I'm waiting for my husband to come home and do that. ;)
For more ideas and ongoing projects, follow along on Instagram and Facebook!
Insta: @farmhouse.ongunnshill
Facebook: Lauren Ann Design
~Lauren 
Resources for this project:
See all materials


Comments
Join the conversation
-
I love this and I’m going to try in my kitchen.
-
Your kitchen now looks like a magazine kitchen. It is absolutely stunning!!!


Frequently asked questions
Have a question about this project?
Do you or any of your followers know if this method can be applied over a tile backsplash….thanks
I have the ugliest cinder box wall in my kitchen. I’m wondering if I cleaned the cinder block that has 50 layers of old paint sanded and then applied the smear, if that would work?
can you paint of the smear?
What's the best idea to use the corner of a kitchen space