


Cookbook Holder

Anyone who cooks and has ever used a cookbook stand knows how nice it is to hold up your recipe book without having it in the way on the counter, getting dirty, etc. Well, I'm a horrible cook, so that's not me.  But this pine and oak stand make for a great gift idea!
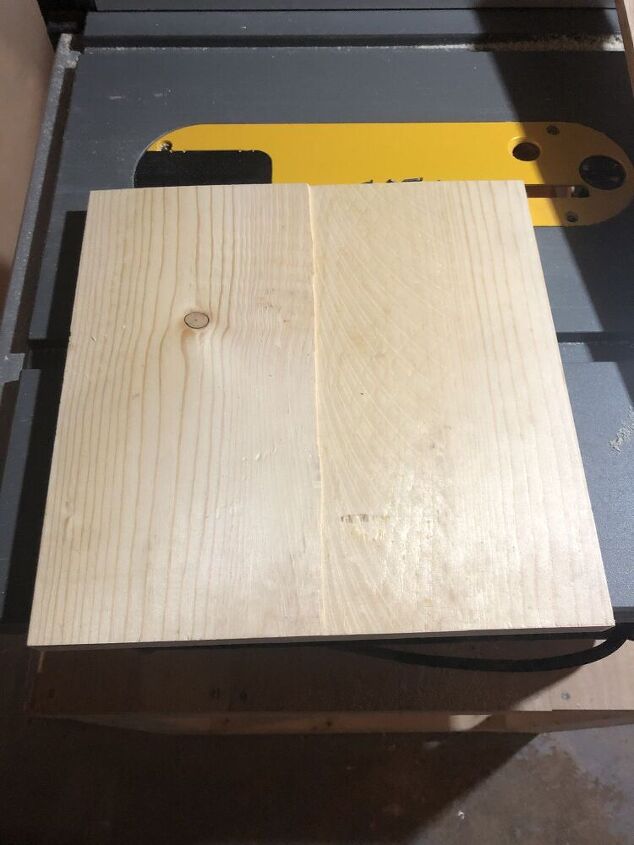
I started with a leftover piece of 3/4" thick pine and cut it to 11" x 11"
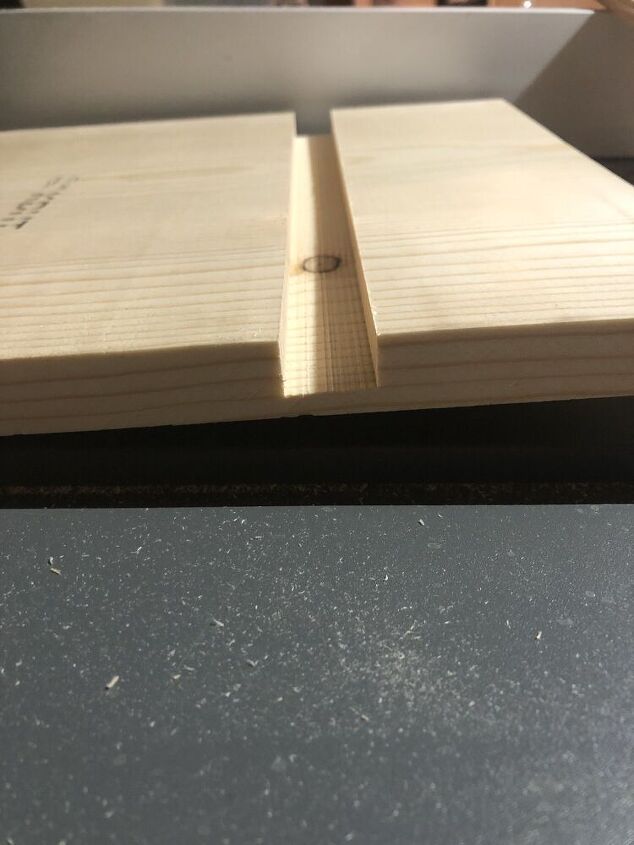
Next, I used a table saw to make an inlay cut across the top half of the board. The cut was 1/2" deep and 3/4" wide.
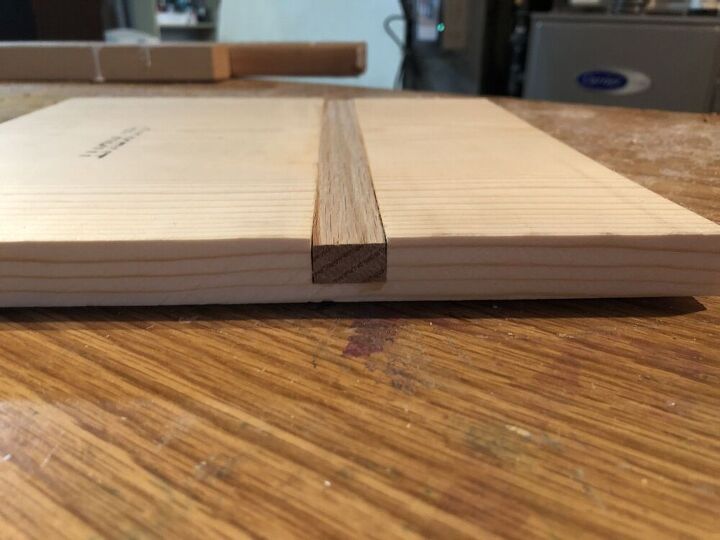
I glued a 3/4" wide and 1/2" deep piece of oak into the inlay.
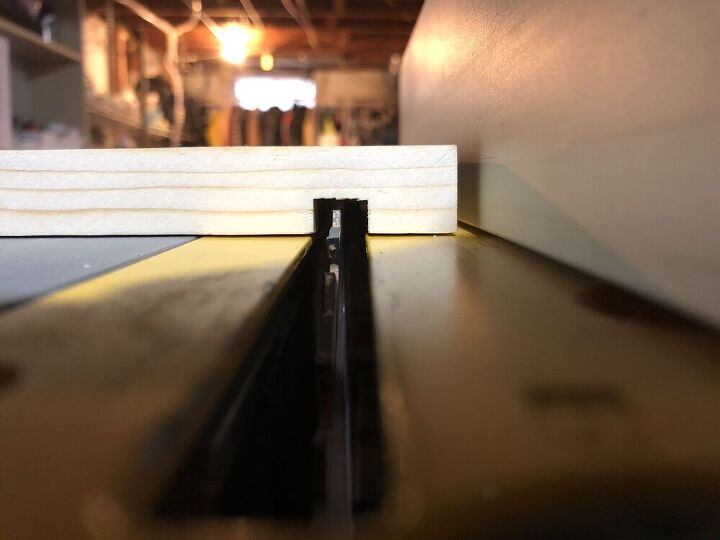
Next, I cut another groove on the face of the pine board near the bottom. This was 1/2" wide and will be where I insert the lip/ledge that will hold the cookbook.
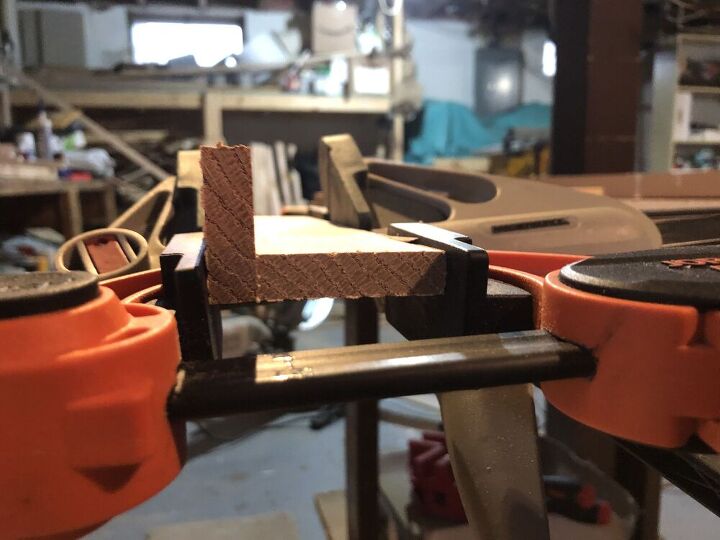
The next step is to cut and assemble the lip/ledge that will hold the cookbook. I also made this out of oak. I made the ledge 1 3/4" deep and added the lip to the front so the book doesn't slide off.

I used 1/2" by 3/4" oak strips for the stand border. I mitered the corners and clamped the pieces on 1 by 1, using wood glue.
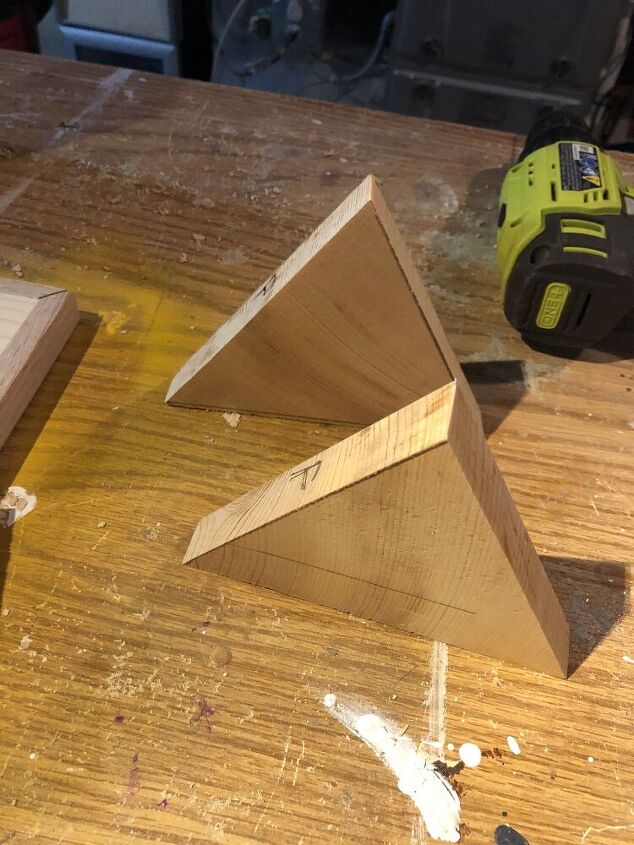
Next, I cut two triangle pieces for the stand back out of 3/4" pine. I determined the angle without any big equations. I just held the face board up until the angle looked right, market it on the first triangle piece and replicated that on the second. I also cut a 6" long piece of 1/2" thick oak to put between these triangle pieces for extra support. There is a good look at this stand assembly below.
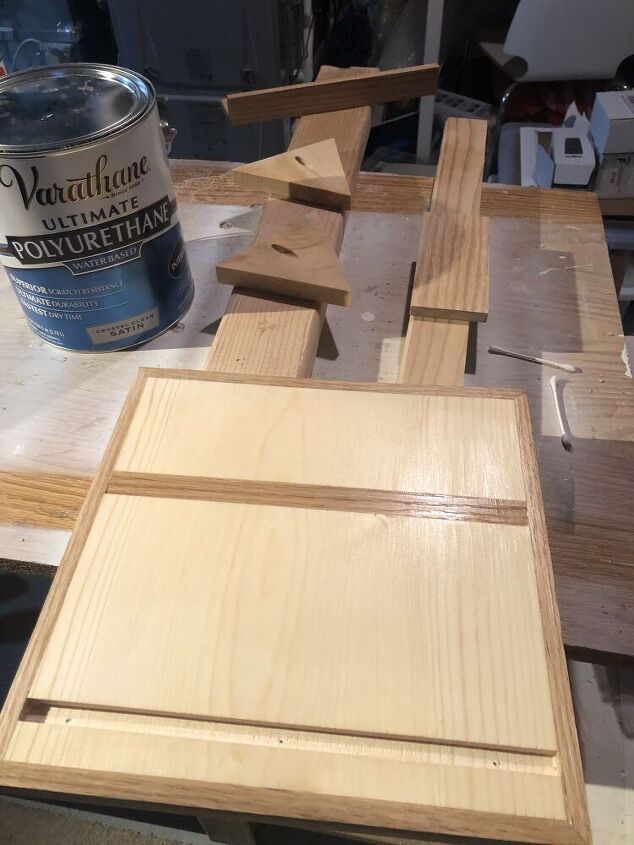
I sanded and added a bit of wood putty where needed, then added several coats of polyurethane.
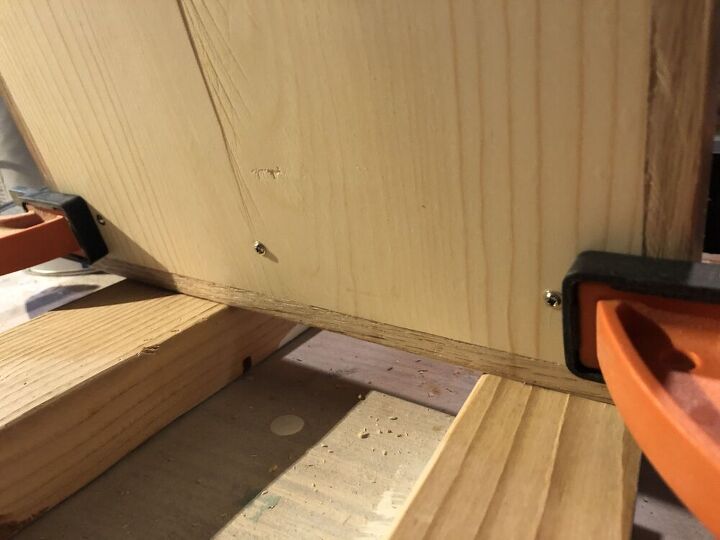
Next, I inserted that ledge into the inlay cut on the front face and clamped it up. I used wood glue and some short/small wood screws from the back side for extra support, which you can see here.
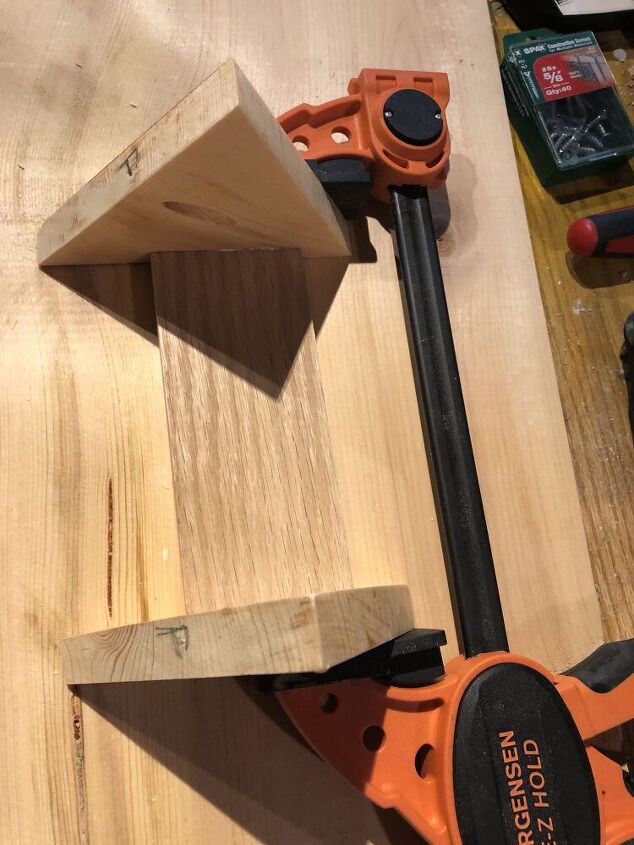
I put pocket holes into the triangle pieces of the support stand and then clamped those side pieces onto the 6" long piece I mentioned above. I used wood glue and one small wood screw on each side to hold it together.
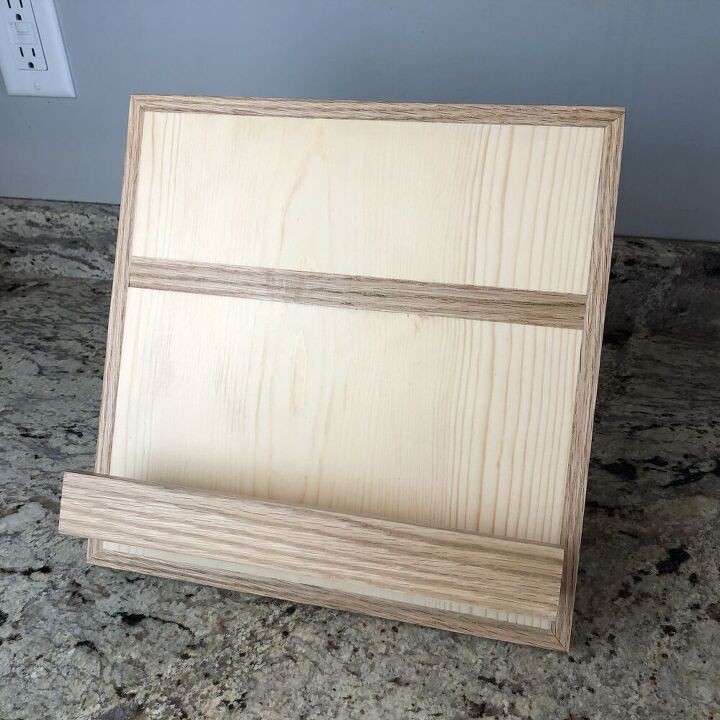
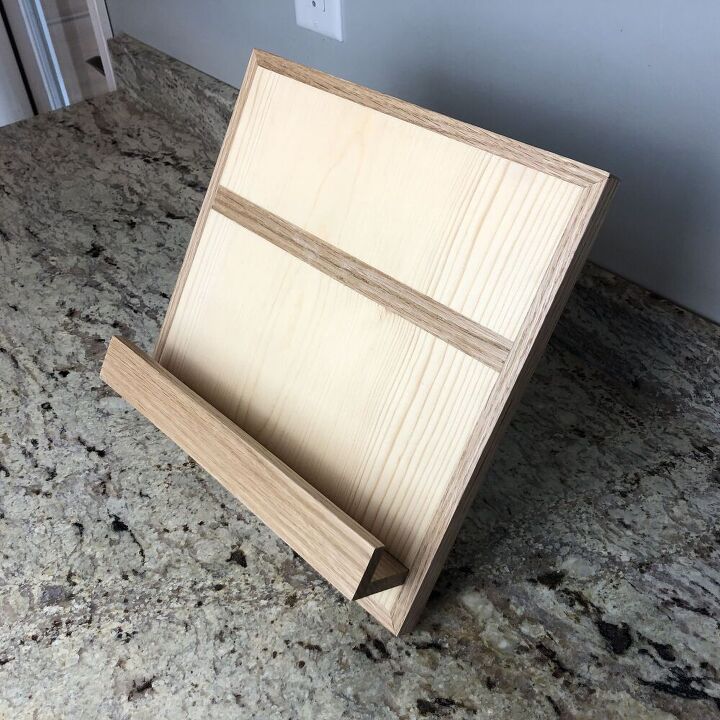
This is a look at the finished cookbook stand from the front.
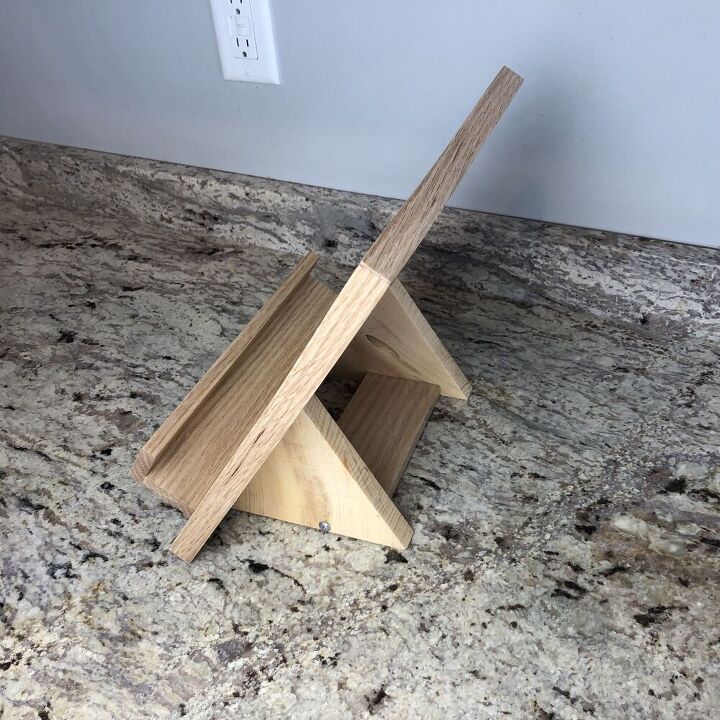
This gives you an idea of how it sits against the stand. The last assembly step is to glue the large face piece onto the triangle supports. Then, I put in the pocket hole screws to keep it together.
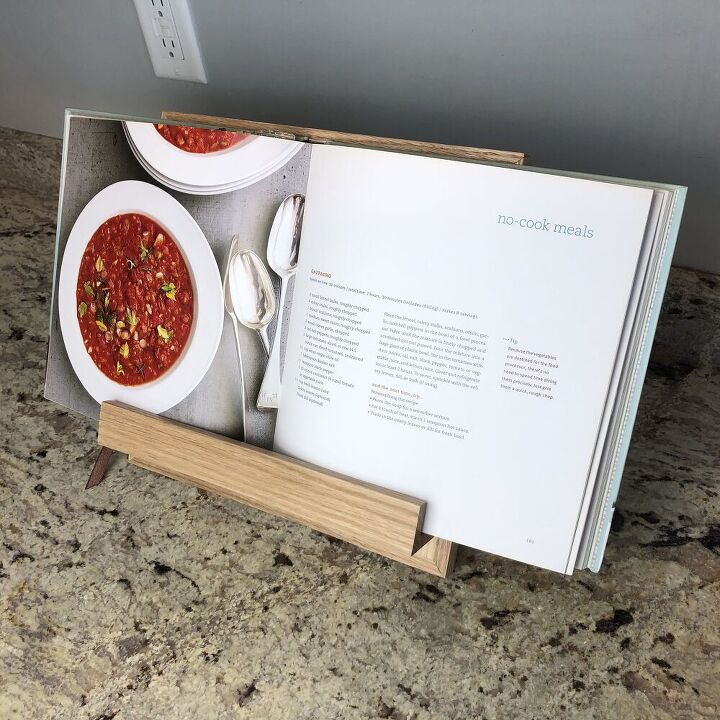
Success!
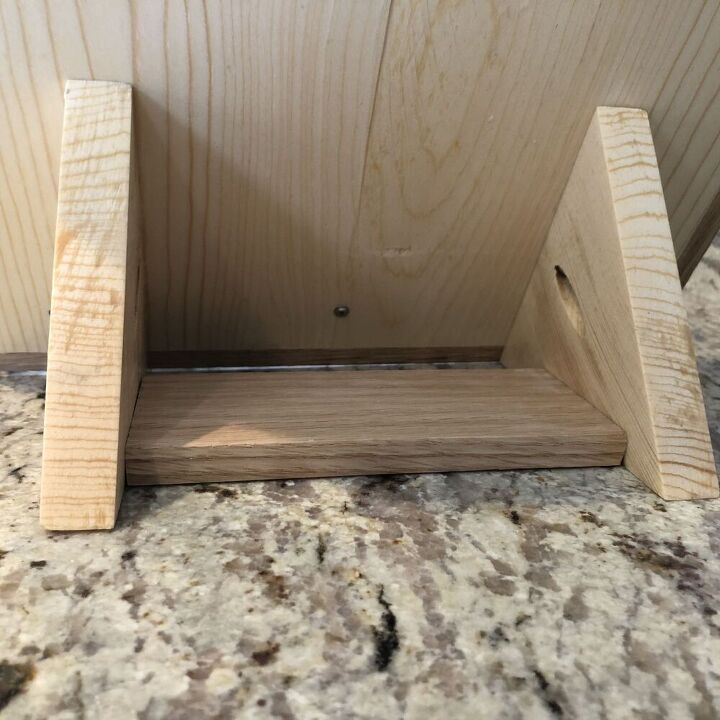
Here's another look at that support stand and how it's attached.
Follow me on Instagram at @woodyworking for more woodworking DIY or home improvement projects. Happy building!
Resources for this project:
See all materials


Comments
Join the conversation
-
Beautiful! Love the contrasting grains of wood. Would look beautiful sitting on the kitchen counter even without a book.
-
This is absolutely lovely! I love the contrasting wood, makes it look rather elegant along with the other details you've included. I hope I can get my husband to make one each for me and our girls.


Frequently asked questions
Have a question about this project?
Nice piece, but lots of opposing grain directions. Perhaps the main board should be plywood?