


How to Make a Succulent Planter
After a long winter, I wanted to do a little something to liven up the library. Green, fresh, spring-like, but also with staying power. After noodling on it a bit I knew just what to do…
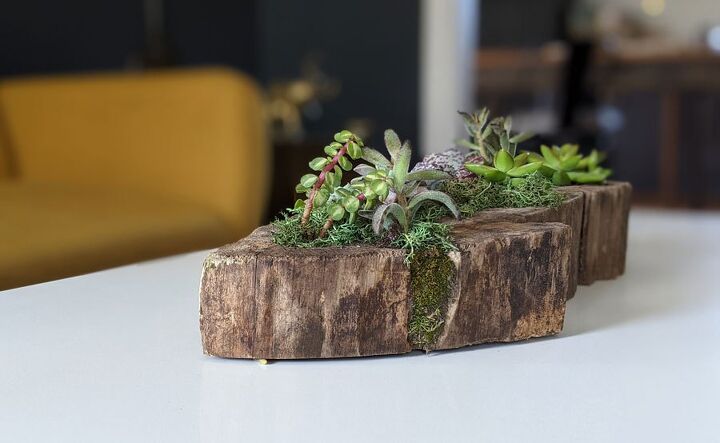
In this post, I’m going to show you how to make a succulent planter (with drainage) out of a found piece of wood and some moss. This easy DIY will cost around $20 — including the mini succulents! We’ll also cover some basic indoor succulent tips and tricks.
Thank you to Costa Farms for providing the succulents!
Materials Needed
- At least 5 mini succulents, more for larger planters
- A piece of wood
- A drill
- 1-1/2″ paddle bit (optional but helpful)
- Reindeer moss (optional but pretty)
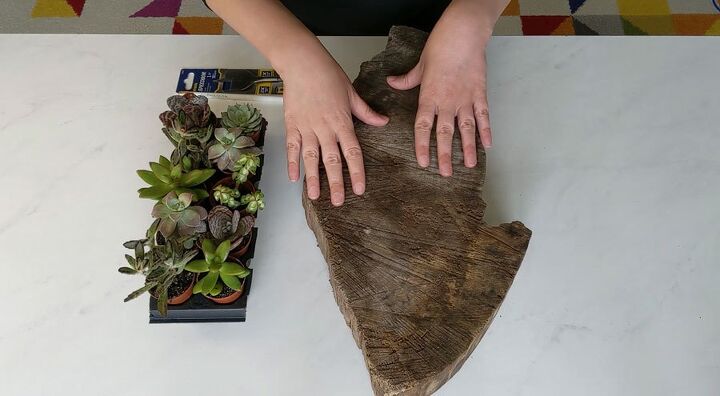
Step 1: Get a piece of wood
You could purchase a piece of wood online or a bundle of firewood at the grocery store, but the beauty of this planter project is that you really don’t need to. Go for a walk in the woods, the beach, the park, or even your backyard and look for a sizeable slab or chunk of wood. You could use a small log, a piece of driftwood, or even part of an old fence post. If you see someone cutting down trees or chopping logs, sidle over and ask if they can spare a slice.
I found a really weathered slice of what was clearly a huge tree in its heyday and I’d been saving it up for just the right project. I love free DIY supplies.
If needed, brush off any dirt or grit with a nylon-bristled brush.
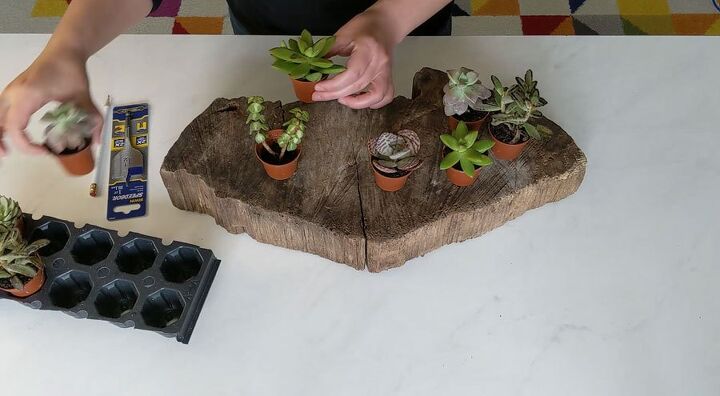
Step 2: How to arrange your succulents
Next, you’ll need to design your succulent arrangement for the planter. To do this, simply place all the pots onto the wood and move them around until you like how they look!
I started with 10 succulents and ended up using 9 of them.
Back to designing your succulent layout. There are a couple of ways to arrange your succulent planter:
- Group by type. If you want the look of larger masses of similar colors and shapes, cluster succulents of the same species into tight groups, then move on to the next species, and so on.
- Group by height. Plan which part will be the front of your planter and place the taller succulents at the back, working down to the shortest at the front.
- Distribute evenly. If you’re after a more rhythmic, organic look, mix all of the different types and heights together in a meandering path along the wood (this is the method I used).
Once you have your succulents arranged the way you want, take a picture with your phone! If you don’t, you’ll forget how they were laid out when you go to plant them and you’ll be very sad indeed.
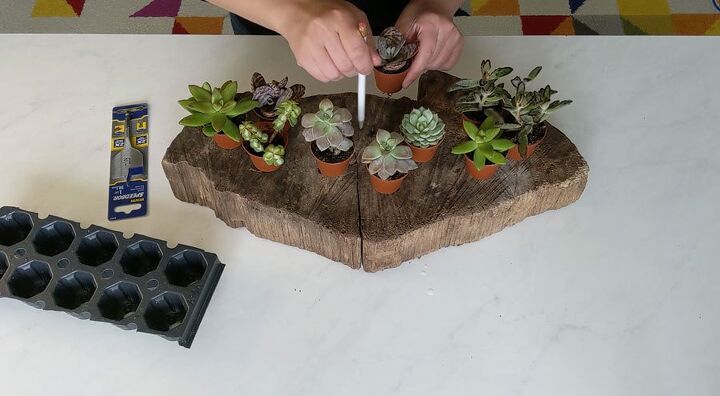
Step 3: Mark where your succulents will be planted
When your succulent design is set, grab a pencil and circle where each plant goes on your slab of wood. They don’t have to be precise circles, just enough to indicate where each pot was sitting. Draw an X in the middle of each circle — this is where you’ll drill.
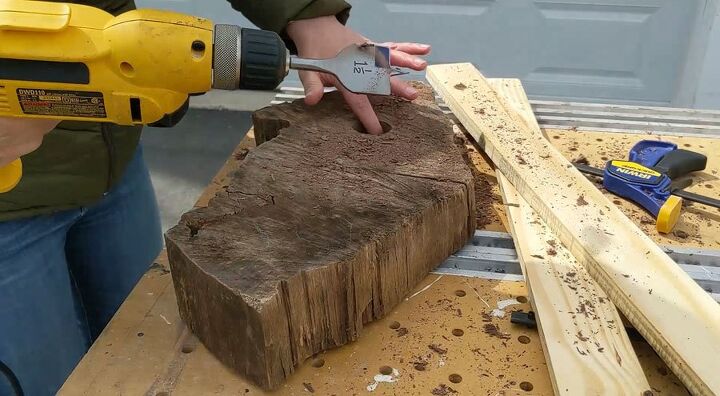
Step 4: Drill your planter holes
Using a 1-1/2″ paddle bit, drill holes to plant your succulents into the wood slab. Err on the side of making your holes too shallow rather than too deep, otherwise, your succulents look a little silly and swallowed up by the planter.
If you accidentally drill too deep, just add a layer of loose stone to the bottom before you plant to make up for the height difference. This is great for drainage too!
What if I don’t have a paddle bit?
If you’re excited to start this project and don’t have (or want to buy) a paddle bit, simply use the largest drill bit you have on hand and drill a bunch of overlapping smaller holes to fill the circle you drew. Easy peasy!
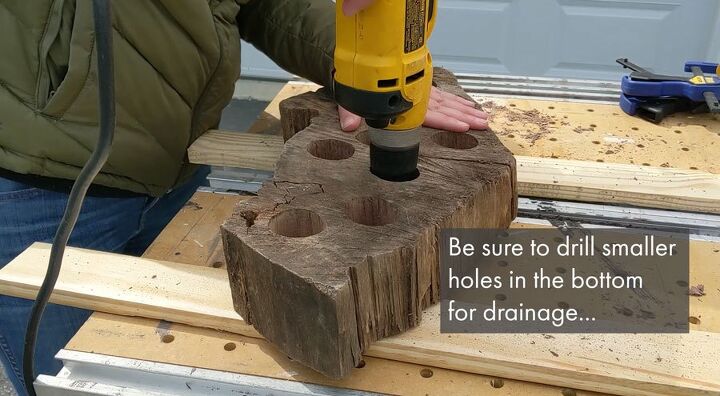
Step 4: Add drainage holes
Succulents are a low water plant so giving them adequate drainage when you plant them is important. Using a 1/4″ bit, drill a drainage hole in the bottom of each planter pot. Most kits come with a 1/4″ bit but if you don’t have one, just use the method I described above to make a larger hole with the bit you happen to have on hand.
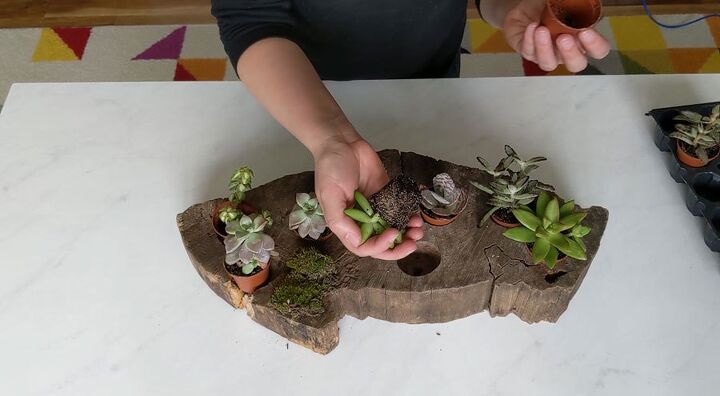
Step 5: Plant your succulents
Here’s how to plant your succulent container:
- Gently squeeze the pot to loosen the plant and tip it into your hand. It should fall right out if you’re using the mini succulents.
- Even more gently, break up the packed dirt and root ball with your fingertips. You just want the soil and root network a little loose.
- Referencing your photo from step 2, place each succulent into its assigned hole. If your plant is too tall for the depth of the hole, remove some soil from the bottom. Too low? Add a bit of loose stone to the planter hole.
- Lightly press the soil into the planter to remove any air pockets.
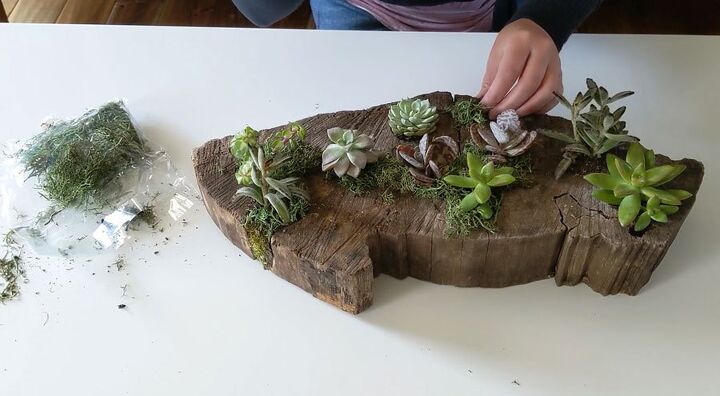
Step 6 (optional): Add reindeer moss
To tie the whole look of the succulent planter together, you can add reindeer moss to cover the exposed soil and over the wood to visually connect the plants. It’s a purely aesthetic step but it makes for a really pretty look!
Prefer video? Here's one showing the process plus the reason for the cute moss detail on the corner ;)
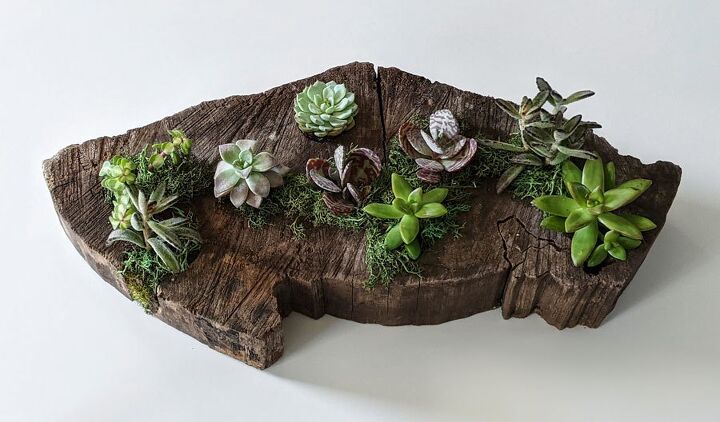
There you have it! How to make a DIY succulent planter. I hope you enjoyed this project and learned something useful in the process.
Want more? Here’s the full collection of Bloom in the Black DIYs. If you’re interested in seeing a future project, shoot me an email and I’ll add it to the list!
Resources for this project:
See all materials


Comments
Join the conversation
-
yes, thanks!
-
Pretty idea. Thanks for your tips


Frequently asked questions
Have a question about this project?
Does moisture accumulate on the bottom of the wood and onto your table?
How does the drainage work with this project? If I drill drainage holes and keep this on a table, there will be water on the table or at least moisture. I know one doesn't water succulents too much, but they still need water.
I was also wondering what did you put under the wood? The moisture would ruin a table.